Love this? Save it for later!
Share the inspiration with your friends
My neighbor, an 82-year-old woman named Betty who grows cucumbers like it’s a competitive sport, asked me why I couldn’t just skip the whole boiling water bath thing for pickles. I started to explain all the reasons you absolutely need to can pickles properly — the botulism risks, the seal failures, the shelf stability requirements. Then I stopped. Because honestly? I had no good answer. I’d just been doing it that way because that’s how my grandmother did it, and her grandmother before her, and frankly, I was a little embarrassed to admit I’d never questioned the process.
Betty handed me a jar of her “quick pickles” that afternoon — cucumbers she’d sliced that morning, tossed with vinegar and dill, and stuck in her fridge. She told me they’d be ready by dinner. I took them home thinking I’d be polite and try one, then quietly toss the rest. Let me tell you, I ate the entire jar standing over my kitchen sink at 4:47 PM, juice dripping down my chin, wondering why I’d spent the last decade of my life hauling out giant pots and sterilizing jars for something that could taste this good with zero effort. Maybe you’ve been there — following rules in the kitchen that nobody actually checked were real rules?
These quick refrigerator dill pickles changed how I think about preserving food. They’re crisp, tangy, garlicky, and somehow even better than the fussy canned versions I used to make. The secret is that you don’t need to preserve them for months in a pantry — you just need them to last a few weeks in your fridge, which frankly, they won’t because you’ll eat them all first. I keep making them because they remind me that sometimes the best cooking advice comes from someone who’s been growing cucumbers since before I was born and doesn’t care about tradition if it doesn’t make sense.
Why You’ll Love This Recipe
I’ve tested this recipe about fourteen times now — not because it needed tweaking, but because I kept making batch after batch to give away to skeptical friends. Every single person who tried them asked for the recipe, and every single person was shocked there was no canning involved. This is the kind of recipe that makes you feel like you’re getting away with something.
- No Canning Required : No boiling water baths, no sterilizing jars, no checking seals. You literally just mix, pour, and refrigerate. That’s it.
- Ready in 24 Hours : While they get better after a few days, these pickles are genuinely delicious the next day. Perfect for when you need pickles for burgers this weekend.
- Simple Ingredients : Cucumbers, vinegar, water, salt, garlic, dill. You probably have most of this in your kitchen right now.
- Perfect for Summer : When garden cucumbers are taking over your counter, this is the fastest way to use them up without turning on your stove for more than a minute.
- Crispier Than Canned : Because these aren’t heat-processed, they stay crunchier than traditional canned pickles. The texture is honestly better.
- Endlessly Customizable : Spicy, sweet, extra garlicky — you can adjust everything to your taste without worrying about food safety ratios.
What makes this recipe different from the other quick pickle recipes out there is the brine ratio I landed on after too many batches of sad, soggy pickles. Most recipes use too much water or not enough salt, and you end up with pickles that taste like vaguely cucumber-flavored water. This brine is punchy, balanced, and brings out the best in whatever cucumbers you use. It’s the kind of recipe you’ll memorize after making it once, and then you’ll start keeping a jar in your fridge at all times because everything tastes better with a pickle on the side.
What Ingredients You Will Need
This recipe uses simple, everyday ingredients to create something that tastes far more complex than it has any right to. The magic is in the proportions and the quality of your cucumbers — everything else is just supporting the main event.
- Cucumbers (1 pound, about 4-5 small pickling cucumbers or 2-3 regular ones): Kirby or pickling cucumbers are ideal because they’re firmer and have fewer seeds. If you can only find English or garden cucumbers, they work fine — just slice them a bit thicker so they don’t get waterlogged. I’ve used both and honestly, the garden cucumbers from my neighbor’s garden make the best pickles because they’re fresh from the vine.
- White Vinegar (1 cup, 240 ml): Regular distilled white vinegar gives the cleanest, brightest pickle flavor. You can use apple cider vinegar if you want a slightly fruitier note, but it will darken the pickles a bit. I keep both on hand and use white vinegar for these because it lets the dill and garlic shine.
- Water (1 cup, 240 ml): Filtered water is best if your tap water has a strong chlorine taste. I learned this the hard way when I made a batch that tasted like a swimming pool.
- Kosher Salt (1 tablespoon, 18 grams): Use kosher salt, not table salt. Table salt has anti-caking agents that can make your brine cloudy, and it’s much saltier by volume. Diamond Crystal or Morton’s kosher salt are my go-to brands. If you only have table salt, use about 2 teaspoons instead.
- Sugar (1 tablespoon, 12 grams): Just enough to balance the vinegar without making the pickles sweet. You can skip it entirely if you prefer, but I find it rounds out the sharp edges of the brine. I’ve made batches with honey instead, and while it works, the flavor is noticeably different — more floral, less clean.
- Garlic (4-5 cloves, smashed): Smashing the cloves releases more flavor than slicing them. Use fresh garlic, not the pre-minced stuff from a jar — trust me on this. The pre-minced garlic has a bitter, metallic taste that ruins the brine.
- Fresh Dill (4-6 sprigs, or 2 tablespoons dried): Fresh dill is noticeably better, but dried dill works in a pinch. If using dried, add it to the brine while it’s still warm so it rehydrates. I’ve also used dill seed heads when my dill plant went to seed, and those are actually my favorite — they look beautiful in the jar and have a more concentrated flavor.
- Black Peppercorns (1 teaspoon): Whole peppercorns are better than ground pepper because they infuse slowly and don’t make the brine murky. I’ve forgotten these before and the pickles were still good, but the peppercorns add a subtle warmth that’s worth including.
- Red Pepper Flakes (1/2 teaspoon, optional): For heat. I add these to about half my batches depending on my mood. My husband thinks they’re too spicy with the flakes, so I sometimes make a separate jar just for me.
- Mustard Seeds (1 teaspoon, optional): These add a lovely pop of texture and a mild mustard flavor. I started adding them after trying a pickle at a farmer’s market that had them, and now I can’t go back.
Equipment Needed
The beauty of this recipe is that you don’t need any special canning equipment. No water bath canner, no jar lifter, no magnetic lid wand. Just a few basic kitchen tools you probably already own.
- Quart-Size Mason Jar (1 jar, 32-ounce/1-liter capacity): A wide-mouth jar is easier to pack with cucumber slices, but a regular mouth works fine. I’ve used repurposed pasta sauce jars too — just make sure they’re thoroughly cleaned and have a tight-fitting lid. Ball or Kerr brands are my favorites because they’re sturdy and the lids seal well.
- Small Saucepan (for heating the brine): Any small pot works. I use a 2-quart saucepan because it’s the right size for the brine volume and heats up quickly.
- Cutting Board and Sharp Knife: A mandoline slicer is faster for uniform slices, but a good chef’s knife works perfectly. I actually prefer hand-slicing because I can control the thickness better — about 1/4 inch is ideal.
- Measuring Cups and Spoons: For accuracy, especially with the salt. I’ve eyeballed it before and ended up with pickles that were either too salty or too bland. Measuring is worth the extra 30 seconds.
- Wooden Spoon or Spatula: For stirring the brine. Metal is fine too, but wooden won’t scratch your pot.
- Funnel (optional but helpful): A wide-mouth funnel makes pouring the brine into the jar much less messy. I bought one specifically for pickling and it was a game-changer — no more spilled brine all over my counter.
If you don’t have a mandoline, don’t run out and buy one just for this recipe. A sharp knife and a steady hand work beautifully. I’ve been using the same $8 vegetable slicer for years, and honestly, I only pull it out when I’m making more than three jars at once.
Preparation Method

- Prepare your cucumbers (5 minutes): Wash your cucumbers thoroughly under cold water, scrubbing gently to remove any dirt or wax. If you’re using garden cucumbers with thin skins, leave them on — the skins add texture and nutrients. For cucumbers with thicker, waxed skins, you might want to peel them partially or fully. Trim off the blossom end (the end opposite the stem) because it contains enzymes that can make your pickles mushy. I learned this after my first batch turned out disappointingly soft, and a quick internet search revealed this simple fix. Slice your cucumbers into rounds about 1/4 inch thick, or cut them into spears if you prefer. Spears take slightly longer to absorb the brine, so they need an extra day in the fridge before they’re ready.
- Prepare your aromatics (3 minutes): Peel 4-5 cloves of garlic and smash them with the flat side of your knife. Smashing releases more flavor than slicing because it breaks the cell walls. Rinse your fresh dill sprigs and pat them dry. If you’re using dried dill, measure out 2 tablespoons. Measure out your peppercorns, mustard seeds, and red pepper flakes if using, and have them ready to go.
- Pack your jar (5 minutes): Layer the cucumber slices, garlic cloves, dill sprigs, and spices in your clean mason jar. I like to put some dill and garlic at the bottom, then a layer of cucumbers, then more dill and garlic in the middle, and finish with cucumbers on top. This ensures the flavors distribute evenly rather than all settling at the bottom. Don’t pack the cucumbers too tightly — you want the brine to be able to flow around each slice. Leave about 1/2 inch of headspace at the top of the jar. If you’re making spears, stand them upright in the jar for the most even brine distribution.
- Make the brine (5 minutes): In your small saucepan, combine 1 cup white vinegar, 1 cup water, 1 tablespoon kosher salt, and 1 tablespoon sugar. Stir with your wooden spoon and bring to a boil over medium-high heat. You want the salt and sugar to fully dissolve — this usually happens just as the liquid reaches a boil. Don’t let it boil for more than 30 seconds or you’ll cook off some of the vinegar’s sharpness. Remove from heat immediately. I’ve forgotten about the brine on the stove before and let it boil for several minutes — the pickles still turned out fine, just slightly less tangy.
- Pour the brine (2 minutes): Carefully pour the hot brine over the cucumbers in the jar, using your funnel if you have one. Make sure all the cucumbers are completely submerged — any pieces sticking out above the brine will soften and potentially spoil. If you need more brine, you can quickly make a half batch (1/2 cup each vinegar and water, 1/2 tablespoon salt and sugar). Tap the jar gently on the counter to release any air bubbles, then add more brine if needed to keep everything submerged.
- Cool and seal (2 minutes): Let the jar cool on the counter for about 15-20 minutes — you’ll see the brine turn from clear to slightly cloudy as it interacts with the cucumbers. This is normal and actually a good sign that the pickling process is working. Once the jar is cool enough to handle, screw on the lid firmly. Don’t overtighten — just snug is fine.
- Refrigerate and wait (24-48 hours): Place the jar in your refrigerator. The pickles need at least 24 hours to develop flavor, but 48 hours is even better. I know it’s hard to wait, but trust the process. The first time I made these, I tried one after 12 hours and it was basically a cucumber in vinegar water — disappointing and watery. Give them the full time, and you’ll be rewarded with crisp, flavorful pickles. They’ll continue to develop flavor over the next week, reaching their peak around day 5 or 6. Shake the jar gently every day or so to redistribute the spices.
Cooking Tips & Techniques
The first time I made refrigerator pickles, I used regular table salt because it’s what I had. Big mistake. The brine turned milky white and the pickles had a weird chemical aftertaste. Kosher salt dissolves more cleanly and doesn’t have the anti-caking agents that cause cloudiness. It’s a small switch that makes a huge difference.
Temperature matters more than you’d think. If you pour boiling brine directly into a cold jar from the fridge, you risk cracking the glass. I always let my jars come to room temperature before I start. Similarly, letting the brine cool for just 15 minutes before pouring helps the cucumbers stay crisp — the heat from boiling brine can start cooking the cucumbers, and nobody wants a cooked pickle.
One mistake I made repeatedly was using old cucumbers. Cucumbers that have been sitting in your fridge for a week are already losing moisture, and they’ll turn into sad, shriveled pickles. Use the freshest cucumbers you can find — ideally ones that were picked within the last day or two. If you’re buying from a store, look for cucumbers that are firm, bright green, and free of soft spots. The difference between pickles made with fresh cucumbers versus week-old ones is honestly shocking.
I also learned the hard way that you shouldn’t skip the step of trimming the blossom end. There’s an enzyme in the blossom end that softens pickles, and it’s potent enough to turn your entire batch into mush within a few days. Just slice off that little nub and you’re safe. My first batch of pickles turned into a science experiment I didn’t sign up for, and I’ve never made that mistake again.
For the crispiest pickles, add a grape leaf or a pinch of calcium chloride (sold as Pickle Crisp) to the jar. Grape leaves contain tannins that help maintain crunch. I have a grape vine in my backyard, so I toss a leaf in every jar. If you don’t have access to grape leaves, a teaspoon of Pickle Crisp works wonders and doesn’t affect the flavor at all.
Variations & Adaptations
Spicy Garlic Pickles: Double the garlic to 8-10 cloves and add 2 whole dried chilies or 1 teaspoon of red pepper flakes. I made a batch of these for a Super Bowl party and they disappeared before the chips did. The heat builds gradually — it’s not overwhelming, just a pleasant warmth that lingers.
Sweet Bread and Butter Style: Increase the sugar to 1/2 cup and add 1/2 teaspoon of turmeric for that classic yellow color. Slice the cucumbers thinner — about 1/8 inch — and add 1 small sliced onion. These are perfect for burgers and sandwiches, and they’re the ones my kids actually ask for by name.
Dill Pickle Spears for Bloody Marys: Cut your cucumbers into long spears that fit vertically in your jar. Add an extra tablespoon of dill and a pinch of celery seed. These are thicker and take about 3 days to fully pickle, but they’re worth the wait. I serve them alongside Bloody Marys at brunch and they always get compliments.
Low-Sodium Version: Reduce the salt to 1 teaspoon and add 1 tablespoon of extra vinegar to maintain the tang. The pickles won’t be as shelf-stable (not that they were going to last long anyway), so make sure to eat them within 2 weeks. I made these for a friend with high blood pressure and honestly, they were still delicious — just a little less punchy.
Herb-Infused Pickles: Replace half the dill with fresh tarragon, thyme, or rosemary. Tarragon gives an anise-like flavor that’s surprisingly good with cucumbers, and thyme adds an earthy note. I tried a tarragon batch on a whim and now it’s my second favorite version after the classic dill.
Serving & Storage Suggestions
These pickles are best served cold, straight from the fridge. They’re incredible on burgers, hot dogs, and sandwiches of any kind. Chop them up for tuna salad or potato salad — the brine adds a brightness that store-bought pickles just can’t match. I also love serving them alongside grilled meats or as part of a charcuterie board. They cut through rich, fatty foods beautifully.
For storage, keep the jar tightly sealed in your refrigerator at all times. These pickles will last 4-6 weeks in the fridge, though honestly, I’ve never had a jar last that long. The flavor continues to develop over the first week, then plateaus. After about 3 weeks, the pickles will start to soften slightly, but they’re still perfectly good to eat. If you see any mold or off-odors, toss them — but this is extremely rare if you’ve kept them properly refrigerated.
One thing I love about these pickles is that the brine itself becomes more flavorful over time. After you finish the pickles, don’t throw away the brine — you can reuse it for a second batch of cucumbers! Just add fresh cucumber slices and let them sit for 2-3 days. The second batch won’t be quite as strong, so you might want to add a little extra vinegar and salt. I’ve reused brine up to three times before it starts to lose its punch.
You can also use the leftover brine to marinate vegetables like carrots, cauliflower, or red onion slices. Just pour the brine over your veggies and refrigerate for 2-3 days. The brine is basically liquid gold — don’t waste a drop.
Nutritional Information & Benefits
One serving of these pickles (about 1/2 cup, or 4-5 slices) contains approximately 15 calories, 0 grams of fat, 3 grams of carbohydrates, 1 gram of sugar, and 1 gram of protein. The sodium content is about 350 milligrams, which is worth noting if you’re watching your salt intake. The low-sodium variation above cuts that roughly in half.
Fermented foods like pickles are great for gut health because they contain beneficial bacteria (though these refrigerator pickles are technically pickled in vinegar, not fermented, so they don’t have live cultures). That said, cucumbers themselves are hydrating and contain vitamin K, potassium, and antioxidants. The dill in this recipe is a good source of vitamin C and has been used traditionally to aid digestion.
From a personal wellness perspective, I love having these pickles in my fridge because they make it easier to eat more vegetables. I’ll grab a few pickle slices as a snack instead of reaching for chips, and they add flavor to meals without adding many calories. They’re also a great option if you’re following a gluten-free, dairy-free, or vegan diet — this recipe naturally fits all of those.
Conclusion
These quick refrigerator dill pickles have honestly changed how I think about “preserving” food. I used to think pickling required a weekend of effort, specialized equipment, and a level of precision that felt intimidating. Turns out, all you need is a jar, some fresh cucumbers, and the willingness to wait 24 hours. Betty was right — and I’m so glad I listened instead of lecturing her about proper canning procedures.
I’d love to hear how these turn out for you. Did you add extra garlic? Throw in some jalapeños? Use them in a recipe you love? Drop a comment below and let me know — I read every single one and I always pick up new ideas from your variations. And if you make a batch for a friend, don’t be surprised when they ask for the recipe. Just tell them it’s the one that doesn’t require any canning, and watch their face light up.
Happy pickling, friends. Your fridge is about to get a whole lot more interesting.
Frequently Asked Questions
Can I use apple cider vinegar instead of white vinegar?
Yes, absolutely. Apple cider vinegar will give your pickles a slightly fruitier, milder flavor and a darker color. I’ve used it plenty of times when I ran out of white vinegar, and the pickles were still delicious. Just know that the flavor profile shifts — it’s less sharp and more rounded. Some people actually prefer it this way.
Do I need to boil the jars before using them?
Nope. Since these pickles are stored in the refrigerator and eaten within a few weeks, you don’t need to sterilize your jars. Just wash them thoroughly with hot, soapy water and rinse well. I’ve been making these for years without sterilizing and never had a problem. The boiling water bath is only necessary if you’re canning for shelf-stable storage.
Why are my pickles soft instead of crunchy?
Soft pickles usually happen for one of three reasons: you used older cucumbers that were already losing moisture, you didn’t trim the blossom end, or you let the brine boil too long. For the crunchiest results, use the freshest cucumbers you can find, always trim the blossom end, and remove the brine from heat as soon as the salt and sugar dissolve.
Can I reuse the brine for another batch?
Yes, you can reuse the brine once or twice, but the flavor will be weaker each time. After you finish the first batch of pickles, add fresh cucumber slices directly to the leftover brine and refrigerate for 2-3 days. If the brine seems thin, add a tablespoon of vinegar and a teaspoon of salt to boost the flavor. I wouldn’t recommend reusing brine more than three times.
How long do these pickles last in the fridge?
Properly stored in a sealed jar in the refrigerator, these pickles will stay good for 4-6 weeks. They’ll be at their peak crunch and flavor during the first two weeks. After that, they’ll gradually soften, but they’re still perfectly safe to eat as long as there’s no mold, off-odors, or sliminess. I’ve never had a jar last long enough to test the six-week limit, honestly.
Pin This Recipe!
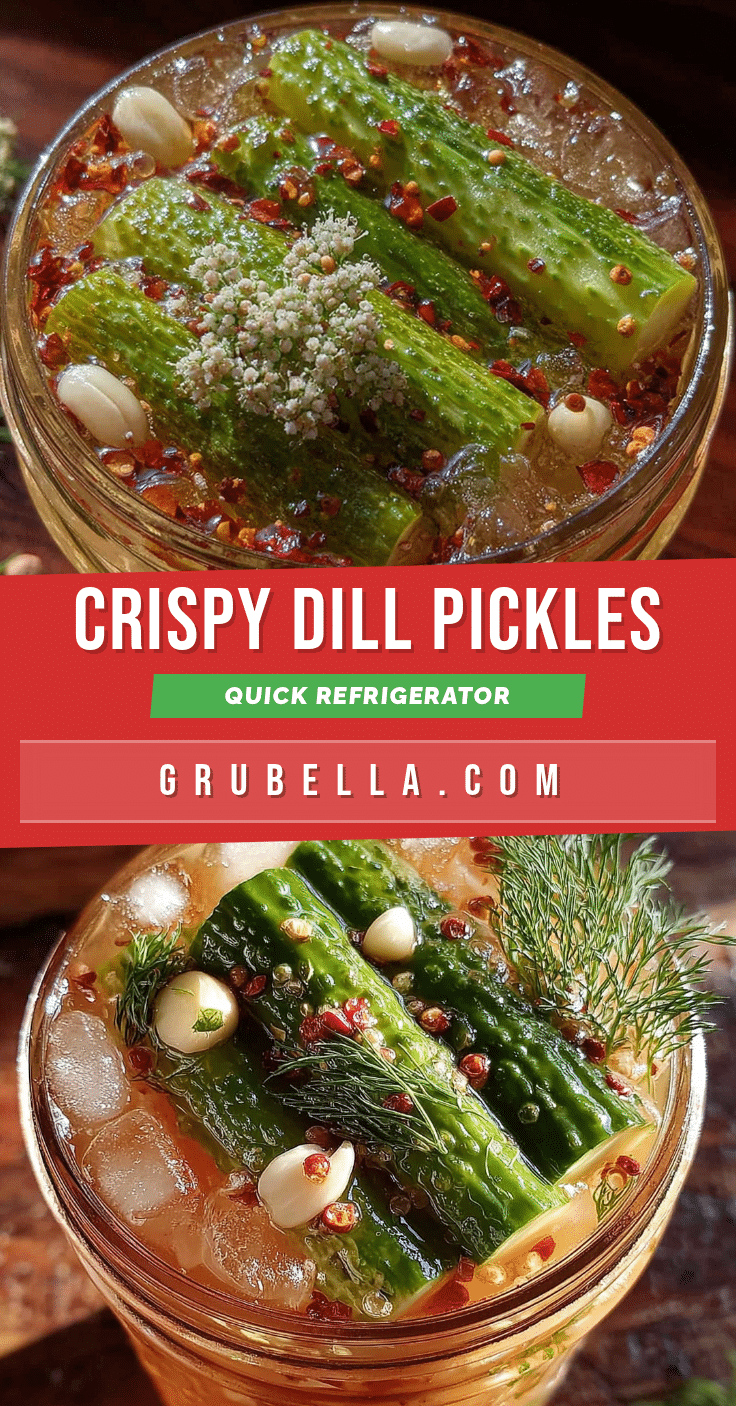
Quick Refrigerator Dill Pickles: No Canning Needed

These quick refrigerator dill pickles are crisp, tangy, and garlicky, made without any canning. Ready in 24 hours with simple ingredients, they’re perfect for summer and stay crunchier than traditional canned pickles.
- Prep Time: 15 minutes
- Cook Time: 5 minutes
- Total Time: 20 minutes (plus 24-48 hours refrigeration)
- Yield: 4 servings 1x
- Category: Side Dish
- Cuisine: American
Ingredients
- 1 pound cucumbers (about 4–5 small pickling cucumbers or 2–3 regular ones)
- 1 cup white vinegar (240 ml)
- 1 cup water (240 ml)
- 1 tablespoon kosher salt (18 grams)
- 1 tablespoon sugar (12 grams)
- 4–5 cloves garlic, smashed
- 4–6 sprigs fresh dill (or 2 tablespoons dried)
- 1 teaspoon black peppercorns
- 1/2 teaspoon red pepper flakes (optional)
- 1 teaspoon mustard seeds (optional)
Instructions
- Prepare your cucumbers: Wash thoroughly, trim the blossom end, and slice into rounds about 1/4 inch thick or cut into spears.
- Prepare your aromatics: Peel and smash garlic cloves, rinse fresh dill, and measure out spices.
- Pack your jar: Layer cucumber slices, garlic, dill, and spices in a clean quart-size mason jar, leaving about 1/2 inch headspace.
- Make the brine: In a small saucepan, combine vinegar, water, kosher salt, and sugar. Bring to a boil, stirring until salt and sugar dissolve. Remove from heat immediately.
- Pour the brine: Carefully pour hot brine over cucumbers, ensuring all slices are submerged. Tap jar gently to release air bubbles.
- Cool and seal: Let jar cool on counter for 15-20 minutes, then screw on lid firmly.
- Refrigerate and wait: Place jar in refrigerator for at least 24 hours (48 hours is better) before eating. Shake jar gently daily to redistribute spices.
Notes
Use the freshest cucumbers possible for best crunch. Always trim the blossom end to prevent mushy pickles. Kosher salt is preferred over table salt. For extra crispness, add a grape leaf or a pinch of calcium chloride (Pickle Crisp) to the jar. Pickles will keep 4-6 weeks in the refrigerator. Brine can be reused for a second batch.
Nutrition
- Serving Size: 1/2 cup (about 4-5 s
- Calories: 15
- Sugar: 1
- Sodium: 350
- Carbohydrates: 3
- Protein: 1
Keywords: refrigerator pickles, dill pickles, quick pickles, no canning, easy pickles, homemade pickles, cucumber pickles



