Love this? Save it for later!
Share the inspiration with your friends
Let’s be honest—showing appreciation for the amazing teachers in our lives can sometimes feel like a scramble. You want to give something heartfelt, but your schedule is already packed. That is exactly where these Easy Teacher Appreciation Brownie-Mix Gift Jars come in. They are the perfect blend of thoughtful and practical, and they solve the “what do I give?” dilemma in the most delicious way possible.
- Quick & Easy: This project comes together in under 15 minutes. No baking required for the gift itself—just layering and decorating. It is a last-minute hero.
- Simple Ingredients: You probably already have most of the brownie mix ingredients in your pantry. No fancy trips to a specialty store needed.
- Perfect for Teacher Appreciation Week: Whether it is for the end of the year, a birthday, or just a random Tuesday, this gift shows you care without adding stress.
- Crowd-Pleaser: Who doesn’t love a warm, fudgy brownie? It is a universal comfort food that always gets a smile.
- Unbelievably Customizable: You can tailor the jar to the teacher’s favorite flavors—add chocolate chips, nuts, or even a sprinkle of sea salt. It is your gift, your way.
This isn’t just another brownie mix in a jar. It is a carefully layered, visually stunning gift that feels personal. The process of layering the dry ingredients creates a beautiful, striped effect that looks like you spent hours on it—when really, it took a few minutes. I mean, honestly, that is the kind of win we all need in our lives, right?
Plus, there is something magical about giving a gift that requires a little bit of the recipient’s own effort. They get to bake the brownies themselves, which means they get the joy of a warm, freshly baked treat whenever they want. It is the gift that keeps on giving—and it smells amazing while doing it.
What Ingredients You Will Need
This recipe uses simple, everyday ingredients to create a gift that looks and tastes incredible. The key is to use fresh, high-quality components for the best results. Here is everything you need for the dry mix, plus a few optional add-ins to make it extra special.
For the Brownie Mix (Dry Layers)
- Granulated Sugar: 1 cup (200g) – This provides the sweetness and helps create that classic crackly top.
- All-Purpose Flour: 1/2 cup (60g) – Make sure to spoon and level it for accuracy. Do not scoop directly from the bag or you might end up with dry brownies.
- Unsweetened Cocoa Powder: 1/3 cup (40g) – I prefer using a Dutch-processed cocoa for a richer, darker flavor, but natural cocoa works perfectly too.
- Baking Powder: 1 teaspoon – This is your leavening agent. Make sure it is fresh (check the date!) for the best rise.
- Salt: 1/4 teaspoon (fine sea salt) – Salt balances the sweetness and enhances the chocolate flavor. Do not skip it.
- Optional Add-Ins (for layering): 1/2 cup (90g) semi-sweet chocolate chips, 1/4 cup (30g) chopped walnuts, or 1/4 cup (40g) white chocolate chips.
What the Teacher Will Need to Add
- Eggs: 2 large eggs (room temperature is best for even mixing).
- Vegetable Oil: 1/2 cup (120ml) or melted butter (unsalted, for a richer flavor).
- Water: 1/4 cup (60ml) – Just tap water is fine, though some people swear by using coffee for a deeper chocolate taste.
When I make these jars, I always use my favorite brand of cocoa powder—it makes a noticeable difference. If you are gifting this to someone who loves dark chocolate, you can even add a tablespoon of dark cocoa powder to the mix. The layers look gorgeous in a clear quart-sized mason jar, so the visual appeal is half the fun.
One tip I learned the hard way: make sure you pack each layer down gently with the back of a spoon or a small tamper. This ensures the layers stay distinct and don’t mix together during transport. Also, if you are adding chocolate chips, place them in the middle layer so they don’t all sink to the bottom.
Equipment Needed
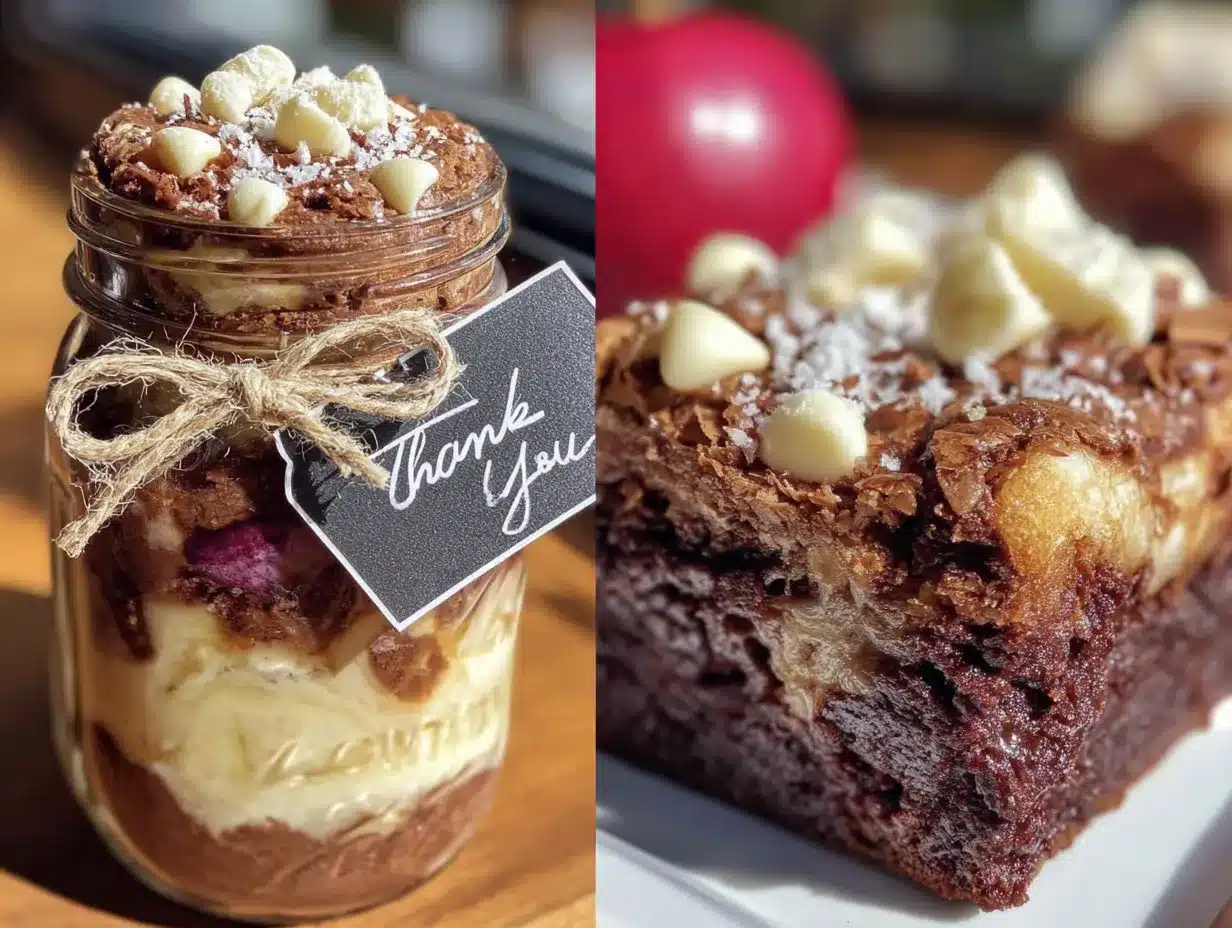
You do not need any fancy gadgets for this project. It is all about simplicity and presentation. Here is what you will need:
- Quart-Sized Mason Jars: (32 oz) – Wide-mouth jars are easiest to fill and layer. You can find them at any grocery store or online. I have used repurposed pasta sauce jars in a pinch, and they work fine too.
- Funnel: A wide-mouth funnel makes layering the dry ingredients so much cleaner and less messy. If you don’t have one, you can roll a piece of parchment paper into a cone.
- Measuring Cups and Spoons: For accurate measurements. A kitchen scale is even better for consistency.
- Small Bowl or Spoon: For packing down each layer gently.
- Decorative Ribbon or Twine: To tie around the jar lid for a finished look.
- Gift Tag: To attach the baking instructions. You can print them on cardstock or write them by hand.
I have made these jars countless times, and my best advice is to invest in a good set of wide-mouth funnels. They save so much time and frustration, especially if you are making multiple jars at once. If you are on a budget, a simple piece of paper folded into a funnel shape works like a charm.
Preparation Method
Follow these steps carefully, and you will have a beautiful, gift-ready jar in no time. The process is straightforward, but the details matter for that perfect layered look.
- Prepare Your Workspace: Clear your counter and gather all your ingredients and equipment. Having everything within reach makes the layering process smooth and enjoyable. I like to line up my jars in a row like little soldiers.
- Layer 1: Flour and Salt: In a small bowl, whisk together the 1/2 cup of all-purpose flour and 1/4 teaspoon of salt. Gently pour this mixture into the bottom of your clean, dry mason jar using your funnel. Tap the jar lightly on the counter to settle the flour evenly. Do not pack it down yet.
- Layer 2: Cocoa Powder: Carefully spoon the 1/3 cup of unsweetened cocoa powder into the jar on top of the flour layer. Use the back of a spoon to spread it evenly. This layer is very fine and can be dusty, so go slowly. Gently tap the jar again to level it out.
- Layer 3: Optional Add-Ins (Chocolate Chips/Nuts): This is where you can get creative. If you are adding chocolate chips or nuts, pour them in now. They will create a distinct middle layer. For a classic look, I use a mix of semi-sweet chips and a few white chocolate chips for contrast.
- Layer 4: Sugar and Baking Powder: In another small bowl, whisk together the 1 cup of granulated sugar and 1 teaspoon of baking powder. Pour this mixture into the jar. This is usually the thickest layer. Use a spoon or a small tamper to gently press it down. You want it to be compact so the layers don’t shift.
- Seal and Decorate: Once all layers are in, place the lid on the jar and screw it tightly. Now for the fun part—decorating! Cut a square of fabric or a circle of parchment paper and place it over the lid before screwing on the band. Tie a piece of ribbon or twine around the neck of the jar. You can also add a small wooden spoon or a whisk tied to the side for an extra touch.
- Attach the Instructions: This is the most important step! Write or print the following instructions on a gift tag and tie it to the jar:
“Preheat oven to 350°F (175°C). Grease an 8×8 inch baking pan. Empty the contents of the jar into a large bowl. Stir in 2 large eggs, 1/2 cup of vegetable oil, and 1/4 cup of water. Mix until just combined. Pour into prepared pan and bake for 20-25 minutes, or until a toothpick inserted in the center comes out clean. Let cool before cutting. Enjoy!”
A little pro tip from my own kitchen mishaps: make sure you label each layer on the jar with a piece of washi tape if you are making a few different versions. I once mixed up a jar with walnuts and one without, and let me tell you, that was a phone call I did not want to make. Also, do not over-pack the sugar layer—you want it to be firm but not rock hard, or it will be difficult to mix later.
Cooking Tips & Techniques
After making these jars more times than I can count, I have picked up a few tricks that make the process smoother and the final gift more impressive.
- Use a Funnel: I cannot stress this enough. A funnel is your best friend for keeping the sides of the jar clean. A dirty jar looks messy and unprofessional. If you don’t have one, use a piece of parchment paper rolled into a cone.
- Pack Layers Gently: You want the layers to be distinct, not mixed. Use the back of a spoon or a small wooden dowel to press each layer down lightly. This prevents the ingredients from settling together during transport.
- Mind the Cocoa Dust: Cocoa powder is notoriously dusty. When you pour it, do it slowly and tap the funnel to get it all in. If you get cocoa on the glass, use a dry pastry brush to wipe it away before adding the next layer.
- Test Your Jar Size: Not all quart jars are created equal. Before you start, make sure your jar is actually 32 ounces. I once used a jar that was slightly smaller, and I had to leave out some of the sugar—it threw off the whole recipe.
- Double Check the Instructions: Before you attach the tag, read the instructions out loud. Make sure they are clear and easy to follow. A confused teacher is not a happy teacher.
One failure I will never forget: I once made a batch of jars and forgot to add the baking powder to the sugar layer. The brownies came out flat as pancakes. Now, I always double-check my layers before sealing the jar. It is a simple step that saves a lot of disappointment.
Variations & Adaptations
These jars are incredibly versatile. You can adapt them to suit any dietary need or flavor preference. Here are a few of my favorite variations.
- Gluten-Free Version: Substitute the all-purpose flour with a 1-to-1 gluten-free baking flour blend. Make sure it contains xanthan gum for structure. The rest of the ingredients remain the same.
- Vegan Option: Use a vegan chocolate chip brand (like Enjoy Life) and ensure your sugar is certified vegan (most granulated sugar is, but some bone char-processed sugars are not). The teacher will still need to add a flax egg (1 tablespoon ground flaxseed mixed with 3 tablespoons water) instead of chicken eggs.
- Flavor Twists: Add a teaspoon of instant espresso powder to the cocoa layer for a mocha kick. Or, add a pinch of cinnamon and cayenne pepper for a Mexican hot chocolate vibe. My personal favorite is adding orange zest to the sugar layer—it pairs beautifully with dark chocolate.
- Nut-Free Option: Simply omit the walnuts or pecans. You can replace them with an extra 1/4 cup of chocolate chips or some dried cherries for a different texture.
- Low-Sugar Version: Use a sugar substitute like monk fruit sweetener or erythritol in place of the granulated sugar. Keep in mind that the texture may be slightly different, but the flavor will still be delicious.
I once made a batch of these jars for a group of teachers with various dietary restrictions. I made a gluten-free version, a vegan version, and a classic version. I used different colored ribbons to tell them apart—blue for gluten-free, green for vegan, and red for classic. It was a huge hit, and the teachers really appreciated the thoughtfulness.
Serving & Storage Suggestions
These jars are designed to be gifts, so the “serving” part is really about how you present them and how the recipient enjoys the finished brownies.
- Presentation: The jar itself is the star. Display it on a small plate or in a gift basket alongside a handwritten note. A sprig of fresh rosemary or a cinnamon stick tied to the ribbon adds a lovely, rustic touch.
- Serving the Brownies: Once the teacher bakes them, they should let the brownies cool completely in the pan before cutting. For clean slices, use a plastic knife—it sounds weird, but it works. Serve them warm with a scoop of vanilla ice cream or a dusting of powdered sugar.
- Storage of the Jar: The un-baked mix can be stored in a cool, dry place for up to 3 months. Keep it away from direct sunlight and heat, as the chocolate chips can bloom (develop white streaks) if it gets too warm.
- Storage of Baked Brownies: Baked brownies can be stored in an airtight container at room temperature for up to 5 days. They also freeze beautifully for up to 3 months. Just wrap them tightly in plastic wrap and then foil.
- Flavor Development: Honestly, brownies taste even better the day after they are baked. The flavors meld together, and the texture becomes even more fudgy. So if the teacher can resist eating them immediately, they are in for a real treat.
I always tell the recipients to store the jar in their pantry, not the fridge. The moisture in the fridge can cause the dry ingredients to clump. And if they are giving it as a last-minute gift, a pretty cellophane bag tied with a bow makes it look extra special.
Nutritional Information & Benefits
While these brownie-mix jars are a treat, they do offer a few surprising benefits. Here is a rough estimate of the nutritional content per serving (based on 16 servings per jar, using the standard recipe).
- Calories: Approximately 180-220 per brownie (depending on add-ins).
- Fat: 8-10g (mostly from oil and chocolate chips).
- Carbohydrates: 28-32g.
- Protein: 2-3g.
- Fiber: 1-2g (thanks to the cocoa powder and any nuts you added).
From a wellness perspective, cocoa powder is actually a fantastic source of antioxidants, specifically flavonoids, which are great for heart health. Dark chocolate has been shown to improve mood and cognitive function—something every teacher can appreciate! Plus, the act of baking itself can be a wonderful stress reliever.
If you are making a gluten-free or vegan version, the nutritional profile will shift slightly, but the core benefits remain. I personally love that this gift gives the teacher a moment of calm—a chance to bake, enjoy the aroma, and then savor a homemade treat. That is a gift in itself.
Conclusion
So there you have it—a simple, heartfelt, and incredibly delicious way to say “thank you” to the teachers who work so hard. These Easy Teacher Appreciation Brownie-Mix Gift Jars are more than just a present; they are an experience. They give the recipient the joy of baking, the comfort of a warm treat, and the knowledge that someone took the time to make something special just for them.
I love making these jars because they remind me of my own favorite teachers—the ones who made a difference in my life. It is a small gesture, but it carries a lot of meaning. And honestly, who doesn’t love a good brownie?
I encourage you to get creative with your layers and decorations. Make it your own. Add a favorite quote on the tag, or include a small bag of gourmet coffee to go with it. The possibilities are endless.
Now, I want to hear from you! Have you ever made a DIY gift jar? What is your favorite teacher appreciation gift? Drop a comment below and share your ideas. And if you make these jars, tag me in your photos—I would love to see your beautiful creations. Happy gifting, and happy baking!
Frequently Asked Questions
Can I use a different type of jar?
Absolutely! While quart-sized mason jars are ideal, you can use any clean, dry glass jar with a tight-fitting lid. Just make sure it holds at least 4 cups of dry ingredients. Pint-sized jars will not hold the full recipe, so you would need to divide the ingredients between two jars.
How long will the brownie mix stay fresh in the jar?
Stored in a cool, dry place away from direct sunlight, the dry mix will stay fresh for up to 3 months. If you are adding nuts, they might go rancid faster, so I recommend using them within 6-8 weeks. You can also store the jar in the freezer for up to 6 months.
Can I use butter instead of oil in the baking instructions?
Yes, you can! Melted unsalted butter works beautifully in place of vegetable oil. It will give the brownies a richer flavor and a slightly denser, more fudgy texture. Just make sure to let the butter cool slightly before adding it to the mix so it does not scramble the eggs.
What if I don’t have a funnel?
No problem at all! You can easily make a funnel by rolling a piece of parchment paper or a clean piece of cardstock into a cone shape. Tape the edge to hold it together, and trim the tip to your desired opening size. It works just as well as a store-bought funnel.
Can I add a liquid ingredient like vanilla extract to the jar?
I would not recommend it. Adding a liquid to the dry mix can cause clumping and spoilage. Instead, you can add a note on the instruction tag suggesting they add 1 teaspoon of vanilla extract along with the wet ingredients. That way, the flavor is still there without compromising the jar’s shelf life.
Pin This Recipe!
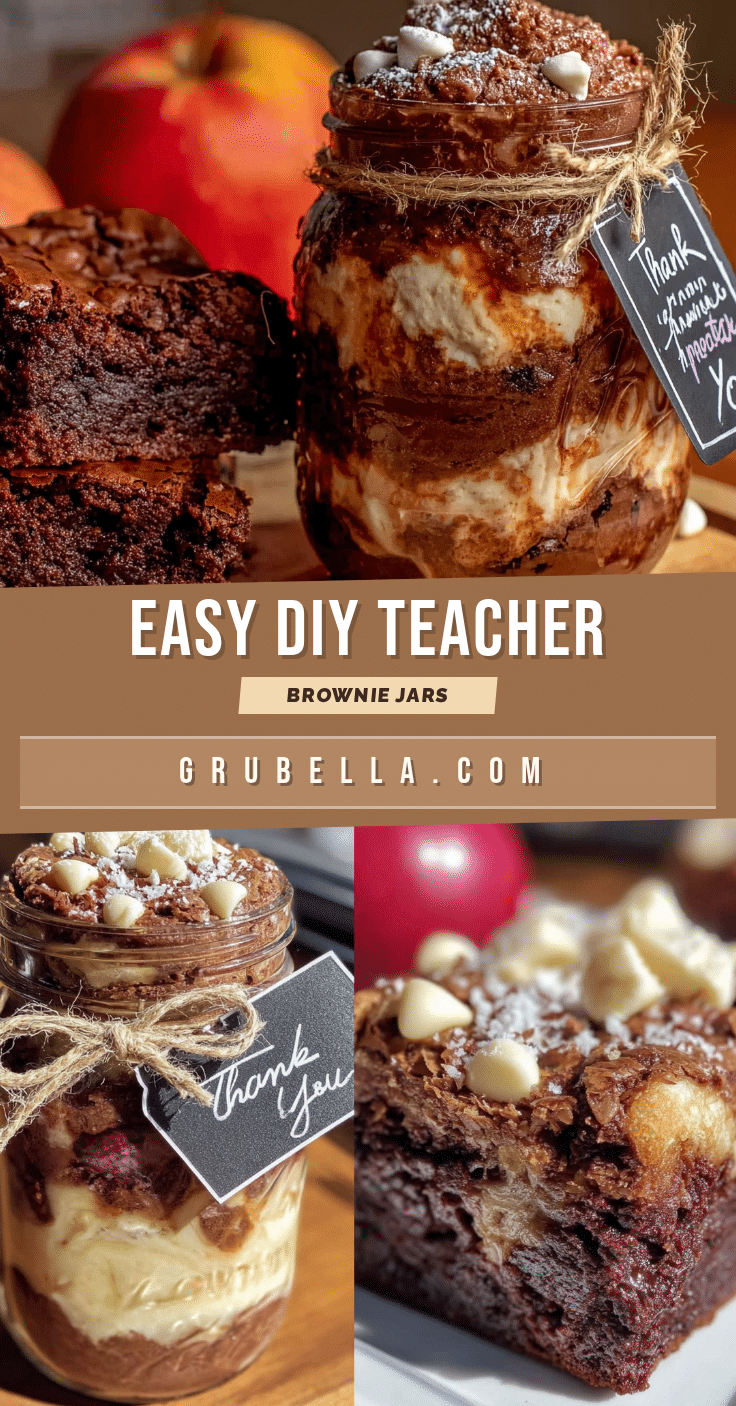
Easy Teacher Appreciation Brownie-Mix Gift Jars
A thoughtful and practical gift idea for teachers, featuring a beautifully layered brownie mix in a jar that the recipient can bake themselves. This project comes together in under 15 minutes and uses simple pantry ingredients.
- Prep Time: 15 minutes
- Cook Time: 20-25 minutes
- Total Time: 35-40 minutes
- Yield: 16 servings 1x
- Category: Dessert
- Cuisine: American
Ingredients
- 1 cup (200g) granulated sugar
- 1/2 cup (60g) all-purpose flour
- 1/3 cup (40g) unsweetened cocoa powder (Dutch-processed or natural)
- 1 teaspoon baking powder
- 1/4 teaspoon fine sea salt
- 1/2 cup (90g) semi-sweet chocolate chips (optional)
- 1/4 cup (30g) chopped walnuts (optional)
- 1/4 cup (40g) white chocolate chips (optional)
- 2 large eggs (room temperature)
- 1/2 cup (120ml) vegetable oil or melted unsalted butter
- 1/4 cup (60ml) water
Instructions
- Prepare your workspace: Clear your counter and gather all ingredients and equipment.
- Layer 1 – Flour and Salt: In a small bowl, whisk together 1/2 cup all-purpose flour and 1/4 teaspoon salt. Pour into the bottom of a clean, dry quart-sized mason jar using a funnel. Tap the jar lightly to settle the flour evenly.
- Layer 2 – Cocoa Powder: Carefully spoon 1/3 cup unsweetened cocoa powder into the jar on top of the flour layer. Spread evenly with the back of a spoon. Tap the jar gently to level.
- Layer 3 – Optional Add-Ins: If using, add 1/2 cup semi-sweet chocolate chips, 1/4 cup chopped walnuts, or 1/4 cup white chocolate chips. This creates a distinct middle layer.
- Layer 4 – Sugar and Baking Powder: In another small bowl, whisk together 1 cup granulated sugar and 1 teaspoon baking powder. Pour into the jar. Gently press down with a spoon or tamper to compact the layer.
- Seal and Decorate: Place the lid on the jar and screw tightly. Decorate with fabric, ribbon, or twine as desired.
- Attach Instructions: Write or print the following on a gift tag: ‘Preheat oven to 350°F (175°C). Grease an 8×8 inch baking pan. Empty the contents of the jar into a large bowl. Stir in 2 large eggs, 1/2 cup vegetable oil, and 1/4 cup water. Mix until just combined. Pour into prepared pan and bake for 20-25 minutes, or until a toothpick inserted in the center comes out clean. Let cool before cutting. Enjoy!’
Notes
Pack each layer down gently with the back of a spoon to keep layers distinct. Use a funnel to keep jar sides clean. For gluten-free, substitute all-purpose flour with a 1-to-1 gluten-free baking blend. For vegan, use vegan chocolate chips and a flax egg (1 tablespoon ground flaxseed mixed with 3 tablespoons water). Store un-baked mix in a cool, dry place for up to 3 months.
Nutrition
- Serving Size: 1 brownie
- Calories: 180220
- Sugar: 1822
- Sodium: 80100
- Fat: 810
- Saturated Fat: 23
- Carbohydrates: 2832
- Fiber: 12
- Protein: 23
Keywords: teacher appreciation, brownie mix, gift jar, DIY gift, easy brownies, mason jar gift, homemade gift



