Love this? Save it for later!
Share the inspiration with your friends
The lunchbox came home empty. Not just the sandwich part, but the little silicone cup of cucumber slices too. My four-year-old actually said, “Mom, can you make those again tomorrow?” without me prompting her. That never happens. Usually I get the polite version of “it was okay” or a half-eaten thermos returned with a shrug. But these little turkey and cheese roll-ups? She asked for them by name. Three days in a row. That’s when I knew I’d stumbled onto something worth keeping around.
I wasn’t trying to invent anything fancy, honestly. It was a Tuesday morning, the kind where you open the fridge and just stare for a minute hoping something edible will assemble itself. I had deli turkey, sliced cheddar, and a flour tortilla that was dangerously close to its expiration date. My kid was in that phase where anything cut into a circle was automatically better than a square. So I rolled, sliced, and tossed them into her Paw Patrol lunchbox without much thought. The reaction was immediate, and honestly, a little embarrassing for how simple the whole thing was.
These Easy Turkey and Cheese Lunchbox Roll-Ups have become our go-to for school lunches, after-school snacks, and even those “I forgot to eat lunch and now I’m hangry” moments. They take literally ten minutes to throw together. No cooking. No heating. Just rolling, slicing, and packing. And the best part? They actually hold up well in a lunchbox without getting soggy or falling apart. If you’ve been looking for a lunch idea that your kids will actually eat and you won’t hate making, this might just be your new weeknight prep hero.
Why You’ll Love This Recipe
I’ve tested a lot of lunchbox ideas over the years. Some were great in theory but fell apart by noon. Others required fancy ingredients I never had on hand. These roll-ups are different. They’re the kind of recipe that makes you wonder why you didn’t think of it sooner.
- Quick & Easy: From fridge to lunchbox in under ten minutes. No cooking, no heating, no complicated steps. Perfect for busy mornings when you’re already running late.
- Simple Ingredients: You probably already have everything in your fridge right now. Tortillas, deli turkey, cheese slices, and a little spread if you want to get fancy. That’s it.
- Perfect for Lunchboxes: These hold up incredibly well. No sogginess, no falling apart, no sad crushed sandwich at the bottom of the bag. They stay intact for hours.
- Crowd-Pleaser: My kids love them. My husband steals them from the fridge. Even picky eaters tend to go for these because they look fun and taste familiar.
- Endlessly Customizable: Swap the turkey for ham, change the cheese, add veggies, or make them gluten-free. This recipe is more of a template than a rigid set of rules.
What makes these different from every other wrap or roll-up recipe out there is the technique. I figured out that spreading a thin layer of cream cheese (or your favorite spread) creates a barrier that keeps the tortilla from getting soggy while adding a little tangy flavor. It’s a small trick, but it makes a huge difference in texture and taste. Plus, the roll-and-slice method gives you those perfect little pinwheels that look way more impressive than they actually are to make.
Honestly, this recipe saved my lunch-packing sanity. No more standing in front of the open fridge at 7:45 AM wondering what to pack. I make a batch of these on Sunday night, and we’re set for the week. It’s that kind of simple.
What Ingredients You Will Need
This recipe uses such basic ingredients that you might already have everything in your kitchen. I love recipes that don’t require a special trip to the grocery store. Here’s what you’ll need:
- Large flour tortillas (10-inch size works best for rolling) — I prefer Mission or La Banderita brands for their flexibility. You can also use whole wheat, spinach, or sun-dried tomato tortillas for extra color and flavor.
- Deli turkey slices (about 4-6 slices per tortilla) — I like Boar’s Head oven-roasted turkey breast for its clean flavor, but any good-quality deli turkey works. Look for slices that aren’t too thin or they’ll tear when rolling.
- Cheese slices (2-3 slices per tortilla) — Cheddar, provolone, Swiss, or pepper jack all work beautifully. I usually go with sharp cheddar for its bold flavor, but provolone gives a milder, creamier result.
- Cream cheese (2-3 tablespoons, softened) — This is my secret weapon. It acts as a spreadable barrier that prevents sogginess and adds a lovely tang. Use full-fat for best texture, but reduced-fat works in a pinch.
- Optional add-ins: Lettuce leaves, thinly sliced cucumber, shredded carrots, bell pepper strips, or avocado slices. These add crunch and nutrition but can make the roll-ups a bit more delicate.
- Optional spreads: Ranch dressing, honey mustard, pesto, hummus, or even a thin layer of mayonnaise. These add flavor variety, just be careful not to overdo it or the roll-ups might get too wet.
For ingredient selection, I’ve learned a few things through trial and error. First, room-temperature cream cheese spreads much more evenly than cold. Just let it sit on the counter for 15 minutes before you start. Second, if you’re using lettuce, pat it completely dry with paper towels first. Wet lettuce is the enemy of a good roll-up. Third, thicker cheese slices hold up better than paper-thin ones. I look for deli-sliced cheese that’s about an eighth of an inch thick.
If you want to make these dairy-free, use vegan cream cheese and your favorite dairy-free cheese slices. For a gluten-free version, corn tortillas work but they’re smaller and more prone to cracking. I’ve had better luck with gluten-free flour tortillas from brands like Mission or Toufayan.
Equipment Needed
You don’t need much for this recipe, which is part of the appeal. Here’s what I use:
- Cutting board — A large, stable surface for rolling and slicing. I prefer a wooden cutting board because it doesn’t slip around.
- Sharp knife — A serrated bread knife actually works best for slicing through tortillas without squishing them. But any sharp chef’s knife will do the job.
- Butter knife or offset spatula — For spreading the cream cheese evenly. A regular butter knife works fine, but an offset spatula gives you better control.
- Plastic wrap or parchment paper — For wrapping the roll-ups tightly before slicing. This helps them hold their shape and makes cleaner cuts.
- Lunchbox or airtight container — For storing and transporting. I use bento-style lunchboxes with compartments to keep everything separate.
- Optional: Rolling pin — If your tortillas are a bit stiff, gently rolling them first makes them more pliable and easier to roll without cracking.
I’ve made these with nothing more than a butter knife and a plate when I was camping, so don’t stress about having the perfect tools. The plastic wrap trick is the one piece of equipment I really recommend. It makes a noticeable difference in how clean your slices turn out.
Preparation Method
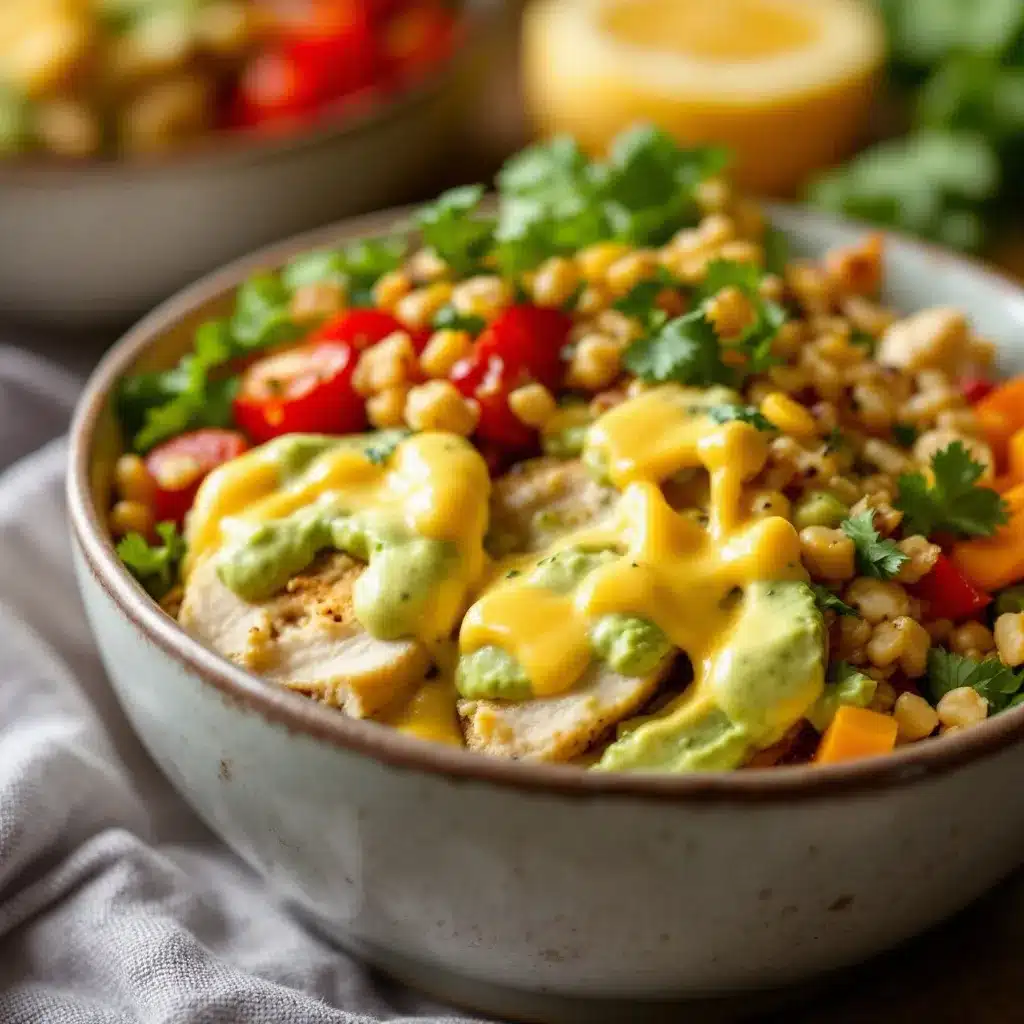
Let me walk you through exactly how I make these. It’s simple, but a few small details make all the difference.
- Soften the cream cheese. Take your cream cheese out of the fridge about 15 minutes before you start. You want it soft and spreadable, not cold and stiff. If you forgot to plan ahead, microwave it for 10 seconds on low power.
- Warm the tortillas slightly. Place each tortilla in a dry skillet over medium heat for about 15 seconds per side, or microwave them between damp paper towels for 10 seconds. This makes them flexible and less likely to crack when rolling. Let them cool slightly before spreading.
- Spread the cream cheese. Using your butter knife or offset spatula, spread a thin, even layer of cream cheese over the entire surface of the tortilla. Leave about a half-inch border around the edges. The layer should be thin enough that you can still see the tortilla through it in places. Too much cream cheese and your roll-ups will be messy.
- Layer the turkey. Place your turkey slices evenly over the cream cheese, overlapping them slightly. I use about 4-6 slices depending on the size of the tortilla and the thickness of the turkey. You want complete coverage without huge clumps in one spot.
- Add the cheese. Lay your cheese slices on top of the turkey. Again, overlap them slightly so there are no bare spots. If you’re using add-ins like lettuce or cucumber, place them on top of the cheese now. Keep any veggies in a single layer to avoid bulges.
- Roll it up tight. Starting at one edge, roll the tortilla as tightly as you can without tearing it. Use your fingers to keep the filling tucked in as you go. Think of it like rolling a sleeping bag — firm and even pressure. When you reach the end, place the seam side down.
- Wrap in plastic wrap. This step is crucial. Wrap the rolled tortilla tightly in plastic wrap, twisting the ends like a candy wrapper. This holds everything together and helps the roll maintain its shape. Refrigerate for at least 15-20 minutes (or up to overnight).
- Slice into pinwheels. Unwrap the chilled roll and place it on your cutting board. Using a sharp serrated knife, slice the roll into 1-inch thick rounds. Use a gentle sawing motion rather than pressing straight down — this prevents squishing. You should get about 6-8 pieces per large tortilla.
- Pack and serve. Arrange the pinwheels in your lunchbox or container. If you’re not serving immediately, keep them refrigerated. They’re best within 24 hours but will keep for up to 3 days.
A few things I’ve learned the hard way: Don’t skip the chilling step. I know it’s tempting to just slice and go, but warm tortillas will unroll and your beautiful pinwheels will fall apart. Also, if your cream cheese layer is too thick, it’ll squish out the sides when you roll. Less is more here. And if you’re using add-ins like cucumber or bell pepper, make sure they’re cut into very thin strips — thick chunks will make your roll lumpy and harder to slice evenly.
Cooking Tips & Techniques
I’ve made these roll-ups probably fifty times by now, and I’ve messed up plenty along the way. Here’s what I’ve learned so you don’t have to make the same mistakes.
The soggy tortilla problem. This was my biggest frustration early on. I’d pack these for lunch, and by noon the tortilla would be soft and falling apart. The fix was two things: drying my ingredients thoroughly (especially lettuce) and using the cream cheese barrier. The cream cheese creates a waterproof layer between the tortilla and the moist fillings. It’s a game-changer.
Uneven slices. If your pinwheels look more like oval blobs than perfect circles, your knife is probably dull. A sharp serrated knife makes clean cuts without squishing the roll. Also, make sure your roll is chilled thoroughly before slicing. A warm roll is a squishy roll.
Fillings falling out. This happens when you don’t roll tight enough or when you overstuff. Keep your fillings in a single, even layer. And when you roll, use firm, even pressure. I sometimes use a sushi rolling mat to get that extra-tight roll, but it’s not necessary.
Timing strategy. I make these on Sunday evenings while I’m meal-prepping other things. I roll them all up, wrap them in plastic, and refrigerate overnight. In the morning, I just slice and pack. It takes maybe two minutes per lunchbox. If you’re making them fresh in the morning, give yourself at least 15 minutes for the chilling step.
Keeping them fresh. If you’re packing these for a school lunch, add a small ice pack to the lunchbox to keep everything cool. They’ll hold up fine for 4-5 hours without one, but the ice pack ensures the cream cheese stays firm and the tortilla stays fresh.
One mistake I made early on was using too many wet ingredients. I added sliced tomatoes once, and by lunchtime, the whole thing was a soggy mess. Tomatoes are delicious but they release too much moisture. Stick with drier veggies like cucumber, bell pepper, or shredded carrots.
Variations & Adaptations
This recipe is more of a starting point than a rigid set of rules. Here are some of my favorite variations:
The Turkey Club Roll-Up: Add a few slices of crispy bacon, some shredded lettuce, and a thin layer of ranch dressing instead of cream cheese. It’s like a club sandwich in pinwheel form. My husband requests these for his work lunches constantly.
The Veggie-Packed Version: Spread hummus instead of cream cheese, then layer turkey, provolone, thinly sliced cucumber, bell pepper strips, and shredded carrots. The hummus adds protein and keeps everything together beautifully.
The Low-Carb Option: Use large lettuce leaves or collard greens instead of tortillas. Blanch the collard greens for 30 seconds to make them pliable, then pat completely dry. Fill with turkey, cheese, and your favorite low-carb additions. These hold up surprisingly well.
The Breakfast Roll-Up: Swap turkey for ham, spread with honey mustard, and add scrambled eggs and cheese. Slice into pinwheels for a fun breakfast-on-the-go. My kids love these on Saturday mornings before soccer games.
The Italian-Inspired Version: Use salami or pepperoni instead of turkey, spread with pesto, and add provolone or mozzarella. A few sun-dried tomato strips take this over the top. It’s like an Italian sub in pinwheel form.
If you’re like me and you love having a variety of lunchbox options on hand, you might also enjoy these easy homemade Lunchable crackers with ham and cheese or these turkey bacon ranch roll-ups for another quick lunch idea. And if you’re looking for something sweet to round out the lunchbox, these no-bake peanut butter oat energy bites are a perfect addition.
Serving & Storage Suggestions
These roll-ups are best served cold or at room temperature. I usually pack them straight from the fridge into the lunchbox, and they’re perfectly chilled by lunchtime. If you’re serving them as an after-school snack, let them sit out for about 10 minutes to take the chill off.
For presentation, I arrange the pinwheels in a single layer in a bento-style lunchbox. They look beautiful on their own, but you can add a little dish of ranch dressing or honey mustard for dipping if your kids like that. I also like to pack them alongside some fresh fruit, veggie sticks, and a small treat. The variety makes lunch feel more special.
Storage: Keep assembled (but unsliced) rolls wrapped tightly in plastic wrap in the refrigerator for up to 3 days. Slice them just before packing for the freshest results. If you’ve already sliced them, store the pinwheels in an airtight container with a paper towel at the bottom to absorb any excess moisture.
Freezing: You can freeze the rolled (but unsliced) tortillas. Wrap each roll tightly in plastic wrap, then place in a freezer bag. They’ll keep for up to 2 months. Thaw overnight in the refrigerator before slicing and packing. The texture is slightly softer after freezing, but still perfectly good for lunches.
Reheating: These are meant to be eaten cold, so no reheating needed. If you’ve frozen them, just thaw and enjoy.
One thing I love about these roll-ups is that the flavors actually meld together a bit after sitting overnight. The turkey absorbs a little of the cream cheese tang, and everything becomes more cohesive. They’re actually better the next day in my opinion.
If you’re planning a week of lunches, I’d suggest making a double batch of these along with some make-ahead egg and cheese breakfast muffins for a complete grab-and-go breakfast and lunch solution. And for another no-cook lunch option that’s perfect for busy weeks, these turkey club lunchbox wraps are another favorite in our house.
Nutritional Information & Benefits
Here’s the approximate nutritional breakdown for one serving (about 4-5 pinwheels, made with one large tortilla, 2 oz turkey, 1 oz cheddar, and 1 tbsp cream cheese):
- Calories: 310
- Protein: 22g
- Fat: 16g
- Carbohydrates: 22g
- Fiber: 2g
- Sugar: 3g
- Sodium: 780mg
These numbers will vary based on your specific ingredients and portion sizes. Using whole wheat tortillas adds more fiber, and reduced-fat cheese and cream cheese can lower the fat content significantly.
Health-wise, these roll-ups offer a good balance of protein from the turkey and cheese, which helps keep kids full and focused through the afternoon. Turkey is a lean protein source that’s low in saturated fat compared to other deli meats. The cream cheese adds calcium and a small amount of protein too. If you add veggies like cucumber or bell pepper, you’re getting extra vitamins and fiber with minimal calories.
For dietary considerations, this recipe is naturally nut-free (check your tortilla brand to be sure) and can be made gluten-free with the right tortillas. It’s also easy to adjust for lower sodium by choosing low-sodium deli turkey and cheese. If you’re watching your carb intake, the lettuce wrap version is a great alternative.
I will say, these aren’t the lowest-sodium option out there, but for a once-in-a-while lunch or a busy-week staple, they’re a perfectly reasonable choice. Pair them with fresh fruit and water, and you’ve got a balanced meal.
Conclusion
These Easy Turkey and Cheese Lunchbox Roll-Ups have honestly changed my lunch-packing game. They’re so simple that I almost feel silly calling it a recipe, but the results speak for themselves. My kids actually look forward to their lunch now, and I don’t dread the morning prep. That’s a win in my book.
What I love most about this recipe is how adaptable it is. You can make it exactly as written, or you can riff on it endlessly based on what you have in your fridge. It’s not a rigid formula — it’s more of a technique that you can customize to your family’s tastes. Add bacon. Swap the cheese. Use different spreads. Make it your own.
I’d love to hear how these turn out for you. Do your kids have a favorite variation? Did you discover a new combination that works? Drop a comment below and share your lunchbox wins. And if you’re looking for more easy lunch ideas, check out these cold Italian pasta salad or these rainbow fruit and cheese kabobs for more lunchbox inspiration. Happy packing!
Frequently Asked Questions
Can I make these roll-ups ahead of time?
Absolutely! That’s actually the best way to make them. Roll them up, wrap tightly in plastic wrap, and refrigerate for up to 3 days. Slice just before packing for the freshest look and texture.
How do I keep the roll-ups from getting soggy in the lunchbox?
The cream cheese barrier is your best friend here. It creates a waterproof layer between the tortilla and the moist fillings. Also, pat any veggies completely dry before adding them, and avoid wet ingredients like tomatoes.
What’s the best cheese to use?
Sharp cheddar is my personal favorite for its bold flavor, but provolone, Swiss, pepper jack, and mozzarella all work beautifully. Choose a cheese that’s firm enough to slice thinly without crumbling.
Can I use a different type of tortilla?
Yes! Whole wheat, spinach, sun-dried tomato, gluten-free, and even corn tortillas all work. Just keep in mind that smaller tortillas will give you fewer slices per roll, and corn tortillas are more prone to cracking. Warm them slightly before rolling to improve flexibility.
How many roll-ups should I pack for a school lunch?
For younger kids (ages 4-7), 3-4 pinwheels is usually enough. For older kids and adults, 5-7 pinwheels makes a satisfying lunch. I always pack a little extra because they tend to disappear fast!
Pin This Recipe!

Easy Turkey Cheese Lunchbox Roll-Ups: Perfect 10-Minute Lunch

These easy turkey and cheese roll-ups are a quick, no-cook lunchbox solution that kids love. Made with simple ingredients like tortillas, deli turkey, cheese, and cream cheese, they hold up well without getting soggy and can be customized endlessly.
- Prep Time: 10 minutes
- Cook Time: 0 minutes
- Total Time: 10 minutes
- Yield: 4 servings
- Category: Lunch
- Cuisine: American
Ingredients
- Large flour tortillas (10-inch size works best)
- Deli turkey slices (about 4-6 slices per tortilla)
- Cheese slices (2-3 slices per tortilla, such as cheddar, provolone, Swiss, or pepper jack)
- Cream cheese (2-3 tablespoons, softened)
- Optional add-ins: lettuce leaves, thinly sliced cucumber, shredded carrots, bell pepper strips, or avocado slices
- Optional spreads: ranch dressing, honey mustard, pesto, hummus, or mayonnaise
Instructions
- Soften the cream cheese by letting it sit at room temperature for 15 minutes or microwaving for 10 seconds on low power.
- Warm the tortillas slightly in a dry skillet over medium heat for 15 seconds per side, or microwave between damp paper towels for 10 seconds. Let cool slightly.
- Spread a thin, even layer of cream cheese over the entire surface of the tortilla, leaving a half-inch border around the edges.
- Layer turkey slices evenly over the cream cheese, overlapping slightly for complete coverage.
- Add cheese slices on top of the turkey, overlapping slightly to avoid bare spots. Add any optional add-ins now.
- Starting at one edge, roll the tortilla tightly, keeping the filling tucked in. Place seam side down.
- Wrap the rolled tortilla tightly in plastic wrap, twisting the ends like a candy wrapper. Refrigerate for at least 15-20 minutes or up to overnight.
- Unwrap the chilled roll and slice into 1-inch thick rounds using a sharp serrated knife with a gentle sawing motion.
- Pack the pinwheels in a lunchbox or airtight container. Serve cold or at room temperature.
Notes
Don’t skip the chilling step; warm tortillas will unroll. Use a thin layer of cream cheese to prevent sogginess. Pat veggies dry before adding. For best results, slice just before packing. Store unsliced rolls in plastic wrap in the refrigerator for up to 3 days. Freeze rolled (unsliced) tortillas for up to 2 months.
Nutrition
- Serving Size: 4-5 pinwheels
- Calories: 310
- Sugar: 3
- Sodium: 780
- Fat: 16
- Saturated Fat: 8
- Carbohydrates: 22
- Fiber: 2
- Protein: 22
Keywords: turkey roll-ups, lunchbox ideas, kids lunch, easy lunch, no-cook lunch, pinwheels, turkey and cheese



