Love this? Save it for later!
Share the inspiration with your friends
There used to be a tiny sandwich shop tucked in the corner of a gas station in my hometown—don’t roll your eyes, I know how that sounds—that made the most incredible turkey and bacon wraps. When they closed suddenly three years ago after the owner retired, I honestly felt a little lost. I mean, who knew gas station food could ruin you for all other sandwiches? After twelve tries—twelve, let me tell you, some of them were absolute disasters involving soggy tortillas and way too much ranch—I finally got it. These Easy Turkey Bacon Ranch Sandwich Roll-Ups are my successful recreation of that memory, and honestly? They might be even better than the original.
Let me paint you a picture of my first attempt. I was so excited I forgot to warm the tortillas, and the whole thing cracked into a sad pile of ingredients on my cutting board. My dog watched me eat the evidence with what I swear was pity. But I kept at it because that flavor combination—creamy ranch, salty bacon, cool turkey, and that perfect crunch—was worth the effort. Maybe you’ve been there, chasing a recipe that felt just out of reach. These roll-ups are the end of that chase. They’re the kind of lunch that makes you look forward to leftovers, and the kind of snack that disappears at parties before you can grab a second one.
What keeps me coming back to this recipe is how forgiving it is. You can prep them ahead, throw them together in a pinch, or double the batch for a crowd. And that first bite—where the ranch hits your tongue and the bacon crunches and the tortilla gives way—it takes me right back to that gas station counter. Only now, I don’t have to hope they’re open. I just open my fridge.
Why You’ll Love This Recipe
These roll-ups aren’t just another lunch idea—they’re the lunch idea you’ll actually want to make. Here’s why they’ve earned a permanent spot in my weekly rotation:
- Quick & Easy: Comes together in under 15 minutes with zero cooking required. Perfect for busy mornings, lazy Sundays, or those days when you’re staring at the fridge wondering what to eat.
- Simple Ingredients: No fancy grocery trips needed. You likely already have tortillas, cream cheese, and deli turkey in your kitchen right now.
- Perfect for Meal Prep: Make a batch on Sunday and grab them all week for lunches, snacks, or even a light dinner with a side salad.
- Crowd-Pleaser: Always gets rave reviews from kids and adults alike. I’ve brought these to potlucks and watched them vanish in minutes.
- Unbelievably Delicious: The creamy ranch filling paired with salty bacon and tender turkey wrapped in a soft tortilla is next-level comfort food.
What makes this recipe different from every other roll-up you’ve seen is the secret to the filling. Instead of just spreading cream cheese and calling it done, I blend in ranch seasoning and a splash of milk to create a spread that’s fluffy, flavorful, and perfectly spreadable. It’s a small tweak that makes a huge difference—no dry bites, no bland patches, just creamy goodness in every single roll.
This recipe isn’t just good—it’s the kind that makes you close your eyes after the first bite. It’s comfort food reimagined: faster, simpler, but with the same soul-soothing satisfaction. Perfect for impressing guests without stress, or turning a simple lunch into something memorable.
What Ingredients You Will Need
This recipe uses simple, wholesome ingredients to deliver bold flavor and satisfying texture without the fuss. Most of these are pantry staples or easy to grab on your next grocery run.
- Flour tortillas (10-inch) – Look for soft, pliable tortillas. Burrito-sized works best for easy rolling. I prefer Mission or Guerrero brands for consistent quality.
- 8 oz cream cheese, softened – Full-fat gives the creamiest results, but reduced-fat works in a pinch. Let it sit on the counter for 30 minutes before mixing.
- 1 packet ranch seasoning mix – Hidden Valley is my go-to, but any brand works. This is where all the flavor comes from, so don’t skip it.
- 2 tablespoons milk – Whole milk makes the filling extra creamy, but any milk you have on hand will work. Add more if needed for spreadable consistency.
- 8 slices deli turkey breast – Oven-roasted or smoked both work beautifully. Ask for thick-cut slices at the deli counter if you want extra texture.
- 8 slices bacon, cooked and crumbled – Thick-cut bacon adds the best crunch. Cook it until extra crispy so it stays crunchy in the roll-ups.
- 1 cup shredded lettuce – Iceberg gives the best crunch, but romaine works too. Pat it dry with paper towels to prevent soggy roll-ups.
- 1/2 cup shredded cheddar cheese – Sharp cheddar adds nice tang, but Monterey Jack or Colby also work great. Pre-shredded is fine, but freshly shredded melts better.
Ingredient Selection Tips:
- For the best texture, use room-temperature cream cheese. Cold cream cheese creates lumps that are hard to spread evenly.
- If you’re using pre-cooked bacon, crisp it up in the microwave for 30 seconds to restore some crunch.
- Look for tortillas with no cracks or dry edges—they’ll roll much more easily and won’t tear.
Substitution Guidance:
- Use gluten-free tortillas for a gluten-free option—just warm them slightly before rolling to prevent cracking.
- Swap turkey with ham, roast beef, or even rotisserie chicken for variety.
- Try dairy-free cream cheese and a dairy-free ranch seasoning blend for a dairy-free version.
- Add sliced avocado or roasted red peppers for extra flavor and nutrition.
Equipment Needed
You don’t need fancy equipment for these roll-ups, which is part of their charm. Here’s what you’ll need:
- Large mixing bowl – For combining the cream cheese filling. Any medium-to-large bowl works fine.
- Hand mixer or stand mixer – Makes whipping the cream cheese filling quick and effortless. A wooden spoon and some elbow grease work too, but the mixer gives you that fluffy texture.
- Cutting board – For assembling and slicing the roll-ups. A large board gives you plenty of workspace.
- Sharp knife – A serrated knife works best for clean slices through the tortillas without squishing them. I learned this after my first attempt with a dull knife—total disaster.
- Parchment paper or plastic wrap – For wrapping the roll-ups tightly before chilling. This step is crucial for clean slices.
- Baking sheet or large plate – To hold the wrapped roll-ups in the fridge.
Budget-Friendly Options: If you don’t have a hand mixer, a fork works surprisingly well for mashing and mixing the cream cheese. Just let the cream cheese get really soft first. And if you don’t have parchment paper, wax paper or even a clean kitchen towel can work for rolling.
Preparation Method
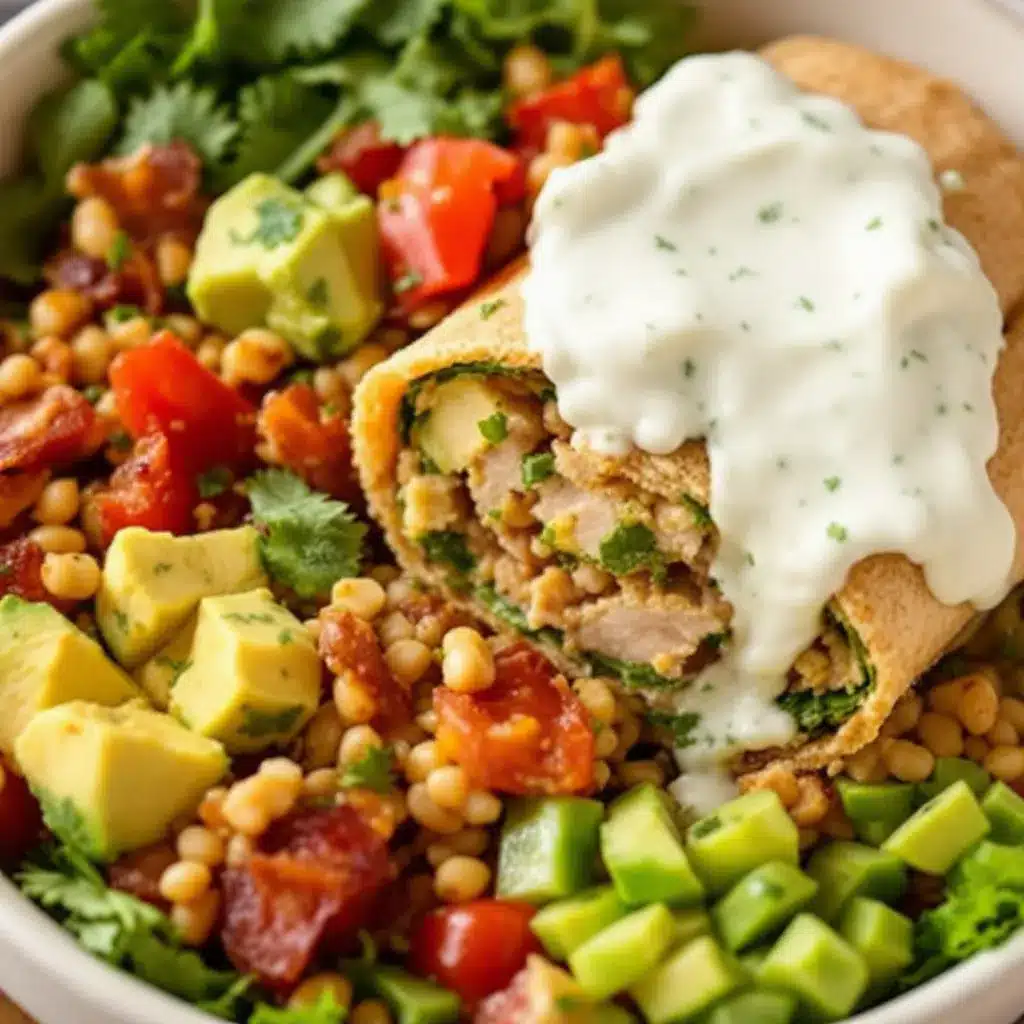
- Make the ranch cream cheese filling: In a large mixing bowl, combine the softened cream cheese, ranch seasoning packet, and 2 tablespoons of milk. Beat with a hand mixer on medium speed for 2-3 minutes until the mixture is smooth, fluffy, and well-combined. Scrape down the sides of the bowl once during mixing. The filling should be spreadable but not runny—if it’s too thick, add another tablespoon of milk.
- Prepare your ingredients: While the cream cheese softens, cook your bacon until extra crispy. I like to bake mine at 400°F for 15-18 minutes on a foil-lined baking sheet—less mess, perfect results. Let it cool completely, then crumble it into small pieces. Shred your lettuce and pat it dry with paper towels. Grate your cheese if you’re using a block.
- Warm the tortillas: This step is non-negotiable. Microwave your tortillas between damp paper towels for 20-30 seconds, or warm them one at a time in a dry skillet for about 15 seconds per side. Warm tortillas are flexible and won’t crack when you roll them. I forgot this step on attempt number four and ended up with tortilla confetti.
- Assemble the roll-ups: Lay one warm tortilla flat on your cutting board. Spread about 2 tablespoons of the ranch cream cheese mixture evenly across the entire surface, leaving a 1-inch border around the edges. Layer 2 slices of turkey on top of the cream cheese, slightly overlapping. Sprinkle about 2 tablespoons of crumbled bacon, followed by 2 tablespoons of shredded cheese, and a small handful of shredded lettuce.
- Roll tightly: Starting at the bottom edge, roll the tortilla away from you as tightly as you can without tearing the tortilla. Tuck the filling in as you go, using your fingers to keep everything snug. When you reach the end, place the roll seam-side down on the cutting board. The cream cheese helps seal the edge naturally.
- Wrap and chill: Wrap each roll-up tightly in parchment paper or plastic wrap, twisting the ends like a candy wrapper. Place the wrapped roll-ups on a baking sheet or plate and refrigerate for at least 30 minutes. This step is crucial—chilling helps the roll-ups hold their shape when you slice them. For best results, chill for 1-2 hours.
- Slice and serve: When ready to serve, unwrap each roll-up and place it on a clean cutting board. Using a sharp serrated knife, slice each roll into 1-inch pinwheels. A gentle sawing motion works better than pressing straight down. Arrange on a platter and serve cold or at room temperature.
Prep Time: 15 minutes | Chill Time: 30 minutes | Total Time: 45 minutes | Servings: 4-6 as an appetizer, 2-3 as a main
Cooking Tips & Techniques
After making these roll-ups more times than I care to admit, I’ve collected a few tricks that make the difference between good roll-ups and unforgettable ones.
Don’t overfill. I know it’s tempting to pile on the good stuff, but overstuffed tortillas are impossible to roll and fall apart when sliced. Stick to the amounts listed, and you’ll get perfect pinwheels every time. Less really is more here.
Patience with the chill time. I learned this the hard way on attempt number seven. I was hungry, so I sliced the roll-ups after only 15 minutes in the fridge. They unraveled into a sad mess on my plate. Give them the full 30 minutes minimum—your future self will thank you.
Use a damp paper towel under your cutting board. This keeps the board from sliding around while you’re rolling and slicing. It’s a small thing, but it makes the whole process smoother and safer.
Toast the tortillas for extra texture. If you have a few extra minutes, toast the tortillas in a dry skillet for about 30 seconds per side before assembling. This adds a subtle char and makes the tortillas sturdier for rolling. It’s not necessary, but it’s a nice touch.
Make the filling ahead. The ranch cream cheese mixture can be made up to 3 days in advance and stored in the fridge. Let it come to room temperature for about 15 minutes before spreading so it’s easier to work with.
Variations & Adaptations
One of the best things about this recipe is how easy it is to customize. Here are some variations I’ve tried and loved:
Spicy Southwest Roll-Ups: Add 1/4 cup of canned black beans (rinsed and drained), 2 tablespoons of diced pickled jalapeños, and swap the cheddar for pepper jack cheese. The ranch filling balances the heat beautifully. I made these for a game day party and they disappeared in minutes.
Mediterranean Twist: Replace the turkey with sliced roasted chicken, skip the bacon, and add 1/4 cup of chopped sun-dried tomatoes, 2 tablespoons of crumbled feta cheese, and a handful of fresh spinach instead of lettuce. The ranch filling still works, or you can swap it for a tzatziki-style spread.
Low-Carb Option: Use large lettuce leaves or low-carb tortillas instead of flour tortillas. The filling stays exactly the same. If using lettuce leaves, double up for sturdiness and roll gently. I’ve made these for keto friends and they were a hit.
Veggie-Packed Version: Add thinly sliced cucumber, shredded carrots, and bell pepper strips along with the lettuce. The crunch factor goes through the roof, and it’s a great way to use up leftover vegetables in the fridge.
Breakfast Roll-Ups: Swap the turkey for scrambled eggs and use bacon or sausage crumbles. Add a little shredded hash brown if you’re feeling extra hungry. These make an amazing grab-and-go breakfast.
Serving & Storage Suggestions
These roll-ups are incredibly versatile when it comes to serving. Here’s how to make the most of them:
Serving Temperature: Serve cold or at room temperature. If you’ve chilled them for several hours, let them sit on the counter for 10-15 minutes before serving so the flavors can wake up a bit. They’re perfect for picnics, lunchboxes, potlucks, and party platters.
Presentation Ideas: Arrange the pinwheels on a platter in concentric circles or in neat rows. Garnish with fresh parsley or a light sprinkle of paprika for color. Serve with extra ranch dressing on the side for dipping—trust me, people love to dip them.
Complementary Dishes: These roll-ups pair beautifully with a simple tomato soup, a crisp garden salad, or a bowl of fresh fruit. For parties, serve alongside other finger foods like mini quiches, veggie sticks with hummus, or a cheese board.
Storage Instructions: Store leftover roll-ups in an airtight container in the refrigerator for up to 3 days. Place a paper towel at the bottom of the container to absorb any excess moisture. The roll-ups will stay fresh and delicious.
Reheating: These are best enjoyed cold or at room temperature, so reheating isn’t recommended. If you prefer them warm, skip the chilling step and serve immediately after assembling. The texture will be softer and less defined, but still tasty.
Freezer Tips: You can freeze the uncut roll-ups (wrapped tightly in plastic wrap and then foil) for up to 1 month. Thaw in the refrigerator overnight before slicing and serving. The texture of the lettuce may soften slightly, so consider adding fresh lettuce after thawing if you want that crunch.
Nutritional Information & Benefits
Here’s the approximate nutritional breakdown for one serving (about 4-5 pinwheels, based on the recipe making 4 servings):
- Calories: 380-420
- Protein: 22g
- Carbohydrates: 28g
- Fat: 22g
- Fiber: 2g
- Sugar: 4g
- Sodium: 980mg
Health Benefits: Turkey is a lean protein source that’s rich in B vitamins and selenium, which support energy metabolism and immune function. Cream cheese provides calcium for bone health, while the lettuce adds a small amount of vitamin A and fiber. If you use whole wheat tortillas, you’ll get additional fiber and complex carbohydrates for sustained energy.
Dietary Considerations: This recipe can be made gluten-free, low-carb, and dairy-free with simple substitutions as noted above. It’s naturally nut-free and egg-free. If you’re watching sodium, use low-sodium turkey and reduced-sodium bacon, and consider making your own ranch seasoning blend without added salt.
I love that these roll-ups feel indulgent but are actually quite balanced. They’ve saved me from countless sad desk lunches and emergency hunger moments. They’re proof that eating well doesn’t have to be complicated or boring.
Conclusion
These Easy Turkey Bacon Ranch Sandwich Roll-Ups are the recipe I keep coming back to, and I think you will too. They’re simple enough for a Tuesday lunch but special enough for a party platter. They come together in minutes, use ingredients you probably already have, and taste like something you’d pay good money for at a cafe.
What I love most about this recipe is how it’s become a canvas for creativity in my kitchen. Some weeks I load them up with extra veggies, other times I go full comfort mode with double bacon and extra cheese. They adapt to whatever I’m craving, and they never let me down. Honestly, that’s the kind of recipe worth holding onto.
I’d love to hear how these turn out for you. Did you try a variation? Add something unexpected? Serve them at a party and watch them disappear? Drop a comment below and share your experience—your twist might inspire someone else’s next great lunch. And if you loved this recipe, pin it for later or share it with a friend who needs a new lunch idea in their life.
Happy rolling, friends. Your next favorite lunch is waiting.
Frequently Asked Questions
Can I make these roll-ups ahead of time?
Absolutely! These are perfect for meal prep. Assemble and wrap them tightly, then refrigerate for up to 3 days. Slice them just before serving for the freshest presentation. The flavors actually meld together beautifully overnight.
How do I keep the roll-ups from getting soggy?
The key is patting your lettuce completely dry before adding it to the roll-ups. Also, make sure your bacon is fully cooled and crispy before crumbling. The cream cheese filling also acts as a barrier that helps prevent moisture from soaking into the tortilla.
Can I use a different type of meat?
Yes! Ham, roast beef, rotisserie chicken, or even salami all work wonderfully. Just make sure the meat is thinly sliced so the roll-ups roll easily and evenly. I’ve made a version with smoked turkey and pepperoni that was absolutely incredible.
What’s the best way to slice the roll-ups cleanly?
Use a sharp serrated knife and use a gentle sawing motion rather than pressing straight down. Chilling the roll-ups for at least 30 minutes before slicing makes a huge difference. For the cleanest cuts, wipe the knife clean between each slice.
Can I freeze these roll-ups?
Yes, but with a caveat. Freeze the whole roll-ups (not sliced) wrapped tightly in plastic wrap and then foil for up to 1 month. Thaw in the refrigerator overnight. The lettuce will lose some crunch, so consider adding fresh lettuce after thawing if texture is important to you. The flavor will still be delicious.
Pin This Recipe!

Easy Turkey Bacon Ranch Roll-Ups Recipe

Creamy ranch, salty bacon, cool turkey, and that perfect crunch wrapped in a soft tortilla. These roll-ups are the perfect lunch or party appetizer that comes together in under 15 minutes with zero cooking required.
- Prep Time: 15 minutes
- Cook Time: 15 minutes
- Total Time: 45 minutes
- Yield: 4 servings 1x
- Category: Appetizer
- Cuisine: American
Ingredients
- 4 (10-inch) flour tortillas
- 8 oz cream cheese, softened
- 1 packet ranch seasoning mix
- 2 tablespoons milk
- 8 slices deli turkey breast
- 8 slices bacon, cooked and crumbled
- 1 cup shredded lettuce
- 1/2 cup shredded cheddar cheese
Instructions
- Make the ranch cream cheese filling: In a large mixing bowl, combine the softened cream cheese, ranch seasoning packet, and 2 tablespoons of milk. Beat with a hand mixer on medium speed for 2-3 minutes until the mixture is smooth, fluffy, and well-combined. Scrape down the sides of the bowl once during mixing. The filling should be spreadable but not runny—if it’s too thick, add another tablespoon of milk.
- Prepare your ingredients: While the cream cheese softens, cook your bacon until extra crispy. I like to bake mine at 400°F for 15-18 minutes on a foil-lined baking sheet—less mess, perfect results. Let it cool completely, then crumble it into small pieces. Shred your lettuce and pat it dry with paper towels. Grate your cheese if you’re using a block.
- Warm the tortillas: This step is non-negotiable. Microwave your tortillas between damp paper towels for 20-30 seconds, or warm them one at a time in a dry skillet for about 15 seconds per side. Warm tortillas are flexible and won’t crack when you roll them.
- Assemble the roll-ups: Lay one warm tortilla flat on your cutting board. Spread about 2 tablespoons of the ranch cream cheese mixture evenly across the entire surface, leaving a 1-inch border around the edges. Layer 2 slices of turkey on top of the cream cheese, slightly overlapping. Sprinkle about 2 tablespoons of crumbled bacon, followed by 2 tablespoons of shredded cheese, and a small handful of shredded lettuce.
- Roll tightly: Starting at the bottom edge, roll the tortilla away from you as tightly as you can without tearing the tortilla. Tuck the filling in as you go, using your fingers to keep everything snug. When you reach the end, place the roll seam-side down on the cutting board. The cream cheese helps seal the edge naturally.
- Wrap and chill: Wrap each roll-up tightly in parchment paper or plastic wrap, twisting the ends like a candy wrapper. Place the wrapped roll-ups on a baking sheet or plate and refrigerate for at least 30 minutes. This step is crucial—chilling helps the roll-ups hold their shape when you slice them. For best results, chill for 1-2 hours.
- Slice and serve: When ready to serve, unwrap each roll-up and place it on a clean cutting board. Using a sharp serrated knife, slice each roll into 1-inch pinwheels. A gentle sawing motion works better than pressing straight down. Arrange on a platter and serve cold or at room temperature.
Notes
Don’t overfill the tortillas. Pat lettuce completely dry to prevent sogginess. Chill for at least 30 minutes before slicing for clean cuts. The ranch cream cheese filling can be made up to 3 days in advance. For best results, use room-temperature cream cheese and warm tortillas before rolling.
Nutrition
- Serving Size: 4-5 pinwheels
- Calories: 400
- Sugar: 4
- Sodium: 980
- Fat: 22
- Saturated Fat: 10
- Carbohydrates: 28
- Fiber: 2
- Protein: 22
Keywords: turkey bacon ranch roll-ups, turkey bacon wrap, easy appetizer, party food, lunch idea, pinwheels, no-cook recipe



