Love this? Save it for later!
Share the inspiration with your friends
My phone buzzed while I was still wiping down the counter. It was Sarah, one of my college roommates, texting: “Those little pies. I need the recipe. Now.”
That was the third time that week I’d heard something similar. Friendsgiving had wrapped up an hour ago, the last guest had just left, and my heart was actually sinking a little. Not because I was tired, but because the tray was completely bare.
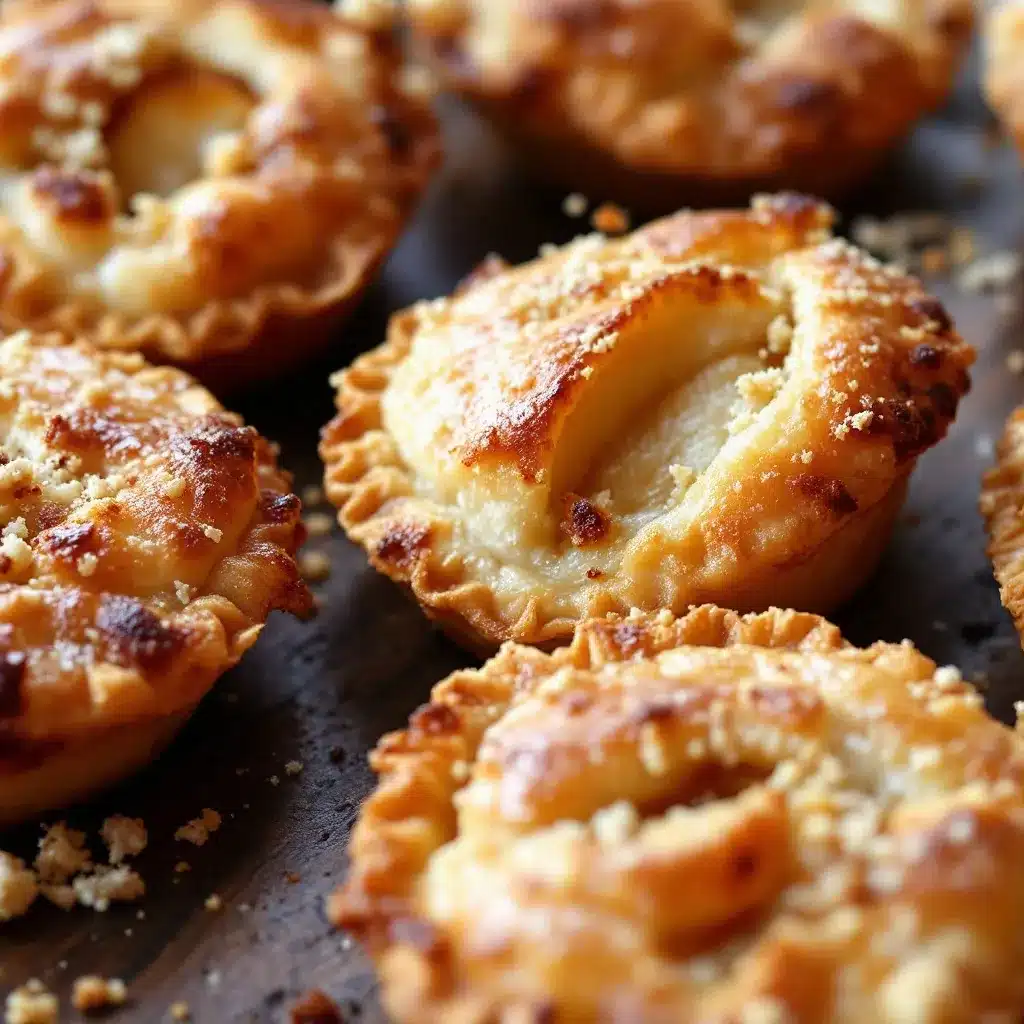
I had made a batch of mini apple hand pies, thinking they’d be a cute little addition to the dessert spread alongside the big pumpkin pie and that cheesy dip people kept going back to. I was wrong. They were the only thing that mattered.
People don’t just eat these; they grab them. They walk around the room holding them, careful not to spill the warm juice on their clothes, laughing about how hard it is to eat something so small without making a mess. It’s chaotic, honestly, and it’s the best part.
There is something about handing someone a warm, flaky pocket of apple filling that feels more intimate than a slice on a plate. You’re giving them a snack they can hold. It’s less formal, more fun, and infinitely easier to manage for a crowd.
I’ve made these for holidays, for game days, and just because it was Tuesday. But they truly shine when you have a bunch of friends gathered who are tired of standing in line for dessert. They disappear fast, but the compliments last all night.
It’s a quiet victory, really. You didn’t spend hours perfecting a grand centerpiece. You just made something simple, warm, and perfect for sharing. And that’s usually the stuff people remember.
Why You’ll Love This Recipe
Let’s be honest, not all desserts are created equal when you’re hosting a group. Some are too messy. Some are too heavy. These mini apple hand pies hit that sweet spot—literally and figuratively. I’ve tested dozens of versions over the years, from using store-bought dough to trying my own pie crust recipes, and this method is the winner.
- Quick & Easy: If you buy pre-made puff pastry or pie crust, you’re looking at about 30 minutes of hands-on time. You can prep the filling while the oven preheats. It’s perfect for those last-minute friendsgiving surprises.
- Simple Ingredients: You probably have everything you need right now. Apples, sugar, cinnamon, butter, and pastry. No fancy grocery trips needed. It’s pantry-friendly comfort food.
- Perfect for Friendsgiving: Unlike a big pie that requires cutting and serving, these are individual portions. No arguing over who gets the last slice. Everyone gets their own.
- Crowd-Pleaser: Kids love the handheld aspect. Adults love the flaky texture. It’s a win-win for mixed groups.
- Unbelievably Delicious: The contrast between the crisp, buttery crust and the soft, spiced apple filling is next-level. It’s like a pocket of autumn.
What makes this recipe different from the rest is the size. Big hand pies are great, but mini ones are easier to eat while standing and mingling. Plus, they bake faster, so you can get a fresh batch out of the oven quickly if people keep coming back for more.
This isn’t just a dessert; it’s a social lubricant. It’s the kind of food that makes people close their eyes after the first bite and smile. It’s comfort food reimagined for a modern gathering—less fuss, more flavor.
What Ingredients You Will Need
This recipe relies on high-quality, simple ingredients to deliver bold flavor and satisfying texture. The beauty of apple hand pies is that the quality of the apples really shines through, so pick wisely.
- For the Filling:
- 4 medium apples, peeled and diced small. I prefer a mix of Granny Smith for tartness and Honeycrisp for sweetness. (Granny Smith holds its shape best when baked.)
- 3 tablespoons unsalted butter, melted. (Adds richness to the filling.)
- 1/2 cup granulated sugar. (Adjust to 1/3 cup if your apples are very sweet.)
- 1 tablespoon all-purpose flour or cornstarch. (This thickens the juices so they don’t leak out.)
- 1 teaspoon ground cinnamon. (Use fresh spice for better flavor.)
- 1/4 teaspoon ground nutmeg. (Optional, but adds warmth.)
- 1 tablespoon lemon juice. (Prevents browning and balances the sweetness.)
- For the Pastry:
- 1 sheet puff pastry or 1 pie crust, thawed if frozen. I recommend Trader Joe’s puff pastry for the flakiest results, but any brand works.
- 1 large egg, beaten with 1 tablespoon water. (For the egg wash.)
- For the Topping:
- 1 tablespoon coarse sugar or sanding sugar. (Gives that professional bakery sparkle.)
- 1/4 teaspoon cinnamon mixed with 1 teaspoon sugar. (For a spiced dusting.)
If you’re making these ahead, note that the filling can be prepped a day in advance and stored in the fridge. The pastry should be kept cold until you’re ready to roll it out. If you don’t have time for pastry, you can use wonton wrappers for a smaller, crispy version, though the texture will be different.
Equipment Needed
You don’t need much fancy gear for this, which is part of the appeal. A standard baking sheet is all you really need. I use a heavy-duty rimmed baking sheet because it prevents warping in the oven, but any sheet will do.
A small paring knife is essential for peeling and dicing the apples. I like to dice them into 1/2-inch cubes so they cook evenly and fit nicely in the small pastry squares. If you have a food processor, you can use it to pulse the apples, but be careful not to puree them.
A small bowl for the egg wash and a pastry brush for applying it are helpful. If you don’t have a pastry brush, you can use your fingers, but it’s messier. A fork is needed for docking the pies—poking holes in the top so steam can escape. Without these holes, the pies might puff up unevenly or burst.
For budget-friendly options, store-bought puff pastry is the way to go. Making pie crust from scratch is lovely, but it adds significant time and effort. For a friendsgiving crowd, efficiency is key, and store-bought dough delivers 95% of the flavor with 10% of the work.
Preparation Method
Preheat your oven to 400°F (200°C). Line your baking sheet with parchment paper. This is non-negotiable for easy cleanup and preventing sticking.
- Prepare the Apples: Peel, core, and dice the apples into small, uniform cubes. Place them in a medium mixing bowl. Add the melted butter, sugar, flour, cinnamon, nutmeg, and lemon juice. Toss everything together until the apples are evenly coated. Let this mixture sit for about 10 minutes while you prepare the pastry. This helps the flavors meld and the sugar dissolve slightly.
- Prepare the Pastry: If using puff pastry, thaw it according to package directions. If it’s too cold to cut, let it sit at room temperature for 5-10 minutes. Roll it out slightly if needed to ensure an even thickness. For pie crust, roll it out to about 1/8 inch thickness on a lightly floured surface.
- Cut the Squares: Cut the pastry into 3-inch squares. You should get about 8-10 squares from one sheet. Keep the scraps for later if you want to make a few extra small ones.
- Fill the Pies: Place a heaping tablespoon of the apple mixture in the center of each square. Be careful not to overfill, or the pies will leak. Leave a half-inch border around the edges. If you’re using pie crust, you can fold the corners over to create a triangle, or fold two sides over to make a rectangle. With puff pastry, a simple fold over one half works well.
- Seal and Dock: Press the edges firmly with your fingers to seal. Then, use a fork to press down along the edges again for a decorative seal. Poke 2-3 holes in the top of each pie with the fork. This allows steam to escape during baking.
- Egg Wash and Sugar: Brush the tops lightly with the egg wash. This ensures a golden-brown color. Sprinkle with the coarse sugar or cinnamon-sugar mix. This step adds that crunchy, sweet finish.
- Bake: Place the baking sheet in the preheated oven. Bake for 15-18 minutes, or until the pastry is puffed and deep golden brown. Keep an eye on them after 12 minutes; if they’re browning too fast, you can tent them with foil.
- Cool: Let them cool on the baking sheet for 5 minutes before transferring to a wire rack. They will be very hot inside, so let them cool slightly before eating.
How do I prevent the filling from leaking?
Leaking is the most common issue. To avoid it, make sure you seal the edges well with the fork. Also, don’t overfill the pies. A little less filling goes a longer way. If you see leaking, it’s usually from the sugar melting and bubbling out. Using cornstarch or flour in the filling helps thicken the juices.
Can I make these ahead of time?
Yes! You can assemble the pies and keep them in the fridge for up to 24 hours before baking. Cover them loosely with plastic wrap. You may need to add 1-2 minutes to the baking time if you bake them straight from the fridge.
Cooking Tips & Techniques
One mistake I used to make was using large chunks of apple. They don’t cook through in the short baking time, leaving you with hard, raw bits in the center of a perfectly cooked crust. Dice them small—no bigger than 1/2 inch. This ensures they become soft and jammy inside.
Another tip is to keep the pastry cold. If your kitchen is warm, your puff pastry might start to soften too much before it hits the oven. If the dough gets too warm, it won’t puff up as nicely. Pop the filled pies back in the fridge for 10 minutes before baking if you feel the dough is getting soft.
Don’t skip the egg wash. It’s what gives those pies that professional, bakery-style shine. Without it, they’ll look pale and matte. Also, the holes you poke with the fork aren’t just for looks; they release steam. If you don’t poke them, the pies might puff up unevenly or the filling might burst out the sides.
Timing is everything. These bake quickly. If you leave them in too long, the sugar in the filling will burn. Watch them closely in the last few minutes. You want a deep golden brown, not a dark brown.
Multitask by preparing the apple filling while the oven preheats. This saves valuable time. Also, have your egg wash ready before you start filling the pies so you can move quickly from filling to sealing to washing.
Variations & Adaptations
While apple is the classic choice, these hand pies are incredibly versatile. Here are a few variations I’ve tried:
- Pear and Ginger: Swap the apples for ripe pears. Add a teaspoon of ground ginger to the filling. This is a sophisticated twist that pairs beautifully with the flaky crust.
- Cherry Almond: Use fresh or frozen cherries. Add a tablespoon of almond extract to the sugar mixture. Sprinkle sliced almonds on top before baking for a nutty crunch.
- Banana and Caramel: Use sliced bananas. Drizzle a little caramel sauce on top after baking. This is a kid-friendly favorite.
- Vegan Option: Use vegan puff pastry and a flax egg (1 tablespoon ground flaxseed mixed with 3 tablespoons water) for the egg wash. The result is surprisingly similar.
- Gluten-Free: Use a gluten-free puff pastry or pie crust. Most brands work well, but check the label for cross-contamination warnings if you have celiac disease.
I once tried making these with leftover apple pie filling from a can. It was too watery and the pies became soggy. Stick to fresh apples for the best texture. If you must use canned, drain them very well and reduce the liquid in the recipe.
Serving & Storage Suggestions
Serve these warm, not hot. They are best enjoyed within an hour of baking, while the crust is still crisp. If you serve them cold, the pastry can become chewy.
Pair them with a scoop of vanilla ice cream or a dollop of whipped cream. A drizzle of caramel sauce or a dusting of powdered sugar adds a nice touch. For a friendsgiving spread, these go well with savory dishes like easy crockpot pork chops with apple and onion dinner or easy baked brie with honey and walnuts.
Store leftovers in an airtight container at room temperature for up to 2 days. Reheat in the oven at 350°F for 5-10 minutes to crisp up the crust. Do not microwave them, as the crust will become soggy.
For longer storage, you can freeze the unbaked pies. Place them on a baking sheet and freeze until solid, then transfer to a freezer bag. Bake from frozen, adding 2-3 minutes to the baking time. They keep well in the freezer for up to 3 months.
The flavors develop over time, but the texture is best fresh. If you make them ahead, it’s better to bake them just before serving. The aroma of baking apples and cinnamon will fill your home and set the perfect mood for your gathering.
Nutritional Information & Benefits
Each mini hand pie contains approximately 150-180 calories, depending on the size and amount of filling. Apples provide fiber and vitamin C, while the pastry offers carbohydrates for energy. This is a moderate treat, best enjoyed in moderation.
For those watching their sugar intake, you can reduce the sugar in the filling by half and rely on the natural sweetness of the apples. Use stevia or erythritol as a substitute if needed.
These pies are naturally nut-free if you use standard pastry, making them a safer option for groups with allergies. However, always check the labels of your pastry and other ingredients for potential cross-contamination.
I view these as a balanced treat. They satisfy a sweet tooth without being overly heavy like a dense cake. The fruit component adds a touch of nutritional value, even if it’s a dessert.
Remember, food is about enjoyment. Don’t stress too much about the calories. Enjoy the moment, share the pies, and let the good times roll.
Conclusion
These mini apple hand pies are more than just a dessert; they’re a way to bring people together. They’re easy to make, fun to eat, and always a hit. Whether you’re hosting a friendsgiving or just having a casual get-together, they add a special touch.
I encourage you to try them and customize them to your liking. Add your favorite spices, swap the fruit, or try different toppings. Make them your own.
I love this recipe because it’s simple yet impressive. It shows you care without requiring hours in the kitchen. It’s the kind of recipe that stays in rotation year after year.
Please leave a comment below and let me know how they turned out. Did your guests love them? What variation did you try? I’d love to hear your stories.
Share this recipe with your friends and family. Maybe they’ll ask for the recipe too. And if you do, tell them to check out my perfect maple pecan pie bars for another easy fall treat.
Happy baking, and enjoy every bite.
Frequently Asked Questions
Can I use frozen apples for this recipe?
Yes, but thaw them completely and drain any excess liquid before mixing with the sugar and spices. Frozen apples can be watery, so you might need to add a little more flour or cornstarch to thicken the filling.
What is the best type of apple to use?
A mix of tart and sweet apples works best. Granny Smith provides structure and tartness, while Honeycrisp or Fuji adds sweetness. Avoid Red Delicious, as they tend to get mushy when baked.
How do I store leftover hand pies?
Store them in an airtight container at room temperature for up to 2 days. For longer storage, freeze them unbaked or baked. Reheat in the oven to restore crispiness.
Can I make these gluten-free?
Yes, use gluten-free puff pastry or pie crust. Ensure all other ingredients, like the flour in the filling, are gluten-free as well.
Why did my pies leak?
Leaking usually happens if the pies are overfilled or if the edges aren’t sealed properly. Make sure to press the edges firmly with a fork and poke holes in the top to release steam.
Pin This Recipe!

Easy Mini Apple Hand Pies: Best Friendsgiving Dessert

These mini apple hand pies are a crowd-pleasing, handheld dessert perfect for Friendsgiving or any gathering. Featuring a flaky puff pastry crust and a warm, spiced apple filling, they are quick to make and easy to eat while mingling.
- Prep Time: 30 minutes
- Cook Time: 18 minutes
- Total Time: 48 minutes
- Yield: 8-10 servings 1x
- Category: Dessert
- Cuisine: American
Ingredients
- 4 medium apples (preferably a mix of Granny Smith and Honeycrisp), peeled and diced small
- 3 tablespoons unsalted butter, melted
- 1/2 cup granulated sugar (adjust to 1/3 cup if apples are very sweet)
- 1 tablespoon all-purpose flour or cornstarch
- 1 teaspoon ground cinnamon
- 1/4 teaspoon ground nutmeg (optional)
- 1 tablespoon lemon juice
- 1 sheet puff pastry or 1 pie crust, thawed
- 1 large egg, beaten with 1 tablespoon water (for egg wash)
- 1 tablespoon coarse sugar or sanding sugar
- 1/4 teaspoon cinnamon mixed with 1 teaspoon sugar (for topping)
Instructions
- Preheat oven to 400°F (200°C) and line a baking sheet with parchment paper.
- In a medium bowl, toss diced apples with melted butter, sugar, flour, cinnamon, nutmeg, and lemon juice. Let sit for 10 minutes.
- Roll out the puff pastry or pie crust. Cut into 3-inch squares (yields about 8-10 squares).
- Place a heaping tablespoon of apple mixture in the center of each square, leaving a half-inch border.
- Fold the pastry over the filling to seal. Press edges firmly with fingers, then crimp with a fork.
- Poke 2-3 holes in the top of each pie with a fork to allow steam to escape.
- Brush tops with egg wash and sprinkle with coarse sugar or cinnamon-sugar mix.
- Bake for 15-18 minutes until puffed and deep golden brown.
- Cool on the baking sheet for 5 minutes before transferring to a wire rack.
Notes
Keep pastry cold to ensure flakiness. Do not overfill to prevent leaking. Can be assembled and refrigerated for up to 24 hours before baking. For vegan option, use vegan puff pastry and a flax egg. For gluten-free, use gluten-free pastry.
Nutrition
- Serving Size: 1 mini hand pie
- Calories: 165
- Sugar: 14
- Sodium: 120
- Fat: 8
- Saturated Fat: 4
- Carbohydrates: 22
- Fiber: 2
- Protein: 2
Keywords: mini apple hand pies, friendsgiving dessert, puff pastry recipe, easy fall dessert, handheld pies, apple dessert, quick baking