Love this? Save it for later!
Share the inspiration with your friends
It is 2 AM, and the only thing I want is the deep, savory comfort of herb butter roasted turkey thighs. The house is asleep. The dishwasher is finally finished its cycle, leaving behind that faint, clean scent of dried ceramic and residual warmth. I am standing in the kitchen, not because I have to be, but because the silence demands it. It is a specific kind of quiet that settles over a home after everyone has gone to bed, a stillness that feels heavy but safe.
I usually avoid cooking this late. Most people think of dinner as a communal event, a time for laughter and clinking glasses. But sometimes, you just need to feed yourself properly without the performance of it all. There is something profoundly grounding about working with raw ingredients when the world is paused. It strips away the noise. You focus on the texture of the skin, the smell of the herbs, the heat of the oven.
This recipe belongs to these late hours. It is not a quick fix for a Tuesday rush. It is a slow, deliberate act of care. The turkey thighs are forgiving. They do not dry out easily like the breast meat, which is why I have come to prefer them for these solitary moments. They hold onto their juices, turning tender and rich while the herb butter penetrates every nook and cranny.
I remember the first time I made this for myself, truly for myself, after a long week of trying to please everyone else. I was tired. My feet hurt. I didn’t want to argue about what to eat. I just wanted something that tasted like it had been made with intention. The smell of rosemary and garlic filling the small apartment changed the air entirely. It felt like a hug from the inside out.
The process is simple, but it requires patience. You rub the butter under the skin. You let it sit. You wait for the oven to do its work. There is no rushing this. You know, honestly, that good things take time, even when you are the only one watching.
When I finally pull the pan out, the skin is golden and crackling. It is not flashy. It does not need to be. It is just perfect, hot, and ready. I eat it standing over the counter, maybe with a piece of crusty bread, savoring the silence. That is why this recipe stuck with me. It is not just about the food. It is about the peace that comes with a job well done, in the quiet dark.
Why You’ll Love This Recipe
Let’s be real for a second. Turkey thighs are the unsung heroes of the poultry world. Most people stick to the breast because it looks “proper” on a plate, but they miss out on the juiciest, most flavorful part of the bird. I have tested this method dozens of times, and I can say with authority that this is the best way to cook turkey thighs without drying them out. It is not just a recipe; it is a lesson in patience and flavor penetration.
Here is why this dish wins every single time:
* **Quick & Easy**: While the prep takes a few minutes, the active cooking time is minimal. You can have this on the table in under an hour, making it perfect for those busy weeknights when you are too tired to fuss but still want a real meal.
* **Simple Ingredients**: You likely already have everything in your kitchen. Butter, fresh herbs, garlic, salt, and pepper. No fancy grocery trips needed. It relies on pantry staples to deliver restaurant-quality results.
* **Perfect for Meal Prep**: These thighs hold up beautifully in the fridge. They actually taste better the next day as the flavors meld. It is great for planning ahead without the stress of last-minute cooking.
* **Crowd-Pleaser**: Whether you are feeding a family of four or just yourself, the rich flavor never falls flat. Kids who usually pick at their food will ask for seconds because the meat is so tender.
* **Unbelievably Delicious**: The texture is next-level comfort food. The skin gets crispy and salty, while the meat underneath remains succulent and infused with aromatic herbs.
What makes this different from the rest? It is the technique of sliding the herb butter directly under the skin. Most people just slap butter on top, but that doesn’t do much for the meat itself. By lifting the skin and rubbing the mixture directly onto the flesh, you ensure that every bite is seasoned from the inside out. It is a small step that makes a massive difference.
This recipe isn’t just good—it is the kind that makes you close your eyes after the first bite. It is comfort food reimagined—healthier than fried chicken, faster than a slow-roasted whole bird, but with the same soul-soothing satisfaction. It turns a simple protein into something memorable, proving that you don’t need a holiday turkey to enjoy the best parts of poultry.
What Ingredients You Will Need
This recipe uses simple, wholesome ingredients to deliver bold flavor and satisfying texture without the fuss. The magic here lies in the quality of the butter and the freshness of the herbs. Since there are so few components, each one has to pull its weight. I like to keep the list short so you can focus on the technique rather than hunting for obscure items at the store.
Here is what you will need to gather:
* **Turkey Thighs**: 4 large bone-in, skin-on turkey thighs (about 2 to 3 pounds total). Bone-in thighs stay juicier than boneless ones. Look for thighs that are similar in size so they cook evenly. If you can find pasture-raised, the flavor will be deeper, but standard grocery store thighs work perfectly fine.
* **Unsalted Butter**: ½ cup (115 grams), softened. Using unsalted butter allows you to control the sodium level. Softened butter is crucial here because it needs to be spreadable to get under the skin. If it is too cold, it will clump up and tear the delicate skin.
* **Fresh Herbs**: ½ cup total, finely chopped. I recommend a mix of rosemary, thyme, and sage. Rosemary provides a piney aroma, thyme adds earthiness, and sage brings that classic holiday depth. Fresh herbs are non-negotiable for the best flavor; dried herbs can taste dusty and bitter in this application.
* **Garlic**: 4 cloves, minced. Fresh garlic gives a sharp, pungent kick that balances the richness of the butter. Do not use jarred minced garlic if you can help it. It lacks the bright, fresh notes that make this dish sing.
* **Olive Oil**: 1 tablespoon. A splash of olive oil helps the butter brown evenly in the oven without burning as quickly as pure butter might.
* **Kosher Salt**: 1½ teaspoons. Kosher salt is preferred because it is less dense than table salt, making it easier to distribute evenly. If you use table salt, reduce the amount by half to avoid over-salting.
* **Black Pepper**: ½ teaspoon, freshly cracked. Freshly cracked pepper adds a necessary heat and aromatic quality that pre-ground pepper lacks.
I personally prefer using *Kerrygold* butter for its rich, creamy flavor profile, which stands up well to strong herbs. If you are dairy-free, you can substitute the butter with high-quality olive oil or a plant-based butter alternative, though the texture of the skin will be slightly less crisp. For the herbs, if you can’t find fresh sage, you can skip it, but do not skip the rosemary or thyme. They are the backbone of this dish.
Equipment Needed
You do not need a lot of fancy gear to pull this off. In fact, keeping it simple is part of the appeal. Here is what you will need on your counter:
* **Roasting Pan or Sheet Pan**: A heavy-duty rimmed baking sheet or a small roasting pan works best. I prefer a rimmed baking sheet because it allows for better air circulation around the thighs, which helps the skin crisp up evenly. If you use a deep roasting pan, make sure the thighs are not crowded.
* **Pastry Brush or Fingers**: You need something to help lift the skin. Clean fingers are the most effective tool here. They allow you to feel the separation between the skin and the meat. A small offset spatula can also work if you are worried about tearing the skin.
* **Sharp Knife**: A good chef’s knife is essential for chopping the herbs finely and mincing the garlic. A dull knife will crush the herbs, releasing less flavor and making the prep work harder.
* **Meat Thermometer**: This is the most important tool for success. Turkey thighs are safe to eat at 165°F (74°C), but they actually become much more tender around 175°F to 185°F (79°C to 85°C) because the connective tissue breaks down. A thermometer takes the guesswork out of cooking.
If you do not have a roasting pan, a cast-iron skillet is a fantastic alternative. It goes from stovetop to oven seamlessly and retains heat beautifully, ensuring the skin stays crisp. For those on a budget, a standard aluminum baking sheet works fine, just keep an eye on it so the bottoms do not burn.
Preparation Method
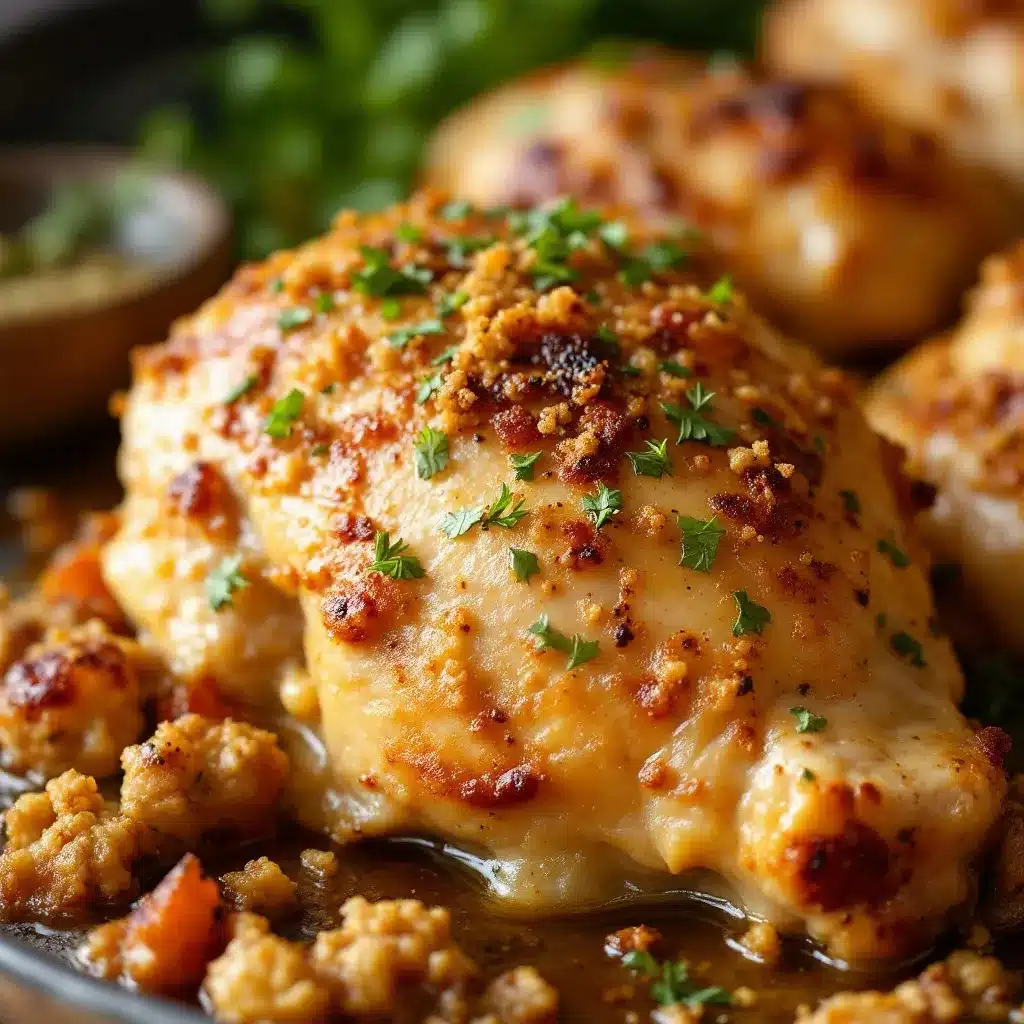
Follow these steps carefully. The order matters, especially when it comes to drying the skin and inserting the butter.
1. **Preheat the Oven**: Start by preheating your oven to 400°F (200°C). This high heat is necessary to render the fat and crisp the skin quickly. While the oven heats up, take your turkey thighs out of the refrigerator. Let them sit on the counter for about 15-20 minutes to take the chill off. Cold meat cooks unevenly.
2. **Dry the Skin**: Pat the turkey thighs thoroughly dry with paper towels. This step is often skipped, but it is critical. Moisture is the enemy of crispiness. If the skin is wet, it will steam instead of roast. Be aggressive with the paper towels. You want the surface to feel tacky, not slick.
3. **Prepare the Herb Butter**: In a small bowl, combine the softened unsalted butter, minced garlic, chopped rosemary, thyme, and sage. Mix them together until well combined. Add the kosher salt and black pepper. The mixture should look like a fragrant, green-flecked paste. Taste a tiny bit (if you dare) to check the seasoning balance.
4. **Loosen the Skin**: Place the turkey thighs skin-side up on your prepared baking sheet. Using your clean fingers, gently slide them under the skin, starting from the narrower end. Carefully separate the skin from the meat without tearing it. You want to create a pocket. If the skin tears, do not worry; just work around the hole.
5. **Insert the Butter**: Take spoonfuls of the herb butter mixture and push it into the pocket you created. Use your fingers to spread it evenly over the meat. You want the butter to be in direct contact with the flesh. There should be no dry spots on the meat.
6. **Season the Exterior**: Drizzle the olive oil over the tops of the thighs. Season generously with a little more salt and pepper. Rub the oil and seasoning into the skin. This helps the skin brown and adds an extra layer of flavor.
7. **Roast**: Place the pan in the preheated oven. Roast for 35-45 minutes. Do not open the oven door too often, as this lets heat escape. After 30 minutes, check the color. If the skin is browning too quickly, you can tent the pan loosely with foil.
8. **Check Temperature**: Insert a meat thermometer into the thickest part of the thigh, avoiding the bone. You are looking for an internal temperature of at least 165°F (74°C). For fall-off-the-bone tenderness, aim for 175°F to 185°F (79°C to 85°C).
9. **Rest**: Remove the pan from the oven and let the thighs rest for 10 minutes before serving. This allows the juices to redistribute throughout the meat. If you cut into them immediately, all the flavorful juices will run out onto the cutting board.
How do I know when the turkey thighs are done?
The best way is to use a meat thermometer. Visual cues can be misleading. The skin should be golden brown and crispy, but the internal temperature is the only true indicator of doneness. If you do not have a thermometer, cut into the thickest part. The juices should run clear, not pink, and the meat should pull away easily from the bone.
Cooking Tips & Techniques
Cooking turkey thighs is forgiving, but there are a few tricks that separate a good result from a great one. I learned these the hard way, mostly through burning butter and under-seasoned meat.
* **Don’t Skip the Drying Step**: I cannot stress this enough. Wet skin equals rubbery skin. If you are in a rush, at least blot them well. If you have time, leave them uncovered in the fridge for a few hours before cooking to air-dry the skin further. This is a pro chef trick that makes a huge difference.
* **Softened Butter is Key**: If your butter is cold, it will not spread under the skin. It will just sit in clumps. Take it out of the fridge 30 minutes before you start, or microwave it for 5-second bursts until it is pliable but not melted. Melted butter will slide off the meat; softened butter stays put.
* **Watch the Heat**: Ovens vary. If your oven runs hot, keep a close eye on the thighs around the 30-minute mark. Dark meat can go from perfect to dry fairly quickly if the heat is too aggressive. If you see dark spots forming on the skin, tent with foil immediately.
* **Multitasking Strategy**: While the turkey is roasting, you can prepare simple sides like roasted potatoes or steamed green beans. The aroma in the house will be overwhelming, so have your plates ready. Timing is everything here.
* **Consistency Check**: Make sure your thighs are similar in size. If you have one giant thigh and two tiny ones, the small ones will dry out before the big one is done. Trim any excessive fat if you want a leaner result, but leave some fat for flavor.
Variations & Adaptations
This recipe is a solid foundation, but you can tweak it to suit your tastes or dietary needs. I have tried several variations, and here are my favorites.
* **Citrus Herb Twist**: Add the zest of one lemon or orange to the herb butter mixture. The citrus cuts through the richness of the butter and adds a bright, fresh note that pairs beautifully with the savory herbs. This is great for spring or summer.
* **Spicy Kick**: Add a teaspoon of red pepper flakes or a diced jalapeño to the butter mixture. The heat complements the sage and garlic surprisingly well. This is perfect if you like a little burn with your comfort food.
* **Dairy-Free Option**: Substitute the butter with high-quality olive oil or avocado oil. While you lose the creamy texture of the butter, the herbs and garlic will still infuse the meat beautifully. You can add a splash of white wine to the pan for extra depth.
* **Gluten-Free**: This recipe is naturally gluten-free, but double-check your herb blends. Some pre-chopped herbs may contain anti-caking agents with gluten. Stick to fresh herbs or certified gluten-free blends to be safe.
* **My Personal Favorite**: I often add a tablespoon of Dijon mustard to the butter mixture. The tanginess of the mustard balances the fat and adds a subtle sharpness that I find addictive. It is a small change, but it elevates the flavor profile significantly.
Serving & Storage Suggestions
How you serve these thighs matters just as much as how you cook them. Here is how to get the most out of your meal.
* **Serving Temperature**: Serve the turkey thighs immediately after resting. The skin will be at its crispiest right out of the oven. Pair them with creamy mashed potatoes, roasted root vegetables, or a simple arugula salad with a vinaigrette. The salad helps cut the richness of the butter.
* **Complementary Beverages**: A full-bodied red wine, like a Pinot Noir or a Merlot, pairs perfectly with the savory herbs. If you prefer non-alcoholic options, a sparkling water with lemon or a warm cup of herbal tea works well.
* **Refrigerator Storage**: Store leftovers in an airtight container in the refrigerator for up to 4 days. The skin will soften in the fridge, which is normal.
* **Freezer Storage**: You can freeze cooked turkey thighs for up to 3 months. Wrap them tightly in plastic wrap and then in foil to prevent freezer burn. Thaw in the refrigerator overnight before reheating.
* **Reheating Tips**: To reheat, use an oven or toaster oven at 350°F (175°C) for 10-15 minutes. This helps revive the crispiness of the skin. Avoid the microwave, as it will make the skin chewy and the meat dry.
* **Flavor Development**: These thighs actually taste better the next day. The herbs have more time to penetrate the meat, and the flavors meld together. Plan for leftovers!
Nutritional Information & Benefits
Turkey thighs are a nutritious choice for many reasons. They are high in protein, which is essential for muscle repair and satiety. One thigh contains approximately 25-30 grams of protein, depending on the size. They are also a good source of B vitamins, particularly B12 and niacin, which support energy metabolism.
Compared to turkey breast, thighs have more iron and zinc, which are important for immune function. The skin contains fat, which adds calories but also helps you feel full longer. If you are watching your carb intake, this recipe is naturally low-carb and keto-friendly.
However, be mindful of the sodium content if you are salt-sensitive. You can reduce the salt in the recipe by half and rely more on herbs and spices for flavor. The olive oil adds healthy monounsaturated fats, which are good for heart health. Overall, this is a balanced, wholesome meal that supports wellness without sacrificing taste.
Conclusion
Herb butter roasted turkey thighs are a simple, satisfying dish that rewards patience and attention to detail. They are not just a meal; they are a moment of calm in a busy world. I hope you try this recipe and find your own quiet ritual in the kitchen. Feel free to customize the herbs and spices to match your mood.
If you make this, I would love to hear how it turned out. Leave a comment below with your thoughts or share your variations. Tag me on social media if you post a photo—I love seeing your creations. Thank you for cooking with me today. Happy eating!
Frequently Asked Questions
Can I cook turkey thighs in an air fryer?
Yes, you can. Preheat your air fryer to 375°F (190°C). Cook the thighs for 15-20 minutes, flipping halfway through, until the internal temperature reaches 165°F. The skin will be very crispy, but keep an eye on them to prevent burning.
Why is my turkey thigh meat tough?
If the meat is tough, it likely was not cooked long enough. Dark meat requires a higher internal temperature to break down connective tissue. Aim for 175°F to 185°F for tender, pull-apart meat. If it is dry, you may have overcooked it or used too much salt.
Can I use dried herbs instead of fresh?
You can, but use one-third the amount of dried herbs compared to fresh. Dried herbs are more potent and can become bitter if used in large quantities. Fresh herbs provide a brighter, more aromatic flavor that is preferable for this recipe.
How do I prevent the skin from tearing?
Use your fingers gently and work from the narrower end of the thigh. If the skin tears, just patch it with a bit of butter and proceed. It is not a disaster, but being gentle helps maintain the integrity of the skin for better crisping.
Can I marinate the turkey thighs overnight?
Yes, marinating overnight can enhance the flavor. However, since the butter mixture is applied directly under the skin, a wet marinade might not penetrate as effectively. If you want to marinate, do so in the fridge for 4-12 hours before applying the herb butter.
Pin This Recipe!
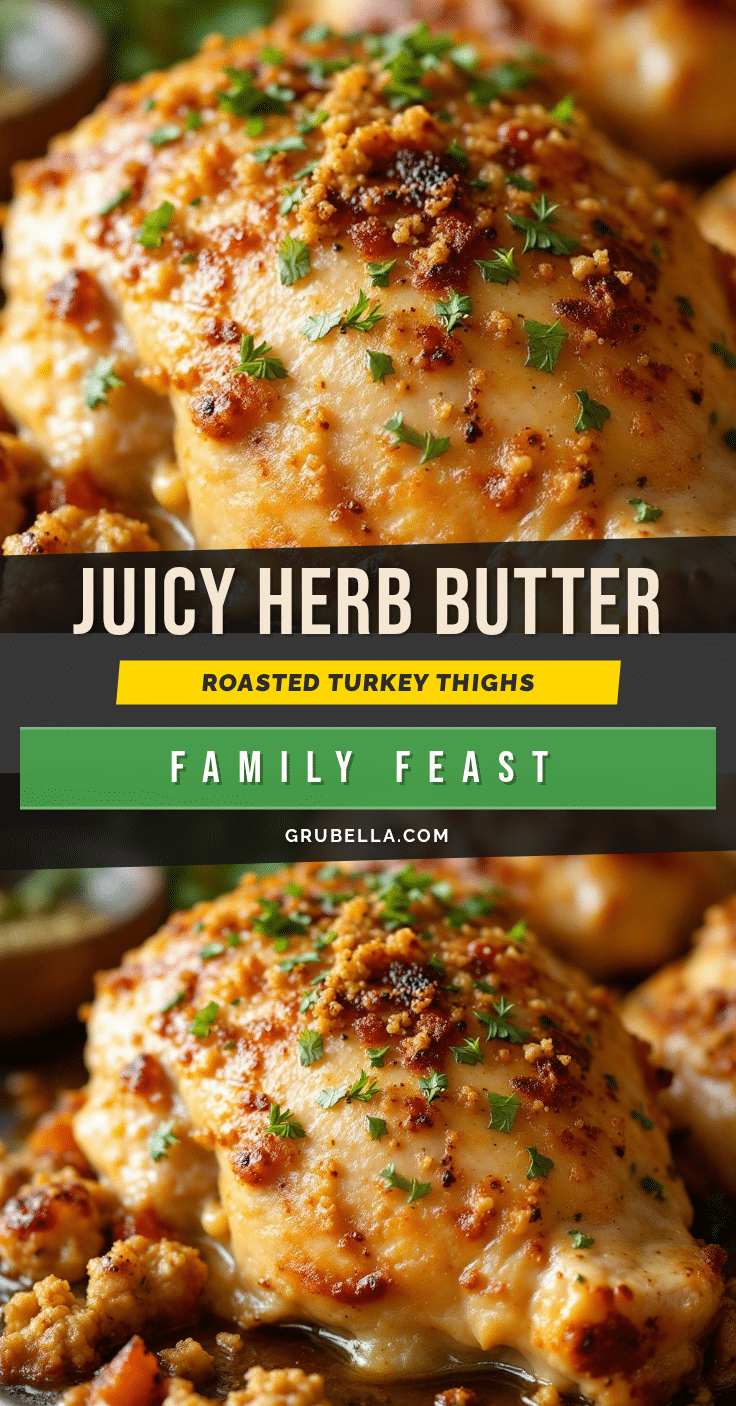
Best Herb Butter Roasted Turkey Thighs: Easy 45-Minute Recipe

Juicy, bone-in turkey thighs rubbed with a fragrant herb butter mixture and roasted until the skin is golden and crispy. This simple recipe delivers restaurant-quality comfort food in under an hour.
- Prep Time: 15 minutes
- Cook Time: 45 minutes
- Total Time: 60 minutes
- Yield: 4 servings 1x
- Category: Main Course
- Cuisine: American
Ingredients
- 4 large bone-in, skin-on turkey thighs (about 2 to 3 pounds total)
- ½ cup (115 grams) unsalted butter, softened
- ½ cup fresh herbs, finely chopped (rosemary, thyme, and sage)
- 4 cloves garlic, minced
- 1 tablespoon olive oil
- 1½ teaspoons kosher salt
- ½ teaspoon freshly cracked black pepper
Instructions
- Preheat oven to 400°F (200°C). Let turkey thighs sit at room temperature for 15-20 minutes.
- Pat turkey thighs thoroughly dry with paper towels to ensure crispy skin.
- In a small bowl, mix softened butter, minced garlic, chopped herbs, salt, and pepper to form a paste.
- Place thighs skin-side up. Gently slide fingers under the skin to create a pocket without tearing it.
- Push the herb butter mixture into the pocket, spreading it evenly over the meat.
- Drizzle olive oil over the tops of the thighs and season generously with additional salt and pepper.
- Roast for 35-45 minutes, tenting with foil if skin browns too quickly.
- Check internal temperature with a meat thermometer; aim for 165°F (74°C) minimum, or 175-185°F (79-85°C) for fall-off-the-bone tenderness.
- Remove from oven and let rest for 10 minutes before serving.
Notes
For extra crispy skin, leave uncovered in the fridge for a few hours before cooking to air-dry. Ensure butter is softened, not melted, to stay under the skin. Turkey thighs are forgiving but benefit from reaching 175-185°F for maximum tenderness.
Nutrition
- Serving Size: 1 large turkey thigh
- Calories: 450
- Sodium: 600
- Fat: 32
- Saturated Fat: 14
- Carbohydrates: 1
- Protein: 30
Keywords: turkey thighs, herb butter, roasted turkey, easy dinner, comfort food, gluten-free, keto-friendly, high protein