Love this? Save it for later!
Share the inspiration with your friends
“So, are these like, a healthier pecan pie, or are they the real deal?” My sister-in-law asked me this last Thanksgiving, eyeing the pan of maple pecan pie bars I’d just set on the counter. She was holding a mug of coffee and looking at me with that mix of hope and suspicion you reserve for healthy desserts. And honestly? I get it. I’ve had one too many “healthy” bars that tasted like cardboard and regret. But these? These are the real deal. They’re the kind of dessert that makes people close their eyes after the first bite. I told her, “Just try one,” and watched her grab a square. That first bite, the way the shortbread crust crumbled and the maple filling clung to her fork – that’s the moment this recipe became a permanent fixture in my fall baking rotation.
I didn’t set out to make a “healthier” version of a classic. I just wanted a pecan pie that didn’t require the patience of a saint to make a perfect pie crust. I wanted all the gooey, nutty, buttery goodness of a traditional pecan pie, but in a bar form that you could pick up with your fingers and not feel bad about. The secret, I found, was swapping out the heavy corn syrup for pure maple syrup. It gives the filling a deeper, more complex sweetness that pairs perfectly with the toasted pecans. It’s not a compromise; it’s an upgrade. And the best part? The buttery shortbread crust comes together in one bowl. No rolling pins, no chilling for hours, no stress. Just a simple, delicious dessert that looks like you spent all day on it.
These Perfect Maple Pecan Pie Bars are the dessert I bring to every fall gathering now. They’re the thing people ask for by name. They’re the reason my sister-in-law now texts me in October to ask, “Is it time for those bars yet?” And honestly, that’s the best compliment a recipe can get. So, let’s get to it. I promise, these bars are going to become a staple in your kitchen, too.
Why You’ll Love This Recipe
Let’s be real for a second. We’ve all had a pecan pie that was just… too much. Too sweet, too sticky, too much work. These bars are the antidote to all of that. They’re the perfect balance of a buttery, melt-in-your-mouth shortbread crust and a rich, maple-infused filling that’s studded with crunchy toasted pecans. I’ve tested this recipe more times than I can count, tweaking the ratio of maple syrup to brown sugar until the filling was just right – not too runny, not too firm, but perfectly sliceable. It’s a dessert that feels special enough for a holiday table but is easy enough for a random Tuesday night craving.
- Quick & Easy: The crust comes together in under 10 minutes, and the whole thing is ready in about an hour. No complicated pie dough or blind baking required.
- Simple Ingredients: You probably have most of these in your pantry right now. Butter, flour, sugar, eggs, and pecans. The star of the show, pure maple syrup, is easy to find at any grocery store.
- Perfect for Fall Gatherings: Whether it’s Thanksgiving, a Friendsgiving potluck, or just a cozy weekend treat, these bars are the perfect portable dessert. They’re a great alternative to a traditional pie and always get rave reviews.
- Crowd-Pleaser: I’ve served these to kids, adults, and even picky eaters. Everyone loves the combination of the buttery crust and the sweet, nutty filling. They disappear fast.
- Unbelievably Delicious: The flavor is next-level. The maple syrup adds a warmth and depth that high-fructose corn syrup just can’t match. It’s the kind of dessert that makes you feel all warm and cozy inside.
What really sets these bars apart is the texture. The shortbread crust is sturdy enough to hold the filling but tender enough to crumble in your mouth. And the filling? It’s not that jiggly, almost raw texture you sometimes get with pecan pie. It’s baked to perfection, with a slightly chewy top and a soft, gooey center. It’s the kind of dessert that makes you close your eyes after the first bite because it’s just that good. Honestly, it’s comfort food at its finest – a little indulgent, a little nostalgic, and completely satisfying.
What Ingredients You Will Need
This recipe uses simple, wholesome ingredients to create a dessert that’s far greater than the sum of its parts. The magic is in the quality of the ingredients, especially the maple syrup. Here’s what you’ll need to grab from your pantry.
For the Shortbread Crust
- 1 ½ cups (190g) all-purpose flour – Spoon and level your flour for the best results. Too much flour will make the crust tough.
- ½ cup (100g) granulated sugar – Just enough to sweeten the crust without making it cloying.
- ½ cup (1 stick / 113g) unsalted butter, cold and cubed – Cold butter is key for a flaky, tender crust. I like using Kerrygold for its rich flavor, but any good unsalted butter will work.
- ¼ teaspoon salt – Balances the sweetness and enhances the buttery flavor.
For the Maple Pecan Filling
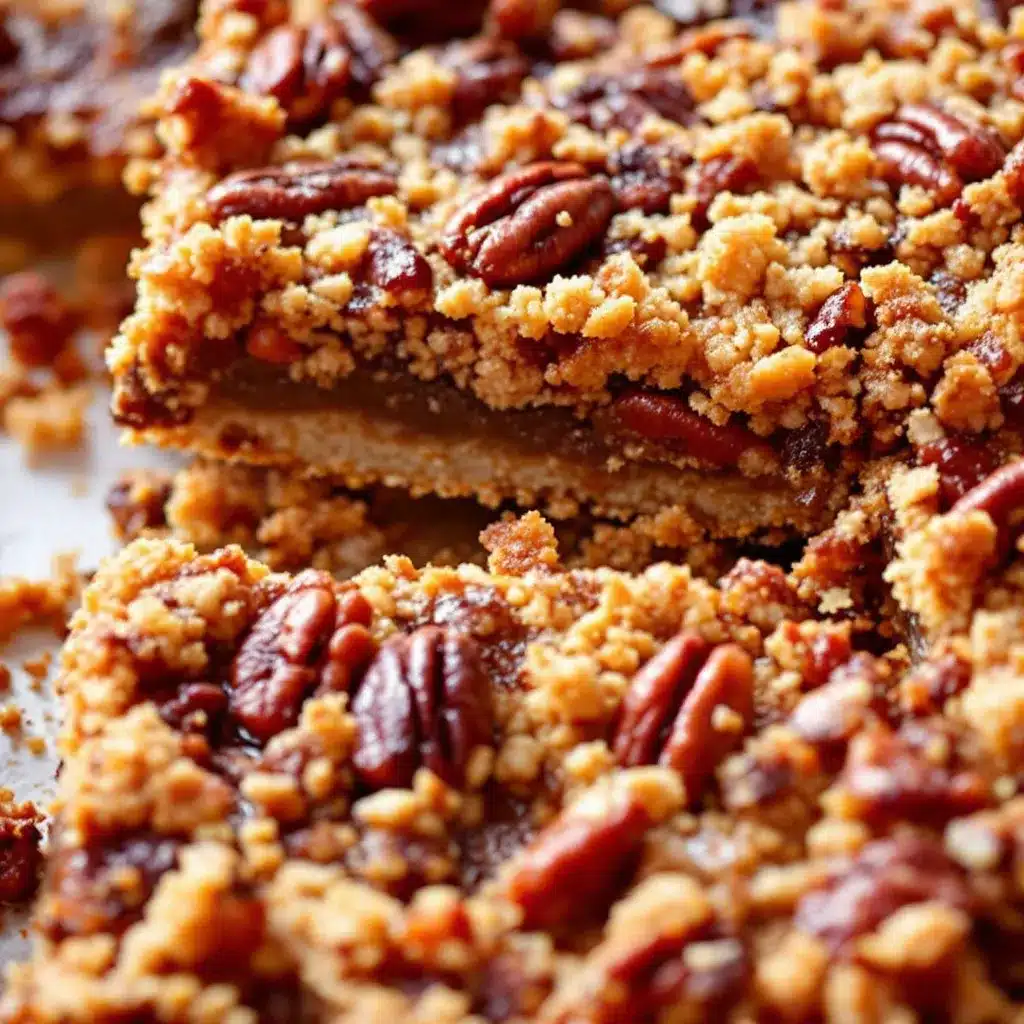
- 1 ½ cups (150g) pecan halves or pieces – Toasting them lightly before adding them to the filling deepens their flavor. I buy raw pecans and toast them myself.
- ¾ cup (180ml) pure maple syrup – Please, please don’t use pancake syrup here. Use the real stuff. Grade A Dark Amber is my go-to for baking because it has a robust, unmistakable maple flavor. (adds richness)
- ½ cup (100g) packed light brown sugar – Adds moisture and a touch of molasses flavor that complements the maple syrup perfectly.
- 3 large eggs, room temperature – Room temperature eggs incorporate more evenly into the filling, creating a smoother texture.
- ¼ cup (½ stick / 57g) unsalted butter, melted – Adds richness and helps the filling set up beautifully.
- 1 teaspoon vanilla extract – Enhances the sweetness and adds a warm, aromatic note.
- ¼ teaspoon salt – Essential to cut through the sweetness and bring all the flavors into focus.
Ingredient Selection Tips: For the pecans, look for ones that are plump and uniform in color. They should smell nutty, not rancid. If you can only find pre-chopped pecans, that’s fine, but whole halves will give you a prettier presentation. For the maple syrup, the darker the grade, the stronger the maple flavor. I find that Grade A Dark Amber gives the bars a wonderfully deep, caramel-like taste that’s perfect for fall. If you need a substitution, you can use a mix of honey and brown sugar, but the flavor will be different.
Equipment Needed
You don’t need a fancy kitchen to make these bars. A few basic tools will do the trick. Here’s what I use every time.
- 9×13-inch baking pan – This is the perfect size for a generous batch of bars. A metal pan will give you a crisper crust than glass.
- Parchment paper – A lifesaver! Lining the pan with parchment paper with overhang on the sides makes lifting the bars out a breeze. No sticking, no mess.
- Mixing bowls – You’ll need one for the crust and one for the filling.
- Pastry cutter or two forks – For cutting the cold butter into the flour for the crust. You can also use a food processor, but I find the pastry cutter gives me more control and less clean-up.
- Whisk – For mixing the filling ingredients together smoothly.
- Spatula – For scraping every last bit of that delicious filling into the pan.
- Cooling rack – Essential for letting the bars cool completely before slicing. Patience is hard, but it makes for cleaner cuts.
Budget-Friendly Options: If you don’t have a pastry cutter, two forks or even your fingers (just work quickly so the butter stays cold) work perfectly. No food processor? No problem. The crust is so simple, it comes together in minutes by hand. And honestly, I prefer it that way. It feels more, well, homemade.
Preparation Method
Alright, let’s get baking! Follow these steps, and you’ll have the most incredible maple pecan pie bars. I’ve included all the little tips I’ve learned from making these dozens of times.
- Preheat and Prep: Preheat your oven to 350°F (175°C). Line a 9×13-inch baking pan with parchment paper, leaving a couple of inches of overhang on the two long sides. This will act as handles to lift the bars out later. Lightly grease the parchment paper with cooking spray or a little butter.
- Make the Crust: In a large bowl, whisk together the 1 ½ cups of all-purpose flour, ½ cup of granulated sugar, and ¼ teaspoon of salt. Add the ½ cup of cold, cubed butter. Using a pastry cutter or two forks, cut the butter into the flour mixture until it resembles coarse meal with some pea-sized butter pieces remaining. Don’t overwork it. The little chunks of butter are what make the crust tender and flaky.
- Press and Bake the Crust: Pour the crust mixture into the prepared pan. Press it down firmly and evenly into the bottom of the pan. I use the bottom of a flat measuring cup to get it nice and compact. Bake for 18-20 minutes, or until the edges are just starting to turn a light golden brown. It won’t be fully cooked through, and that’s okay. Set it aside on a wire rack while you make the filling.
- Toast the Pecans (Optional but Recommended): While the crust bakes, spread the 1 ½ cups of pecans on a baking sheet. Toast them in the oven for 5-7 minutes, just until they become fragrant. Keep an eye on them—they can burn quickly! Let them cool slightly, then roughly chop them. You can leave some halves whole for a prettier top. This step deepens their flavor so much.
- Make the Filling: In a medium bowl, whisk together the ¾ cup of pure maple syrup, ½ cup of packed light brown sugar, 3 large eggs, ¼ cup of melted butter, 1 teaspoon of vanilla extract, and ¼ teaspoon of salt. Whisk until everything is completely smooth and well combined. The mixture will be a beautiful, rich amber color.
- Assemble the Bars: Sprinkle the toasted, chopped pecans evenly over the warm pre-baked crust. Pour the maple filling over the pecans, making sure it spreads all the way to the edges. The pecans will float to the top—that’s exactly what you want.
- Bake to Perfection: Bake for 28-32 minutes. The filling should be set around the edges but still have a slight jiggle in the center. It will continue to set as it cools. A good test is to gently shake the pan; the center should wobble just a little bit, like a firm custard. If it’s still very liquidy, give it a few more minutes. The top will be a gorgeous, shiny golden brown.
- Cool Completely: This is the hardest part! Place the pan on a wire rack and let the bars cool completely at room temperature. This takes about 2-3 hours. Do not try to cut them while they are warm, or they will be a gooey mess. Patience is key for clean, beautiful squares.
- Slice and Serve: Once completely cool, use the parchment paper overhang to lift the entire block of bars out of the pan. Place it on a cutting board. Use a sharp knife to cut into squares or bars. For the cleanest cuts, wipe the knife clean between each slice.
Pro-Tip: For even cleaner slices, you can chill the bars in the refrigerator for about 30 minutes before cutting them. This firms up the filling just enough to make slicing effortless.
Cooking Tips & Techniques
Over the years, I’ve made every mistake in the book with these bars. I’ve had a crust that was too hard, a filling that overflowed, and bars that stuck to the pan. Here’s what I’ve learned so you don’t have to make the same mistakes.
The Cold Butter Rule: This is non-negotiable for the crust. If your butter is too soft, you won’t get that flaky, shortbread texture. You’ll end up with a dense, tough crust. Keep your butter in the fridge right up until you cube it. If your kitchen is really warm, you can even pop the flour mixture in the freezer for 5 minutes before you start cutting in the butter.
Don’t Overbake the Crust: You want the crust to be set but not fully browned before you add the filling. It will continue to bake once the filling is added. If you overbake it at this stage, the crust can become too hard and difficult to cut.
Room Temperature Eggs: This is a small detail that makes a big difference. Cold eggs can seize the melted butter in the filling, creating a slightly grainy texture. To quickly bring eggs to room temperature, place them in a bowl of warm (not hot) water for 5-10 minutes.
The Jiggle Test: Trust the jiggle! The filling should be set around the edges but still wobble slightly in the center when you gently shake the pan. It will firm up as it cools. Overbaking the filling will result in a dry, almost rubbery texture, so it’s better to err on the side of slightly underdone.
Multitasking Strategy: While the crust is baking, get your pecans toasting and whisk together your filling. This way, the crust is still warm when you pour in the filling, which helps it meld together beautifully. It makes the whole process feel seamless and efficient.
Variations & Adaptations
One of the best things about this recipe is how adaptable it is. You can easily tweak it to suit your taste or what you have on hand. Here are a few of my favorite variations.
- Chocolate Maple Pecan Bars: For the chocoholics out there, sprinkle ½ cup of dark or semi-sweet chocolate chips over the warm pre-baked crust before adding the pecans and filling. The melted chocolate creates a fudgy layer that is absolutely divine.
- Bourbon Maple Pecan Bars: Add 1-2 tablespoons of good quality bourbon to the filling mixture. The warmth of the bourbon pairs beautifully with the maple and pecans. It adds a grown-up, sophisticated twist that’s perfect for holiday parties.
- Gluten-Free Option: Substitute the all-purpose flour with a good 1-to-1 gluten-free baking flour blend (the kind with xanthan gum). I’ve tested this with Bob’s Red Mill 1-to-1 Baking Flour, and it works perfectly. The crust will be slightly more crumbly, but just as delicious.
- Spiced Maple Pecan Bars: Add 1 teaspoon of pumpkin pie spice or a mix of ½ teaspoon cinnamon and ¼ teaspoon nutmeg to the filling. It gives the bars a warm, cozy fall flavor that’s perfect for a crisp autumn day. If you love that kind of flavor, you might also enjoy our Cozy Maple Pumpkin Sourdough Discard Bread for another seasonal treat.
- Coconut Pecan Bars: Swap half of the pecans (¾ cup) for unsweetened shredded coconut. Toast the coconut along with the pecans for an extra layer of flavor. It adds a lovely chewy texture and a tropical hint.
Serving & Storage Suggestions
These bars are delicious on their own, but a little extra something can take them over the top. Here’s how I like to serve and store them.
Serving: These bars are best served at room temperature. The filling is perfectly gooey, and the crust is tender. For an extra-special treat, serve a bar with a scoop of high-quality vanilla bean ice cream or a dollop of lightly sweetened whipped cream. A drizzle of extra maple syrup on top is never a bad idea either. They’re also amazing with a cup of hot coffee or a glass of cold milk.
Storage: Store any leftover bars in an airtight container at room temperature for up to 3 days. If your kitchen is very warm, you can store them in the refrigerator, but let them come to room temperature before serving for the best texture. The flavors actually meld and deepen over the first 24 hours, so they might taste even better the next day!
Freezing: These bars freeze beautifully! Once they are completely cool, cut them into squares and place them on a baking sheet lined with parchment paper. Freeze for about an hour, or until solid. Then, transfer the frozen bars to a freezer-safe bag or container, separating layers with parchment paper. They will keep for up to 3 months. To thaw, simply leave them at room temperature for about 30 minutes, or pop one in the microwave for 15-20 seconds for a warm, gooey treat.
Reheating: If you want that “fresh from the oven” feel, reheat individual bars in a 300°F (150°C) oven for about 5-7 minutes, or in the microwave for 15-20 seconds. Just be careful not to overheat them, or the filling can become too runny.
Nutritional Information & Benefits
Let’s be honest—these are a treat. But they’re made with real, whole-food ingredients, which makes them a little better for you than something made with corn syrup and artificial flavors. Here’s a quick look at what you’re getting.
Estimated Nutritional Information (per bar, based on 24 servings):
- Calories: 220
- Fat: 13g
- Carbohydrates: 25g
- Fiber: 1g
- Sugar: 18g
- Protein: 3g
Health Benefits: Pecans are a great source of healthy monounsaturated fats, which are good for heart health. They also contain fiber, protein, and important minerals like manganese and copper. Maple syrup, while still a sugar, contains antioxidants and minerals like zinc and manganese. It’s a more natural sweetener than refined white sugar or corn syrup. This dessert is also naturally vegetarian.
Dietary Considerations: This recipe is vegetarian. For a gluten-free version, use a 1-to-1 gluten-free flour blend. For a dairy-free version, you can substitute the butter in the crust with a high-quality vegan butter stick (like Earth Balance) and use a plant-based butter alternative in the filling.
Potential Allergens: This recipe contains: Wheat (gluten), Dairy (butter), Eggs, and Tree Nuts (pecans).
Conclusion
These Perfect Maple Pecan Pie Bars are more than just a dessert; they’re a little piece of fall you can hold in your hand. They’ve got the buttery, crumbly crust, the rich, maple-kissed filling, and the satisfying crunch of toasted pecans. They’re everything you love about pecan pie, but without the stress of making a pie crust. Honestly, they might be even better. I’ve made these for Thanksgiving, for cozy weekend baking sessions, and for random Tuesday night cravings, and they never disappoint.
I really hope you give these a try. Don’t be afraid to make them your own—add some chocolate, a splash of bourbon, or a sprinkle of sea salt on top. The best recipes are the ones you make your own. And if you do make them, I’d love to hear about it! Leave a comment below and let me know how they turned out. Did you try a fun variation? Share it with the community! And if you’re looking for another easy, crowd-pleasing dessert for your next gathering, you absolutely have to try our Cozy Small Batch Pumpkin Dump Cake. It’s just as simple and just as delicious.
Happy baking, friends! I can’t wait to hear about your maple pecan pie bar adventures.
Frequently Asked Questions
Can I use light corn syrup instead of maple syrup?
You can, but the flavor will be completely different. The whole point of this recipe is the deep, complex sweetness of pure maple syrup. If you use corn syrup, you’ll just have regular pecan pie bars. If you want to keep the maple flavor but need a substitute, you can use a mix of half maple syrup and half honey.
My crust is too crumbly. What went wrong?
This usually happens if there isn’t enough butter, or if the butter wasn’t cut in properly. Make sure you’re using a full ½ cup (1 stick) of cold butter. When you press it into the pan, it should feel like wet sand. If it’s too dry and powdery, you can add a tablespoon of ice water to help it come together. Also, make sure you’re pressing it very firmly into the pan.
Can I make these bars in a different size pan?
Yes, but the baking time will change. For a 9-inch square pan, the bars will be much thicker and will need to bake for about 40-45 minutes. For a 9-inch round pie plate, the baking time will be similar to the 9×13 pan, but you’ll have a deeper bar. Keep a close eye on them and use the jiggle test to determine doneness.
How do I know when the bars are done baking?
The best way is the jiggle test. The edges should be set and puffed up slightly, while the center should still have a gentle wobble when you shake the pan. It should look like a firm custard, not a liquid. If the center is still very jiggly and liquidy, it needs a few more minutes. If the top is getting too dark before the center is set, tent the pan loosely with foil.
Can I prepare these bars ahead of time?
Absolutely! These are a great make-ahead dessert. You can bake them a day or two in advance and store them in an airtight container at room temperature. They actually taste even better the next day after the flavors have had time to meld. You can also freeze them for up to 3 months, as mentioned in the storage section.
Pin This Recipe!
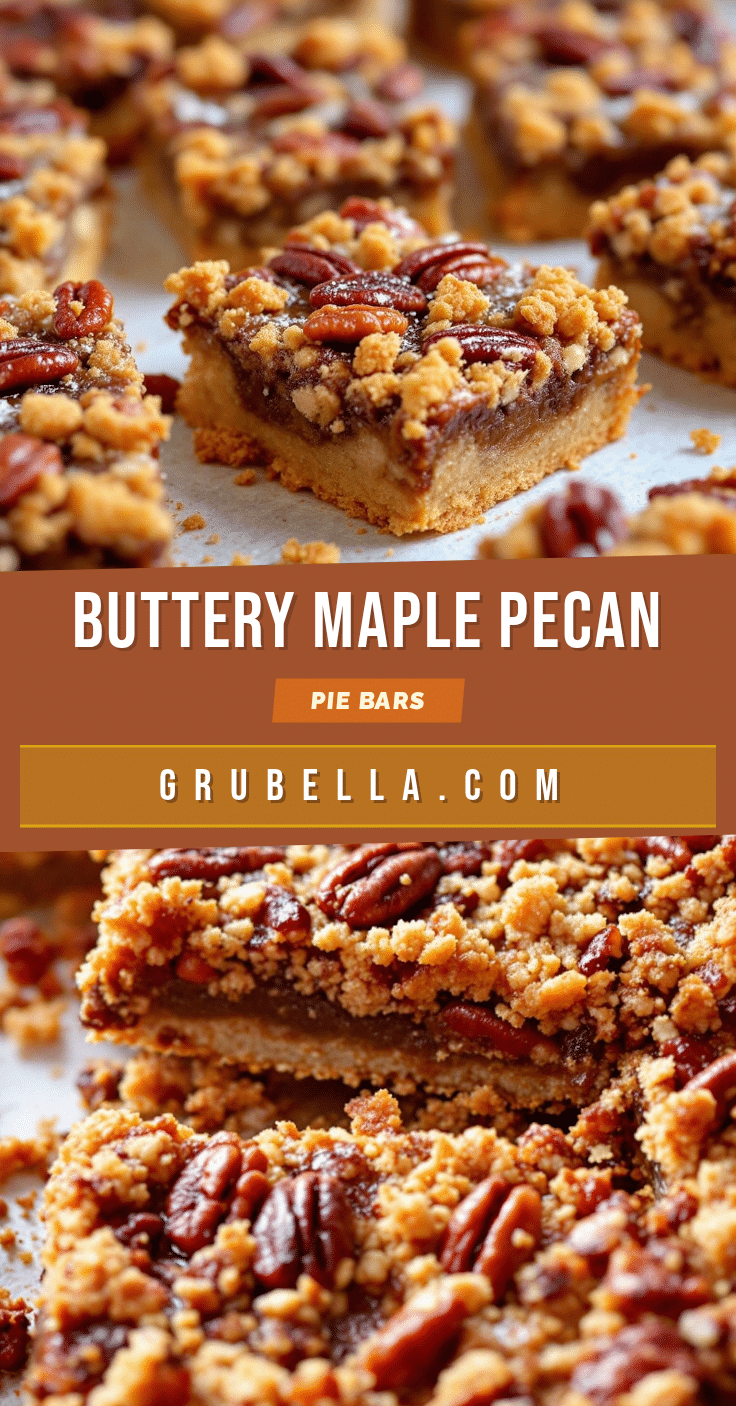
Perfect Maple Pecan Pie Bars: Easy Fall Dessert Recipe
These Perfect Maple Pecan Pie Bars are the ultimate fall dessert, featuring a buttery shortbread crust and a rich, maple-infused pecan filling. They’re easy to make, portable, and always a crowd-pleaser.
- Prep Time: 15 minutes
- Cook Time: 50 minutes
- Total Time: 1 hour 5 minutes
- Yield: 24 servings 1x
- Category: Dessert
- Cuisine: American
Ingredients
- 1 ½ cups (190g) all-purpose flour
- ½ cup (100g) granulated sugar
- ½ cup (1 stick / 113g) unsalted butter, cold and cubed
- ¼ teaspoon salt
- 1 ½ cups (150g) pecan halves or pieces
- ¾ cup (180ml) pure maple syrup
- ½ cup (100g) packed light brown sugar
- 3 large eggs, room temperature
- ¼ cup (½ stick / 57g) unsalted butter, melted
- 1 teaspoon vanilla extract
- ¼ teaspoon salt
Instructions
- Preheat your oven to 350°F (175°C). Line a 9×13-inch baking pan with parchment paper, leaving a couple of inches of overhang on the two long sides. Lightly grease the parchment paper with cooking spray or a little butter.
- In a large bowl, whisk together the 1 ½ cups of all-purpose flour, ½ cup of granulated sugar, and ¼ teaspoon of salt. Add the ½ cup of cold, cubed butter. Using a pastry cutter or two forks, cut the butter into the flour mixture until it resembles coarse meal with some pea-sized butter pieces remaining.
- Pour the crust mixture into the prepared pan. Press it down firmly and evenly into the bottom of the pan. Bake for 18-20 minutes, or until the edges are just starting to turn a light golden brown. Set aside on a wire rack.
- While the crust bakes, spread the 1 ½ cups of pecans on a baking sheet. Toast them in the oven for 5-7 minutes, just until fragrant. Let cool slightly, then roughly chop.
- In a medium bowl, whisk together the ¾ cup of pure maple syrup, ½ cup of packed light brown sugar, 3 large eggs, ¼ cup of melted butter, 1 teaspoon of vanilla extract, and ¼ teaspoon of salt until smooth.
- Sprinkle the toasted, chopped pecans evenly over the warm pre-baked crust. Pour the maple filling over the pecans, spreading to the edges.
- Bake for 28-32 minutes. The filling should be set around the edges but still have a slight jiggle in the center. Cool completely on a wire rack (about 2-3 hours).
- Once cool, use the parchment paper overhang to lift the bars out of the pan. Cut into squares with a sharp knife, wiping the knife clean between slices.
Notes
For cleaner slices, chill the bars in the refrigerator for about 30 minutes before cutting. The bars can be stored in an airtight container at room temperature for up to 3 days, or frozen for up to 3 months.
Nutrition
- Serving Size: 1 bar
- Calories: 220
- Sugar: 18
- Sodium: 95
- Fat: 13
- Saturated Fat: 5
- Carbohydrates: 25
- Fiber: 1
- Protein: 3
Keywords: maple pecan pie bars, pecan pie bars, fall dessert, easy dessert, shortbread crust, maple syrup, pecan bars, Thanksgiving dessert