Love this? Save it for later!
Share the inspiration with your friends
Late November dusk, and all I wanted was something that tasted like the holidays but didn’t require me to pull out my stand mixer or wait for layers to chill. The kitchen smelled faintly of cinnamon from a candle I’d lit earlier, and the quiet felt heavy in that good way—like the house was finally settling down. I wasn’t trying to impress anyone. I just wanted a square of something that tasted like December, with that warm gingerbread bite that makes you slow down. So I grabbed a pan, some cream cheese from the back of the fridge, and started pulling together what I wasn’t sure would work. I wanted the deep molasses flavor of gingerbread but with a creamy, almost cheesecake-like layer on top. Not a full cheesecake—too much commitment for a Tuesday night. But bars? That felt right. Manageable. Honest.
I think that’s why these Creamy Gingerbread Cheesecake Bars stuck. They’re not fussy. The crust is just crushed gingersnaps and butter, which is the easiest thing you’ll do all week. The filling comes together in one bowl, and the gingerbread layer uses pantry spices you probably already have. I remember pulling them out of the oven and thinking, okay, this is it. This is the holiday recipe I’ll actually want to make again. Not because it’s showy, but because it tastes like the part of the season that’s quiet and good. (And honestly, the smell alone is worth it.)
These bars have become my go-to for holiday gatherings where I don’t want to stress over a complicated dessert. They travel well, slice cleanly, and somehow manage to feel both indulgent and comforting. That first bite—tangy cream cheese meeting warm gingerbread—is the kind of thing that makes you close your eyes without meaning to. Trust me on this one.
Why You’ll Love This Recipe
After testing this recipe more times than I’d like to admit (including one batch where the gingerbread layer completely sank to the bottom—still delicious, but not pretty), I landed on a version that actually works every time. Here’s why I think you’ll love it too:
- Simple Ingredients — No trips to specialty stores. You need butter, cream cheese, molasses, and basic baking staples. That’s it.
- No Water Bath Needed — Unlike a traditional cheesecake, these bars bake evenly without a fussy water bath. Less stress, same creamy texture.
- Perfect for the Holidays — Whether it’s a cookie swap, Thanksgiving dessert table, or just a cozy night in, these bars fit right in without stealing the spotlight from your pumpkin chocolate chip bread or maple pumpkin sourdough bread.
- Crowd-Pleaser — The combination of tangy cheesecake and warm spiced gingerbread appeals to both kids and adults. I’ve watched people go back for thirds.
- Make-Ahead Friendly — These bars actually taste better the next day. The flavors meld together, and the texture becomes even creamier.
What sets this recipe apart is the technique. Instead of layering the gingerbread batter on top of the cheesecake (which often sinks or separates), I use a method that keeps both layers distinct but cohesive. The result is a bar that holds its shape but melts in your mouth. It’s comfort food reimagined—faster than a full cheesecake, but with the same soul-soothing satisfaction. Perfect for impressing guests without the stress, or turning a simple evening into something memorable.
What Ingredients You Will Need
This recipe uses simple, wholesome ingredients to deliver bold flavor and satisfying texture without the fuss. Most of these are pantry staples, especially if you do any holiday baking.
For the Gingersnap Crust:
- 2 cups (200g) crushed gingersnap cookies — I prefer Nabisco or Anna’s for that perfect snap. You can use a food processor or a zip-top bag and rolling pin.
- 5 tablespoons (70g) unsalted butter, melted — Adds richness and helps the crust hold together.
- 2 tablespoons (25g) granulated sugar — Just a little sweetness to balance the spice.
- ¼ teaspoon salt — Enhances the ginger flavor.
For the Cheesecake Layer:
- 16 ounces (450g) cream cheese, softened — Full-fat is best for that rich, creamy texture. Let it sit at room temperature for at least 30 minutes.
- ½ cup (100g) granulated sugar — Sweetens without overpowering the tang.
- 2 large eggs, room temperature — Helps the filling set smoothly. Cold eggs can cause lumps.
- 1 teaspoon vanilla extract — Use pure vanilla if you have it; the flavor difference is noticeable.
- ¼ cup (60ml) sour cream — Adds tang and extra creaminess. I’ve used Greek yogurt in a pinch, and it works fine.
For the Gingerbread Layer:
- 1 ½ cups (190g) all-purpose flour — Spoon and level for accuracy. Too much flour makes the gingerbread dense.
- 1 teaspoon baking soda — Helps the gingerbread rise slightly.
- 2 teaspoons ground ginger — The star of the show. Freshly ground is lovely, but store-bought works perfectly.
- 1 teaspoon ground cinnamon — Adds warmth.
- ½ teaspoon ground cloves — Just enough to make it smell like the holidays.
- ½ teaspoon salt — Balances the sweetness.
- ½ cup (115g) unsalted butter, softened — Room temperature is key for easy mixing.
- ½ cup (100g) packed brown sugar — Light or dark works; dark gives deeper molasses flavor.
- 1 large egg, room temperature — Binds the batter.
- ⅓ cup (80ml) molasses — Use unsulphured molasses for the best flavor. Blackstrap is too bitter here.
- ½ cup (120ml) buttermilk — Adds tenderness. You can make a quick version by adding 1 tablespoon lemon juice to ½ cup milk.
Ingredient Selection Tips: For the best texture, use block cream cheese, not the spreadable kind in a tub. The spreadable version has added water and stabilizers that can make the filling runny. If you’re using a different brand of gingersnaps, taste one first—some are spicier than others, and you may want to adjust the sugar.
Equipment Needed
You don’t need a fancy kitchen to pull these off. Here’s what I use:
- 9×9-inch baking pan — Glass or metal both work. If using metal, line with parchment paper for easy removal.
- Parchment paper — Makes lifting the bars out so much easier. Cut two strips to create a sling.
- Food processor or zip-top bag — For crushing the gingersnaps. A rolling pin works too, but a food processor is faster and gives even crumbs.
- Electric hand mixer or stand mixer — For the cheesecake layer. A whisk works if you have strong arms, but a mixer gives smoother results.
- Mixing bowls — At least two medium bowls and one small bowl.
- Spatula — A flexible silicone spatula for scraping every bit of batter.
- Measuring cups and spoons — Accurate measurements matter in baking.
- Cooling rack — Lets air circulate so the bars cool evenly.
If you don’t have a 9×9 pan, an 8×8 pan works but will give slightly thicker bars—just add 5-8 minutes to the baking time. I’ve also used a disposable aluminum pan for potlucks, and it works fine. Just be careful when lifting the bars out.
Preparation Method
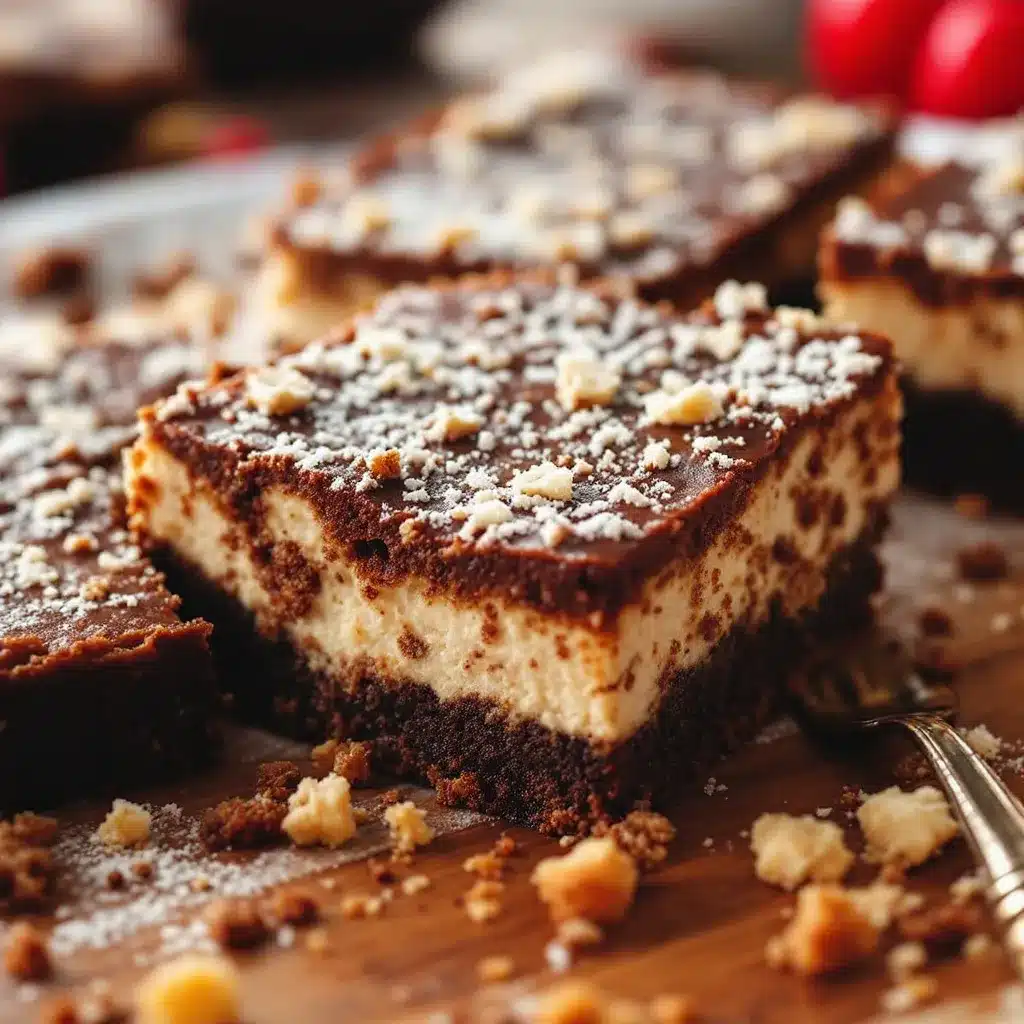
Let’s get into it. I’ll walk you through each step, including what to look for—because baking is as much about feel as it is about measurements.
Step 1: Prepare the Pan and Preheat
Preheat your oven to 350°F (175°C). Line your 9×9-inch pan with parchment paper, leaving overhang on two opposite sides. This creates a sling that makes lifting the bars out effortless. Lightly grease the parchment with butter or non-stick spray.
Step 2: Make the Crust
In a food processor, pulse the gingersnap cookies until they become fine crumbs. You should have about 2 cups. Transfer to a medium bowl, add the melted butter, sugar, and salt, and stir until the mixture looks like wet sand. Press this firmly into the bottom of your prepared pan. I use the bottom of a measuring cup to really pack it down. Bake for 10 minutes, then set aside to cool slightly while you make the fillings. The crust will firm up as it cools.
Step 3: Make the Cheesecake Layer
In a large bowl, beat the softened cream cheese with an electric mixer on medium speed until smooth—about 2 minutes. Scrape down the sides and bottom of the bowl. Add the sugar and beat for another minute until fluffy. Add the eggs one at a time, beating on low after each addition just until combined. Overmixing at this stage can incorporate too much air, which causes cracks. Add the vanilla and sour cream, and mix on low until smooth. Set aside.
Step 4: Make the Gingerbread Layer
In a separate bowl, whisk together the flour, baking soda, ginger, cinnamon, cloves, and salt. In a large bowl, beat the softened butter and brown sugar together until light and fluffy—about 3 minutes. Add the egg and beat until combined. Pour in the molasses and mix until smooth. The mixture might look slightly separated; that’s okay. Add half the dry ingredients, mix on low, then add the buttermilk, then the remaining dry ingredients. Mix just until no streaks of flour remain. The batter will be thick and smell incredible.
Step 5: Assemble the Layers
Pour the cheesecake filling over the slightly cooled crust and spread it evenly. Now, drop spoonfuls of the gingerbread batter over the cheesecake layer. Don’t worry if it doesn’t cover everything—you’ll swirl it in. Use a butter knife or skewer to gently swirl the two layers together. I like to do figure-eight motions, but don’t overdo it. You want distinct ribbons of gingerbread and cheesecake, not a muddy mix.
Step 6: Bake
Bake at 350°F (175°C) for 35-40 minutes. The edges should look set, and the center should jiggle slightly when you gently shake the pan. That slight jiggle is what gives you that creamy texture. If the center looks completely firm, it’s overbaked. Let the bars cool in the pan on a wire rack for 1 hour, then refrigerate for at least 4 hours—overnight is even better. This chilling step is crucial. It allows the cheesecake to set properly and makes slicing clean.
Step 7: Slice and Serve
Once fully chilled, use the parchment sling to lift the bars out of the pan. Place on a cutting board and slice into 16 squares. For the cleanest cuts, wipe your knife clean between each slice. I like to run the knife under hot water and dry it before cutting.
Cooking Tips & Techniques
I’ve made these bars at least a dozen times, and I’ve learned a few things the hard way. Here’s what I wish someone had told me:
- Room temperature ingredients matter. Cold cream cheese and eggs create lumps that are nearly impossible to smooth out. Take them out of the fridge 30-60 minutes before starting. If you forget, you can microwave the cream cheese in 10-second bursts—just be careful not to melt it.
- Don’t overmix the cheesecake filling. I know it’s tempting to keep beating until it’s perfectly smooth, but too much air creates bubbles that lead to cracks. Mix just until combined, then stop.
- The jiggle test is your friend. When you pull the pan out of the oven, the center should wobble slightly. If it’s completely firm, it’s overbaked. That jiggle will set as it chills.
- Patience with chilling. I once tried to speed up the process by putting the bars in the freezer for an hour. The texture was off—grainy instead of creamy. Trust the process and give them at least 4 hours in the fridge.
- Use a sharp knife. A dull knife will drag through the bars and smudge the layers. A clean, sharp knife gives you those beautiful distinct stripes.
One mistake I made early on: I didn’t press the crust firmly enough. The result was a crumbly base that fell apart when I tried to lift the bars. Use a measuring cup or glass to really compact those crumbs. It makes all the difference.
Variations & Adaptations
One of the best things about this recipe is how adaptable it is. Here are some variations I’ve tried and loved:
- Gluten-Free Version — Use gluten-free gingersnap cookies for the crust and substitute the all-purpose flour with a 1:1 gluten-free baking blend. I’ve tested this with King Arthur Measure for Measure, and it works beautifully.
- Dairy-Free Adaptation — Swap the cream cheese with a dairy-free alternative like Kite Hill or Miyoko’s. Use coconut oil instead of butter in the crust and a dairy-free yogurt or coconut cream in place of sour cream. The texture will be slightly less firm, but the flavor is still fantastic.
- Spice It Up — Add a pinch of black pepper or cardamom to the gingerbread layer. It sounds unusual, but the warmth of black pepper actually enhances the ginger. I tried this on a whim and now it’s my secret twist.
- Chocolate Gingerbread — Stir ½ cup of mini chocolate chips into the gingerbread batter before layering. The chocolate melts into little pockets of richness that pair perfectly with the spices.
- Pumpkin Cheesecake Bars — Swap the gingerbread layer for a pumpkin spice batter by replacing the molasses with pumpkin puree and adding an extra teaspoon of pumpkin pie spice. This version is perfect for Thanksgiving, especially alongside my pumpkin dump cake.
Serving & Storage Suggestions
These bars are best served cold, straight from the fridge. The texture is firm but creamy, and the flavors are more pronounced when they’re chilled. If you prefer a softer texture, let them sit at room temperature for 10-15 minutes before serving.
Presentation Ideas: Dust the tops with a light sprinkle of powdered sugar just before serving. For an extra touch, add a dollop of whipped cream and a tiny pinch of cinnamon. I’ve also drizzled a simple caramel sauce over the top for holiday parties—it adds a lovely sweetness that contrasts with the tangy cheesecake.
Complementary Dishes: These bars pair beautifully with a hot cup of coffee or spiced chai. For a dessert spread, serve them alongside homemade pumpkin spice lattes or brown butter pumpkin cinnamon rolls for a full holiday brunch.
Storage Instructions: Store the bars in an airtight container in the refrigerator for up to 5 days. They actually taste better on day two, as the flavors continue to meld. If you need to stack them, place a sheet of parchment paper between layers to prevent sticking.
Freezing Instructions: These bars freeze beautifully. Wrap individual slices tightly in plastic wrap, then place them in a freezer-safe bag or container. They’ll keep for up to 3 months. To thaw, transfer a slice to the refrigerator overnight. I often make a double batch and freeze half for unexpected guests—it’s a lifesaver during the holiday season.
Nutritional Information & Benefits
Let’s be honest: these are a treat, not a health food. But I believe in balance, and sometimes a square of gingerbread cheesecake is exactly what you need. Here’s the approximate nutritional breakdown per bar (based on 16 servings):
- Calories: 285
- Total Fat: 17g
- Saturated Fat: 10g
- Cholesterol: 65mg
- Sodium: 220mg
- Total Carbohydrates: 30g
- Dietary Fiber: 1g
- Sugars: 18g
- Protein: 4g
Health Highlights: Ginger contains gingerol, a compound with anti-inflammatory properties that can help with digestion. Molasses is a good source of iron, calcium, and magnesium—though the amount in a single bar is modest. The cream cheese provides calcium and protein, but also contributes to the fat content. If you’re watching your sugar intake, you can reduce the sugar in the cheesecake layer to ⅓ cup without significantly affecting the texture.
Dietary Considerations: This recipe contains gluten, dairy, and eggs. For a gluten-free or dairy-free version, see the variations section above. These bars are not suitable for a vegan diet without significant modifications.
Conclusion
These Creamy Gingerbread Cheesecake Bars are the kind of recipe that becomes a tradition. They’re not complicated, but they feel special. The combination of tangy cheesecake and warm, spiced gingerbread is exactly what the holidays should taste like—comforting, familiar, but with a little something extra that makes you pause and enjoy the moment.
I love that I can make them ahead, slice them neatly, and bring them to gatherings without any stress. They’ve become my go-to for cookie swaps, Thanksgiving dessert tables, and quiet nights when I just want something sweet. And honestly, watching people take that first bite and close their eyes? That’s the best part.
I’d love to hear how yours turn out. Did you try any variations? Did you add chocolate chips or a pinch of black pepper? Drop a comment below or tag me in your photos—I genuinely love seeing these bars in other people’s kitchens. And if you’re looking for more holiday inspiration, check out my pumpkin spice cold foam coffee bar for the perfect drink pairing. Happy baking, friends!
Frequently Asked Questions
Can I use store-bought gingerbread mix instead of making the gingerbread layer from scratch?
You can, but the texture and flavor won’t be quite the same. Homemade gingerbread batter has a deeper molasses flavor and a softer crumb that pairs better with the cheesecake. If you’re short on time, use a high-quality gingerbread mix and follow the package directions, then swirl it into the cheesecake layer as instructed.
Why did my cheesecake layer crack?
Cracking usually happens from overmixing the filling or overbaking. Mix the cream cheese and sugar just until smooth, and add the eggs on low speed. When baking, pull the bars out while the center still jiggles slightly. Overbaking dries out the cheesecake and causes cracks. Chilling them slowly in the fridge also helps prevent cracking.
Can I make these bars in a 9×13-inch pan?
Yes, but you’ll need to double the recipe ingredients to fill the larger pan. The baking time will be similar, but start checking at 30 minutes. The bars will be thinner, so they may bake faster. Keep an eye on them and use the jiggle test to determine doneness.
How do I get clean slices without the layers smearing?
Chill the bars for at least 4 hours—overnight is ideal. Use a sharp chef’s knife and run it under hot water, then dry it off before each slice. Wipe the blade clean between cuts. This prevents the cheesecake from sticking and keeps the layers distinct.
Can I freeze these bars for later?
Absolutely. Wrap individual slices tightly in plastic wrap, then place them in a freezer-safe bag or container. They’ll keep for up to 3 months. Thaw in the refrigerator overnight before serving. I recommend freezing them without any toppings like powdered sugar or caramel sauce—add those fresh after thawing.
Pin This Recipe!
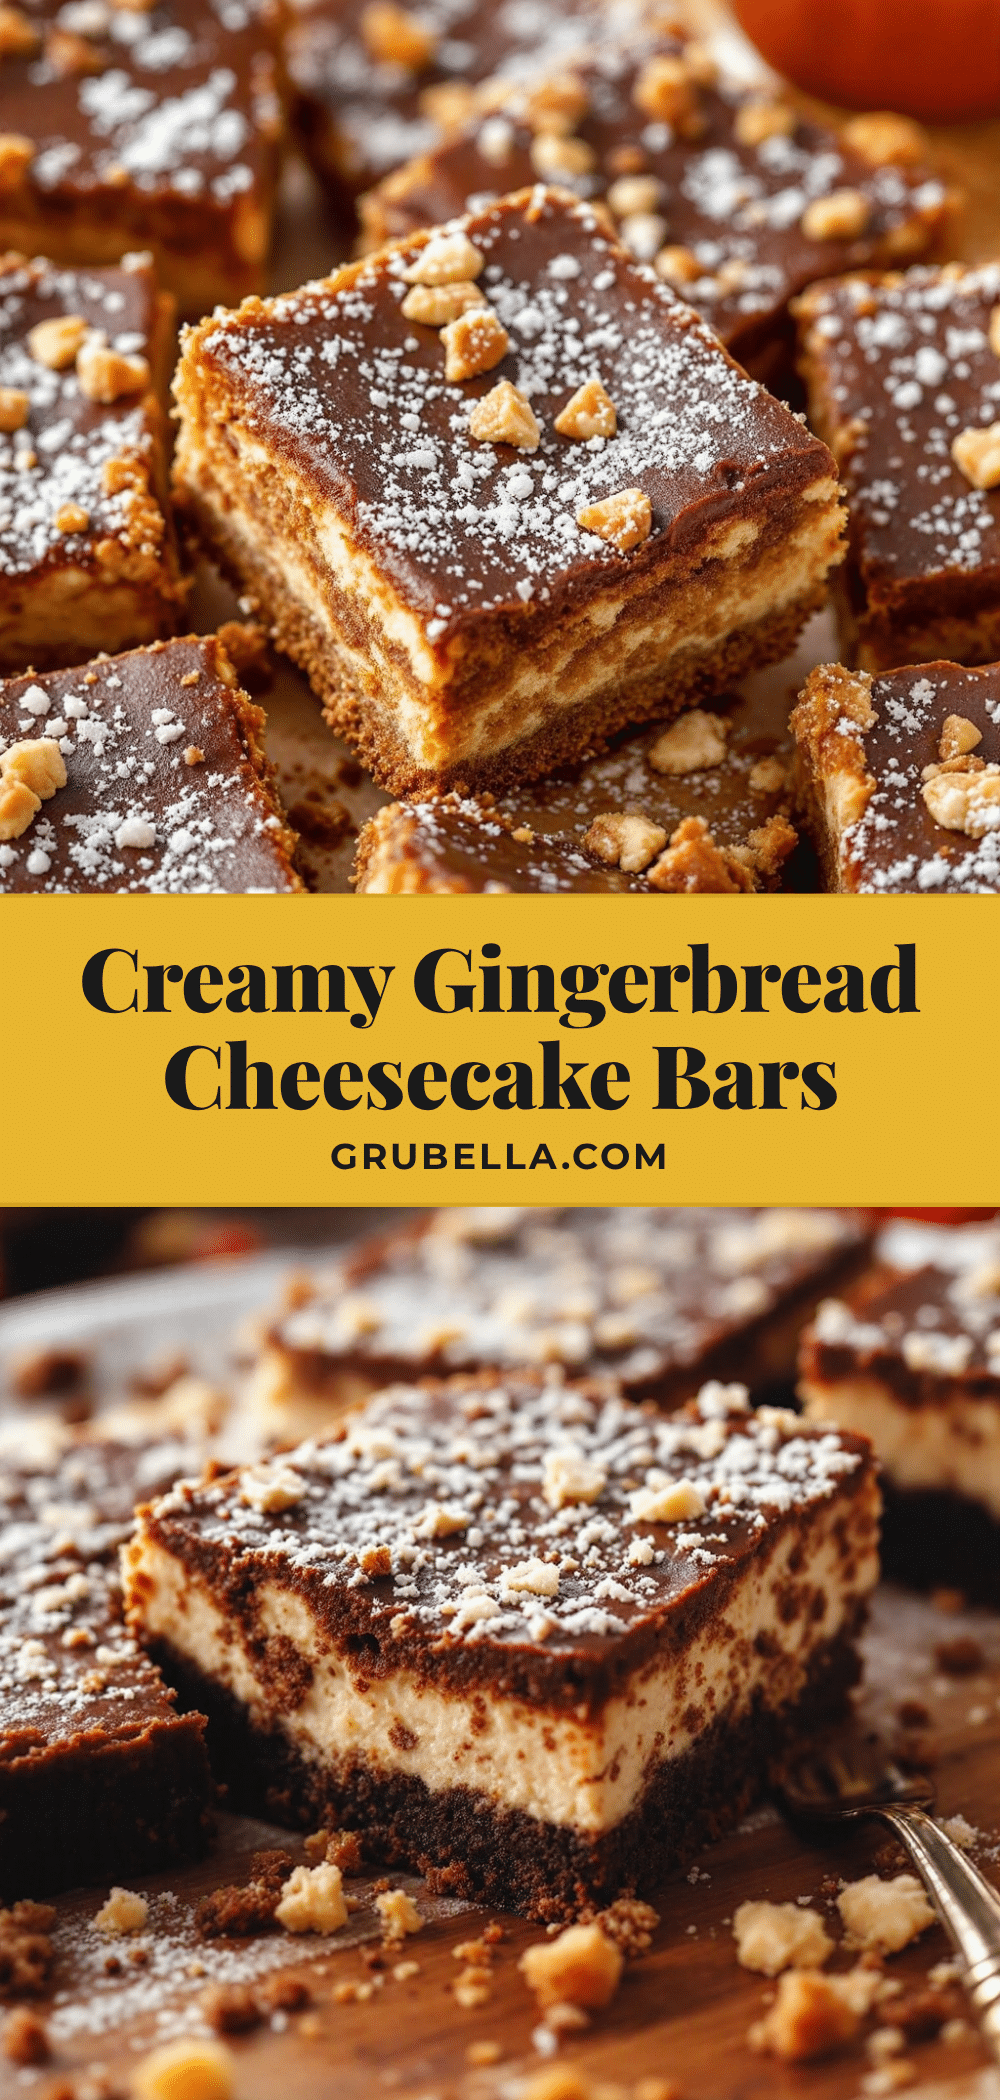
Creamy Gingerbread Cheesecake Bars – Easy Holiday Dessert
These Creamy Gingerbread Cheesecake Bars combine a tangy cheesecake layer with warm, spiced gingerbread, all on a crunchy gingersnap crust. They’re easy to make, no water bath needed, and perfect for holiday gatherings.
- Prep Time: 30 minutes
- Cook Time: 35-40 minutes
- Total Time: 5 hours 10 minutes (including chilling)
- Yield: 16 bars 1x
- Category: Dessert
- Cuisine: American
Ingredients
- 2 cups (200g) crushed gingersnap cookies
- 5 tablespoons (70g) unsalted butter, melted
- 2 tablespoons (25g) granulated sugar
- ¼ teaspoon salt
- 16 ounces (450g) cream cheese, softened
- ½ cup (100g) granulated sugar
- 2 large eggs, room temperature
- 1 teaspoon vanilla extract
- ¼ cup (60ml) sour cream
- 1 ½ cups (190g) all-purpose flour
- 1 teaspoon baking soda
- 2 teaspoons ground ginger
- 1 teaspoon ground cinnamon
- ½ teaspoon ground cloves
- ½ teaspoon salt
- ½ cup (115g) unsalted butter, softened
- ½ cup (100g) packed brown sugar
- 1 large egg, room temperature
- ⅓ cup (80ml) molasses
- ½ cup (120ml) buttermilk
Instructions
- Preheat oven to 350°F (175°C). Line a 9×9-inch pan with parchment paper, leaving overhang on two sides. Lightly grease the parchment.
- Make the crust: In a food processor, pulse gingersnap cookies into fine crumbs. Transfer to a bowl, add melted butter, sugar, and salt; stir until mixture looks like wet sand. Press firmly into the bottom of the prepared pan. Bake for 10 minutes, then set aside to cool slightly.
- Make the cheesecake layer: In a large bowl, beat softened cream cheese with an electric mixer on medium speed until smooth (about 2 minutes). Add sugar and beat until fluffy (1 minute). Add eggs one at a time, beating on low after each addition. Add vanilla and sour cream; mix on low until smooth. Set aside.
- Make the gingerbread layer: In a separate bowl, whisk together flour, baking soda, ginger, cinnamon, cloves, and salt. In a large bowl, beat softened butter and brown sugar until light and fluffy (about 3 minutes). Add egg and beat until combined. Add molasses and mix until smooth. Add half the dry ingredients, mix on low, then add buttermilk, then remaining dry ingredients. Mix just until no streaks remain.
- Assemble: Pour cheesecake filling over the slightly cooled crust and spread evenly. Drop spoonfuls of gingerbread batter over the cheesecake layer. Use a butter knife or skewer to gently swirl the two layers together in figure-eight motions, being careful not to overmix.
- Bake at 350°F (175°C) for 35-40 minutes, until edges are set and center jiggles slightly. Cool in the pan on a wire rack for 1 hour, then refrigerate for at least 4 hours (overnight is best).
- Slice and serve: Use the parchment sling to lift bars out of the pan. Place on a cutting board and slice into 16 squares. For clean cuts, wipe the knife clean between slices.
Notes
Room temperature ingredients are crucial for a smooth texture. Don’t overmix the cheesecake filling to avoid cracks. The jiggle test is key: the center should wobble slightly when done. Chill for at least 4 hours for clean slices. For gluten-free, use gluten-free gingersnaps and a 1:1 gluten-free flour blend. For dairy-free, use dairy-free cream cheese, coconut oil in crust, and dairy-free yogurt.
Nutrition
- Serving Size: 1 bar
- Calories: 285
- Sugar: 18
- Sodium: 220
- Fat: 17
- Saturated Fat: 10
- Carbohydrates: 30
- Fiber: 1
- Protein: 4
Keywords: gingerbread cheesecake bars, holiday dessert, easy cheesecake bars, gingersnap crust, no water bath cheesecake



