Love this? Save it for later!
Share the inspiration with your friends
This was supposed to be a pumpkin cheesecake. I had the cream cheese softening on the counter, the graham crackers ready to be crushed, and a whole vision of this elegant, layered dessert that would make me feel like a proper baker. But somewhere between answering a text and realizing I was out of eggs — well, the vision crumbled. I stood there, staring at a can of pumpkin puree and a box of yellow cake mix, feeling that familiar kitchen panic rise up. You know the one. The “I’ve already committed to this dessert and now I have to deliver” kind of panic.
So I did what any reasonable person would do. I dumped everything into a small baking dish — pumpkin, evaporated milk, sugar, spices — and then, almost defiantly, sprinkled the dry cake mix on top. I sliced some cold butter over it, hoping for the best, and slid it into the oven feeling like I was making a mistake. Thirty-five minutes later, the kitchen smelled like autumn had exploded inside it. What came out was nothing like the plan — and better. It was golden on top, soft and warm underneath, with those little pockets of buttery, cakey goodness that just begged for a scoop of vanilla ice cream.
Honestly, I almost didn’t share this recipe. It felt too simple, too accidental. But then I made it again the next week. And the week after that. My neighbor Karen texted me for the recipe after I dropped off a warm dish on her porch. My sister started making it for her book club. And now, every time the weather turns crisp and the leaves start changing, this is the first thing I want to make. It’s the kind of dessert that doesn’t try to impress you — it just quietly becomes your favorite. Maybe you’ve been there, staring at a half-finished plan in the kitchen, wondering if you should just give up. Let me tell you: don’t. Sometimes the best recipes are the ones you stumble into.
Why You’ll Love This Recipe
Let’s be real for a second. Most pumpkin dump cake recipes feed a crowd — we’re talking a 9×13 pan full of dessert that sits on the counter for days. This one? It’s made for two. Or for you, on a quiet Tuesday night, with no judgment. Here’s why this cozy small-batch pumpkin dump cake with vanilla ice cream is about to become your new favorite fall ritual:
- Quick & Easy : From start to finish, this comes together in under 45 minutes. No mixer required. No complicated steps. Just dump, bake, and scoop.
- Simple Ingredients : You probably have most of these in your pantry right now. Pumpkin puree, cake mix, butter, eggs, and a few basic spices. No fancy trips to specialty stores.
- Perfect for Cozy Nights : This is the dessert you make when you’re curled up in sweatpants, watching a movie, or just wanting something warm and sweet without the effort of a full-blown baking project.
- Crowd-Pleaser : I’ve served this at small dinner parties and it gets devoured every single time. There’s something about that warm, spiced pumpkin with melty vanilla ice cream that makes people close their eyes and go quiet.
- Unbelievably Delicious : The texture is what gets you. The bottom layer is soft and almost pudding-like, the middle is tender and cakey, and the top has these crispy, buttery crumbles that are pure magic.
What makes this different from every other pumpkin dump cake recipe out there? It’s the ratio. Most recipes use a whole can of pumpkin and a full box of cake mix, which works fine for a crowd but leaves you with leftovers for a week. This version scales everything down perfectly — you get four generous servings, or two very generous ones. Plus, I’ve tested the baking time to make sure that small batch cooks through without drying out. No sad, overcooked edges here. Just pure, golden, spoonable comfort.
This recipe isn’t just good — it’s the kind that makes you text your friend a photo mid-bite with the caption “you need this in your life.” It’s fall in a dish, but without the stress. And honestly? That’s exactly what we all need sometimes.
What Ingredients You Will Need
This recipe uses simple, wholesome ingredients that work together to create something truly special. The beauty of a dump cake is that the ingredients do all the heavy lifting — you just have to get them in the right order. Here’s what you’ll need:
For the Pumpkin Base
- 1 cup pumpkin puree (not pumpkin pie filling — make sure you grab the plain stuff. I prefer Libby’s for its consistent texture and deep color)
- 1/2 cup evaporated milk (this adds richness without making the base too heavy. You can substitute with whole milk in a pinch, but the texture will be slightly less creamy)
- 1/4 cup granulated sugar (just enough sweetness to balance the pumpkin’s earthiness)
- 1 large egg (room temperature works best for even mixing, but cold is fine too — I’ve done both)
- 1 teaspoon vanilla extract (pure vanilla extract makes a difference here, but imitation works in a pinch)
- 1 teaspoon pumpkin pie spice (or make your own: 1/2 teaspoon cinnamon, 1/4 teaspoon ginger, 1/4 teaspoon nutmeg, and a pinch of cloves)
- 1/4 teaspoon salt (don’t skip this — it makes all the flavors pop)
For the Topping
- 3/4 cup yellow cake mix (just the dry mix, straight from the box. Duncan Hines and Betty Crocker both work great. You’ll have leftover mix — save it for another batch or make a few cupcakes)
- 1/4 cup cold unsalted butter (cut into small cubes. The colder the butter, the better those crumbly bits will be on top)
- 1/4 cup chopped pecans (optional, but highly recommended for texture. Toast them lightly first for extra flavor)
For Serving
- Vanilla ice cream (the good stuff. I’m partial to Häagen-Dazs or a local creamery brand — you want something creamy that melts slowly into the warm cake)
A few ingredient notes from experience: If you’re using a different brand of pumpkin puree, check the consistency. Some are more watery than others. If yours seems thin, let it sit in a fine-mesh strainer for 10 minutes to drain off excess liquid. And about that cake mix — you can use spice cake mix instead of yellow for an even more intense fall flavor. I’ve done it before and it’s lovely, just slightly sweeter. Also, if you’re dairy-free, swap the evaporated milk for full-fat coconut milk and use a vegan butter stick. The texture changes a little, but it’s still delicious.
Equipment Needed
One of the best things about this recipe is how little equipment it requires. You don’t need a stand mixer, a food processor, or any fancy gadgets. Here’s what you’ll actually use:
- Small baking dish (I use a 6×6-inch square dish or a 1-quart round baking dish. An 8×4-inch loaf pan works too — just keep an eye on the baking time)
- Mixing bowl (medium-sized, for whisking the pumpkin base)
- Whisk (or a fork, in a pinch)
- Chef’s knife (for cutting the butter into cubes)
- Cutting board
- Measuring cups and spoons
- Spatula (for spreading the pumpkin mixture evenly)
- Oven mitts (trust me, that dish gets hot)
If you don’t have a small baking dish, you can use a small cast-iron skillet — it actually gives the edges a nice, slightly caramelized finish. I’ve also made this in a 9×5-inch loaf pan, and it worked perfectly. The key is using a dish that holds about 1.5 to 2 quarts. Anything larger and the layer will be too thin. I picked up my little 6×6-inch dish at a thrift store for two dollars, and honestly, it’s become one of my most-used kitchen tools. If you’re looking for one, check your local home goods store or even the baking aisle at the grocery store — they often carry small ceramic dishes perfect for recipes like this.
Preparation Method
Alright, let’s make this cozy small-batch pumpkin dump cake with vanilla ice cream. Clear your counter, preheat your oven, and let’s get started. This is going to be the easiest, most rewarding 45 minutes of your week.
- Preheat your oven to 350°F (175°C). Place your empty baking dish on a baking sheet — this catches any potential overflow and makes it easier to get in and out of the oven. I learned this the hard way after a spill that smoked up my entire kitchen. Trust me on this one.
- In a medium mixing bowl, whisk together the pumpkin puree, evaporated milk, granulated sugar, egg, vanilla extract, pumpkin pie spice, and salt. Whisk until everything is smooth and well-combined. The mixture should be a beautiful, deep orange color with a silky texture. If you see any lumps from the pumpkin, keep whisking until they dissolve. This takes about 1-2 minutes. Take a moment to smell it — that spice blend hitting your nose is pure autumn.
- Pour the pumpkin mixture into your prepared baking dish. Use a spatula to spread it evenly across the bottom. Don’t worry if it looks a little thin — it will thicken as it bakes. Give the dish a gentle tap on the counter to release any air bubbles.
- Sprinkle the dry cake mix evenly over the top of the pumpkin mixture. This is where the “dump” part of dump cake comes in. Just scatter it right on top — don’t stir it in. You want that dry layer to sit on top of the wet pumpkin base. It might seem strange, but trust the process. The cake mix will absorb moisture from the pumpkin as it bakes, creating that magical cake-like layer.
- Scatter the cold butter cubes evenly over the cake mix. This is the most important step for getting that golden, crumbly top. Try to distribute the butter as evenly as possible — every little cube will melt and create a buttery pocket in the cake mix. Don’t press the butter into the mix; just let it sit on top. If you have pecans, sprinkle them over the butter now.
- Place the dish (on the baking sheet) in the preheated oven. Bake for 30-35 minutes, or until the top is golden brown and the edges are bubbly. You’ll know it’s done when the center is set but still has a slight jiggle — think of it like a pumpkin pudding with a cake topping. If you insert a toothpick into the center, it should come out with a few moist crumbs, not wet batter.
- Remove from the oven and let it cool for 5-10 minutes. This is the hardest part, I know. But letting it rest allows the layers to set slightly, making it easier to scoop. The cake will continue to cook from residual heat, so don’t worry if it seems a little soft when it first comes out.
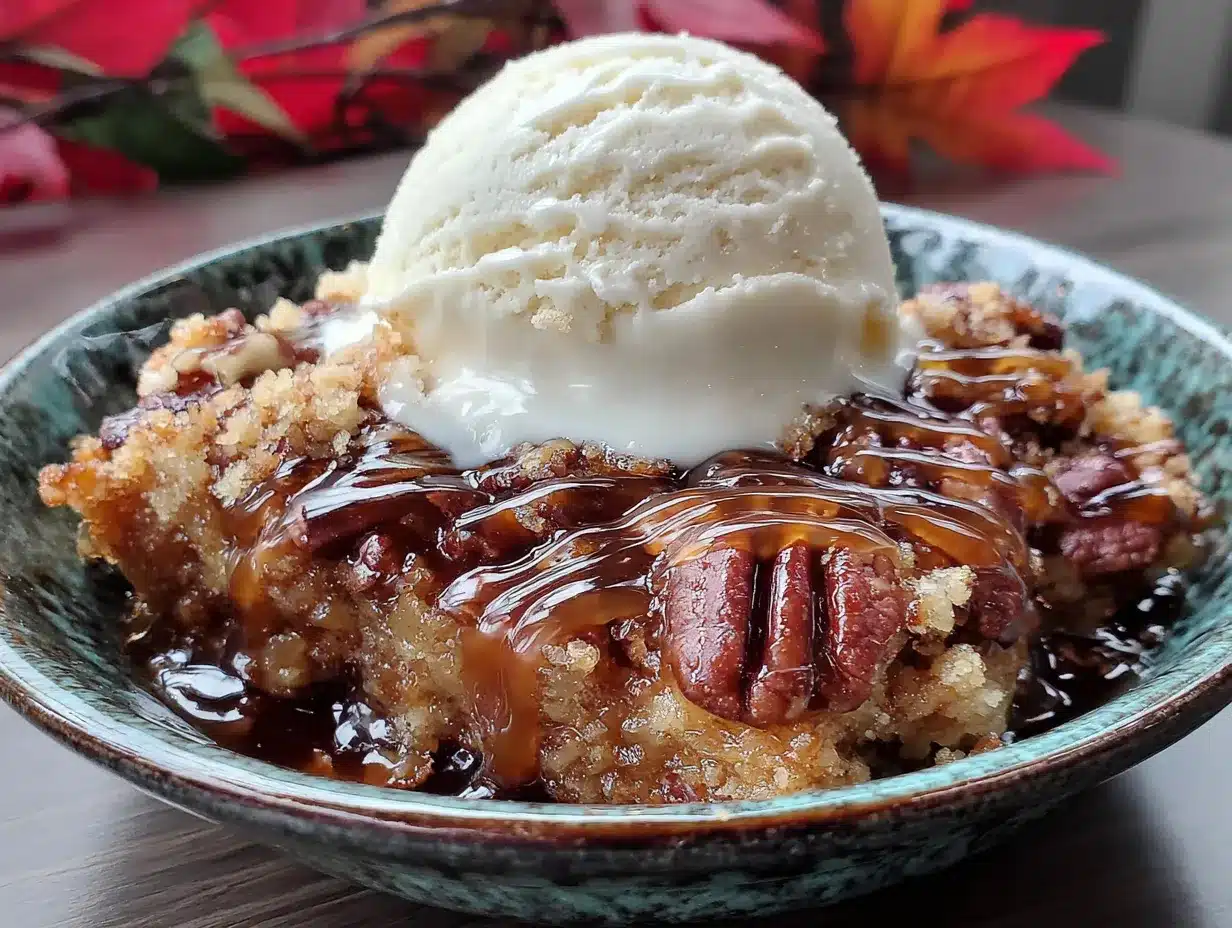
- Scoop into bowls while still warm. Use a large spoon to get through all three layers — the pumpkin base, the cake layer, and the buttery crumble on top. Top each serving with a generous scoop of vanilla ice cream. Watch it melt into the warm cake. That’s the moment right there.
A few timing notes: If you’re using a glass or ceramic dish, it may take closer to 35 minutes. If you’re using a metal dish, check at 28 minutes. Every oven runs a little differently, so start checking around the 25-minute mark. The top should be a deep, golden brown — not pale, not burnt. If the edges are browning too quickly but the center isn’t set, tent the dish loosely with foil for the last 5 minutes of baking.
Cooking Tips & Techniques
After making this small-batch pumpkin dump cake more times than I care to count, I’ve picked up a few tricks that make a real difference. Let me share what I’ve learned — including the mistakes I’ve made so you don’t have to.
Don’t overmix the pumpkin base. I know it’s tempting to keep whisking until everything is perfectly smooth, but overmixing can make the base a little dense. Just whisk until the ingredients are combined and the spices are evenly distributed. A few tiny lumps from the pumpkin are totally fine — they’ll smooth out during baking.
The butter needs to be cold. This is non-negotiable. If your butter is soft or melted, it will soak into the cake mix instead of creating those lovely crumbly pockets. Cut it into small cubes and pop them back in the fridge for 5 minutes if your kitchen is warm. I once used room-temperature butter out of laziness, and the top came out as a sad, greasy paste. Never again.
Let the cake rest before serving. I know you want to dig in immediately — I’ve been there, spoon in hand, hovering over the dish. But giving it even 5 minutes of rest makes a huge difference. The layers need a moment to settle, and the pumpkin base will thicken slightly as it cools. Plus, the contrast between the warm cake and cold ice cream is even more pronounced when the cake isn’t scorching hot.
Use a cookie scoop for the ice cream. This isn’t essential, but it makes for prettier servings. A warm cookie scoop glides through ice cream smoothly and gives you those perfect round scoops that look beautiful against the golden cake. If you don’t have one, just use a large spoon — it will taste just as good.
Watch your oven temperature. I have an older oven that runs about 25 degrees hot, so I learned to check early. If your oven runs hot, reduce the temperature to 325°F and bake a few minutes longer. If it runs cool, stick with 350°F but keep an eye on the color. The top should be a rich golden brown — if it’s pale after 30 minutes, give it another 5.
One more thing — if you’re making this for the first time, don’t panic if the top looks a little uneven. The butter melts in different spots, the cake mix might clump in places, and that’s exactly what makes it look homemade and beautiful. Perfection is overrated. A rustic, slightly messy top means it was made with love.
Variations & Adaptations
One of the best things about this cozy small-batch pumpkin dump cake with vanilla ice cream is how easy it is to adapt. Here are some variations I’ve tried and loved:
Gluten-Free Version: Use a gluten-free yellow cake mix. I’ve tested this with King Arthur’s gluten-free yellow cake mix and it works beautifully. The texture is slightly more delicate, so let it cool for a full 10 minutes before scooping. Also check that your pumpkin puree and spices are certified gluten-free — most are, but it’s worth a look.
Dairy-Free Adaptation: Substitute the evaporated milk with full-fat coconut milk or oat milk. Use a plant-based butter stick (I like Miyoko’s or Country Crock plant butter). The top won’t get quite as crispy, but it will still be delicious. And of course, use a dairy-free vanilla ice cream for serving. I’ve made this for a dairy-free friend and she said it was the best dessert she’d had in months.
Spice-It-Up Variation: Add 1/4 teaspoon of cayenne pepper or chipotle powder to the pumpkin base. The heat pairs beautifully with the sweet, buttery topping and the cold ice cream. It’s subtle — just enough to make people say “wait, what’s in this?” in a good way.
Apple-Pumpkin Fusion: Finely dice half an apple (I use Honeycrisp or Granny Smith) and fold it into the pumpkin base before pouring it into the dish. The apple pieces soften during baking and add little bursts of tart sweetness. This is my go-to variation when I have apples sitting on the counter.
Chocolate Lover’s Twist: Sprinkle 1/4 cup of mini chocolate chips over the cake mix before adding the butter. The chocolate melts into the cake layer and creates these gooey pockets that are incredible with the pumpkin. I was skeptical the first time I tried this, but it works surprisingly well.
Air Fryer Method: Yes, you can make this in an air fryer! Use a small oven-safe dish that fits in your air fryer basket. Bake at 320°F for about 20-22 minutes, checking halfway through. The top gets extra crispy in the air fryer — almost like a streusel. Just make sure your dish is air fryer safe and not too full.
Each variation brings something different to the table, but the original remains my favorite. There’s something about that simple combination of pumpkin, spice, and buttery cake mix that just hits differently. But it’s nice to know you can switch it up depending on your mood or what’s in your pantry.
Serving & Storage Suggestions
This small-batch pumpkin dump cake is best served warm, straight from the oven, with a generous scoop of vanilla ice cream melting into every spoonful. But let’s talk about the details that make it even better.
Serving Temperature: Aim for warm, not hot. Let the cake rest for 5-10 minutes after baking. The ideal serving temperature is when the cake is still warm enough to slightly melt the ice cream, but not so hot that the ice cream turns into soup immediately. That sweet spot is around 5 minutes out of the oven.
Presentation: Scoop the cake into shallow bowls so you can see all the layers — the dark pumpkin base, the golden cake layer, and the crumbly top. Add a scoop of vanilla ice cream on top or to the side. If you’re feeling fancy, drizzle a little caramel sauce over everything and sprinkle with a pinch of flaky sea salt. The salt cuts through the sweetness and makes the flavors pop.
What to Serve With It: A cup of hot coffee or chai tea is perfect alongside this dessert. The bitterness of the coffee balances the sweetness of the cake. For a cozy fall evening, I love serving this with a mug of spiced apple cider. And if you’re making it for a small gathering, a dollop of whipped cream on top of the ice cream never hurts.
Storage Instructions: If you have leftovers (unlikely, but possible), cover the dish tightly with foil or plastic wrap and store it in the refrigerator for up to 3 days. The cake will become more pudding-like as it sits, which is actually quite lovely. To reheat, pop individual servings in the microwave for 20-30 seconds, or warm the whole dish in a 300°F oven for 10 minutes. Add fresh ice cream after reheating — the old ice cream will have melted and won’t have the same texture.
Freezer Notes: You can freeze the baked and cooled cake for up to 2 months. Wrap the entire dish tightly in plastic wrap, then foil. Thaw overnight in the refrigerator and reheat as directed. The texture will be slightly softer after freezing, but the flavor will still be wonderful. I wouldn’t recommend freezing the cake with ice cream — add that fresh when you’re ready to serve.
Flavor Development: Here’s a little secret — this cake actually tastes even better the next day. The flavors meld together overnight, and the pumpkin spice becomes more pronounced. If you can resist eating it all in one sitting, try some cold from the fridge the next morning. It’s like a pumpkin custard with cake crumbles on top. I may or may not have eaten it for breakfast once. Or twice.
Nutritional Information & Benefits
Let’s be honest — this is a dessert, and it’s meant to be enjoyed. But I know some of you like to know what you’re working with, so here’s the breakdown. Per serving (based on 4 servings, without ice cream):
- Calories: Approximately 310-340
- Fat: 14-16g (mostly from butter and butterfat in the evaporated milk)
- Carbohydrates: 42-46g
- Protein: 5-6g
- Fiber: 3-4g (thanks to the pumpkin!)
- Sugar: 28-32g (includes natural and added sugars)
Health Highlights: Pumpkin is packed with vitamin A (in the form of beta-carotene), which is excellent for eye health and immune function. It’s also a good source of fiber, which helps with digestion and keeps you feeling satisfied. The spices — cinnamon, ginger, nutmeg — are all anti-inflammatory and add antioxidants to the mix. So while this isn’t a health food by any stretch, it’s not empty calories either. You’re getting some real nutritional value from that pumpkin base.
Dietary Considerations: This recipe contains gluten (from the cake mix), dairy (from the butter, evaporated milk, and ice cream), and eggs. For gluten-free and dairy-free options, see the variations section above. If you’re watching your sugar intake, you can reduce the sugar in the pumpkin base to 2 tablespoons — the cake mix is already sweet enough to carry the dessert. The pecans add healthy fats and a bit of protein, but they’re optional if you have nut allergies.
My personal take? I don’t stress about the numbers on a dessert like this. It’s made with real ingredients, it’s portion-controlled (hello, small batch!), and it brings genuine joy. That counts for something. Enjoy it without guilt, maybe take a walk afterward, and call it a balanced life.
Conclusion
This cozy small-batch pumpkin dump cake with vanilla ice cream started as a kitchen accident, and now it’s one of my most-requested recipes. It’s proof that you don’t need fancy techniques or complicated steps to create something truly memorable. Sometimes the best things come from grabbing the wrong ingredient, making a mistake, and just going with it.
I love this recipe because it meets you where you are. Maybe you’re tired after a long week and just want something warm and sweet without a sink full of dishes. Maybe you’re cooking for one or two and tired of recipes that assume you’re feeding a crowd. Or maybe you just want to taste fall in a spoonful, without any fuss. This cake delivers on all fronts. It’s forgiving, it’s adaptable, and it’s genuinely delicious.
I’d love to hear how yours turns out. Did you add the pecans? Try the chocolate chip version? Eat it straight from the dish with a spoon? (No judgment here — I’ve done it.) Drop a comment below and let me know. And if you share a photo on Pinterest, tag me — I want to see your cozy creations. Until next time, happy baking, and remember: sometimes the best recipes are the ones you never planned to make.
Frequently Asked Questions
Can I use pumpkin pie filling instead of pumpkin puree?
I wouldn’t recommend it. Pumpkin pie filling already has sugar and spices added, which will throw off the balance of this recipe. The cake will end up overly sweet and the spice level will be unpredictable. Stick with plain pumpkin puree — it gives you control over the final flavor.
Can I double this recipe?
Absolutely! Double all the ingredients and bake in a standard 9×13-inch dish. Increase the baking time to 40-45 minutes, checking for doneness around the 35-minute mark. You’ll have a full-sized pumpkin dump cake that feeds a crowd.
Why is my top not crispy?
This usually happens for one of two reasons: your butter wasn’t cold enough, or you didn’t use enough of it. Make sure your butter is straight from the fridge, cut into small cubes, and distributed evenly. If the top still isn’t crispy, try broiling it for the last 1-2 minutes — watch it carefully so it doesn’t burn.
Can I make this ahead of time?
Yes! You can assemble the entire dish (without baking) up to 24 hours in advance. Cover and refrigerate, then bake straight from the fridge — just add 5-7 minutes to the baking time. You can also bake it fully, let it cool, and reheat individual servings in the microwave.
What if I don’t have pumpkin pie spice?
No problem! Make your own blend: mix 1/2 teaspoon cinnamon, 1/4 teaspoon ginger, 1/4 teaspoon nutmeg, and a pinch of cloves. That’s exactly what’s in most store-bought pumpkin pie spice blends. You can also just use cinnamon alone — it won’t be as complex, but it will still be delicious.
Pin This Recipe!
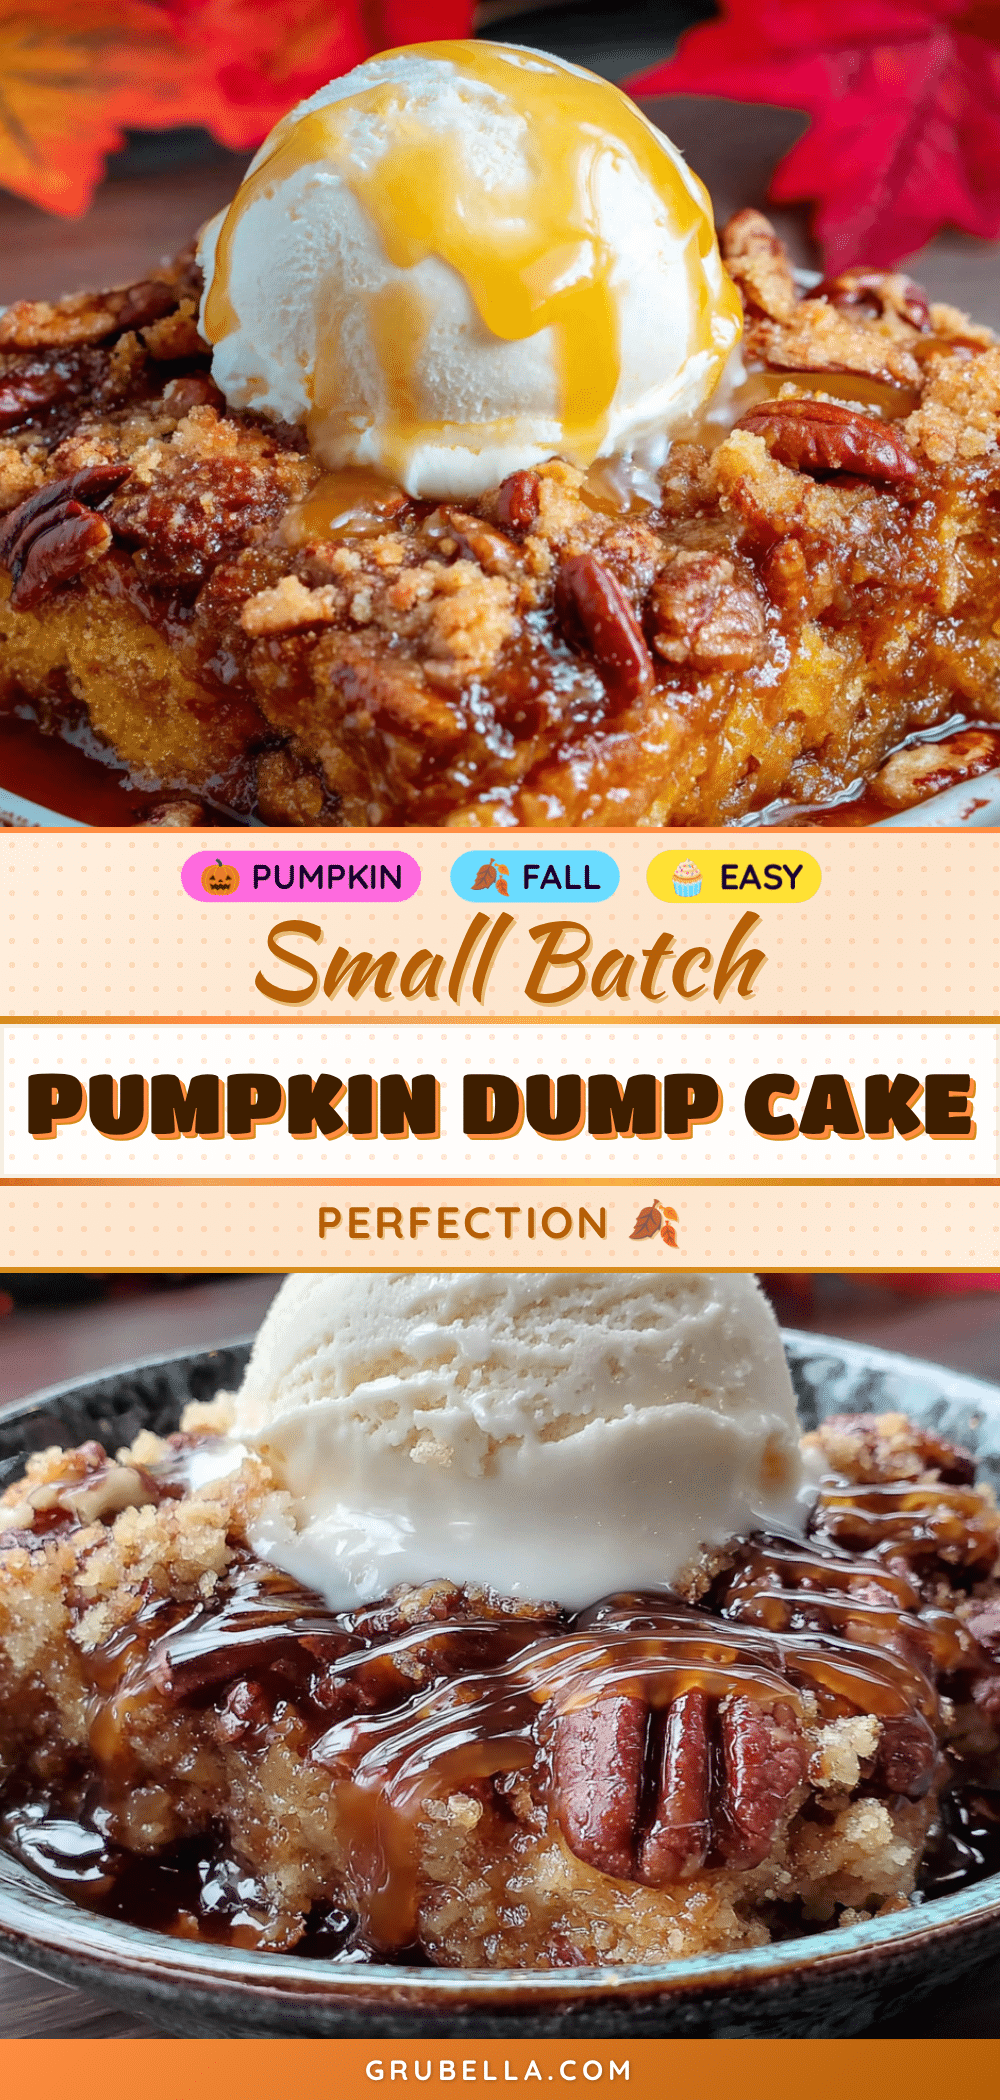
Cozy Small-Batch Pumpkin Dump Cake with Vanilla Ice Cream
A warm, spiced pumpkin dump cake made in a small baking dish, topped with a buttery crumble and served with vanilla ice cream. Perfect for cozy nights when you want a simple, delicious dessert for two.
- Prep Time: 10 minutes
- Cook Time: 35 minutes
- Total Time: 45 minutes
- Yield: 4 servings 1x
- Category: Dessert
- Cuisine: American
Ingredients
- 1 cup pumpkin puree (not pumpkin pie filling)
- 1/2 cup evaporated milk
- 1/4 cup granulated sugar
- 1 large egg
- 1 teaspoon vanilla extract
- 1 teaspoon pumpkin pie spice
- 1/4 teaspoon salt
- 3/4 cup yellow cake mix (dry, from a box)
- 1/4 cup cold unsalted butter, cut into small cubes
- 1/4 cup chopped pecans (optional)
- Vanilla ice cream, for serving
Instructions
- Preheat your oven to 350°F (175°C). Place your empty baking dish on a baking sheet to catch any overflow.
- In a medium mixing bowl, whisk together the pumpkin puree, evaporated milk, granulated sugar, egg, vanilla extract, pumpkin pie spice, and salt until smooth and well-combined.
- Pour the pumpkin mixture into your prepared baking dish and spread it evenly with a spatula. Tap the dish gently on the counter to release air bubbles.
- Sprinkle the dry cake mix evenly over the top of the pumpkin mixture. Do not stir.
- Scatter the cold butter cubes evenly over the cake mix. If using pecans, sprinkle them over the butter.
- Place the dish (on the baking sheet) in the preheated oven. Bake for 30-35 minutes, or until the top is golden brown and the edges are bubbly. The center should be set but still have a slight jiggle.
- Remove from the oven and let it cool for 5-10 minutes to allow the layers to set.
- Scoop into bowls while still warm and top each serving with a generous scoop of vanilla ice cream.
Notes
For best results, use cold butter straight from the fridge. Let the cake rest for 5-10 minutes before serving to allow layers to set. If using a glass or ceramic dish, baking time may be closer to 35 minutes; for metal, check at 28 minutes. The cake can be assembled up to 24 hours in advance and baked straight from the fridge, adding 5-7 minutes to the baking time.
Nutrition
- Serving Size: 1 serving (about 1/4
- Calories: 325
- Sugar: 30
- Sodium: 380
- Fat: 15
- Saturated Fat: 8
- Carbohydrates: 44
- Fiber: 3.5
- Protein: 5.5
Keywords: pumpkin dump cake, small batch, fall dessert, easy pumpkin recipe, cozy dessert, pumpkin cake, dump cake



