Love this? Save it for later!
Share the inspiration with your friends
Third time in a week I found myself elbow-deep in crushed Oreos, and honestly, I still wasn’t tired of it. The first batch disappeared before the Halloween party even started, the second one got demolished by my neighbor’s kids during a playdate, and this third one? Well, that one was purely for me. There’s something about the way the chocolate crumbs mimic fresh soil, and the gummy worms peek out like they just crawled up for air. It’s silly, it’s messy, and it makes everyone who sees it grin like a kid.
I didn’t grow up making these for Halloween, which might be why I’m so obsessed now. I stumbled onto the idea while scrolling for last-minute party desserts that didn’t require turning on the oven. My kitchen was already littered with half-empty bags of candy corn and pumpkin-shaped sprinkles. I needed something that felt festive but didn’t add to the chaos. These dirt cups fit that weird little niche perfectly.
The whole thing comes together in about ten minutes of active work. You crush cookies, you mix pudding, you layer, you poke worms in the top. That’s it. No baking, no fussing, no complicated techniques. But the real magic is in how the pudding sets overnight. The flavors meld together, the Oreo crumbs soften just slightly, and the whole thing turns into this rich, creamy, slightly crunchy mess that tastes way better than it has any right to. I think that’s why I keep making them. They’re not trying to be fancy. They’re just fun, and sometimes that’s exactly what you need.
Why You’ll Love This Recipe
Let’s be honest, most Halloween desserts are either too complicated or too sugary in a bad way. These dirt cups hit that sweet spot where they’re impressive enough for a party but simple enough for a Tuesday afternoon. I’ve tested this recipe more times than I care to admit, and every single version disappeared fast.
- Only 4 Ingredients: Oreos, instant chocolate pudding, milk, and gummy worms. That’s the whole list. No hunting down specialty items or spending a fortune.
- No Oven Required: Perfect for those days when your kitchen is already a war zone of Halloween prep. No baking, no waiting for things to cool.
- Kid-Friendly Assembly: My niece helped me crush the Oreos for the last batch, and she had more fun than anyone at the actual party. It’s a great recipe to make with little helpers.
- Make-Ahead Magic: These actually taste better after sitting in the fridge overnight. The pudding thickens up, the cookies soften, and the flavors get all cozy together.
- Crowd-Pleasing Presentation: I’ve brought these to potlucks, school parties, and family dinners. The gummy worms poking out always get a laugh, and the chocolatey goodness keeps people coming back for seconds.
What sets this version apart from the usual dirt cup recipes is the texture balance. I don’t just dump crushed Oreos on top. I layer them in the middle too, so every spoonful has that creamy-pudding-meets-crunchy-cookie moment. Plus, I’ve figured out the perfect pudding-to-milk ratio so the cups set firm enough to hold their shape but stay silky smooth on the tongue. It’s a small tweak, but it makes a big difference.
Honestly, these dirt cups are the kind of dessert that makes you feel like a hero with almost zero effort. You get all the credit for making something fun and festive, but you barely broke a sweat. That’s my favorite kind of recipe.
What Ingredients You Will Need
This recipe keeps things simple with just four core ingredients, plus a few optional extras for garnish. You probably have most of these in your pantry already, which is exactly how I like it.
- Oreo Cookies (1 family-size package, about 36 cookies): These are the backbone of the dirt cups. I use regular Oreos, not Double Stuf, because the cookie-to-creme ratio is better for that dirt-like texture. You’ll crush most of them into fine crumbs, but save a few whole cookies for crumbling on top. If you want a fun twist, try the Halloween-themed Oreos with orange creme filling. They add a festive pop of color when you crush them.
- Instant Chocolate Pudding Mix (2 boxes, 3.9 ounces each): Instant is non-negotiable here. Cook-and-serve pudding won’t set properly in the fridge, and you’ll end up with soupy cups. I prefer Jell-O brand for its consistent texture, but store brands work fine too. For a deeper chocolate flavor, try the dark chocolate variety. Just make sure it’s instant.
- Cold Milk (4 cups, whole milk recommended): The fat content matters here. Whole milk gives the pudding a creamier, richer texture that holds up better against the Oreo crumbs. If you’re using a dairy-free alternative, go with oat milk or full-fat coconut milk. Avoid skim or almond milk, which can make the pudding watery and thin.
- Gummy Worms (1 bag, about 20-24 worms): These are the star of the show visually. I use the sour variety for a little tangy contrast against the sweet pudding, but regular gummy worms work great too. For best results, look for worms that are long and flexible so they curl nicely out of the dirt. If you can find the extra-sour ones, they add a nice little zing.
- Optional Garnishes: A few crushed graham crackers for extra crunch, chocolate shavings for a more grown-up look, or a dollop of whipped cream with a tiny spider decoration on top. I sometimes add a few candy pumpkins around the base for a harvest-themed version.
A quick note on the pudding: I’ve tried making this with homemade chocolate pudding, and honestly, it’s not worth the extra effort. The instant pudding sets up perfectly and has the right consistency for these cups. Save your homemade pudding energy for something that really benefits from it, like a classic chocolate pie.
Equipment Needed
You don’t need much for this recipe, which is part of the appeal. Here’s what I use every time:
- Mixing Bowls (2 medium-sized): One for the pudding, one for crushing the Oreos. I prefer glass bowls because they don’t retain odors, but any bowl works.
- Whisk: For mixing the pudding. A balloon whisk works best to get rid of lumps quickly. If you don’t have one, a fork will do in a pinch, but it takes longer.
- Rolling Pin or Food Processor: For crushing the Oreos. A rolling pin gives you more control over the texture, but a food processor is faster. I’ve used both, and honestly, I prefer the rolling pin because I can leave some bigger chunks for texture. If you’re using a food processor, pulse instead of running it continuously.
- Ziploc Bags (2 gallon-sized): Put the Oreos in a bag before crushing to contain the mess. Trust me on this one. I learned the hard way after finding cookie dust on my ceiling fan.
- Small Cups or Glasses (8-10, about 6-8 ounces each): Clear plastic cups let the layers show through, which is part of the fun. I use the small disposable cups from the party supply store, but any clear glass or plastic cup works. The key is being able to see the dirt and worm layers.
- Measuring Cups and Spoons: For the milk and any optional garnishes.
- Spatula: For scraping every last bit of pudding into the cups. Waste not, want not.
If you don’t have a rolling pin, a heavy-bottomed skillet or even a wine bottle works fine. I’ve used a can of beans in a pinch. The important thing is to get those Oreos crushed without pulverizing them into dust.
Preparation Method
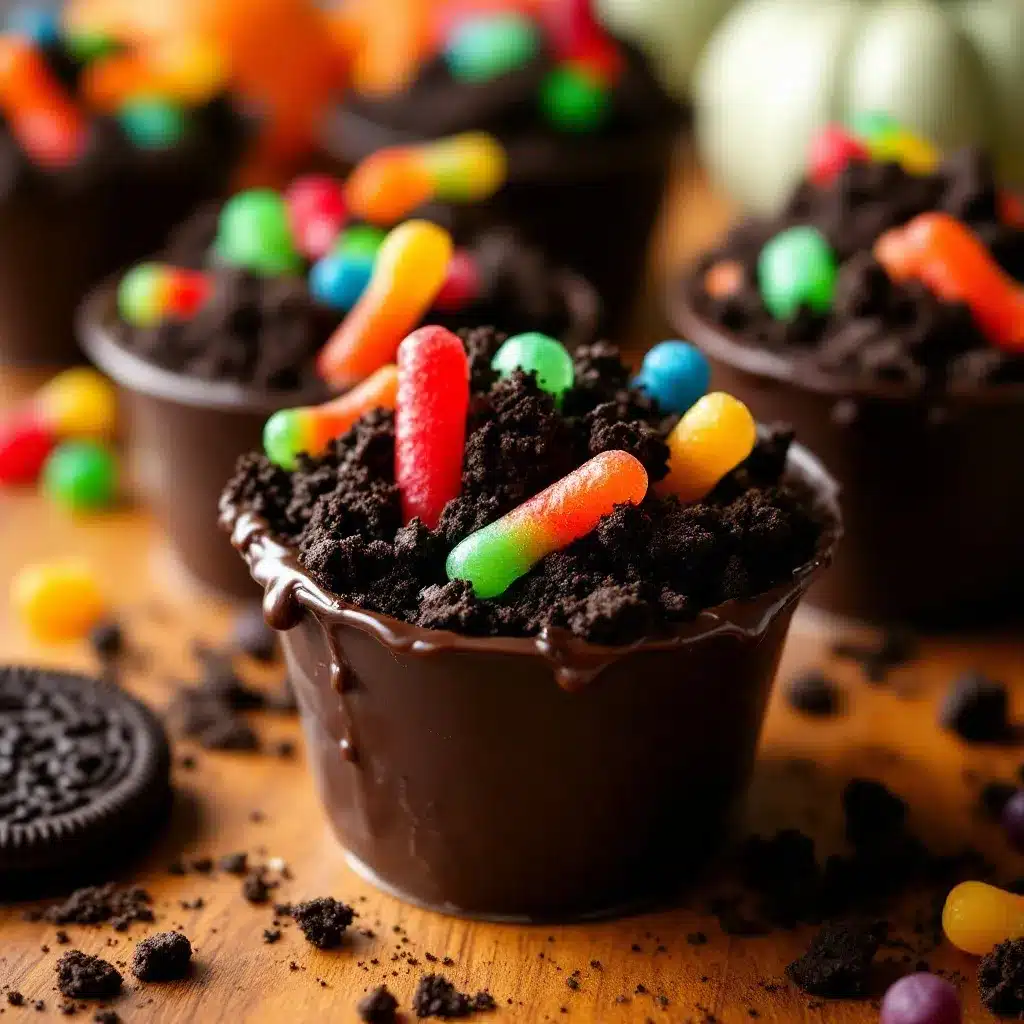
Here’s the step-by-step process I follow every time. It’s simple, but a few small details make a big difference.
- Crush the Oreos (5 minutes): Place the Oreos in a large Ziploc bag (you may need to do this in two batches). Seal the bag, removing as much air as possible. Use a rolling pin to crush the cookies into fine crumbs. You want a mix of fine powder and small chunks. Too fine, and it becomes mud instead of dirt. Too chunky, and it won’t look like soil. Aim for the texture of coarse sand. Set aside about 1/4 cup of the crumbs for topping later.
- Make the Pudding (5 minutes): In a medium mixing bowl, whisk together the cold milk and both boxes of instant chocolate pudding mix. Whisk vigorously for about 2 minutes until the mixture thickens and starts to set. Don’t overmix, or it can become grainy. You’ll notice it go from thin to thick pretty suddenly. That’s your cue to stop.
- Layer the Cups (10 minutes): Spoon about 2 tablespoons of the crushed Oreo crumbs into the bottom of each cup. This creates the base layer of dirt. Next, spoon the pudding on top, filling each cup about 2/3 full. Use the back of your spoon to smooth the top slightly. Then sprinkle another tablespoon of Oreo crumbs on top of the pudding, covering it completely. You want to hide the pudding so it looks like a cup full of dirt.
- Add the Worms (2 minutes): Gently poke 2-3 gummy worms into each cup, letting them wiggle out of the top. Some should be fully visible, while others should look like they’re crawling out. I like to curl one around the rim of the cup for extra effect. Press them in just enough that they stay upright.
- Chill (at least 2 hours, preferably overnight): Place the cups in the refrigerator, uncovered, for about 30 minutes to let the top set. Then cover loosely with plastic wrap and chill for at least 2 hours. Overnight is better. The pudding firms up, the Oreo crumbs soften slightly, and the flavors meld together. Don’t skip this step. I made that mistake once, and the pudding was too loose to hold the worms upright.
- Garnish and Serve (5 minutes): Before serving, sprinkle the reserved Oreo crumbs on top for a fresh dirt look. Add any optional garnishes like a dollop of whipped cream or a candy pumpkin. Serve cold straight from the fridge.
A few notes from my kitchen: If you’re making these for a party, assemble them the night before. The texture is actually better after 12-24 hours in the fridge. Just wait to add the fresh Oreo crumbs until right before serving so they stay crunchy. Also, if you’re using clear plastic cups, wipe the edges with a damp paper towel before chilling to keep them looking clean.
Cooking Tips & Techniques
I’ve made these dirt cups more times than I can count, and I’ve learned a few things along the way. Some of these came from happy accidents, others from straight-up failures.
The Biggest Mistake I Made: The first time I made these, I used cook-and-serve pudding instead of instant. Big mistake. The cups never set properly, and I ended up with chocolate soup with floating cookie chunks. It still tasted good, but it looked terrible. Always check the box to make sure it says “instant” on the front.
Texture Troubleshooting: If your Oreo crumbs are too fine, the dirt looks more like mud. If they’re too chunky, it doesn’t look like dirt at all. I’ve found that crushing them in a bag with a rolling pin gives me the most control. I leave a few bigger pieces for texture, but most of it should be fine and powdery. If you’re using a food processor, pulse in short bursts and check frequently.
Timing and Multitasking: This is a great recipe to make while you’re doing other things. Crush the Oreos while the coffee brews. Mix the pudding while you’re waiting for water to boil. Assemble the cups while you’re on a phone call. The whole active time is about 15 minutes, so it’s easy to squeeze into a busy day.
Consistency is Key: For the best texture, make sure your milk is very cold. Cold milk helps the instant pudding set up faster and more evenly. I keep my milk in the fridge until the last minute. If your milk is room temperature, the pudding will be thinner and take longer to set.
Worm Placement: Don’t just stick the worms straight down. Curl them a little, let some poke out more than others. The goal is to make it look like they’re crawling out of the dirt naturally. I’ve found that pressing them in at a slight angle gives the most realistic look. And if you’re using sour worms, the contrast between the tangy candy and the sweet pudding is fantastic.
One Last Tip: If you’re serving these at a party, make extra. I always underestimate how many people will want seconds. The first time I brought these to a Halloween gathering, I made 8 cups. They were gone in 10 minutes. Now I make at least 12, and even that’s not always enough.
Variations & Adaptations
One of the best things about this recipe is how easy it is to adapt. Here are a few ways I’ve changed it up over the years.
Gluten-Free Version: Use gluten-free chocolate sandwich cookies instead of Oreos. There are several brands available now, and they work just as well. Just make sure your pudding mix is also gluten-free. Most instant pudding is, but it’s worth checking the label. I’ve tested this with Glutino brand cookies, and the texture was spot-on.
Dairy-Free Version: Substitute the milk with oat milk or full-fat coconut milk. I’ve tried almond milk, and it was too thin. The pudding didn’t set properly. Oat milk gives the creamiest result. For the cookies, most Oreos are actually dairy-free, but check the package to be sure. The original Oreos are vegan-friendly, which is a happy surprise.
Peanut Butter Twist: Add a layer of peanut butter between the Oreo crumbs and the pudding. Just warm the peanut butter slightly so it spreads easily. The combination of chocolate and peanut butter is always a winner. I did this for a Halloween potluck last year, and it was the first thing to disappear.
Spooky Spider Version: Instead of gummy worms, use plastic spider rings (washed and dried) poking out of the dirt. Just make sure to warn people before they eat them. I’ve also seen people use chocolate-covered raisins as “bugs” scattered on top.
Pumpkin Patch Twist: Swap the chocolate pudding for vanilla or butterscotch, and use candy pumpkins instead of worms. Top with crushed graham crackers for a sandy look. It’s a fun alternative for people who aren’t into the creepy factor. I made these for a fall-themed party, and they were a hit with the younger kids.
Individual vs. Large Format: Instead of individual cups, make one large dish. Layer everything in a 9×13 baking dish, then let everyone scoop their own portion. It’s less cute but easier for a crowd. Just make sure to poke the worms in right before serving so they stay upright.
Serving & Storage Suggestions
These dirt cups are best served cold, straight from the fridge. The contrast between the cool, creamy pudding and the slightly softened Oreo crumbs is part of what makes them so satisfying.
Serving Temperature and Presentation: Pull the cups out of the fridge just before serving. If they sit at room temperature too long, the pudding can start to soften and lose its structure. I like to arrange them on a platter with a few extra gummy worms scattered around for effect. If you’re feeling fancy, add a small plastic spider or bat to each cup for extra Halloween vibes.
Complementary Dishes: These dirt cups pair perfectly with other Halloween treats. I often serve them alongside my Mummy Wrapped Baked Brie with Raspberry Jam for a sweet-and-savory spread. The creamy brie balances the chocolatey sweetness of the dirt cups. For a full Halloween menu, add some Crispy Baked Buffalo Cauliflower Bites for a spicy kick that contrasts with the dessert.
Storage Instructions: Store any leftover dirt cups in the refrigerator, covered with plastic wrap or in an airtight container. They’ll keep for up to 3 days. After that, the Oreo crumbs can get too soggy, and the gummy worms start to soften. If you’re making them ahead, I recommend waiting to add the final layer of fresh Oreo crumbs until right before serving. That keeps the top crunchy.
Reheating: These are meant to be served cold, so no reheating needed. If you’ve stored them for a day or two, just let them sit at room temperature for 5 minutes before serving to take the chill off. That’s all they need.
How Flavors Develop Over Time: The magic happens after about 12 hours in the fridge. The pudding thickens up perfectly, the Oreo crumbs soften into something almost cake-like, and the chocolate flavor deepens. I actually prefer these on day two. The gummy worms do get a little softer, but I kind of like that texture contrast. If you’re a texture purist, add fresh worms right before serving.
Nutritional Information & Benefits
Let’s be real, these are a treat, not a health food. But here’s what you’re looking at per serving (one cup, about 6 ounces).
| Nutrient | Amount Per Serving |
|---|---|
| Calories | 310 |
| Total Fat | 12g |
| Saturated Fat | 5g |
| Carbohydrates | 48g |
| Sugar | 34g |
| Protein | 5g |
| Calcium | 150mg |
The milk in the pudding does provide a decent amount of calcium, which is something. And the Oreos have a small amount of iron. But mostly, this is a dessert for enjoyment, not nutrition. If you’re looking for a slightly healthier option, you can use sugar-free pudding mix and low-fat milk. It won’t be as creamy, but it cuts the sugar and calories significantly.
For dietary considerations, these are not gluten-free unless you use gluten-free cookies. The original Oreos are dairy-free, which is a nice surprise. If you’re serving a crowd with various dietary needs, consider making a few dairy-free versions with oat milk and a few gluten-free versions with alternative cookies. That way, everyone gets to join the fun.
My personal take on this? Halloween is one night a year. Enjoy the dirt cups. Balance them out with a healthy dinner and maybe a walk around the block. Life is about balance, and these little cups of chocolatey goodness are worth the indulgence.
Conclusion
These Easy Halloween Dirt Cups with Oreos and Gummy Worms are everything a Halloween dessert should be. They’re fun, they’re easy, and they taste amazing. The best part is how little effort they take. You can whip them up in 15 minutes, and they look like you spent hours on them. That’s the kind of recipe I keep coming back to.
I love how customizable they are. You can make them gluten-free, dairy-free, or swap in different candies. They work for kids’ parties, adult get-togethers, or just a fun treat on a cozy October evening. Every time I make them, someone asks for the recipe. And I love telling them how simple it is.
If you make these, I’d love to hear how they turned out. Did you add any fun twists? Did the kids help you crush the Oreos? Did they disappear as fast as mine always do? Drop a comment below and let me know. And if you’re looking for more Halloween inspiration, check out my Black Velvet Cupcakes with Orange Buttercream for another spooky treat that’s sure to impress.
Happy Halloween, and happy snacking! These dirt cups are waiting for you.
Frequently Asked Questions
Can I make these dirt cups ahead of time?
Absolutely. In fact, they’re better if you make them the day before. The pudding sets up perfectly, and the flavors meld together overnight. Just wait to add the final sprinkle of fresh Oreo crumbs until right before serving so they stay crunchy.
Can I use homemade chocolate pudding instead of instant?
I wouldn’t recommend it. Homemade pudding doesn’t set as firmly as instant, so the cups can turn soupy. Stick with instant pudding mix for the best texture. If you really want to use homemade, add an extra tablespoon of cornstarch to help it set.
How long do these keep in the fridge?
They’ll stay good for up to 3 days in the refrigerator. After that, the Oreo crumbs get too soggy, and the gummy worms start to soften. If you’re making them for a party, I recommend assembling them no more than 24 hours in advance for the best texture.
Can I freeze these dirt cups?
I don’t recommend freezing them. The pudding can become watery when thawed, and the Oreo crumbs will turn mushy. These are best enjoyed fresh from the fridge. If you need to make them further ahead, prepare the pudding and crushed Oreos separately, then assemble them the day before serving.
What other candies can I use besides gummy worms?
You can use any Halloween-themed candy. Gummy spiders, candy pumpkins, or even plastic spider rings work great. For a non-Halloween version, try using gummy bears or chocolate-covered raisins. The key is to pick something that contrasts with the chocolate pudding both in color and texture.
Pin This Recipe!
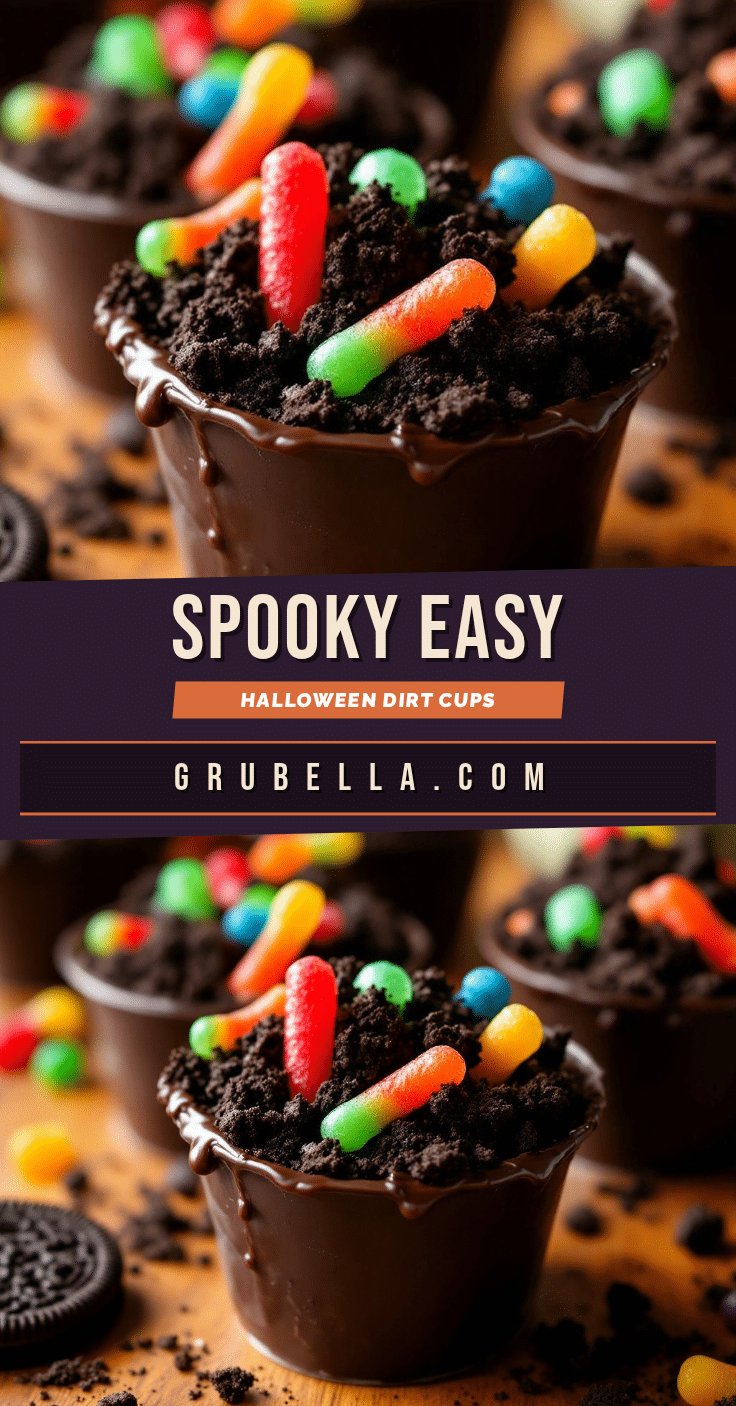
Easy Halloween Dirt Cups: 4-Ingredient Oreo Dessert

These Easy Halloween Dirt Cups are a fun, no-bake dessert made with just 4 ingredients: Oreos, instant chocolate pudding, milk, and gummy worms. They come together in 15 minutes and are perfect for parties, potlucks, or a spooky treat.
- Prep Time: 15 minutes
- Cook Time: 0 minutes
- Total Time: 2 hours 15 minutes (includes chilling)
- Yield: 8-10 servings 1x
- Category: Dessert
- Cuisine: American
Ingredients
- 1 family-size package Oreo cookies (about 36 cookies)
- 2 boxes (3.9 ounces each) instant chocolate pudding mix
- 4 cups cold whole milk
- 1 bag gummy worms (about 20–24 worms)
- Optional: crushed graham crackers, chocolate shavings, whipped cream, candy pumpkins
Instructions
- Crush the Oreos: Place the Oreos in a large Ziploc bag (in batches if needed). Seal the bag, removing as much air as possible. Use a rolling pin to crush the cookies into fine crumbs with some small chunks. Set aside about 1/4 cup of the crumbs for topping later.
- Make the pudding: In a medium mixing bowl, whisk together the cold milk and both boxes of instant chocolate pudding mix. Whisk vigorously for about 2 minutes until the mixture thickens and starts to set. Do not overmix.
- Layer the cups: Spoon about 2 tablespoons of the crushed Oreo crumbs into the bottom of each cup. Then spoon the pudding on top, filling each cup about 2/3 full. Smooth the top slightly. Sprinkle another tablespoon of Oreo crumbs on top of the pudding, covering it completely.
- Add the worms: Gently poke 2-3 gummy worms into each cup, letting them wiggle out of the top. Curl one around the rim for extra effect.
- Chill: Place the cups in the refrigerator, uncovered, for about 30 minutes to let the top set. Then cover loosely with plastic wrap and chill for at least 2 hours, preferably overnight.
- Garnish and serve: Before serving, sprinkle the reserved Oreo crumbs on top. Add any optional garnishes like whipped cream or candy pumpkins. Serve cold straight from the fridge.
Notes
For best results, use instant pudding mix (not cook-and-serve). Whole milk gives the creamiest texture. The cups taste even better after chilling overnight. Wait to add fresh Oreo crumbs until just before serving to keep them crunchy. If using dairy-free alternatives, oat milk or full-fat coconut milk work best.
Nutrition
- Serving Size: 1 cup (about 6 ounce
- Calories: 310
- Sugar: 34
- Sodium: 380
- Fat: 12
- Saturated Fat: 5
- Carbohydrates: 48
- Fiber: 1
- Protein: 5
Keywords: Halloween dirt cups, Oreo dessert, no-bake dessert, gummy worms, chocolate pudding, easy Halloween recipe, kid-friendly dessert



