Love this? Save it for later!
Share the inspiration with your friends
There used to be a tiny bakery tucked between a vintage shop and a laundromat in my old neighborhood that made the most incredible black velvet cupcakes. When they closed their doors three years ago—literally overnight, with a handwritten sign taped to the window—I felt a genuine pang of loss. I mean, I’d stop in every single Friday after work, and the owner, this sweet older woman named Margaret, would always save me one with the biggest swirl of orange buttercream. After twelve tries—twelve, let me tell you, with some truly questionable batches that ended up more gray than black—I finally got it. This is that cupcake.
The thing about black velvet cake is it’s not just chocolate cake with food coloring. It’s its own thing—lighter than red velvet, more tender, with a crumb that practically melts. And the orange buttercream? Honestly, that combination of dark, rich cocoa and bright, citrusy sweetness is something I think about more than is probably normal. I remember standing in my kitchen at midnight, staring at a batch that had finally turned the right shade of midnight, and I actually whispered “gotcha” to myself. My cat looked at me like I’d lost my mind, but I didn’t care.
Maybe you’ve been there—chasing a flavor memory from a place that no longer exists. It’s a specific kind of food obsession, isn’t it? You can’t just go buy it anymore, so you have to figure it out yourself. This recipe became my little tribute to Margaret and her bakery, and honestly, it might be better than the original. The cake is impossibly moist, the color is genuinely spooky without tasting like chemicals, and that orange buttercream is the kind of frosting you want to eat with a spoon when nobody’s watching. I keep making these because they remind me that sometimes the best things come from trying to hold onto something good.
Why You’ll Love This Recipe
These aren’t just Halloween cupcakes—they’re the kind of dessert that makes people stop mid-bite and just look at the cupcake with respect. Here’s why this recipe has become my most-requested fall bake:
- Show-Stopping Visuals : The deep black cake against bright orange frosting is pure Halloween magic. No artificial-tasting colors, just gorgeous contrast.
- Perfectly Moist Texture : This cake stays tender for days thanks to buttermilk and oil. No dry, crumbly disappointment here.
- Surprisingly Simple : Despite the dramatic look, these come together in under an hour with basic baking staples.
- Balanced Flavors : The orange buttercream isn’t too sweet—it’s bright and creamy, cutting through the rich cocoa beautifully.
- Crowd-Pleasing Appeal : Kids love the spooky color, adults love the sophisticated flavor. Everyone wins.
What makes these different from other black velvet recipes I’ve tried is the technique. Most versions end up tasting like dyed chocolate cake, but this one uses a specific ratio of cocoa to flour that keeps the cake light while still giving it that deep, dark color. I tested this six ways from Sunday—more cocoa, less cocoa, different types of black food coloring—and this version won every single time. It’s the kind of recipe that makes you look like a rockstar baker without actually having to be one.
These cupcakes are for the Halloween party where you want to impress, the cozy fall afternoon when you need a baking project, or honestly, any Tuesday that could use a little drama. They’re the kind of treat that makes people ask for the recipe before they’ve even finished the first one.
What Ingredients You Will Need
This recipe uses simple, baker-friendly ingredients to create something that looks way more complicated than it actually is. Most of these are pantry staples, with a few special additions for that signature color and flavor.
For the Black Velvet Cupcakes
- All-purpose flour , 1 ½ cups (180g) – spooned and leveled, never scooped straight from the bag
- Unsweetened cocoa powder , ¼ cup (20g) – I prefer Hershey’s Special Dark for richer color
- Baking soda , 1 teaspoon
- Salt , ½ teaspoon
- Granulated sugar , 1 cup (200g)
- Vegetable oil , ½ cup (120ml) – keeps the cake moist without butter flavor competing with the cocoa
- Buttermilk , ¾ cup (180ml), room temperature – this is non-negotiable for tenderness
- Large eggs , 2, room temperature
- Vanilla extract , 2 teaspoons
- White vinegar , 1 teaspoon – sounds weird, but it reacts with the baking soda for lift
- Black gel food coloring , 2-3 teaspoons – I use Americolor Super Black, it’s worth the extra few bucks
For the Orange Buttercream
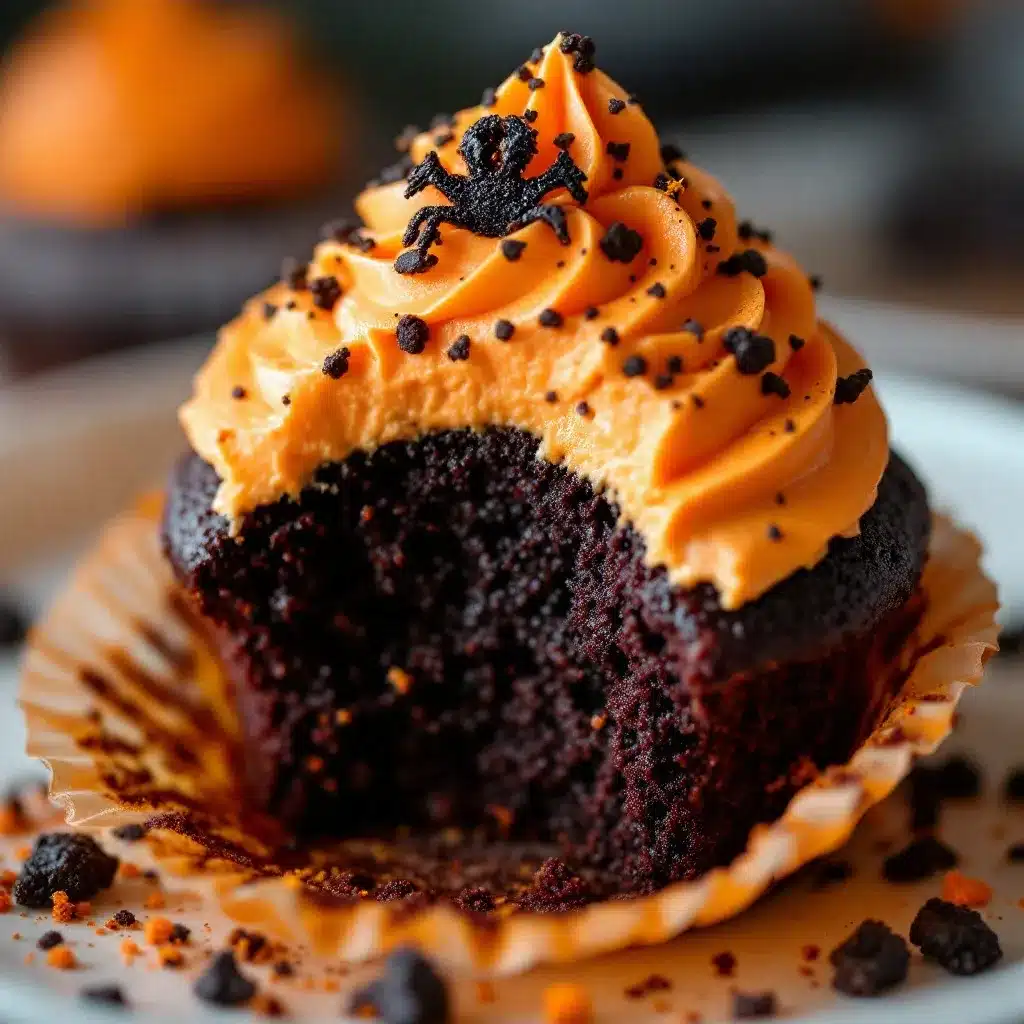
- Unsalted butter , 1 cup (226g), softened – let it sit out for at least an hour
- Powdered sugar , 3 ½ cups (420g), sifted if you’re feeling fancy
- Heavy cream , 3-4 tablespoons (45-60ml)
- Orange zest , zest of 2 medium oranges – get the good stuff, not the dried kind
- Fresh orange juice , 2 tablespoons (30ml), strained
- Vanilla extract , 1 teaspoon
- Salt , a pinch
- Orange gel food coloring , a tiny dab (optional, for brighter color)
A few notes on ingredients: The buttermilk is crucial here. I’ve tried making these with regular milk plus lemon juice, and it’s just not the same. Real buttermilk gives the cake that tender, velvety crumb you’re after. For the black food coloring, please use gel, not liquid. Liquid coloring will throw off your liquid ratios and leave you with gray, splotchy cupcakes. I learned that one the hard way—batch number four was a sad, streaky mess.
For the oranges, go with navel oranges if you can. They’re juicier and have great flavor. And please, please zest them before you juice them—I cannot tell you how many times I’ve juiced an orange and then had to awkwardly zest a nub. It’s a whole thing.
Equipment Needed
You don’t need a professional bakery setup for these, but a few specific tools make the process much smoother.
- 12-count standard muffin tin – non-stick or light-colored metal works best
- Paper cupcake liners – black or orange ones look amazing, but white lets the cake color pop
- Electric hand mixer or stand mixer – you can do this by hand, but your arm will hate you by the buttercream stage
- Large mixing bowls – at least two, preferably three
- Whisk and rubber spatula
- Cooling rack – wire racks are cheap and prevent soggy bottoms
- Piping bag with large star tip – I use a Wilton 1M tip, but any open star tip works
- Microplane or fine grater – for zesting those oranges
- Kitchen scale – optional but highly recommended for consistent results
If you don’t have a piping bag, you can use a zip-top bag with the corner snipped off. It won’t be as pretty, but it’ll still taste fantastic. I actually used that method for years before I bought proper piping bags—sometimes you just work with what you’ve got.
Preparation Method
Let’s make some Halloween magic. This recipe takes about 20 minutes of active prep and 18-20 minutes of baking time.
- Preheat and prep. Preheat your oven to 350°F (175°C). Line your muffin tin with 12 paper liners. This is not the time to skip the liners—these cakes are tender and will stick to a plain tin.
- Mix dry ingredients. In a medium bowl, whisk together the flour, cocoa powder, baking soda, and salt. Make sure there are no lumps in the cocoa—I’ve had batches where I got a pocket of straight cocoa powder in one bite, and it’s not pleasant.
- Combine wet ingredients. In a large bowl, whisk together the sugar, oil, buttermilk, eggs, vanilla extract, and white vinegar until smooth. The mixture should look pale and slightly thickened. This takes about 2 minutes of consistent whisking.
- Add the color. Add the black gel food coloring to the wet mixture and whisk until completely incorporated. The batter should look like black ink at this point. If it looks dark gray, add another half teaspoon of coloring. Don’t be shy—the color will fade slightly during baking.
- Combine wet and dry. Add the dry ingredients to the wet mixture in two additions, folding gently with a rubber spatula. Mix just until you can’t see any more flour streaks. Overmixing will make these cupcakes tough, and nobody wants a tough black velvet cupcake.
- Fill the liners. Divide the batter evenly among the 12 liners, filling each about ⅔ full. I use a cookie scoop for this—it’s cleaner and ensures even sizing. The batter will be thin, that’s normal.
- Bake. Bake for 18-20 minutes, or until a toothpick inserted in the center comes out clean or with a few moist crumbs. The tops should spring back when lightly touched. Rotate the pan halfway through if your oven runs hot.
- Cool completely. Let the cupcakes cool in the pan for 5 minutes, then transfer them to a wire rack to cool completely. Do not frost warm cupcakes—your buttercream will turn into a melty puddle, and that’s a tragedy I’ve lived through.
- Make the buttercream. While the cupcakes cool, make the frosting. In a large bowl, beat the softened butter with an electric mixer on medium speed until smooth and creamy, about 2 minutes. It should look pale and fluffy.
- Add sugar gradually. Add the powdered sugar, one cup at a time, beating on low speed after each addition. The mixture will look crumbly at first—that’s okay. After each cup, add a splash of heavy cream to keep things moving.
- Add flavorings. Once all the sugar is incorporated, add the orange zest, orange juice, vanilla extract, and salt. Beat on medium-high speed for 3-4 minutes until the frosting is light, fluffy, and spreadable. If it’s too stiff, add more cream a teaspoon at a time. If it’s too loose, add more powdered sugar.
- Color the frosting. If you want a brighter orange, add a tiny dab of orange gel food coloring and beat until combined. I usually add just enough to make it look like a creamsicle.
- Frost the cupcakes. Transfer the buttercream to a piping bag fitted with a large star tip. Pipe a generous swirl onto each completely cooled cupcake. Start from the outside and work your way in, lifting up at the end for that classic bakery look.
A quick note on timing: The cupcakes need to be completely cool before frosting. I usually bake them the night before and frost them the next day. This actually works in your favor because the flavors meld and the texture improves overnight.
Cooking Tips & Techniques
After those twelve failed attempts, I learned a few things the hard way. Let me save you some trouble.
Don’t overmix the batter. I know I said this already, but I’m saying it again because it’s that important. Black velvet cake is supposed to be tender and delicate. Overmixing develops gluten, which gives you tough, rubbery cupcakes. Mix until the flour just disappears, then stop. Your spatula is not a mixer—use it gently.
Room temperature ingredients matter. Cold eggs and cold buttermilk will seize up your batter and give you a lumpy mess. Take them out of the fridge 30 minutes before you start. I usually set everything on the counter while I’m gathering my equipment, and by the time I’m ready to mix, they’re perfect.
Test your food coloring. Different brands of black gel coloring have different strengths. Americolor Super Black is my go-to, but if you’re using a different brand, start with less and add more as needed. You can always add more color, but you can’t take it out. And for the love of all things baked, don’t use liquid food coloring. It’ll ruin your liquid ratios and leave you with gray, splotchy cupcakes.
Zest before you juice. This is one of those tips that sounds obvious but I forget it constantly. Zest your oranges first, then juice them. Trying to zest a juiced orange half is a recipe for grated knuckles and frustration.
Let the buttercream beat long enough. The 3-4 minutes of beating at the end isn’t just for show. It incorporates air, which makes the frosting light and fluffy instead of dense and greasy. Set a timer if you have to—I do, because I always think it’s done two minutes before it actually is.
Use a cookie scoop for batter. This ensures even-sized cupcakes that bake at the same rate. Nothing worse than one burnt cupcake and one underdone one in the same batch. A #20 scoop (about 3 tablespoons) is perfect for standard cupcakes.
Variations & Adaptations
One of the best things about this recipe is how adaptable it is. Here are some ways I’ve tweaked it over the years.
Dairy-Free Version: Substitute the buttermilk with ¾ cup of unsweetened almond milk mixed with 1 tablespoon of lemon juice. Let it sit for 5 minutes before using. For the buttercream, use vegan butter sticks (not margarine) and substitute the heavy cream with full-fat coconut cream. The texture is slightly different but still delicious.
Gluten-Free Option: Swap the all-purpose flour with a good 1:1 gluten-free baking flour blend. I’ve had success with King Arthur’s Measure for Measure blend. Add ¼ teaspoon of xanthan gum if your blend doesn’t already include it. The cupcakes will be a tad more delicate, so handle them gently when moving to the cooling rack.
Blood Orange Variation: During winter, when blood oranges are in season, use those instead of regular navel oranges. The buttercream takes on a gorgeous pinkish-orange hue and the flavor is slightly tarter and more complex. It’s absolutely stunning against the black cake.
Chocolate Orange Buttercream: For double the chocolate-orange love, melt 2 ounces of dark chocolate and let it cool slightly, then beat it into the buttercream along with the orange zest. It’s decadent and dangerously good. I made this version for a Halloween party last year and people actually fought over the last one.
Cupcake Cake: Want to make a cake instead? Pour the batter into two 8-inch round cake pans lined with parchment paper. Bake at 350°F for 25-30 minutes. Double the buttercream recipe for filling and frosting. It makes a stunning Halloween layer cake.
Mini Cupcakes: For bite-sized treats, use a mini muffin tin and bake for 10-12 minutes. This yields about 36 mini cupcakes. Perfect for classroom parties or potlucks where people want a small sweet treat.
Serving & Storage Suggestions
These cupcakes are best served at room temperature, which lets the cake stay tender and the buttercream soften to that perfect creamy consistency. If you’ve refrigerated them, let them sit on the counter for about 30 minutes before serving.
For presentation, I love arranging these on a black cake stand or a dark wood board. The contrast of the black cake and orange frosting pops beautifully against a dark surface. Sprinkle a few orange sanding sugar crystals or candy eyeballs on top for extra Halloween flair. I once made a batch and topped them with little fondant ghosts—it took forever but the photos were incredible.
These pair wonderfully with a hot cup of coffee or a cold glass of milk. For an adult gathering, they’re fantastic with a dark stout beer or a spiced apple cider. The bitterness of the stout plays off the sweetness of the buttercream in a way that feels very grown-up and sophisticated.
Storage: Store unfrosted cupcakes in an airtight container at room temperature for up to 3 days. Frosted cupcakes should be stored in the refrigerator, but bring them to room temperature before serving. The buttercream will firm up in the fridge, so don’t serve them cold—the texture won’t be as nice.
Freezing: These freeze beautifully. Freeze unfrosted cupcakes in a single layer on a baking sheet, then transfer to a freezer bag for up to 3 months. Thaw at room temperature and frost as usual. You can also freeze the buttercream in a piping bag for up to 2 months—just thaw it in the refrigerator overnight and give it a good stir before piping.
I’ve noticed that the flavors actually develop and deepen after a day in the fridge. The orange zest infuses the buttercream more fully, and the cocoa flavor in the cake becomes more pronounced. So if you can make these a day ahead, do it. Your future self will thank you.
Nutritional Information & Benefits
Let’s be real—these are cupcakes, not health food. But here’s the approximate nutritional breakdown for one cupcake with frosting, based on 12 servings:
- Calories: 415
- Fat: 22g
- Carbohydrates: 54g
- Protein: 4g
- Sugar: 40g
- Fiber: 1g
On the bright side, the cocoa powder in these cupcakes is a good source of antioxidants, specifically flavonoids that support heart health. The orange zest provides a small amount of vitamin C and adds digestive-friendly fiber. And hey, there’s protein from the eggs and buttermilk—every little bit counts, right?
If you’re watching your sugar intake, you can reduce the sugar in the cake to ¾ cup without affecting the texture too much. The buttercream is harder to reduce since sugar is its structural base, but you can use a sugar substitute like Swerve in the frosting. Just note that the texture will be slightly different—a bit grainier, less creamy.
These cupcakes contain dairy, eggs, and gluten. For allergen-friendly versions, check out the variations section above. And as always, please consult with a healthcare professional for specific dietary advice. I’m just a baker who’s made a lot of cupcakes, not a nutritionist.
Conclusion
These Black Velvet Halloween Cupcakes with Orange Buttercream are everything I wanted them to be—dramatic, delicious, and just a little bit spooky. They’re the kind of recipe that makes you feel like a baking wizard, even if you’re just following instructions from someone who messed up eleven times before getting it right.
What I love most about these cupcakes is how they bring people together. There’s something about that black cake and orange frosting that makes everyone smile, whether they’re six or sixty. I’ve made these for Halloween parties, fall birthdays, and even a goth-themed wedding shower (true story), and they’ve never failed to impress.
I’d love to hear how yours turn out! Did you try any of the variations? Did you add your own spooky twist? Drop a comment below and let me know—I read every single one and I answer questions faster than you’d think. And if you share a photo on Pinterest or Instagram, tag me so I can see your beautiful creations.
Happy baking, and may your cupcakes always be perfectly black and your buttercream perfectly orange!
Frequently Asked Questions
Can I make these cupcakes ahead of time?
Absolutely! You can bake the cupcakes up to 3 days in advance and store them unfrosted in an airtight container at room temperature. Frost them the day you plan to serve them for the best presentation. You can also freeze unfrosted cupcakes for up to 3 months.
Why did my cupcakes turn gray instead of black?
This usually happens when you use liquid food coloring instead of gel. Liquid coloring adds too much moisture to the batter and doesn’t concentrate enough pigment. Stick with black gel food coloring—Americolor Super Black is my favorite. Also, make sure you’re adding enough; the color should look very dark before baking because it will lighten slightly in the oven.
Can I use a different frosting flavor?
Of course! While the orange buttercream is a classic Halloween pairing, these black velvet cupcakes work beautifully with cream cheese frosting, vanilla buttercream, or even a chocolate ganache. For a different seasonal twist, try peppermint buttercream for Christmas or raspberry buttercream for Valentine’s Day.
How do I get that perfect swirl on top?
Use a large open star tip (like Wilton 1M) in a piping bag. Start piping from the outside edge of the cupcake, working your way in a spiral toward the center. When you reach the middle, stop squeezing and lift the bag straight up. The key is consistent pressure and a steady hand—practice on a plate first if you’re nervous!
My buttercream turned out too runny. What went wrong?
Runny buttercream usually means your butter was too soft or you added too much liquid. If this happens, pop the bowl in the refrigerator for 15-20 minutes to firm up the butter, then beat it again. You can also add more powdered sugar, a quarter cup at a time, until it reaches the right consistency. Remember that fresh orange juice adds more liquid than you might expect, so add it slowly.
Pin This Recipe!
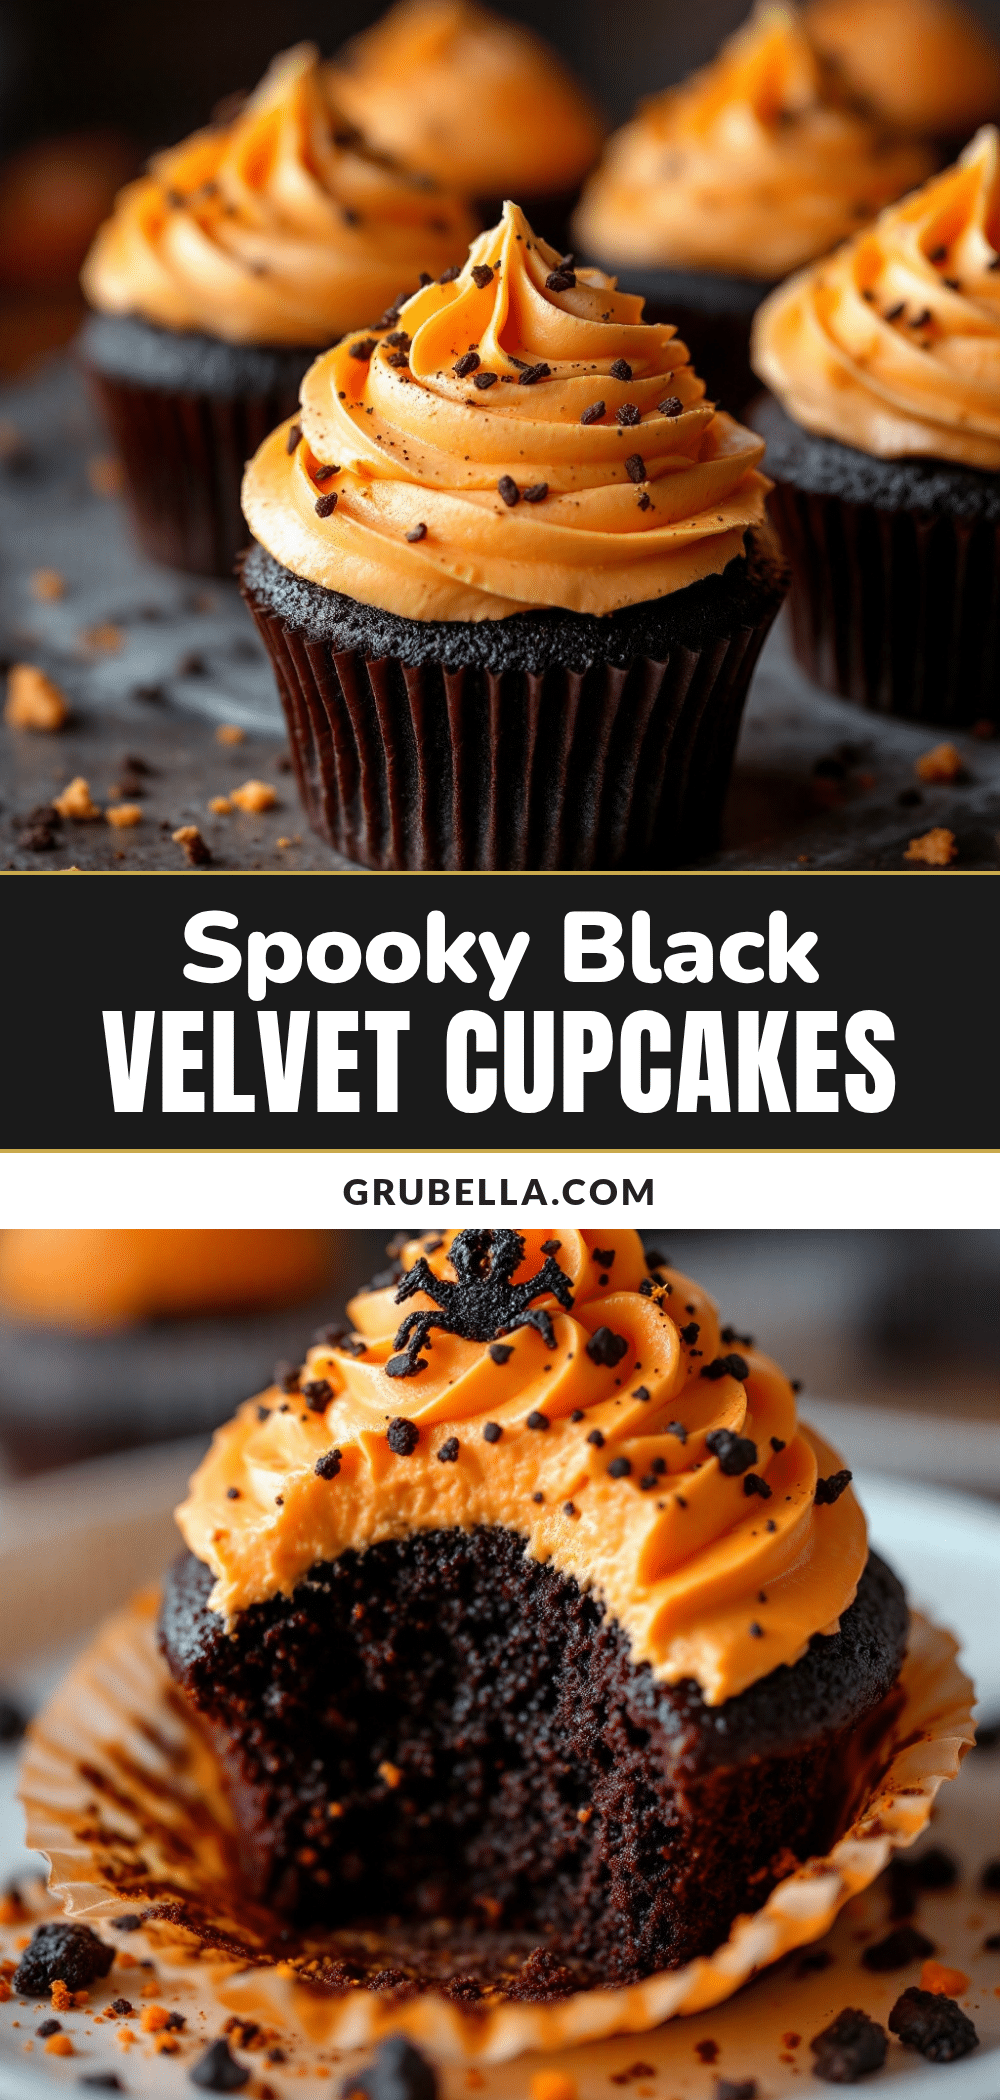
Best Black Velvet Cupcakes with Orange Buttercream
These black velvet cupcakes are impossibly moist with a tender crumb, topped with a bright and creamy orange buttercream. A show-stopping Halloween treat that’s surprisingly simple to make.
- Prep Time: 20 minutes
- Cook Time: 20 minutes
- Total Time: 40 minutes
- Yield: 12 cupcakes
- Category: Dessert
- Cuisine: American
Ingredients
- All-purpose flour, 1 ½ cups (180g)
- Unsweetened cocoa powder, ¼ cup (20g)
- Baking soda, 1 teaspoon
- Salt, ½ teaspoon
- Granulated sugar, 1 cup (200g)
- Vegetable oil, ½ cup (120ml)
- Buttermilk, ¾ cup (180ml), room temperature
- Large eggs, 2, room temperature
- Vanilla extract, 2 teaspoons
- White vinegar, 1 teaspoon
- Black gel food coloring, 2-3 teaspoons
- Unsalted butter, 1 cup (226g), softened
- Powdered sugar, 3 ½ cups (420g), sifted
- Heavy cream, 3-4 tablespoons (45-60ml)
- Orange zest, zest of 2 medium oranges
- Fresh orange juice, 2 tablespoons (30ml), strained
- Vanilla extract, 1 teaspoon
- Salt, a pinch
- Orange gel food coloring, a tiny dab (optional)
Instructions
- Preheat oven to 350°F (175°C). Line a 12-count muffin tin with paper liners.
- In a medium bowl, whisk together flour, cocoa powder, baking soda, and salt.
- In a large bowl, whisk together sugar, oil, buttermilk, eggs, vanilla extract, and white vinegar until smooth and slightly thickened.
- Add black gel food coloring to the wet mixture and whisk until completely incorporated. The batter should look black.
- Add dry ingredients to wet mixture in two additions, folding gently with a rubber spatula until just combined. Do not overmix.
- Divide batter evenly among the 12 liners, filling each about ⅔ full.
- Bake for 18-20 minutes, or until a toothpick inserted in the center comes out clean or with a few moist crumbs. Rotate pan halfway through if needed.
- Let cupcakes cool in the pan for 5 minutes, then transfer to a wire rack to cool completely.
- For the buttercream: In a large bowl, beat softened butter with an electric mixer on medium speed until smooth and creamy, about 2 minutes.
- Add powdered sugar, one cup at a time, beating on low speed after each addition. Add a splash of heavy cream after each cup.
- Once all sugar is incorporated, add orange zest, orange juice, vanilla extract, and salt. Beat on medium-high speed for 3-4 minutes until light and fluffy.
- If desired, add a tiny dab of orange gel food coloring and beat until combined.
- Transfer buttercream to a piping bag fitted with a large star tip. Pipe a generous swirl onto each completely cooled cupcake.
Notes
Don’t overmix the batter to keep the cake tender. Use room temperature ingredients. Test your food coloring brand; Americolor Super Black is recommended. Zest oranges before juicing. Let buttercream beat for a full 3-4 minutes for best texture. Cupcakes must be completely cool before frosting. For best results, bake the night before and frost the next day.
Nutrition
- Serving Size: 1 cupcake
- Calories: 415
- Sugar: 40
- Sodium: 220
- Fat: 22
- Saturated Fat: 10
- Carbohydrates: 54
- Fiber: 1
- Protein: 4
Keywords: black velvet cupcakes, orange buttercream, Halloween cupcakes, black velvet cake, orange frosting, spooky cupcakes, fall baking



