Love this? Save it for later!
Share the inspiration with your friends
My buddy Marcus showed up at my door last October holding a baking sheet covered in foil. He didn’t even say hello, just shoved it toward me and grinned. “Taste test,” he said. I peeled back the corner and saw these little football-shaped treats lined up like they were about to run a play. I grabbed one, took a bite, and honestly, I think I let out a sound that was a little embarrassing. The peanut butter flavor hit first, then that classic marshmallow chew, and I knew right then I was going to need the recipe.
Marcus is the kind of guy who shows up to every game day party with something unexpected. One time it was a seven-layer dip he’d spent all morning on. Another time it was store-bought cookies he didn’t even bother taking out of the package. You never know with him. But these football-shaped peanut butter rice krispie treats? They were different. He told me his aunt used to make them for his cousins before every Super Bowl, and he’d been trying to get them right for years. I stood there in my doorway, eating my third one, and asked him to show me how.
Now, I’m not usually one for themed snacks. I mean, I’ve seen the Pinterest boards with the perfectly decorated cupcakes and the meticulously arranged veggie platters that look like team logos. That’s just not my kitchen style. I’m more of a “let’s get this done in twenty minutes and still have time to watch the pre-game show” kind of cook. So when Marcus walked me through his aunt’s method, I was relieved to find out how simple it actually was. No special molds. No fancy decorating. Just a little shaping with your hands and a few minutes of patience.
Maybe you’ve been there, scrolling through game day recipes and feeling overwhelmed by the ones that require fifteen steps and a trip to three different stores. I know that feeling. It’s why I ended up making these football-shaped peanut butter rice krispie treats for every single game day gathering last season. They disappeared every time. People asked for the recipe. Kids especially went crazy for them. And the best part? I could make a whole batch during halftime of the early game and still have them set by kickoff of the night game. That’s the kind of recipe that earns a permanent spot in your rotation. Honestly, I don’t think I’ll ever show up to another game day party without a plate of these.
Why You’ll Love This Recipe
Let me tell you why these football-shaped peanut butter rice krispie treats have become my go-to game day contribution. I’ve tested this recipe about seven times now, tweaking the peanut butter ratio and the marshmallow timing until it was just right. I even brought a batch to my neighbor who used to work in a bakery, and she asked for the recipe before I’d even finished explaining what they were. That’s when I knew I’d nailed it.
- Quick & Easy: You can have these from stove to table in under 25 minutes. No kidding. The actual active time is maybe ten minutes, and the rest is just waiting for them to set.
- Simple Ingredients: You need exactly five things, and I bet you already have four of them in your pantry right now. No special trip to the store required.
- Perfect for Game Day: These are made for watching football. They’re portable, not too messy, and they look like little footballs. Kids and adults both get a kick out of the shape.
- Crowd-Pleaser: I’ve brought these to parties where people were skeptical about “rice krispie treats for adults,” and every single time, the plate comes back empty. The peanut butter makes them feel more grown-up somehow, while still being totally kid-friendly.
- Unbelievably Delicious: The texture is where these really shine. The peanut butter makes them slightly denser and chewier than regular rice krispie treats, and the salty-sweet balance is absolutely spot on. You get that crispy crunch from the cereal, the gooey marshmallow pull, and the rich peanut butter flavor all in one bite.
What makes this recipe different from all the other football-shaped treats out there is the peanut butter. Most versions I’ve seen just use regular marshmallow treats and then try to decorate them to look like footballs. That’s fine, I guess, but the peanut butter actually makes them taste like something special. It adds richness and depth that plain marshmallow treats just don’t have. Plus, the peanut butter helps the treats hold their shape better when you’re forming the footballs, so you don’t end up with a sticky mess on your hands.
This recipe is the kind that makes you close your eyes after the first bite. It’s comfort food reimagined for game day—faster than you’d expect, but with the same soul-soothing satisfaction that makes you reach for another one before you’ve even finished the first. Perfect for impressing guests without any stress, or turning a simple snack into something memorable.
What Ingredients You Will Need
This recipe uses simple, pantry-friendly ingredients to create something that tastes way more impressive than the ingredient list suggests. Every component plays a specific role in getting that perfect texture and flavor.
- 6 tablespoons unsalted butter (I use Land O’Lakes, but any brand works fine. The butter adds richness and helps the marshmallows melt smoothly. Salted butter works too, just reduce the added salt slightly.)
- 1 package (10 ounces) mini marshmallows (Jet-Puffed is my go-to. The mini ones melt faster and more evenly than the big ones. If all you have are large marshmallows, that’s fine, just give them an extra minute or two to melt completely.)
- 1/3 cup creamy peanut butter (I prefer Jif or Skippy for this recipe because they have a consistent texture. Natural peanut butter that separates can sometimes make the treats greasy. If you want to use natural peanut butter, stir it really well before measuring.)
- 6 cups crispy rice cereal (Rice Krispies brand gives the best texture, but generic versions work fine. Just make sure whatever you use is fresh and still crispy. Stale cereal will make sad, soggy treats.)
- 1/4 teaspoon salt (This balances the sweetness and brings out the peanut butter flavor. I use fine sea salt. If your peanut butter is already salted, you can skip this, but I find the extra salt makes a noticeable difference.)
- Optional: white candy melts or white chocolate chips (For making the laces on the footballs. Totally optional, but they make the treats look way cuter. I use Wilton candy melts because they melt smoothly and set firmly.)
- Optional: vegetable shortening or coconut oil (If using candy melts, a teaspoon of shortening helps thin them out for easier piping. Coconut oil works too, just use the refined kind so it doesn’t add coconut flavor.)
I want to mention something about the peanut butter here because I learned this the hard way. The first time I made these, I used a natural peanut butter that had been sitting in my pantry for a while. It was oily and separated, and my treats came out greasy and didn’t hold their shape well. They still tasted good, don’t get me wrong, but they were a mess to work with. The second time, I used a standard creamy peanut butter, and the difference was night and day. The treats set up perfectly, held their football shape beautifully, and had a much better texture. So if you can, go with the processed stuff for this one. It really does make a difference.
For the cereal, make sure it’s fresh. I know that sounds obvious, but I’ve definitely made the mistake of using a box that had been open for a few weeks. The cereal was a little stale, and my treats turned out dense and chewy instead of light and crispy. Fresh cereal gives you that satisfying crunch that makes rice krispie treats so good. If your box has been open for more than a week or two, just grab a new one. It’s worth it.
Equipment Needed
You don’t need anything fancy for these football-shaped peanut butter rice krispie treats. I’ve made them in multiple kitchens, and the equipment list stays short no matter where I am.
- Large pot or Dutch oven: You need something big enough to stir the marshmallow mixture with the cereal. A 5-quart pot works perfectly. I use my enameled cast iron Dutch oven, but any large pot will do. Just make sure it’s big enough to stir without spilling cereal everywhere.
- Spatula or wooden spoon: A silicone spatula is ideal because it doesn’t scratch your pot and it scrapes the sides well. A wooden spoon works fine too, just be prepared for a little more sticking.
- 9×13 inch baking dish: This is for the initial pressing of the treats before you cut and shape them. You can use a slightly smaller dish for thicker treats, or a larger one for thinner ones. I like the 9×13 size because it gives me a good thickness for shaping.
- Parchment paper or wax paper: Line your baking dish and also have some ready for shaping. This is crucial. Without it, everything sticks to everything and you’ll be scraping marshmallow off your counter for days.
- Sharp knife: For cutting the treats into rectangles before shaping. A chef’s knife or a large serrated knife both work. Just make sure it’s sharp so you get clean cuts instead of squished edges.
- Small piping bag or zip-top bag: Only needed if you’re adding the white laces. A zip-top bag with a tiny corner snipped off works perfectly. You don’t need to buy a special piping bag for this.
- Microwave-safe bowl: For melting the candy melts if you’re doing the laces. A small glass bowl works great.
I should mention that you absolutely do not need a football-shaped cookie cutter for this recipe. I know those exist, and I’ve seen people use them, but honestly, shaping these by hand is easier and gives you more control. Plus, hand-shaped footballs look more rustic and homemade, which I personally prefer. If you really want to use a cutter, you can press the mixture into a sheet, let it set, and then cut out football shapes. But I’ve tried both methods, and hand-shaping is faster and wastes less of the mixture.
Preparation Method
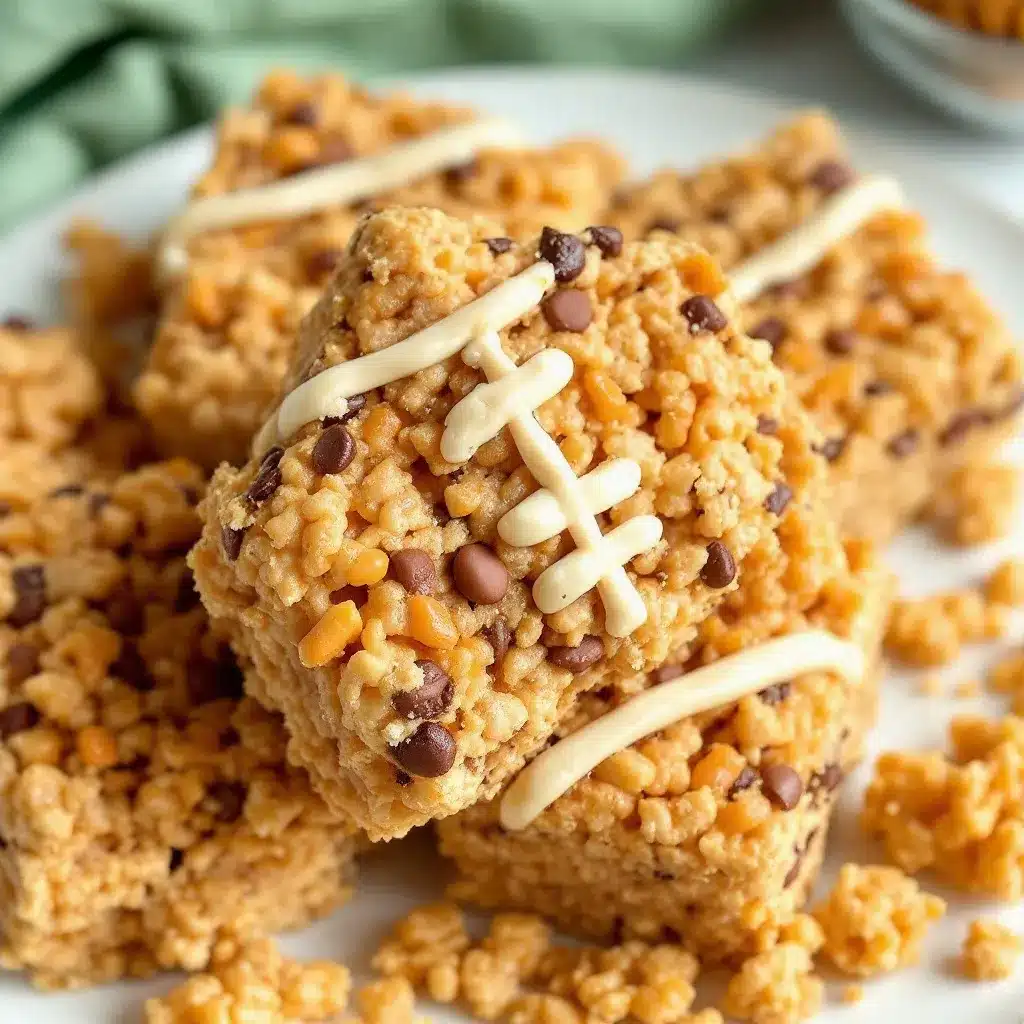
Let me walk you through this step by step. I’ve made these football-shaped peanut butter rice krispie treats so many times now that I could do it in my sleep, but I’ll share all the little tricks I’ve learned along the way.
Step 1: Prepare your pan and workspace.
Line your 9×13 inch baking dish with parchment paper, leaving some overhang on two sides. This makes lifting the treats out later so much easier. Also lay out another sheet of parchment paper on your counter for shaping. Trust me, you want everything ready before you start cooking because the marshmallow mixture sets fast.
Step 2: Melt the butter.
Place your large pot over medium-low heat and add the 6 tablespoons of butter. Let it melt slowly, stirring occasionally with your spatula. You want the butter fully melted but not bubbling or browning. If it starts to sizzle, your heat is too high. Turn it down. I once got distracted and let my butter brown, and it gave the treats a slightly nutty flavor that actually wasn’t bad, but it wasn’t what I was going for. So keep an eye on it.
Step 3: Melt the marshmallows.
Once the butter is melted, add the entire 10-ounce bag of mini marshmallows. Stir constantly as they melt. This takes about 3 to 4 minutes. Keep the heat on low to medium-low. You’ll see the marshmallows start to puff up and then collapse into a smooth, gooey mass. Keep stirring until there are no lumps left. The mixture should be smooth and glossy.
Step 4: Add the peanut butter and salt.
Now add the 1/3 cup of creamy peanut butter and the 1/4 teaspoon of salt. Stir until the peanut butter is completely incorporated into the marshmallow mixture. This takes about a minute of steady stirring. You’ll see the color change from white to a warm, creamy tan. The mixture should be smooth and uniform. Taste it if you want, but be careful because it’s hot. The first time I made these, I burned my tongue doing this. Worth it, but not recommended.
Step 5: Add the cereal.
Remove the pot from the heat. Add the 6 cups of crispy rice cereal all at once. Stir gently but thoroughly, folding the cereal into the marshmallow mixture. You want every piece of cereal coated. Be gentle here because you don’t want to crush the cereal into crumbs. I use a folding motion, lifting the mixture from the bottom and bringing it over the top. This takes about 2 minutes of careful stirring.
Step 6: Press into the pan.
Transfer the mixture to your prepared baking dish. Using a piece of parchment paper or wax paper on top, press the mixture firmly into an even layer. Press hard enough that it holds together, but not so hard that you compress it into a dense brick. You want it to be compact but still have some airiness. I press with my hands through the paper, focusing on the corners and edges. Let this cool at room temperature for about 15 to 20 minutes. It should be firm but still slightly warm to the touch.
Step 7: Cut into rectangles.
Lift the treats out of the pan using the parchment overhang. Place them on a cutting board. Using a sharp knife, cut the sheet into rectangles. I usually cut them into about 20 to 24 rectangles, roughly 2 inches by 3 inches each. The exact size doesn’t matter as long as they’re uniform. If your knife starts sticking, wipe it clean between cuts. This is normal, don’t worry.
Step 8: Shape into footballs.
Here’s where the magic happens. Take one rectangle and hold it in your palms. Gently squeeze and shape it into an oval, then taper the ends slightly so it looks like a football. Don’t squeeze too hard or you’ll crush the cereal. You want the shape to be defined but still light. Place each shaped football on a clean piece of parchment paper. Repeat with all the rectangles. This takes a little practice. My first few looked more like potatoes than footballs, but after a couple of tries, I got the hang of it. The warmth from your hands helps the treats stay pliable, so work while they’re still slightly warm. If they get too firm, just microwave them for 5 to 10 seconds to soften them up.
Step 9: Add the laces (optional but recommended).
If you want your footballs to look legit, melt about 1/2 cup of white candy melts in a microwave-safe bowl. Microwave in 20-second intervals, stirring between each, until smooth. Add a teaspoon of shortening if the mixture seems too thick. Transfer to a small piping bag or a zip-top bag with a tiny corner snipped off. Pipe a small line down the center of each football, then add short crosswise lines to look like laces. Let the candy set for about 10 minutes before serving. You can skip this step if you’re in a hurry, but honestly, the laces are what make people smile when they see these.
Cooking Tips & Techniques
I’ve made enough mistakes with these football-shaped peanut butter rice krispie treats that I can save you from repeating them. Let me share what I’ve learned.
The biggest mistake people make is overcooking the marshmallows. I did this my third time making these, and I’ll never forget it. I got distracted by a text message and left the marshmallows on the heat too long. They started to brown and get a little crusty around the edges. The treats came out hard and almost crunchy, like peanut butter flavored cement. Not good. You want the marshmallows just melted, not cooked. As soon as they’re smooth, get them off the heat. Low and slow is the way to go here.
Another thing I learned the hard way: don’t skip the salt. I know it seems like a tiny detail, but that 1/4 teaspoon makes a huge difference. Without it, the treats taste flat and overly sweet. The salt brightens the peanut butter flavor and cuts through the sugar. It’s the difference between a good treat and a great one. I actually add a tiny pinch more than the recipe calls for because I like the salty-sweet contrast, but that’s just my preference.
Timing is everything with these treats. The marshmallow mixture starts setting as soon as it comes off the heat, so you need to work efficiently. Have your cereal measured and ready to go before you start melting. Have your pan lined. Have your parchment paper laid out. I once had to scramble to find my spatula while the mixture was cooling in the pot, and by the time I got back to it, it was too stiff to stir properly. Don’t be like me. Prep everything first.
If your hands are getting too sticky while shaping the footballs, here’s a trick I figured out: lightly grease your palms with a tiny bit of butter or cooking spray. Just a little, not enough to make the treats greasy. This prevents sticking without affecting the texture. Alternatively, you can wear disposable gloves lightly coated with cooking spray. That works even better.
For consistent football shapes, make sure your rectangles are roughly the same size before you start shaping. I use a ruler to measure the first few, then eyeball the rest. Uniform rectangles lead to uniform footballs, which look way more professional on the serving platter. Trust me, your guests will notice the difference between a neatly shaped football and a lumpy blob.
Variations & Adaptations
One of the best things about this recipe is how easy it is to change up. I’ve experimented with quite a few variations, and some of them have become favorites in their own right.
Peanut Butter Chocolate Footballs: After pressing the mixture into the pan, drizzle melted chocolate over the top before cutting and shaping. I use about 1/2 cup of semi-sweet chocolate chips melted with a teaspoon of coconut oil. The chocolate adds a nice richness that pairs beautifully with the peanut butter. My friend Dave, who claims he doesn’t have a sweet tooth, ate six of these at the last game day party.
Crunchy Peanut Butter Version: If you’re a texture person like me, try using crunchy peanut butter instead of creamy. The little bits of peanut add an extra crunch that’s really satisfying. Just make sure you’re using a brand that has actual peanut pieces, not just a chunky texture. Jif crunchy works great for this.
Gluten-Free Adaptation: This recipe is actually naturally gluten-free as long as you use certified gluten-free crispy rice cereal. Rice Krispies brand is not gluten-free in the United States, but there are several gluten-free alternatives available. I’ve used the generic store brand from my local grocery store and it worked perfectly. Just double-check the label if you’re serving someone with celiac disease.
Chocolate Footballs: For a completely different flavor profile, substitute the peanut butter with 1/3 cup of Nutella or chocolate hazelnut spread. The process is exactly the same, but you end up with chocolate footballs instead. These are especially popular with kids. I made a batch of these for a Halloween party and they disappeared in minutes.
Vegan Option: Use vegan butter and vegan marshmallows. Dandies brand makes excellent vegan marshmallows that melt just as well as regular ones. For the peanut butter, any brand works since peanut butter is naturally vegan. The texture will be slightly different, but still delicious. I’ve tested this version for a friend who’s vegan, and she said they were the best rice krispie treats she’d had in years.
Serving & Storage Suggestions
These football-shaped peanut butter rice krispie treats are best served at room temperature. I usually arrange them on a large platter in a pyramid formation, with the laces facing up so people can see the football shape. They look especially cute next to a bowl of popcorn or some pretzels. For game day, I like to serve them on a tray lined with a green napkin to look like a football field. It’s a small touch, but people always comment on it.
As for what to serve alongside them, these treats pair well with anything salty. I usually put out a bowl of salted nuts or some potato chips to balance the sweetness. For drinks, they go great with cold milk, coffee, or even a beer if you’re feeling adventurous. I’ve had people tell me they taste amazing with a dark stout, though I haven’t tried that myself.
For storage, keep these in an airtight container at room temperature. They’ll stay fresh for up to 5 days, though I doubt they’ll last that long. I use a large Tupperware container with a tight-fitting lid. Layer them between sheets of parchment paper so they don’t stick together. Do not refrigerate them. The refrigerator makes them hard and dry. Room temperature is where they’re at their best.
You can also freeze these treats for up to 3 months. Wrap each football individually in plastic wrap, then place them in a freezer-safe bag. When you’re ready to serve, just let them thaw at room temperature for about an hour. They taste almost as good as fresh. I made a double batch before the playoffs last year and froze half, and they were still perfect when I pulled them out for the championship game.
One thing to note: these treats actually get better after a day or two. The flavors meld together, and the texture becomes perfectly chewy. So if you’re making them for a party, feel free to make them a day ahead. Just keep them in an airtight container and they’ll be even better than when you first made them. The first time I discovered this, I was shocked. I thought fresh was always best, but with these, day two is actually the sweet spot.
Nutritional Information & Benefits
Let’s be real here, these are treats, not health food. But I do think it’s helpful to know what’s in them, especially if you’re keeping track of what you’re eating during game day. Here’s the approximate nutritional breakdown for one football-shaped treat, assuming you get about 20 treats from the batch.
- Calories: Approximately 180 per treat
- Total Fat: 8 grams
- Saturated Fat: 4 grams
- Carbohydrates: 25 grams
- Sugar: 14 grams
- Protein: 3 grams
- Sodium: 120 milligrams
The peanut butter does add some protein and healthy fats, which is nice. It also provides a little bit of fiber and vitamin E. The butter adds some vitamin A. But honestly, the main ingredient here is marshmallows, so this is definitely a treat to enjoy in moderation. I usually have one or two during the game and then save the rest for later in the week.
If you’re watching your sugar intake, you could try using a sugar-free marshmallow alternative, though I haven’t tested that myself. The texture would likely be different. For a lower-fat version, you could reduce the butter to 4 tablespoons, but the treats will be less rich and may not hold their shape as well. I’ve tried this, and honestly, it’s not worth the trade-off. Just enjoy these as they are and balance them out with healthier choices during the rest of the game day spread.
These treats contain dairy (butter) and peanuts (peanut butter), so they’re not suitable for anyone with those allergies. The crispy rice cereal is typically gluten-free, but check the label if you’re serving someone with celiac disease. Some brands use malt flavoring that contains gluten. I always check the box before serving these to my gluten-sensitive friends.
Conclusion
These football-shaped peanut butter rice krispie treats have become my signature game day contribution, and I don’t see that changing anytime soon. They’re simple enough to throw together during halftime, impressive enough to get compliments, and delicious enough that people actually fight over the last one. I’ve brought them to Super Bowl parties, regular season games, and even a baseball watch party (don’t tell anyone), and they’ve been a hit every single time.
What I love most about this recipe is how adaptable it is. You can keep them simple with just the peanut butter, or dress them up with chocolate and laces. You can make them ahead of time or whip them up at the last minute. They work for a crowd of twenty or just for yourself on a quiet Sunday afternoon. There’s no wrong way to enjoy these.
I’d love to hear how yours turn out. Did you add the laces? Did you try the chocolate variation? Did your kids help shape the footballs? Drop a comment below and let me know. And if you have your own twist on this recipe, please share it. I’m always looking for new ideas to try. Until next time, happy cooking and go team!
Frequently Asked Questions
Can I use natural peanut butter for this recipe?
You can, but the treats may turn out greasier and not hold their shape as well. Standard creamy peanut butter like Jif or Skippy works best because it has a more consistent texture and doesn’t separate. If you do use natural peanut butter, stir it really well before measuring and be prepared for slightly softer treats.
How do I keep the treats from sticking to my hands when shaping?
Lightly grease your palms with a tiny bit of butter or cooking spray. You can also wear disposable gloves coated with a thin layer of cooking spray. Another option is to shape them while the mixture is still slightly warm, as it’s more pliable and less sticky at that stage.
Can I make these ahead of time for a party?
Absolutely. These treats actually taste even better after a day or two. Store them in an airtight container at room temperature for up to 5 days. You can also freeze them for up to 3 months. Just wrap each football individually in plastic wrap and thaw at room temperature for about an hour before serving.
Why did my treats turn out hard instead of chewy?
This usually happens when the marshmallows are overcooked. You want to melt them just until they’re smooth, then remove them from the heat immediately. If you cook them too long, they’ll set up hard. Also, make sure you’re not pressing the mixture too firmly into the pan. Gentle pressure is all you need.
Can I use a different type of cereal?
You can experiment with other crispy rice cereals, but the texture will vary. Some generic brands are less crispy and can result in denser treats. You could also try using cocoa rice cereal for a chocolate version, or even crushed cornflakes for a different crunch. Just keep the total volume at 6 cups.
Pin This Recipe!
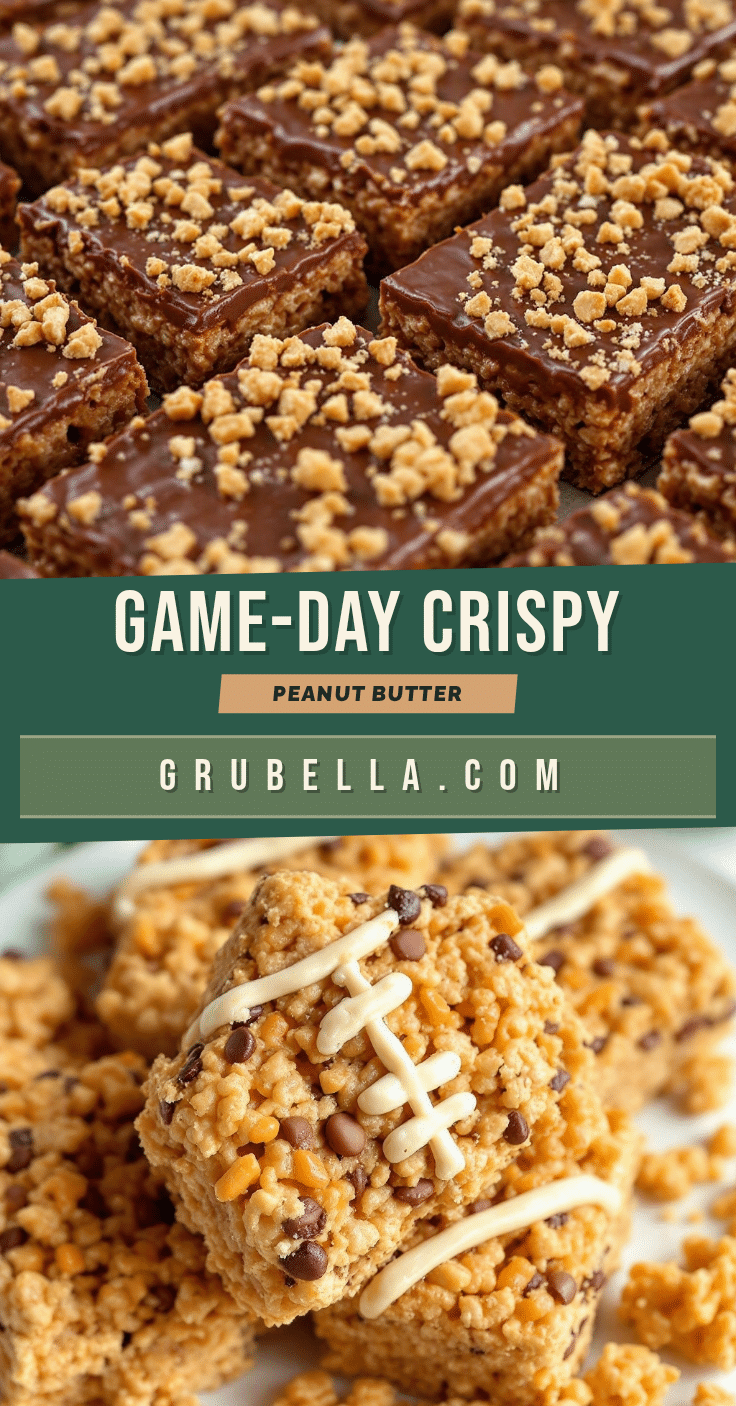
Easy Football Peanut Butter Rice Krispie Treats: Best Game Day Snack
These football-shaped peanut butter rice krispie treats are the ultimate game day snack. Quick to make with simple ingredients, they’re a crowd-pleasing, portable treat that looks adorable and tastes amazing.
- Prep Time: 10 minutes
- Cook Time: 10 minutes
- Total Time: 25 minutes
- Yield: 20-24 servings 1x
- Category: Snack
- Cuisine: American
Ingredients
- 6 tablespoons unsalted butter
- 1 package (10 ounces) mini marshmallows
- 1/3 cup creamy peanut butter
- 6 cups crispy rice cereal
- 1/4 teaspoon salt
- Optional: white candy melts or white chocolate chips (for laces)
- Optional: vegetable shortening or coconut oil (for thinning candy melts)
Instructions
- Line a 9×13 inch baking dish with parchment paper, leaving overhang on two sides. Lay out another sheet of parchment paper on your counter for shaping.
- Place a large pot over medium-low heat and melt 6 tablespoons of butter, stirring occasionally, until fully melted but not browning.
- Add the entire 10-ounce bag of mini marshmallows to the melted butter. Stir constantly over low to medium-low heat until marshmallows are completely melted and smooth, about 3-4 minutes.
- Add 1/3 cup creamy peanut butter and 1/4 teaspoon salt. Stir until fully incorporated and the mixture is smooth and uniform, about 1 minute.
- Remove the pot from heat. Add 6 cups crispy rice cereal all at once. Gently fold until every piece of cereal is coated, being careful not to crush the cereal.
- Transfer the mixture to the prepared baking dish. Using a piece of parchment paper on top, press firmly into an even layer. Let cool at room temperature for 15-20 minutes until firm but still slightly warm.
- Lift the treats out of the pan using the parchment overhang. Place on a cutting board and cut into 20-24 rectangles, roughly 2×3 inches each.
- Take each rectangle and shape it into an oval with tapered ends to form a football shape. Place on clean parchment paper. If mixture gets too firm, microwave for 5-10 seconds to soften.
- Optional: Melt 1/2 cup white candy melts in a microwave-safe bowl in 20-second intervals, stirring between each. Add 1 teaspoon shortening if too thick. Transfer to a piping bag or zip-top bag with a tiny corner snipped off. Pipe a line down the center of each football, then add short crosswise lines for laces. Let set for 10 minutes before serving.
Notes
Use standard creamy peanut butter like Jif or Skippy for best results; natural peanut butter can make treats greasy. Don’t overcook marshmallows or treats will become hard. Prep all ingredients before starting as mixture sets quickly. Treats actually taste better after a day or two. Store in airtight container at room temperature for up to 5 days, or freeze for up to 3 months.
Nutrition
- Serving Size: 1 football-shaped tr
- Calories: 180
- Sugar: 14
- Sodium: 120
- Fat: 8
- Saturated Fat: 4
- Carbohydrates: 25
- Protein: 3
Keywords: football treats, peanut butter rice krispie treats, game day snacks, no-bake desserts, easy party snacks



