Love this? Save it for later!
Share the inspiration with your friends
The woman at the farmers’ market stall watched me sniffing a paper bag of roasted chiles like I was trying to memorize them. I was, honestly. It was late August in New Mexico, and I had driven six hours to stock up on Hatch chiles because my local grocery store back home sold pale imitations that tasted more like bell pepper than anything worth writing about. She didn’t say anything at first. Then she handed me a folded index card with handwriting so tiny I had to squint. “That’s my cornbread,” she said. “Don’t lose it.”
I almost did lose it, actually. The card sat in my glove compartment for three months underneath a melted granola bar and a stack of parking receipts. When I finally cleaned out my car, I found it crinkled and stained with what I hoped was coffee. But I made that cornbread that same afternoon, and let me tell you—I’ve made it every year since. The recipe has changed a little. I added sharp cheddar because I couldn’t help myself. I swapped the white cornmeal for yellow because that’s what I had. But the soul of it, that smoky warmth from the roasted Hatch green chiles, that’s all hers.
Maybe you’ve never cooked with Hatch chiles before. Maybe you’re holding a bag of frozen ones right now, wondering what to do with them. Or maybe you just want a cornbread that’s actually interesting—not dry, not sweet, not boring. This one is all three of those things in reverse. It’s moist, savory, and honestly unforgettable. The first time I made it for friends, someone asked for the recipe before they finished their first piece. That’s the kind of cornbread this is. It stays with you.
Why You’ll Love This Recipe
I’ve tested this Hatch green chili cheddar cornbread more times than I can count. Some batches came out too dry. Some were so wet they collapsed in the middle. One time I forgot the baking powder entirely and ended up with a dense, sad pancake situation. But this version? This is the one. It’s been approved by my neighbor who grew up in New Mexico, my picky seven-year-old nephew, and a group of coworkers who devoured an entire pan in under ten minutes.
- Quick & Easy: From mixing bowl to oven in about 15 minutes. No stand mixer needed, no complicated techniques.
- Simple Ingredients: You probably have cornmeal, flour, eggs, and butter in your kitchen right now. The chiles and cheese are the only special additions.
- Perfect for Game Days: This cornbread pairs beautifully with chili, barbecue, or just a bowl of soup on a cold evening.
- Crowd-Pleaser: Even people who swear they don’t like cornbread ask for seconds. The cheese and chiles make it impossible to resist.
- Unbelievably Delicious: The texture is tender but sturdy, with pockets of melted cheddar and little bursts of smoky heat from the chiles. It’s comfort food that actually delivers.
What makes this recipe different from every other cornbread out there is the balance. Most cornbread leans too sweet or too dry. This one stays moist thanks to buttermilk and butter, while the Hatch green chiles add warmth without overwhelming heat. The sharp cheddar brings salt and richness. Every bite hits a different note. It’s not just another cornbread recipe—it’s the one you’ll keep coming back to.
This is the kind of recipe that makes you feel like a good cook without actually having to work that hard. It’s forgiving. It’s flexible. And it’s genuinely satisfying in that way that only a warm slice of cornbread can be. The first time I pulled a golden, bubbling pan out of the oven, I closed my eyes and just breathed in the smell. That’s the moment I knew I had something worth sharing.
What Ingredients You Will Need
This recipe uses simple, wholesome ingredients to deliver bold flavor and satisfying texture without any fuss. Most of these are pantry staples, and the chiles and cheese are easy to find during Hatch season or frozen year-round.
For the Cornbread Batter
- 1 cup yellow cornmeal (I prefer Bob’s Red Mill for consistent texture; medium-grind works best)
- 1 cup all-purpose flour (spoon and level it—don’t scoop straight from the bag)
- 1 tablespoon baking powder (make sure it’s fresh; stale baking powder kills the rise)
- 1 teaspoon salt (fine sea salt dissolves better than kosher in this batter)
- 1/4 cup granulated sugar (just enough to balance the savory elements without making it sweet cornbread)
- 1 cup buttermilk (adds tang and tenderness; shake the carton before measuring)
- 2 large eggs (room temperature, so they blend smoothly into the batter)
- 1/2 cup unsalted butter (melted and slightly cooled; don’t use it hot or it’ll cook the eggs)
For the Savory Add-Ins

- 1 cup roasted Hatch green chiles (diced, seeds removed for less heat if you prefer; frozen or fresh both work)
- 1 1/2 cups sharp cheddar cheese (shredded from a block—pre-shredded has anti-caking agents that affect melt)
- 1/4 cup chopped fresh cilantro (optional, but I love the freshness it adds)
Ingredient Selection Tips: Look for Hatch green chiles that are labeled “hot” or “mild” depending on your spice tolerance. I usually buy a mix. If you can’t find Hatch chiles, Anaheim or poblano peppers make decent substitutes, though the flavor won’t be quite the same. For the cheese, I recommend Cabot or Tillamook sharp cheddar—they melt beautifully and have real flavor. Avoid generic store-brand cheddar that tastes like plastic.
Substitution Guidance: For a gluten-free version, swap the all-purpose flour with a 1:1 gluten-free baking blend. Use dairy-free buttermilk (add a tablespoon of lemon juice to oat milk) and vegan butter if needed. The texture will be slightly different, but still delicious. If you can’t find buttermilk, add 1 tablespoon of white vinegar or lemon juice to regular milk and let it sit for 5 minutes.
Equipment Needed
You don’t need fancy equipment for this Hatch green chili cheddar cornbread. I’ve made it in a cast iron skillet, a glass baking dish, and even a metal cake pan. They all work, but each gives slightly different results.
- 10-inch cast iron skillet (my top choice—it creates a beautifully crispy golden crust)
- 9×9-inch baking dish (glass or ceramic both work; just reduce oven temperature by 25°F if using glass)
- Large mixing bowl (for dry ingredients)
- Medium mixing bowl (for wet ingredients)
- Whisk (for smooth batter)
- Rubber spatula (for folding in chiles and cheese)
- Measuring cups and spoons (accurate measurements matter here)
- Oven mitts (trust me, you’ll need them)
Budget-Friendly Options: If you don’t own a cast iron skillet, a standard 9×9 baking dish works perfectly. You can also use a muffin tin to make cornbread muffins—just reduce baking time to 15-18 minutes. I’ve done this for parties and it’s always a hit. One note: if you use a metal pan, line it with parchment paper for easy removal. I learned that the hard way after a particularly stubborn batch.
Preparation Method
Preheat your oven to 400°F (200°C). Place your cast iron skillet or baking dish in the oven while it preheats. This step is non-negotiable if you want that gorgeous golden crust. I forgot once and the bottom came out pale and soft. Never again.
- Prepare the dry ingredients: In a large mixing bowl, whisk together 1 cup yellow cornmeal, 1 cup all-purpose flour, 1 tablespoon baking powder, 1 teaspoon salt, and 1/4 cup granulated sugar. Make sure there are no lumps. Give it a good stir—baking powder has a tendency to hide at the bottom.
- Mix the wet ingredients: In a separate medium bowl, whisk together 1 cup buttermilk, 2 large eggs, and 1/2 cup melted unsalted butter. Whisk until the eggs are fully incorporated and the mixture looks smooth and pale yellow. If your butter seizes up when it hits cold buttermilk, don’t panic—just keep whisking and it’ll come together.
- Combine wet and dry: Pour the wet ingredients into the dry ingredients. Stir gently with a spatula until just combined. A few lumps are totally fine. Overmixing will make your cornbread tough, and nobody wants that. Stop stirring when you can’t see any more dry flour.
- Fold in the good stuff: Gently fold in 1 cup roasted Hatch green chiles, 1 1/2 cups shredded sharp cheddar cheese, and 1/4 cup chopped cilantro (if using). Use a folding motion—cut through the center, scrape the bottom, and turn. Do this about 8-10 times until everything is evenly distributed. The batter will look thick and chunky. That’s perfect.
- Prepare the hot pan: Carefully remove the preheated skillet or baking dish from the oven using oven mitts. Add about 1 tablespoon of butter to the pan and swirl it around to coat the bottom and sides. The butter should sizzle and foam immediately. Pour the batter into the hot pan and spread it into an even layer with your spatula.
- Bake to golden perfection: Place the pan in the oven and bake for 20-25 minutes, or until the top is golden brown and a toothpick inserted in the center comes out clean. The edges should be pulling away from the sides of the pan slightly. If the top is browning too quickly but the center isn’t done, tent loosely with foil for the last 5 minutes.
- Cool and serve: Let the cornbread cool in the pan for 10 minutes before slicing. This rest time allows the structure to set. Cut into squares or wedges and serve warm. The cheese will still be a little stretchy, and the chiles will be perfectly distributed throughout.
Sensory Cues: When you pull the pan from the oven, you should smell toasted corn and melted cheese with a hint of smoky chile. The top should be deep golden with darker edges. If you tap the center, it should feel firm but spring back slightly. A knife inserted should come out with a few moist crumbs, not wet batter.
Cooking Tips & Techniques
I’ve made this Hatch green chili cheddar cornbread probably thirty times by now, and I’ve learned a few things the hard way. Here’s what I wish someone had told me from the start.
Don’t skip preheating the pan. This is the single most important tip for a crispy crust. When you pour batter into a hot, buttered skillet, it starts cooking immediately, creating that gorgeous golden bottom. Room temperature pans give you pale, soft cornbread. I tested this side by side once, and the difference was dramatic. Hot pan wins every time.
Use room temperature ingredients. Cold eggs and buttermilk will make your melted butter clump up into little solid pieces. Let everything sit on the counter for 20 minutes before you start. I know it’s annoying, but it makes a real difference in texture. The batter comes together smoother and bakes more evenly.
Don’t overmix the batter. I ruined my first few batches by stirring too enthusiastically. Cornbread batter should be treated gently. Mix until the flour disappears, then stop. Overmixing develops gluten, which makes cornbread tough and rubbery. You want tender, not tough.
Watch your oven temperature. Every oven runs differently. I burned two batches before realizing my oven runs 25 degrees hot. Use an oven thermometer if you have one. If the top is browning too fast, reduce the temperature to 375°F and bake a few minutes longer. Patience pays off.
Let it rest before slicing. I know it’s tempting to cut into it immediately, but hot cornbread crumbles. Give it 10 minutes to set up. The texture improves dramatically. Plus, you won’t burn your mouth on molten cheese. Trust me on this one.
Toast your cornmeal for extra flavor. This is a trick I picked up from a chef friend. Spread cornmeal on a baking sheet and toast it at 350°F for 5-7 minutes before using. It deepens the corn flavor and adds a nutty note. Totally optional, but worth the extra few minutes.
Variations & Adaptations
One of the best things about this Hatch green chili cheddar cornbread is how adaptable it is. I’ve tweaked it for different seasons, diets, and cravings. Here are some variations I’ve personally tested and loved.
Spicy Jalapeño Cheddar Version: Add 2 fresh jalapeños, seeded and diced, along with the Hatch chiles. Keep the seeds in one of them if you want real heat. I made this for a Super Bowl party and watched people reach for water glasses while reaching for seconds. It’s that kind of spicy—the good kind.
Smoky Bacon Cornbread: Cook 4 strips of bacon until crispy, crumble them, and fold into the batter along with the chiles and cheese. Use 2 tablespoons of the rendered bacon fat in place of some of the butter. The smoky, salty flavor pairs beautifully with the chiles. I honestly can’t decide which version I like better.
Gluten-Free Adaptation: Swap the all-purpose flour for a 1:1 gluten-free baking blend. I’ve used King Arthur Measure for Measure with excellent results. Add an extra tablespoon of buttermilk since gluten-free flours tend to absorb more liquid. The texture is slightly more crumbly but still delicious.
Dairy-Free Version: Use vegan butter, dairy-free buttermilk (oat milk with lemon juice), and your favorite shredded vegan cheddar. I like Violife or Miyoko’s for melting. The flavor won’t be identical, but it’s surprisingly good. My dairy-intolerant friend requests this version regularly.
Sweet Corn Addition: Fold in 1/2 cup of fresh or frozen corn kernels along with the chiles. The little bursts of sweetness complement the smoky heat perfectly. This is my go-to summer version when corn is in season. It feels more substantial, almost like a meal in itself.
Serving & Storage Suggestions
This cornbread is best served warm, straight from the pan, with a pat of butter melting into each slice. The contrast between the crispy crust and the tender, cheesy interior is absolutely worth the wait.
Serving Ideas: I love serving this alongside a big bowl of chili, a hearty bowl of black bean soup, or a plate of smoky pulled pork. It also works beautifully as a side for grilled meats, roasted vegetables, or even a simple salad. For brunch, try it with scrambled eggs and avocado. Honestly, it goes with almost anything.
Storage Instructions: Store leftover cornbread in an airtight container at room temperature for up to 2 days, or in the refrigerator for up to 5 days. Wrap individual pieces in plastic wrap for easy grab-and-go snacks. The flavor actually gets better after a day—the chiles and cheese have time to meld together.
Freezing Tips: This cornbread freezes beautifully. Wrap cooled slices individually in plastic wrap, then place them in a freezer bag. They’ll keep for up to 3 months. To reheat, unwrap and microwave for 30-45 seconds, or pop in a 350°F oven for 10 minutes. The texture comes back almost perfectly.
Reheating Methods: For best results, reheat in a skillet with a little butter. The crust gets crispy again, and the cheese remelts. If you’re in a hurry, the microwave works fine, but the texture will be softer. I usually go with the skillet method—it’s worth the extra 3 minutes.
Flavor Development: Here’s something interesting—this cornbread actually tastes better the next day. The chile flavor deepens and the cheese distributes more evenly. I sometimes make it a day ahead on purpose. Just warm it up before serving and nobody will know it wasn’t freshly baked.
Nutritional Information & Benefits
While this Hatch green chili cheddar cornbread is definitely a comfort food, it does offer some nutritional benefits worth mentioning. Per serving (based on 9 servings), here’s the estimated breakdown:
- Calories: Approximately 320 per serving
- Protein: 9g (from eggs, cheese, and buttermilk)
- Fat: 18g (mostly from butter and cheese)
- Carbohydrates: 32g
- Fiber: 2g (from cornmeal and chiles)
- Calcium: 15% of daily value (thanks to the cheddar and buttermilk)
Health Benefits: Hatch green chiles are rich in vitamin C and capsaicin, which may support metabolism and reduce inflammation. Cornmeal provides complex carbohydrates for sustained energy. The buttermilk adds probiotics and calcium. It’s not health food, but it’s certainly not junk food either.
Dietary Considerations: This recipe contains gluten, dairy, and eggs. For gluten-free and dairy-free adaptations, see the variations section above. It’s naturally nut-free and soy-free. If you’re watching sodium, reduce the added salt to 1/2 teaspoon.
I personally love that this cornbread feels indulgent without being over-the-top. It’s the kind of food that satisfies deeply, so you don’t need a huge slice to feel content. One piece with a side of protein and vegetables makes a balanced, satisfying meal.
Conclusion
This Hatch green chili cheddar cornbread is more than just a recipe—it’s the one I reach for when I want to impress without stress, when I need comfort on a cold night, or when I just want to use up those chiles I bought on impulse. It’s forgiving enough for beginners and rewarding enough for experienced cooks.
I hope you’ll try it and make it your own. Add more cheese if that’s your thing. Throw in some bacon. Swap the cheddar for pepper jack. The beauty of this recipe is that it welcomes your creativity. The first time you pull a golden, bubbling pan from the oven and smell that smoky, cheesy aroma, you’ll understand why I keep coming back to it.
If you make this, I’d love to hear about it. Drop a comment below and tell me how it turned out, what variations you tried, or just share your favorite memory of cooking with Hatch chiles. And if you loved it, share it with a friend who needs a little comfort food in their life. Happy baking!
Frequently Asked Questions
Can I use canned Hatch chiles instead of roasted fresh ones?
Absolutely. Canned Hatch chiles work well in a pinch. Just drain them well and pat them dry with paper towels before adding to the batter. Extra moisture can make the cornbread soggy, so this step matters. The flavor won’t be quite as smoky as freshly roasted, but it’s still delicious.
Why did my cornbread turn out dry?
Dry cornbread usually means one of three things: too much cornmeal, overbaking, or not enough fat. Make sure you’re measuring your cornmeal correctly (spoon and level, don’t scoop). Check your oven temperature with a thermometer—it might be running hot. And don’t skip the butter; it’s essential for moisture.
Can I make this cornbread in a muffin tin?
Yes! Grease a 12-cup muffin tin and fill each cup about 2/3 full. Bake at 400°F for 15-18 minutes, until golden and a toothpick comes out clean. Muffins are great for parties, meal prep, or portion control. They also freeze beautifully.
How spicy is this cornbread?
It depends on the chiles you use. Mild Hatch chiles add warmth without heat, while hot varieties bring noticeable spice. If you’re sensitive to heat, remove all seeds and membranes from the chiles, or use a mix of mild and sweet peppers. The cheese actually helps balance the spice, so don’t skip it.
Can I make this cornbread ahead of time?
Absolutely. You can bake it a day ahead and reheat before serving. The flavor actually deepens overnight. Store it tightly wrapped at room temperature, then warm individual slices in a skillet with butter or in the oven at 350°F for 10 minutes. It tastes almost as good as fresh.
Pin This Recipe!
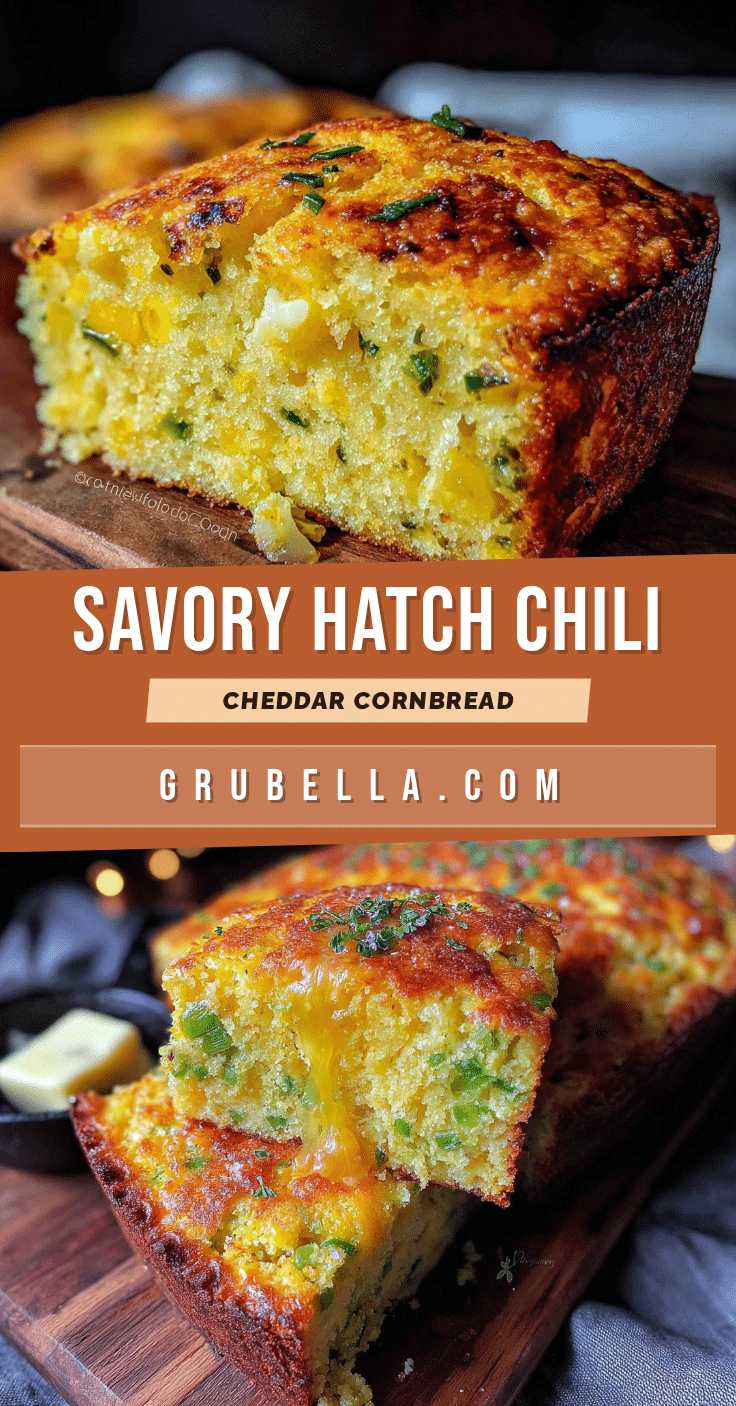
Best Hatch Green Chili Cheddar Cornbread Recipe

This moist, savory cornbread is packed with smoky roasted Hatch green chiles and sharp cheddar cheese. It’s the perfect side for chili, barbecue, or soup, and it’s so good you’ll want to make it year-round.
- Prep Time: 15 minutes
- Cook Time: 25 minutes
- Total Time: 40 minutes
- Yield: 9 servings 1x
- Category: Side Dish
- Cuisine: American (Southwestern)
Ingredients
- 1 cup yellow cornmeal
- 1 cup all-purpose flour
- 1 tablespoon baking powder
- 1 teaspoon fine sea salt
- 1/4 cup granulated sugar
- 1 cup buttermilk
- 2 large eggs, room temperature
- 1/2 cup unsalted butter, melted and slightly cooled
- 1 cup roasted Hatch green chiles, diced (seeds removed for less heat)
- 1 1/2 cups sharp cheddar cheese, shredded from a block
- 1/4 cup chopped fresh cilantro (optional)
Instructions
- Preheat your oven to 400°F (200°C). Place a 10-inch cast iron skillet or 9×9-inch baking dish in the oven while it preheats.
- In a large mixing bowl, whisk together 1 cup yellow cornmeal, 1 cup all-purpose flour, 1 tablespoon baking powder, 1 teaspoon salt, and 1/4 cup granulated sugar until no lumps remain.
- In a separate medium bowl, whisk together 1 cup buttermilk, 2 large eggs, and 1/2 cup melted unsalted butter until smooth and pale yellow.
- Pour the wet ingredients into the dry ingredients. Stir gently with a spatula until just combined. A few lumps are fine; do not overmix.
- Gently fold in 1 cup roasted Hatch green chiles, 1 1/2 cups shredded sharp cheddar cheese, and 1/4 cup chopped cilantro (if using) using a folding motion until evenly distributed.
- Carefully remove the hot skillet or baking dish from the oven. Add about 1 tablespoon of butter and swirl to coat the bottom and sides. Pour the batter into the hot pan and spread into an even layer.
- Bake for 20-25 minutes, or until the top is golden brown and a toothpick inserted in the center comes out clean. If the top browns too quickly, tent loosely with foil for the last 5 minutes.
- Let the cornbread cool in the pan for 10 minutes before slicing. Serve warm.
Notes
For a crispy crust, do not skip preheating the pan. Use room temperature ingredients to prevent butter from clumping. Let the cornbread rest for 10 minutes before slicing to prevent crumbling. For extra flavor, toast the cornmeal at 350°F for 5-7 minutes before using. Leftovers can be stored at room temperature for up to 2 days or refrigerated for up to 5 days. Freeze wrapped slices for up to 3 months.
Nutrition
- Serving Size: 1 slice (1/9 of reci
- Calories: 320
- Sugar: 6
- Sodium: 520
- Fat: 18
- Saturated Fat: 10
- Carbohydrates: 32
- Fiber: 2
- Protein: 9
Keywords: Hatch green chile cornbread, cheddar cornbread, green chili cornbread, southwestern cornbread, savory cornbread, Hatch chile recipe



