Love this? Save it for later!
Share the inspiration with your friends
You know that feeling when you volunteer for something and immediately regret it? That was me last September when my friend Maria texted the neighborhood group chat asking who could bring a “savory side” to her annual Hatch Chili Roast. The roast was in 48 hours, and I’d completely forgotten that Hatch season was even happening. Everyone else would be bringing their grandmother’s green chile enchiladas or slow-cooked pork posole. I had a bag of frozen Hatch chiles from last year’s trip to New Mexico and a box of cornmeal that was probably older than my relationship with my spouse.
Honestly, I panicked. I mean, you can’t show up to a Hatch Chili Roast with something boring. That’s practically a crime in some circles. I started scrolling through recipes, getting more stressed by the minute. Everything required soaking, simmering, or some kind of culinary magic I didn’t have time for. Then I remembered this skillet cornbread I used to make for Sunday dinners. It was simple, it was fast, and it was always gone before I could get a second piece. Maybe, just maybe, I could give it a Hatch makeover.
I threw in the roasted chiles, because obviously. Then I grabbed the block of sharp cheddar from the fridge—the good stuff, not the pre-shredded kind because that has anti-caking agents that mess with the texture. I figured, if I’m going to fail, I’m going to fail with lots of cheese. I mixed the batter, poured it into my trusty cast iron skillet, and slid it into the oven. The whole thing took maybe 15 minutes of active work. When it came out, golden brown and bubbling at the edges, I thought, “Okay, this looks decent.”
At the roast, my little cornbread skillet sat next to all those elaborate dishes. And you know what happened? It was the first thing to run out. People kept coming back for “just one more piece of that cornbread.” Maria asked for the recipe three times. I stood there, a little sheepish, holding my empty skillet, realizing I’d accidentally won the potluck with a recipe that took less effort than my morning coffee. It was a good lesson—sometimes the simple, honest dish wins over the complicated one. And that’s why I keep making this Hatch Chili Cheddar Cornbread Skillet. It reminds me that you don’t need a culinary degree or a full day in the kitchen to create something people genuinely love.
Why You’ll Love This Recipe
Let’s be real—finding a side dish that feels special but doesn’t require a ton of work is like finding a parking spot right in front of the grocery store. It feels like a small miracle. This Hatch Chili Cheddar Cornbread Skillet is exactly that kind of miracle. I’ve tested this recipe at least a dozen times, tweaking the ratios, trying different heat levels of chiles, and even testing it with a gluten-free flour blend for a friend. It’s been through the wringer, and it comes out perfect every single time.
- Quick & Easy: From start to finish, you’re looking at about 30 minutes. That’s less time than it takes to watch a sitcom. Perfect for those weeknights when you need something on the table fast, or for last-minute party invites.
- Simple Ingredients: You probably have 90% of these in your pantry right now. Cornmeal, flour, eggs, butter—it’s all standard stuff. The only special ingredient is the Hatch chiles, and I’ll tell you exactly where to find them or what to use instead.
- Perfect for Game Day or Potlucks: This isn’t just a side dish; it’s a conversation starter. The smoky heat from the chiles and the sharp cheddar make it a standout at any gathering. It’s also fantastic alongside a bowl of chili or a plate of BBQ.
- Crowd-Pleaser: I’ve served this to my spice-loving brother-in-law and my toddler niece who thinks black pepper is “too spicy.” Both of them asked for seconds. The heat is warm and flavorful, not punishing.
- Unbelievably Delicious: The texture is what gets me every time. The crust is crispy and buttery from the skillet, while the inside stays tender and moist. The pockets of melted cheese and the little flecks of green chile make every bite different.
What makes this recipe different from all the other cornbread recipes out there? It’s the technique of preheating the skillet with butter. That sizzle when you pour the batter in creates an instant, golden-brown crust that you just can’t get from a regular baking pan. It’s not just another cornbread—it’s the best version of savory cornbread you’ll ever make. This is the kind of recipe that makes you close your eyes after the first bite. It’s comfort food reimagined—hearty, cheesy, and just a little bit smoky.
What Ingredients You Will Need
This recipe uses simple, wholesome ingredients that work together to create a cornbread that’s anything but ordinary. Most of these are pantry staples, so you might not even need a grocery run. Here’s everything you’ll need, along with a few notes from my kitchen to yours.
- 1 cup yellow cornmeal (I prefer a medium-grind cornmeal for texture. Avoid the very fine “corn flour” as it can make the bread gummy.)
- 1 cup all-purpose flour (For structure. You can swap this with a 1:1 gluten-free baking flour if needed.)
- 1 tablespoon baking powder (Make sure it’s fresh! Old baking powder is the number one reason cornbread turns out flat.)
- 1 teaspoon salt (Kosher salt is best, but table salt works too. Just use a little less.)
- 1/2 teaspoon baking soda (Helps with browning, especially since we’re using buttermilk.)
- 1 cup buttermilk (Adds tang and tenderness. In a pinch, you can make your own by adding 1 tablespoon of lemon juice or vinegar to 1 cup of milk and letting it sit for 5 minutes.)
- 2 large eggs (Room temperature is ideal—they mix in more evenly. If you forget, just place them in a bowl of warm water for 5 minutes.)
- 1/4 cup unsalted butter, melted, plus 2 tablespoons for the skillet (The butter in the skillet is non-negotiable for that crispy crust. I use unsalted so I can control the salt level.)
- 1 cup sharp cheddar cheese, shredded (Shred it yourself from a block. Pre-shredded cheese has cellulose that stops it from melting smoothly. I recommend a good aged cheddar from brands like Tillamook or Cabot for the best flavor.)
- 1 cup roasted Hatch green chiles, chopped (These are the star of the show. Look for them in the frozen section of your grocery store during late summer and fall. You can also use canned Hatch chiles, but the flavor won’t be as bright. If you can’t find Hatch, Anaheim or Poblano peppers work well as substitutes.)
- 1/4 cup green onions, sliced (For a fresh, mild onion flavor. Reserve a tablespoon for garnish.)
- 1 tablespoon honey or sugar (Optional, but a tiny bit of sweetness balances the heat from the chiles. I usually add it because I like that sweet-savory combo.)
For the chiles, if you’re using fresh Hatch chiles, you’ll need to roast and peel them first. I usually do a big batch on the grill or under the broiler until the skin is blackened, then steam them in a bowl covered with plastic wrap for 10 minutes. The skins slip right off. It’s a bit of work, but the flavor is absolutely worth it. If you’re short on time, the frozen chopped Hatch chiles from brands like 505 Southwestern are a fantastic shortcut.
Equipment Needed
You don’t need a fancy kitchen to make this Hatch Chili Cheddar Cornbread Skillet, but having the right tools makes the process smoother. Here’s what you’ll need:
- 10-inch cast iron skillet: This is the heart of the recipe. The heavy pan holds heat like a champ, creating that perfect crispy crust. If you don’t have one, you can use a 9×9-inch baking dish, but the crust won’t be as crunchy. I’ve had my Lodge skillet for years, and it just gets better with age. They’re affordable and last forever.
- Mixing bowls: One large bowl for the dry ingredients and one medium bowl for the wet ingredients. I use glass or stainless steel.
- Whisk: For combining the dry ingredients and for mixing the wet ingredients. A fork works in a pinch.
- Rubber spatula: For folding the cheese and chiles into the batter without overmixing. Overmixing makes cornbread tough.
- Measuring cups and spoons: Precision matters in baking, even for cornbread. Use the “dip and sweep” method for dry ingredients.
- Oven mitts: The skillet handle gets extremely hot. Trust me on this one—I’ve burned my hand more times than I’d like to admit.
- Cooling rack: Letting the cornbread cool for a few minutes in the skillet before serving helps it set and makes it easier to slice.
If you don’t have a cast iron skillet, don’t run out and buy one just for this recipe. You can use a regular 9-inch round cake pan or an 8×8-inch square baking dish. Just note that the baking time might be a couple of minutes shorter, and you’ll miss out on that signature crispy edge. It will still be delicious.
Preparation Method
Alright, let’s get cooking. This recipe moves fast, so I like to have everything measured out and ready to go before I turn on the oven. It makes the whole process feel effortless.
- Preheat your oven to 400°F (200°C). Place your 10-inch cast iron skillet inside the oven while it preheats. This is a crucial step—the skillet needs to be screaming hot when the batter hits it. Don’t skip this!
- In a large mixing bowl, whisk together the dry ingredients: 1 cup yellow cornmeal, 1 cup all-purpose flour, 1 tablespoon baking powder, 1 teaspoon salt, and 1/2 teaspoon baking soda. Whisk them well to make sure the baking powder and soda are evenly distributed. If you skip this, you might get a bitter pocket of baking powder in your first bite—not fun.
- In a separate medium bowl, whisk together the wet ingredients: 1 cup buttermilk, 2 large eggs, and 1/4 cup melted unsalted butter. Whisk until the eggs are fully incorporated and the mixture is smooth. It should look pale and slightly frothy.
- Pour the wet ingredients into the dry ingredients. Use a rubber spatula to stir them together gently. Stir just until the flour disappears. A few small lumps are totally fine—overmixing will make the cornbread tough and dense. Think of it like making pancakes; you want to be gentle.
- Fold in the add-ins: Add 1 cup of your shredded sharp cheddar cheese, 1 cup of chopped roasted Hatch chiles, and 1/4 cup of sliced green onions (save a little for the top). If you’re using the honey or sugar, add it now. Fold everything together with the spatula until it’s just combined. The batter will be thick and slightly chunky from the cheese and chiles.
- Carefully remove the hot skillet from the oven. Place it on a heat-safe surface. Add the remaining 2 tablespoons of butter to the skillet. It will immediately sizzle and melt. Swirl the skillet to coat the bottom and sides completely with the melted butter. This is where the magic happens.
- Pour the batter into the hot skillet. It should sizzle when it hits the butter—that’s the sound of a great crust forming. Use the spatula to spread the batter evenly to the edges. It will be thick, so just nudge it into place.
- Sprinkle the remaining cheese and green onions on top. I like to add a little extra cheese on top for a golden, bubbly crust. It makes it look gorgeous.
- Bake for 20-25 minutes. Start checking at 20 minutes. The cornbread is done when the top is golden brown and a toothpick inserted into the center comes out clean or with just a few moist crumbs. The edges should be pulling away from the skillet slightly. If the top is browning too fast but the center isn’t done, tent the skillet loosely with foil for the last 5 minutes.
- Let it cool in the skillet for 5-10 minutes. This is important for the structure. If you try to cut it immediately, it will crumble. After it rests, slice it into wedges and serve it warm directly from the skillet. That’s the best way to enjoy it!
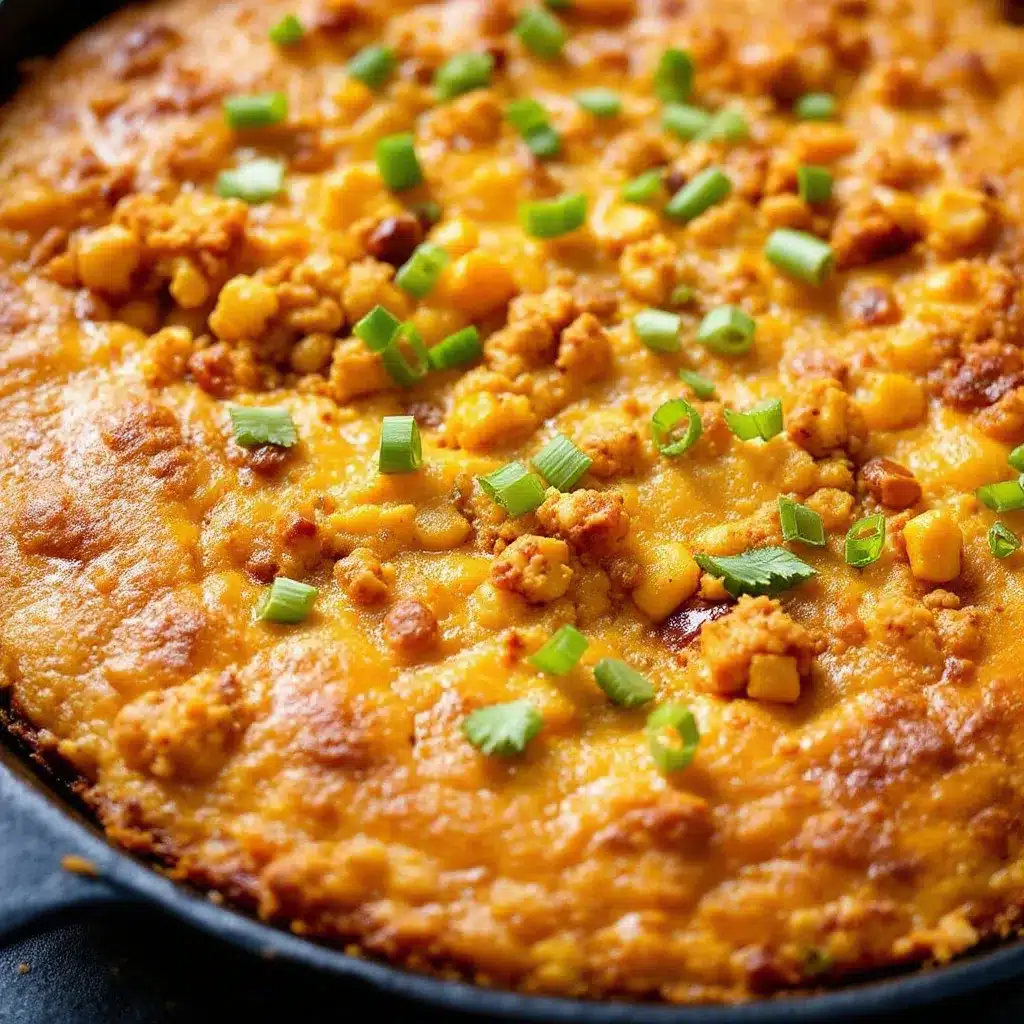
A quick sensory check: when it’s done, your kitchen will smell like toasted corn, melted cheese, and a hint of smoky chile. The top will be a deep golden brown, and you’ll see little bubbles of cheese peeking through. The edges will be darker and crispier than the center—that’s the prize piece.
Cooking Tips & Techniques
Over the years, I’ve made this cornbread at least twenty times, and I’ve learned a few things the hard way. Here are my best tips to make sure yours turns out perfect every time.
Don’t skip preheating the skillet. This is the single most important tip. I once tried to save time by not preheating the skillet, thinking the butter would just melt in the oven anyway. The result was a cornbread with a soggy, pale bottom. The hot butter creates an instant seal that fries the bottom of the batter, giving you that irresistible crunchy crust. It’s worth the extra 10 minutes of oven time.
Watch your heat level with the chiles. Hatch chiles come in different heat levels, from mild (which is perfect for most people) to hot (which will clear your sinuses). If you’re unsure, start with mild. You can always add more heat next time. I once used a mix of mild and hot without thinking, and the cornbread was too spicy for my kids. Now I stick to mild or medium for family dinners and save the hot for when it’s just adults.
Shred your own cheese. I know it’s tempting to buy the bag of pre-shredded cheddar, but it’s coated in potato starch or cellulose to prevent clumping. That coating stops the cheese from melting smoothly into the batter. You end up with little pockets of unmelted cheese instead of gooey, stretchy goodness. A block of sharp cheddar takes two minutes to shred, and the difference is massive.
Let the batter rest. After you mix the wet and dry ingredients, let the batter sit for about 5 minutes before pouring it into the skillet. This gives the cornmeal time to absorb some of the liquid, which results in a more tender crumb. I usually do this while I’m waiting for the skillet to heat up.
Use a toothpick to check for doneness. Ovens vary wildly. My old oven used to run hot, and I’d burn the bottom of my cornbread before the top was even brown. Now I always start checking at the 20-minute mark. Insert a toothpick into the center—if it comes out clean, it’s done. If there’s wet batter on it, give it another 3-5 minutes.
Multitasking tip: While the cornbread is baking, you can prep the rest of your meal. It’s perfect for making alongside a pot of chili or some grilled sausages. The 25-minute bake time is just enough to get everything else ready.
Variations & Adaptations
One of the best things about this Hatch Chili Cheddar Cornbread Skillet is how easy it is to adapt. I’ve tried several variations over the years, and they’ve all been delicious in their own way. Here are a few of my favorites.
Spicy Jalapeño & Corn Version: For an extra kick, add 1/2 cup of fresh or frozen corn kernels and 1-2 finely diced jalapeños (seeds removed for less heat). The sweet pop of corn pairs beautifully with the smoky chiles and sharp cheddar. I made this version for a Fourth of July barbecue, and it was a huge hit. The corn adds a nice texture contrast.
Southwest Black Bean & Cilantro Twist: Make it a heartier dish by folding in 1/2 cup of drained and rinsed black beans and 1/4 cup of chopped fresh cilantro. This turns the cornbread into more of a meal on its own. I’ve served this with a dollop of sour cream and a side salad for a quick weeknight dinner. It’s also fantastic crumbled over a bowl of chili.
Dairy-Free Adaptation: You can make this without dairy if needed. Use a plant-based buttermilk (like almond milk with a splash of vinegar) and a dairy-free butter substitute for the skillet. For the cheese, use a good quality vegan cheddar shreds. The texture will be slightly different—a bit more tender and less crispy on the edges—but the flavor is still great. I tested this for a friend who is lactose intolerant, and she said it was the best cornbread she’d had in years.
Sweet & Savory Maple Bacon Version: This is a little indulgent, but oh my goodness. Cook 4 slices of bacon until crispy, then crumble them. Reduce the Hatch chiles to 1/2 cup and add 2 tablespoons of maple syrup to the batter. Sprinkle the bacon on top along with the cheese before baking. The salty, smoky, sweet combo is absolutely divine. I made this for a brunch potluck, and it disappeared in minutes.
Muffin Tin Option: If you don’t have a skillet or want individual servings, this batter works beautifully as muffins. Grease a 12-cup muffin tin and fill each cup about 2/3 full. Bake at 400°F for 12-15 minutes, or until golden and a toothpick comes out clean. They’re perfect for lunchboxes or picnics.
Serving & Storage Suggestions
This cornbread is best served warm, straight from the skillet. The contrast between the warm, tender center and the crispy, buttery edges is at its peak within the first 20 minutes out of the oven. I like to serve it in wedges, right at the table, with a pat of butter melting on top. It’s rustic and inviting.
What to serve with it: This cornbread is a natural partner for chili, whether it’s a classic beef chili, white chicken chili, or a vegetarian version. It’s also fantastic alongside a bowl of hearty soup, like tortilla soup or black bean soup. For a barbecue spread, it pairs perfectly with pulled pork, smoked brisket, or grilled sausages. For breakfast, try it with scrambled eggs and a side of refried beans—trust me, it’s a game-changer.
Beverage pairings: A cold beer, like a Mexican lager or a pale ale, cuts through the richness perfectly. For non-alcoholic options, a tart limeade or a spicy ginger beer is wonderful. If you’re serving it for brunch, a spicy Bloody Mary is a classic choice.
Storing leftovers: If you have any left (which is rare in my house), let the cornbread cool completely in the skillet. Then cover the skillet tightly with foil or transfer the wedges to an airtight container. It will keep in the refrigerator for up to 4 days. The texture will soften slightly, but it’s still delicious.
Reheating: The best way to reheat is in a 350°F oven for about 10 minutes. This helps restore some of the crispiness to the crust. You can also microwave individual slices for 20-30 seconds, but the texture will be softer. For a quick fix, I toast slices in a dry skillet over medium heat for a minute on each side—it works surprisingly well.
Freezing: This cornbread freezes beautifully. Wrap individual wedges tightly in plastic wrap, then place them in a freezer bag. They’ll keep for up to 3 months. To thaw, let them sit at room temperature for an hour, then reheat in the oven or toaster oven. The flavors actually meld together even more after freezing, so it’s a great make-ahead option for holidays or parties.
One thing I’ve noticed is that the flavors develop overnight. The second day, the chile and cheese flavors seem to blend together more harmoniously. So if you can resist eating it all the first day, it’s even better the next.
Nutritional Information & Benefits
While this Hatch Chili Cheddar Cornbread Skillet is definitely a comfort food, it does have some surprising nutritional benefits, especially compared to a standard sweet cornbread. Here’s a rough estimate per serving (based on 8 servings):
| Nutrient | Amount per Serving |
|---|---|
| Calories | ~310 |
| Total Fat | 16g |
| Saturated Fat | 9g |
| Cholesterol | 75mg |
| Sodium | 580mg |
| Total Carbohydrates | 32g |
| Dietary Fiber | 3g |
| Sugars | 4g |
| Protein | 10g |
| Calcium | 200mg (15% DV) |
| Iron | 2mg (10% DV) |
The Hatch chiles themselves are a great source of vitamin C and vitamin A. They also contain capsaicin, which has anti-inflammatory properties and can help boost metabolism. The sharp cheddar cheese adds a good amount of calcium and protein, making this cornbread more satisfying than a plain version. The cornmeal provides fiber and complex carbohydrates for sustained energy.
If you’re watching your sodium intake, you can reduce the added salt to 1/2 teaspoon and use a low-sodium cheese. For a lower-fat option, you can use a reduced-fat cheddar and replace half the butter with applesauce, though the texture will be less rich. This recipe is naturally nut-free and can be made gluten-free with a simple flour swap. It’s not suitable for a dairy-free diet without the adaptations I mentioned earlier.
From a wellness perspective, I love that this recipe feels indulgent but uses whole-food ingredients. It’s the kind of dish that nourishes you while also making you feel good about what you’re eating. It’s comfort food that doesn’t leave you feeling heavy or guilty.
Conclusion
This Hatch Chili Cheddar Cornbread Skillet is more than just a side dish—it’s a little piece of New Mexico sunshine that you can bring to your table any time of year. It’s the recipe that won me a neighborhood potluck, the one that gets requested at every family gathering, and the one I turn to when I need something delicious, fast, and foolproof.
I love this recipe because it’s forgiving. It doesn’t care if your chiles are frozen or fresh, if your cheese is extra sharp or mild, or if you add a little extra green onion because you got carried away. It just works. And it works beautifully. The combination of smoky chiles, sharp cheddar, and that buttery, crispy crust is something you’ll crave again and again.
So go ahead and make it your own. Add more cheese, throw in some corn, or drizzle honey on top if that’s your thing. The beauty of a great recipe is that it’s a starting point, not a rulebook. I’d love to hear how yours turns out. Did you try a variation? Did you serve it with something amazing? Drop a comment below and tell me all about it. And if you loved it as much as I do, share it with a friend who needs a little comfort food in their life. Happy cooking!
Frequently Asked Questions
Can I use canned Hatch chiles instead of frozen or fresh?
Yes, you can use canned Hatch chiles. They are already roasted and peeled, so they’re very convenient. Just drain them well before chopping to remove excess liquid. The flavor will be slightly milder and less smoky than fresh or frozen roasted chiles, but the cornbread will still be delicious.
Why did my cornbread turn out dry?
Dry cornbread is usually a result of overbaking or overmixing the batter. Check your oven temperature with an oven thermometer to make sure it’s accurate. Also, be careful not to bake it longer than 25 minutes. Finally, make sure you’re measuring your flour and cornmeal correctly—use the spoon-and-level method instead of scooping directly from the bag.
Can I make this cornbread ahead of time?
Absolutely! You can bake the cornbread a day in advance. Let it cool completely, then cover it tightly and store it at room temperature. Reheat it in a 350°F oven for 10-15 minutes before serving to restore some of the crispiness. You can also freeze it for up to 3 months.
What if I can’t find Hatch chiles at my grocery store?
Don’t worry—you have options. Anaheim chiles are the closest substitute and are widely available. Poblano peppers also work well, though they are a bit milder. If you want more heat, you can use a combination of Anaheim and a small jalapeño. Canned green chiles (like Ortega) are another easy substitute, though they won’t have the same depth of flavor.
Can I make this recipe gluten-free?
Yes! Simply replace the all-purpose flour with a good quality 1:1 gluten-free baking flour blend that contains xanthan gum. I’ve tested this with King Arthur Measure for Measure and Bob’s Red Mill Gluten Free 1-to-1 Baking Flour, and both worked perfectly. The texture will be slightly more tender, but the flavor and crust will be just as good.
Pin This Recipe!
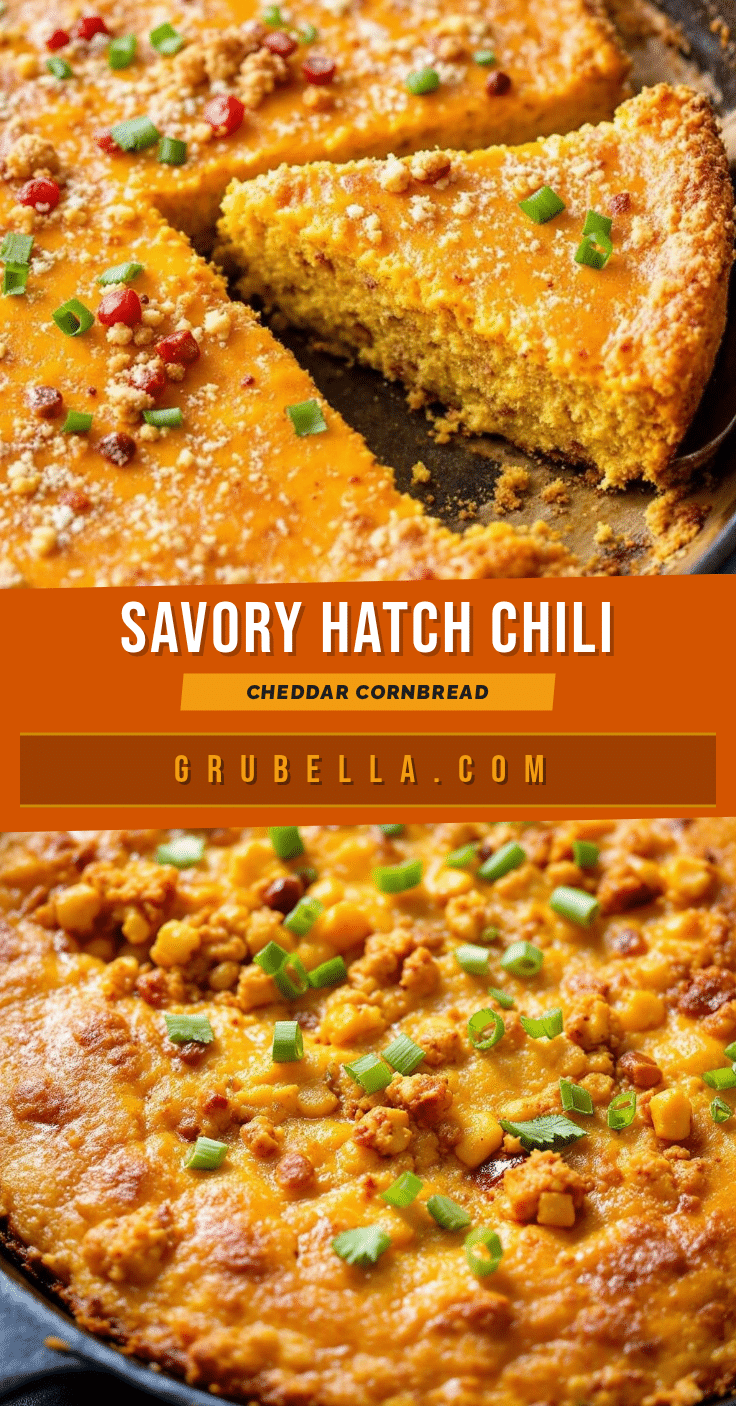
Best Easy Hatch Chili Cheddar Cornbread Skillet Recipe

A quick and easy savory cornbread skillet loaded with roasted Hatch green chiles and sharp cheddar cheese, featuring a crispy, buttery crust. Perfect for potlucks, game day, or as a side for chili and BBQ.
- Prep Time: 15 minutes
- Cook Time: 25 minutes
- Total Time: 40 minutes
- Yield: 8 servings 1x
- Category: Side Dish
- Cuisine: Southwestern
Ingredients
- 1 cup yellow cornmeal (medium-grind)
- 1 cup all-purpose flour
- 1 tablespoon baking powder
- 1 teaspoon salt (kosher preferred)
- 1/2 teaspoon baking soda
- 1 cup buttermilk
- 2 large eggs (room temperature)
- 1/4 cup unsalted butter, melted, plus 2 tablespoons for the skillet
- 1 cup sharp cheddar cheese, shredded (from a block)
- 1 cup roasted Hatch green chiles, chopped
- 1/4 cup green onions, sliced (plus extra for garnish)
- 1 tablespoon honey or sugar (optional)
Instructions
- Preheat oven to 400°F (200°C). Place a 10-inch cast iron skillet inside the oven to preheat.
- In a large bowl, whisk together cornmeal, flour, baking powder, salt, and baking soda.
- In a separate medium bowl, whisk together buttermilk, eggs, and 1/4 cup melted butter until smooth.
- Pour wet ingredients into dry ingredients and stir gently with a rubber spatula until just combined (a few lumps are fine).
- Fold in shredded cheddar, chopped Hatch chiles, sliced green onions, and honey/sugar (if using) until just combined.
- Carefully remove hot skillet from oven. Add remaining 2 tablespoons butter; swirl to coat bottom and sides.
- Pour batter into hot skillet; spread evenly. Sprinkle reserved cheese and green onions on top.
- Bake for 20-25 minutes, until golden brown and a toothpick inserted in center comes out clean.
- Let cool in skillet for 5-10 minutes before slicing into wedges. Serve warm.
Notes
Preheating the skillet with butter is essential for a crispy crust. Shred cheese from a block for best melting. Let batter rest 5 minutes before baking for a tender crumb. For gluten-free, use a 1:1 gluten-free flour blend. For dairy-free, use plant-based buttermilk, dairy-free butter, and vegan cheddar.
Nutrition
- Serving Size: 1 wedge (1/8 of skil
- Calories: 310
- Sugar: 4
- Sodium: 580
- Fat: 16
- Saturated Fat: 9
- Carbohydrates: 32
- Fiber: 3
- Protein: 10
Keywords: Hatch chili cornbread, cheddar cornbread, skillet cornbread, green chile cornbread, easy cornbread recipe, savory cornbread, potluck side dish



