Love this? Save it for later!
Share the inspiration with your friends
Dropped the bag of chocolate chips on the floor at 9 PM the night before my kid’s Halloween class party. Of course I did. The dog swooped in before I could even curse, and suddenly I’m standing in a puddle of semi-sweet chaos with zero backup plan and a rapidly shrinking window of time. The store was closed. The pantry looked sad. And then my eyes landed on the jar of peanut butter sitting next to the leftover Halloween candy we’d bought “just in case.”
That’s how this Easy Spiderweb Chocolate Peanut Butter Bark was born — out of pure desperation and a stubborn refusal to show up empty-handed. I grabbed a baking sheet, melted what I could salvage, and started swirling peanut butter into chocolate like I knew what I was doing. Honestly? I was just trying not to cry over spilled chocolate chips.
But here’s the thing — that accidental mess turned into the most popular treat at the party. Parents asked for the recipe. Kids asked for seconds. And I stood there grinning, knowing full well this whole thing started with a dog licking chocolate off the kitchen floor. This bark is crunchy, creamy, salty-sweet, and stupidly easy to make. No oven required. No fancy skills. Just chocolate, peanut butter, and a little bit of Halloween magic.
Why You’ll Love This Recipe
Let me tell you why this Easy Spiderweb Chocolate Peanut Butter Bark has become my go-to for every Halloween gathering. I’ve tested this recipe at four different parties now, and it never fails to get that “wait, you made this?” reaction.
- No Baking Required : You don’t even turn on the oven. This is a set-it-and-forget-it situation that takes about 10 minutes of active work.
- Pantry Staples Only : Chocolate chips, peanut butter, and maybe some candy eyes if you’re feeling fancy. That’s literally it.
- Perfect for Halloween Parties : Whether it’s a classroom celebration, a trunk-or-treat event, or just a spooky movie night, this bark fits right in.
- Kid-Friendly to Make : My six-year-old helped swirl the peanut butter web. Messy? Yes. Fun? Absolutely.
- Stores Like a Dream : Make it three days ahead and it still tastes perfect. I’ve tested this extensively, obviously.
What makes this version different from other chocolate bark recipes you’ll find? It’s the technique. Most recipes just drizzle peanut butter on top and call it a day. But I figured out that gently swirling the peanut butter while the chocolate is still warm creates those delicate, web-like strands that actually look like a spiderweb. Not a blob. Not a mess. An actual web. I learned this after three failed attempts where my peanut butter just sank into the chocolate like it was giving up on life.
This recipe is the kind that makes you close your eyes after the first bite. The chocolate snaps cleanly, the peanut butter adds that creamy, salty punch, and the whole thing feels way more impressive than it has any right to be. It’s Halloween comfort food — spooky enough to impress, easy enough to actually enjoy making.
What Ingredients You Will Need
This recipe keeps things simple. You probably have most of these ingredients in your kitchen right now, which is exactly how I like my last-minute recipes to work. Here’s what you’ll need and why each ingredient matters:
For the Chocolate Base:
- 12 ounces semi-sweet chocolate chips (I prefer Ghirardelli or Guittard for that smooth melt and clean snap when it sets — cheaper brands sometimes get grainy)
- 1 tablespoon coconut oil or vegetable shortening (this helps the chocolate set with a shiny finish and makes it easier to cut without shattering everywhere)
For the Peanut Butter Web:
- 1/3 cup creamy peanut butter (use the standard processed kind like Jif or Skippy — natural peanut butter separates and won’t give you that smooth swirl texture)
- 2 tablespoons powdered sugar (optional but recommended — it stabilizes the peanut butter so it doesn’t sink into the chocolate)
For Decoration (Optional but Fun):
- Candy eyeballs (I found a bag at the dollar store — they last forever and make everything instantly Halloween-ready)
- Flaky sea salt (trust me on this one — the salty crunch against sweet chocolate is chef’s kiss)
- Orange and black sprinkles (if you want to get festive without the creepy factor)
A quick note on chocolate selection — I’ve tested this with milk chocolate, dark chocolate, and even white chocolate. Semi-sweet hits the sweet spot because it’s not too sweet against the salty peanut butter. If you only have dark chocolate on hand, add a tablespoon of honey to the melted chocolate to balance the bitterness. And if you’re dairy-free? Most semi-sweet chocolate chips are naturally dairy-free, but check the label to be sure.
For the peanut butter, please don’t use the natural stuff that sits with oil on top. I learned this the hard way when my first batch turned into a greasy mess. The stabilizers in processed peanut butter help it hold its shape when you swirl it into warm chocolate. Your bark will thank you.
Equipment Needed
You don’t need much for this recipe, which is honestly my favorite part. Here’s what you’ll need:
- Baking sheet (a standard half-sheet pan works perfectly — line it with parchment paper so the bark releases easily)
- Parchment paper (non-negotiable — wax paper will melt and foil will stick)
- Medium microwave-safe bowl (or a double boiler if you’re feeling traditional)
- Spatula (for spreading the chocolate evenly)
- Toothpick or skewer (this is your web-drawing tool — a chopstick works too)
- Small piping bag or zip-top bag (for the peanut butter mixture)
- Sharp knife (for cutting the bark cleanly once it’s set)
If you don’t have a microwave, you can melt the chocolate using a double boiler. Just put a heatproof bowl over a pot of simmering water — make sure the bottom of the bowl doesn’t touch the water. I’ve done it both ways, and honestly, the microwave is faster with less cleanup.
One tip I wish someone had told me earlier — use a metal baking sheet instead of a glass dish. Metal conducts cold better, so your bark sets faster in the fridge. Glass takes forever and you’ll be standing there checking it every five minutes like a impatient kid on Christmas morning.
Preparation Method
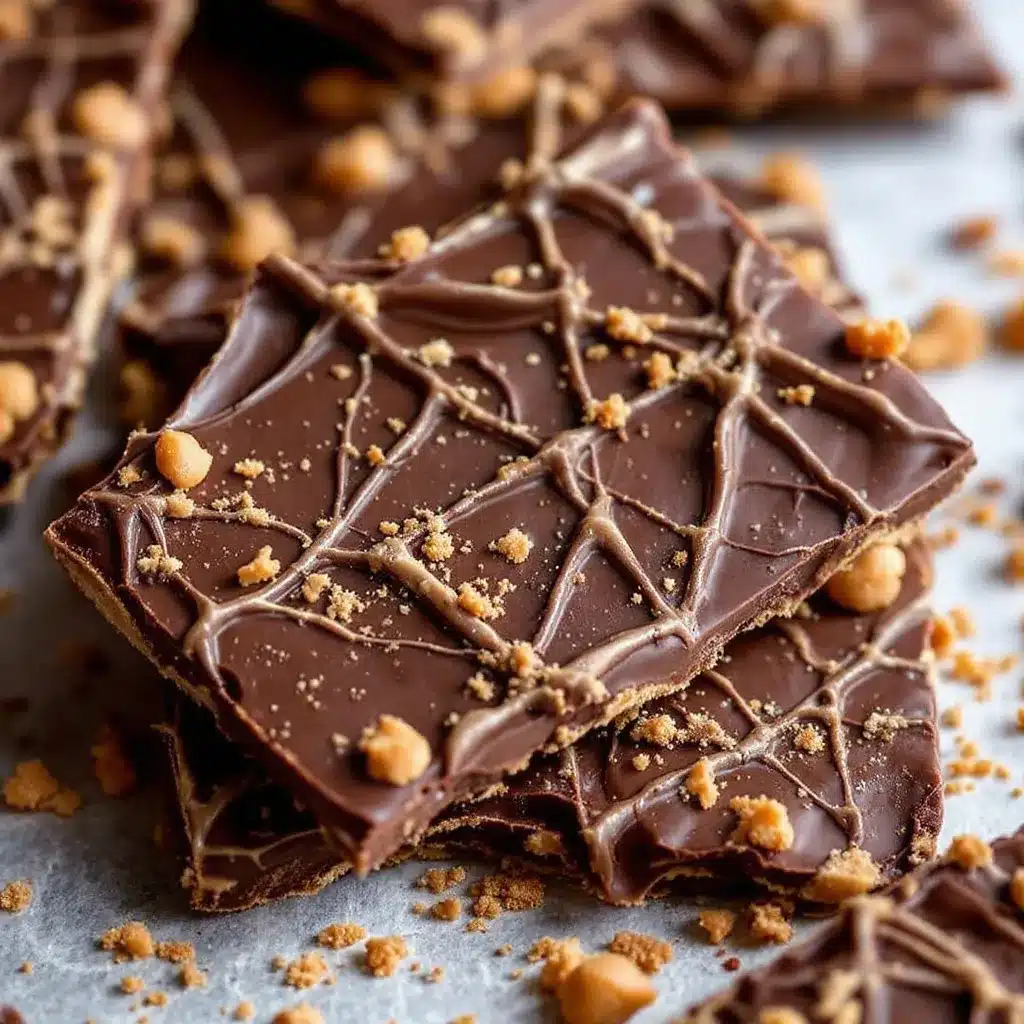
Okay, let’s make this Easy Spiderweb Chocolate Peanut Butter Bark happen. I’ve broken this down so clearly that even my disaster-prone self can pull it off without drama.
- Line your baking sheet with parchment paper. Make sure the paper extends up the sides a little — this gives you handles to lift the bark out later. Set the sheet aside.
- Melt the chocolate chips with the coconut oil in a microwave-safe bowl. Microwave in 30-second intervals, stirring thoroughly between each round. It usually takes me about 90 seconds total. Stop when most of the chips are melted and stir until the residual heat finishes the job. Do NOT overheat — burnt chocolate is a tragedy I’ve experienced too many times.
- Pour the melted chocolate onto your prepared baking sheet. Use your spatula to spread it into an even rectangle, about 1/4 inch thick. Don’t stress about perfect edges — rustic bark looks more homemade anyway. Aim for roughly a 9×13 inch rectangle.
- While the chocolate is still warm (this is crucial — if it cools too much, the peanut butter won’t swirl properly), prepare your peanut butter mixture. In a small bowl, stir together the peanut butter and powdered sugar until smooth. The powdered sugar thickens it just enough to hold its shape.
- Transfer the peanut butter mixture to a small piping bag or a zip-top bag with the corner snipped off. Pipe concentric circles of peanut butter over the chocolate — start in the center and work your way outward, leaving about an inch between each circle. Don’t overthink this. Imperfect circles look more like a real spiderweb anyway.
- Here’s where the magic happens. Take your toothpick or skewer and drag it from the center of the chocolate outward, through all the peanut butter circles, like you’re drawing spokes on a wheel. Space these lines about an inch apart all the way around. Then — and this is my secret trick — drag the toothpick in the opposite direction between each spoke to create those delicate webbed connections. You’ll see the web pattern emerge immediately.
- While the chocolate is still tacky, press in your candy eyeballs and sprinkle with flaky sea salt if you’re using it. Don’t wait until the chocolate sets or nothing will stick.
- Place the baking sheet in the refrigerator for at least 30 minutes, or until the chocolate is completely firm and set. If you’re in a hurry (and let’s be honest, when aren’t we?), the freezer works in 15 minutes.
- Once set, lift the parchment paper to remove the bark from the sheet. Place it on a cutting board and use a sharp knife to break or cut it into irregular pieces. I like keeping some pieces large and some smaller — it looks more organic that way.
- Store in an airtight container in the refrigerator until you’re ready to serve. The bark keeps beautifully for up to two weeks — if it lasts that long.
A few sensory cues to watch for — the chocolate should look glossy and smooth when you spread it, not dull or grainy. When you drag your toothpick through the peanut butter circles, you should see clean lines where the dark chocolate shows through. If the peanut butter just smears instead of parting, your chocolate has cooled too much. Pop the sheet in the microwave for 10 seconds to warm it slightly and try again.
Cooking Tips & Techniques
I’ve made this Easy Spiderweb Chocolate Peanut Butter Bark at least a dozen times now, and I’ve collected some hard-won wisdom along the way. Let me save you from my mistakes.
The temperature game is real. Chocolate that’s too hot will melt the peanut butter into a brown puddle. Chocolate that’s too cool won’t let the peanut butter swirl at all. The sweet spot is when the chocolate is still warm to the touch but not hot — think warm bath water, not hot coffee. I usually wait about 2 minutes after spreading before I start piping the peanut butter.
Don’t skip the powdered sugar in the peanut butter. I know it seems like an extra step, but it’s the difference between a defined web and a muddy mess. The sugar absorbs excess oil and gives the peanut butter enough body to sit on top of the chocolate instead of sinking in. I tried skipping it once because I was out of powdered sugar. Once. Never again.
Work in a cool room. If your kitchen is hot and humid, your chocolate will take forever to set and might bloom (those white streaks that look like mold but are actually just fat crystals). I learned this the hard way when I made this recipe during a heatwave and ended up with streaky, soft bark that refused to snap. Save yourself the frustration and make this on a cool day or in an air-conditioned space.
For the cleanest cuts, let the bark come to room temperature for about 5 minutes before cutting. Cold chocolate shatters. Room-temp chocolate cuts cleanly. I use a sharp chef’s knife and cut with a firm, straight-down motion — no sawing back and forth.
Multitasking tip: While the chocolate is setting in the fridge, clean your dishes. The chocolate residue wipes off easily when it’s still wet but becomes a sticky nightmare once dry. Future you will be grateful.
Variations & Adaptations
This recipe is endlessly adaptable, which is why I keep coming back to it. Here are some variations I’ve tried and loved:
Peanut-Free Version: Swap the peanut butter for sunflower seed butter or cookie butter (speculoos). Sunflower butter works exactly the same way — just add the powdered sugar and swirl as directed. Cookie butter makes a slightly thinner swirl but tastes incredible with chocolate.
White Chocolate Spiderweb: Use white chocolate chips instead of semi-sweet and swirl with dark chocolate or melted caramel. The contrast is stunning — a white web on dark chocolate or vice versa. I made this for a friend’s Halloween party and it looked like something from a fancy bakery.
Spicy-Sweet Version: Add a pinch of cayenne pepper and cinnamon to the melted chocolate before spreading. The heat sneaks up on you after the sweetness, and it’s surprisingly addictive. My husband calls these “danger bars” because you can’t eat just one.
Crunchy Texture: Sprinkle crushed pretzels or toasted peanuts over the chocolate before it sets, then pipe your web on top. The salty crunch against the smooth chocolate is incredible. I did this for a Halloween movie night and the bowl was empty before the first scary scene.
Halloween Candy Bark: Chop up leftover Halloween candy bars (Reese’s cups, Kit Kats, Snickers) and press them into the chocolate before it sets. It’s ridiculous and over-the-top and absolutely perfect for Halloween parties.
If you love easy no-bake treats, you should definitely try my fudgy protein-packed peanut butter oat bars — they use similar ingredients and are perfect for when you want something sweet but slightly more substantial.
Serving & Storage Suggestions
This Easy Spiderweb Chocolate Peanut Butter Bark is best served cold or at room temperature, depending on your preference. I personally love it straight from the fridge — the snap is more satisfying and the chocolate stays firm. If you’re serving it at a party, arrange the pieces on a platter and let them sit out for about 10 minutes before serving. That brief rest takes the chill off without making the bark soft.
What to serve with it: This bark pairs beautifully with a hot cup of coffee or a cold glass of milk. For Halloween parties, I love setting it out next to a bowl of candy corn popcorn Halloween party mix for a sweet-and-salty snack spread that covers all the bases.
Storage instructions: Keep the bark in an airtight container in the refrigerator for up to two weeks. Layer pieces between sheets of parchment paper so they don’t stick together. If you live in a humid climate (I feel your pain), the fridge is non-negotiable — your bark will soften at room temperature within a few hours.
Freezer instructions: This bark freezes beautifully for up to three months. Place the pieces in a single layer on a baking sheet and freeze until solid, then transfer to a freezer-safe bag or container. To serve, let them thaw in the refrigerator for about 30 minutes. I always keep a stash in my freezer for unexpected guests or last-minute Halloween cravings.
Flavor development note: This bark actually tastes better after a day or two in the fridge. The flavors meld together, and the chocolate develops that perfect snap. So if you’re planning ahead, make this a day or two before you need it. Your future self will be thrilled.
Nutritional Information & Benefits
Let’s be real — this is a treat, not a health food. But here’s the estimated nutritional breakdown per serving (based on 12 pieces):
- Calories: Approximately 220 per piece
- Fat: 14g (mostly from chocolate and peanut butter)
- Carbohydrates: 22g
- Protein: 5g
- Sugar: 16g
- Fiber: 2g
Potential allergens: This recipe contains peanuts (unless you use a substitute) and dairy (unless you use dairy-free chocolate). It’s naturally gluten-free as long as your chocolate chips are certified gluten-free — most are, but always check the label.
Health perspective: Dark chocolate actually has some antioxidant benefits, and peanut butter provides protein and healthy fats. Is it a superfood? Absolutely not. But as far as Halloween treats go, this one has slightly more redeeming qualities than a bag of artificially colored candy corn. I feel good about serving this to my kids because I know exactly what’s in it — no preservatives, no weird additives, just real ingredients.
If you’re looking for a slightly healthier peanut butter fix, my easy no-bake peanut butter protein balls are perfect for when you want something sweet but need more protein to keep you going.
Conclusion
This Easy Spiderweb Chocolate Peanut Butter Bark is proof that the best recipes come from happy accidents. That night I spilled chocolate chips on the floor could have ended with me ordering pizza and showing up to the party empty-handed. Instead, it turned into a Halloween tradition that my family now requests every single year.
What I love most about this recipe is how forgiving it is. You don’t need to be a pastry chef to make a beautiful spiderweb. You don’t need special equipment or rare ingredients. You just need chocolate, peanut butter, and the willingness to try something that looks way harder than it actually is. That’s my favorite kind of recipe — the one that makes you look like a kitchen wizard when really you just melted some chocolate and drew lines with a toothpick.
I’d love to hear how your spiderweb turns out. Did you add candy eyes? Did you try the white chocolate version? Did your kids help with the swirling? Drop a comment below and let me know — I read every single one and I love seeing your creations. And if you’re looking for more Halloween inspiration, check out my mummy hot dog bites and spiderweb Halloween cookie cake for a full spooky spread.
Happy Halloween, friends. May your chocolate stay melted and your spiderwebs stay spooky.
Frequently Asked Questions
Can I use milk chocolate instead of semi-sweet?
Absolutely. Milk chocolate will make a sweeter, creamier bark. Just keep in mind that milk chocolate is softer than semi-sweet, so the bark might not snap as cleanly. If you go this route, add an extra tablespoon of coconut oil to help it set firmly.
Why did my peanut butter sink into the chocolate?
This usually happens for two reasons — either your chocolate was too hot when you added the peanut butter, or you didn’t add powdered sugar to stabilize the peanut butter. Let your chocolate cool for 2-3 minutes after melting, and always mix in that tablespoon of powdered sugar. It makes a huge difference.
Can I make this vegan?
Yes! Use dairy-free chocolate chips (most semi-sweet chips are naturally dairy-free, but check the label) and a vegan butter substitute for the peanut butter swirl. The rest of the ingredients are already plant-based. I’ve made this for vegan friends and they couldn’t tell the difference.
How far in advance can I make this bark?
You can make this up to two weeks ahead and store it in an airtight container in the refrigerator. It actually tastes better after a day or two because the flavors have time to meld. If you’re making it for a party, I recommend making it 2-3 days in advance.
My chocolate seized up and got grainy — what happened?
A tiny bit of water likely got into your chocolate. Even a drop of water can cause chocolate to seize and turn into a grainy, clumpy mess. Always make sure your bowl and spatula are completely dry before melting chocolate. If this happens, you can sometimes rescue it by stirring in a tablespoon of warm coconut oil or heavy cream, but honestly, it’s usually better to start fresh with dry equipment.
Pin This Recipe!
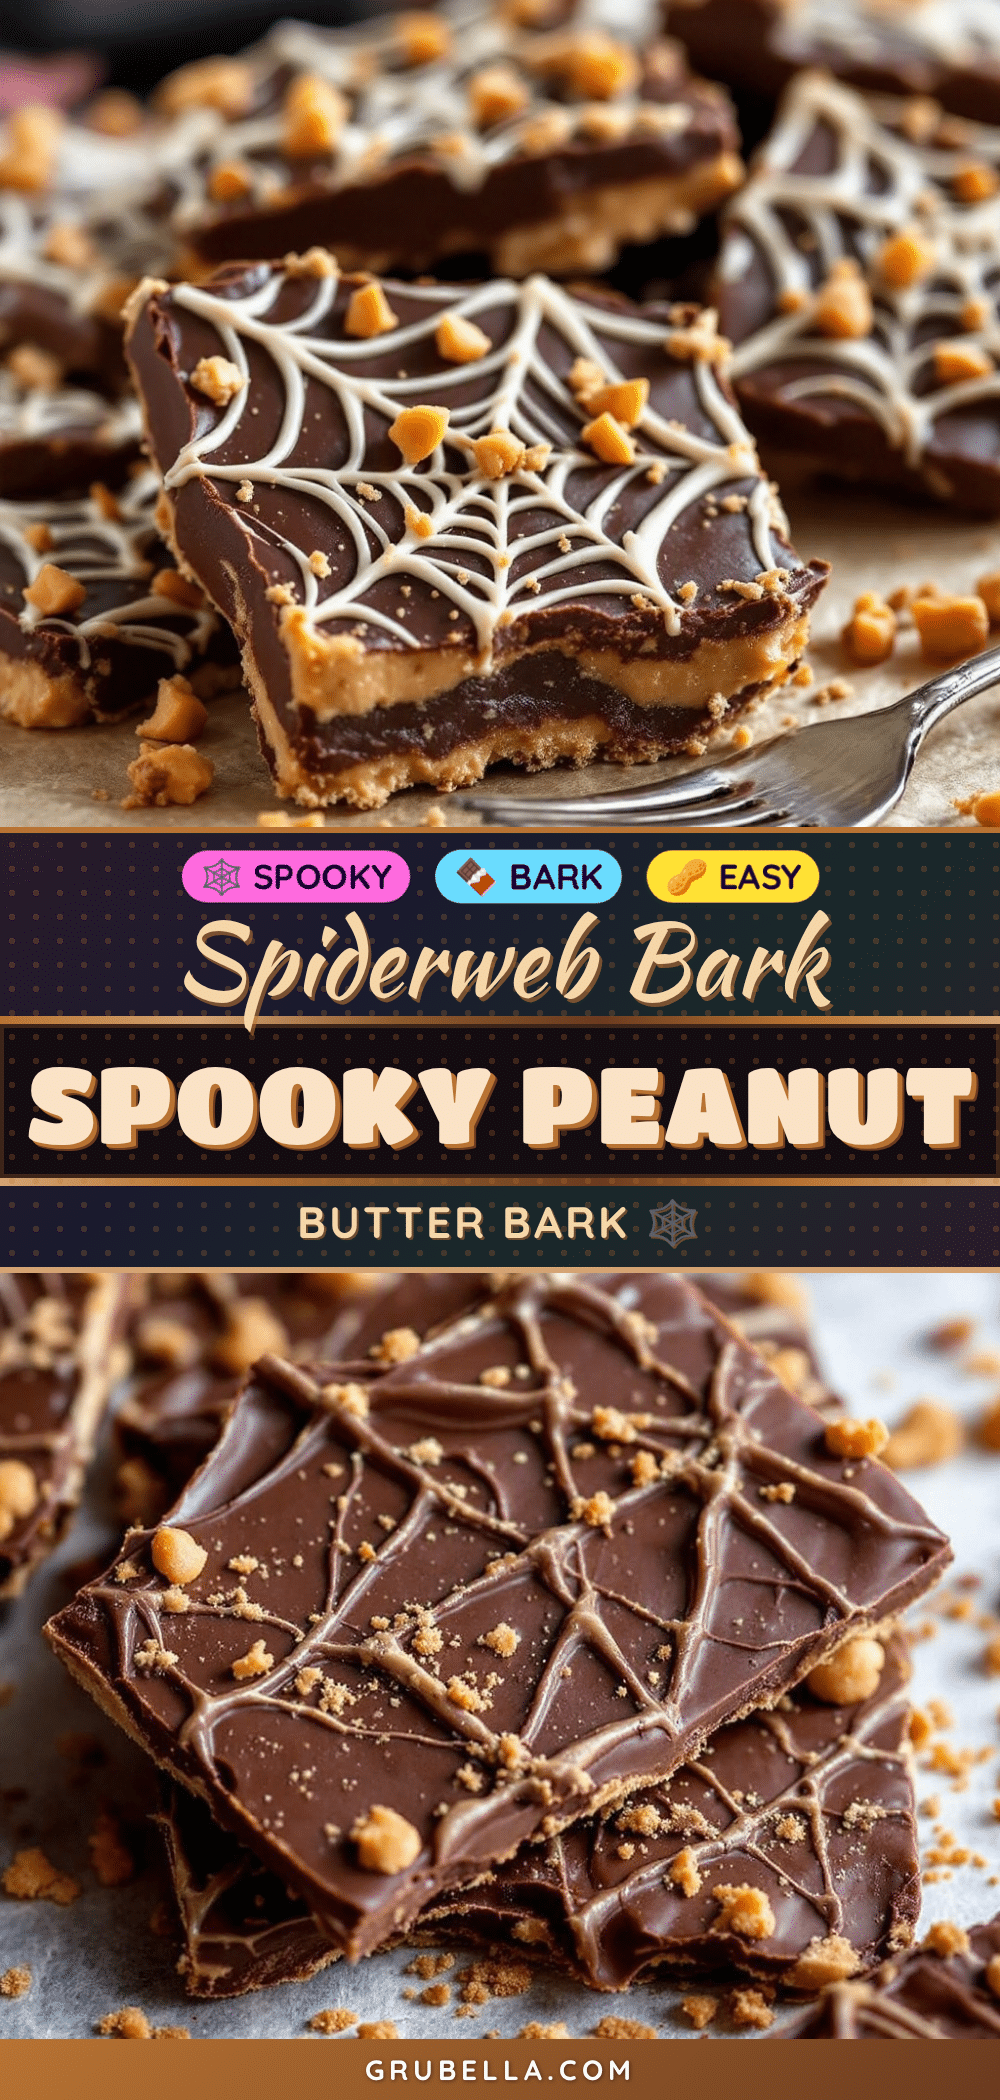
Easy Spiderweb Chocolate Peanut Butter Bark: Best Halloween Treat
This Easy Spiderweb Chocolate Peanut Butter Bark is a no-bake Halloween treat made with semi-sweet chocolate and creamy peanut butter swirled into a spiderweb pattern. It’s crunchy, creamy, salty-sweet, and perfect for parties, with minimal ingredients and effort.
- Prep Time: 10 minutes
- Cook Time: 0 minutes
- Total Time: 40 minutes (including chilling)
- Yield: 12 servings 1x
- Category: Dessert
- Cuisine: American
Ingredients
- 12 ounces semi-sweet chocolate chips
- 1 tablespoon coconut oil or vegetable shortening
- 1/3 cup creamy peanut butter (processed kind like Jif or Skippy)
- 2 tablespoons powdered sugar (optional but recommended)
- Candy eyeballs (optional)
- Flaky sea salt (optional)
- Orange and black sprinkles (optional)
Instructions
- Line your baking sheet with parchment paper, extending up the sides for handles. Set aside.
- Melt the chocolate chips with the coconut oil in a microwave-safe bowl in 30-second intervals, stirring between each, until smooth (about 90 seconds total). Do not overheat.
- Pour the melted chocolate onto the prepared baking sheet and spread into an even rectangle about 1/4 inch thick (roughly 9×13 inches).
- While the chocolate is still warm, prepare the peanut butter mixture: stir together the peanut butter and powdered sugar until smooth.
- Transfer the peanut butter mixture to a small piping bag or zip-top bag with the corner snipped off. Pipe concentric circles of peanut butter over the chocolate, starting from the center and working outward, leaving about an inch between circles.
- Using a toothpick or skewer, drag from the center outward through all the peanut butter circles to create spokes. Then drag the toothpick in the opposite direction between each spoke to create webbed connections.
- While the chocolate is still tacky, press in candy eyeballs and sprinkle with flaky sea salt (if using).
- Refrigerate for at least 30 minutes (or freeze for 15 minutes) until completely firm.
- Lift the parchment paper to remove the bark, place on a cutting board, and cut into irregular pieces with a sharp knife.
- Store in an airtight container in the refrigerator for up to two weeks.
Notes
Use processed peanut butter (not natural) for best swirl texture. Let chocolate cool 2-3 minutes after melting before piping peanut butter. For clean cuts, let bark come to room temperature for 5 minutes before cutting. Bark tastes better after a day or two in the fridge.
Nutrition
- Serving Size: 1 piece
- Calories: 220
- Sugar: 16
- Sodium: 60
- Fat: 14
- Saturated Fat: 6
- Carbohydrates: 22
- Fiber: 2
- Protein: 5
Keywords: Halloween bark, spiderweb bark, chocolate peanut butter bark, no-bake Halloween treat, easy Halloween dessert



