Love this? Save it for later!
Share the inspiration with your friends
It was 10:47 PM on a random Wednesday, and I was staring into the fridge like it owed me money. I’d just finished a late workout—one of those sessions where you push harder than you planned—and the hunger hit me like a truck. Not a “I could eat a salad” hunger. A real hunger. The kind where your hands start shaking a little and you start mentally calculating how fast you can make something edible.
I wanted a brownie. Bad. Like, the fudgy, dense, almost-underbaked kind that sticks to the wrapper. But I also knew if I ate a real brownie at 11 PM, I’d crash hard and wake up feeling like garbage. So I stood there, fridge door open, defeated, until my eyes landed on the peanut butter jar and a sad-looking banana on the counter. Then I remembered the oats in the pantry and the tub of vanilla protein powder I’d bought on a whim last week.
Honestly, I wasn’t expecting much. I was just trying to survive the craving. But I threw things in a bowl—peanut butter, oats, protein powder, a little maple syrup because I deserved it—and pressed it into a pan. I didn’t even chill them properly. I ate one straight from the bowl, still warm and sticky, and let me tell you, I closed my eyes. That first bite was everything I wanted and nothing I expected.
These Fudgy Protein-Packed Peanut Butter Oat Bars became my late-night hero. They taste like dessert but actually fuel your body. No baking, no weird ingredients, and they come together in about ten minutes. If you’ve ever stood in your kitchen at night, hungry and tired, not wanting to ruin your progress but also not wanting to suffer—this recipe is for you. I’ve been making them for months now, and they still hit every single time.
Why You’ll Love This Recipe
Let me be real with you—I’ve tested a lot of protein bars. Some tasted like cardboard dipped in regret. Others fell apart before I could even take a bite. These Fudgy Protein-Packed Peanut Butter Oat Bars are different. They’re the ones I actually look forward to eating, even when I’m not hungry.
- Quick & Easy: No oven required. No complicated steps. You can make these in under 15 minutes, including cleanup. Perfect for those “I need something now” moments.
- Simple Ingredients: You probably have most of these in your kitchen right now. Oats, peanut butter, a sweetener, and your favorite protein powder. That’s it.
- Perfect for Meal Prep: Make a batch on Sunday and grab one on your way out the door all week. They hold up beautifully in the fridge.
- Crowd-Pleaser: I brought these to a potluck once, and people asked for the recipe before I could even tell them they had protein powder in them. Kids love them too.
- Unbelievably Delicious: The texture is the real star here. Fudgy, chewy, with just the right amount of peanut butter richness. You won’t believe they’re actually good for you.
What makes this recipe different from every other protein bar out there is the ratio. I spent weeks tweaking the wet-to-dry ingredient balance until I got that perfect fudgy texture that doesn’t crumble or get rock-hard in the fridge. It’s not just another healthy snack—it’s my best version of a protein bar, tested by friends, family, and even my picky neighbor who swears he hates “health food.”
These bars are the kind of thing that makes you feel good about what you’re eating without sacrificing flavor. They’re comfort food that actually works with your goals, not against them. Whether you need a post-workout refuel, an afternoon pick-me-up, or a dessert that won’t derail your progress, these bars deliver.
What Ingredients You Will Need
This recipe uses simple, wholesome ingredients that work together to create a bar that’s both satisfying and nourishing. No fancy grocery store trips required—just honest, real food.
For the Bars
- 2 cups rolled oats (use certified gluten-free if needed) — These provide the chewy texture and fiber. I prefer old-fashioned oats over quick oats for better structure.
- 1 cup creamy peanut butter — Natural peanut butter works best here. Look for one where the only ingredients are peanuts and salt. The oil separation is normal—just stir it well before measuring.
- 1/2 cup vanilla protein powder — I recommend a whey or plant-based protein powder that you enjoy the taste of. My personal favorite is a vanilla whey isolate because it blends smoothly without making the bars chalky.
- 1/3 cup maple syrup — Adds natural sweetness and helps bind everything together. Honey works too, but maple syrup gives a slightly more caramel-like flavor.
- 1/4 cup unsweetened almond milk (or any milk you have) — This helps bring the dough together without making it too wet. Start with less and add more if needed.
- 1 teaspoon vanilla extract — Enhances the overall flavor and makes these taste more like a treat.
- 1/4 teaspoon salt — Balances the sweetness and brings out the peanut butter flavor. Skip this if your peanut butter is already salted.
Optional Mix-Ins
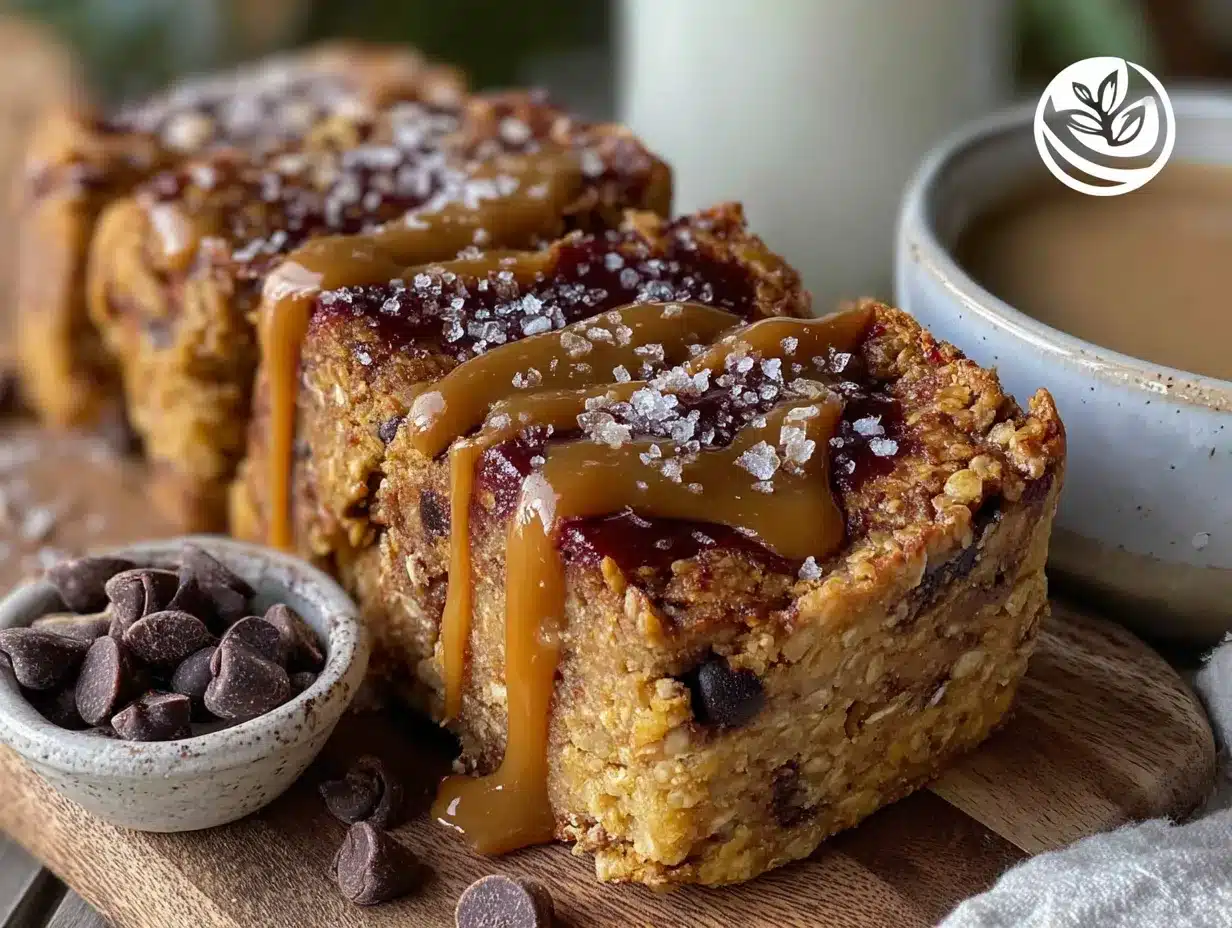
- 1/3 cup dark chocolate chips — Because chocolate and peanut butter are a match made in heaven. Use sugar-free if you’re watching your sugar intake.
- 2 tablespoons chia seeds or flax seeds — Adds extra fiber and omega-3s without changing the flavor.
- 1/4 cup chopped peanuts — For extra crunch and texture.
When it comes to ingredient selection, here’s my honest advice: don’t overthink it. The beauty of this recipe is its flexibility. If you only have almond butter, use that. If you’re out of maple syrup, honey or even agave will work. The protein powder is the one ingredient I’d be picky about—use one you actually like the taste of because it really does affect the final flavor.
For the oats, I’ve tried this with both rolled and quick oats. Rolled oats give a better chewy texture, while quick oats make the bars a bit softer and more crumbly. Both work, but I personally prefer rolled oats for that satisfying bite.
Equipment Needed
You don’t need a fancy kitchen to make these bars. Honestly, you could probably get away with just a bowl and a spoon. But here’s what I use to make the process smooth and easy:
- Large mixing bowl — Any medium-to-large bowl will do. I use a ceramic one because it’s heavy and doesn’t slide around.
- 8×8 inch baking pan — This is the perfect size for getting bars that are thick and fudgy. If you only have a 9×9 pan, your bars will be slightly thinner, which is fine too.
- Parchment paper — A total lifesaver. Line your pan with parchment paper, leaving some overhang on two sides. This makes lifting the bars out so much easier.
- Rubber spatula — For mixing and pressing the mixture into the pan. A silicone spatula works best because nothing sticks to it.
- Measuring cups and spoons — I’ve learned the hard way that eyeballing ingredients in no-bake recipes can lead to disaster. Measure carefully for consistent results.
- Food processor (optional but helpful) — If you want a smoother texture, you can pulse the oats a few times before mixing. I don’t always bother, but it does make the bars less rustic.
If you don’t have an 8×8 pan, you can use a loaf pan for thicker bars or a 9×13 pan for thinner ones. Just adjust the chilling time slightly—thicker bars need a bit longer to set.
Preparation Method
Alright, let’s make these bars. Trust me, this is one of those recipes where you’ll wonder why you ever bought pre-made protein bars.
- Line your pan. Take your 8×8 inch baking pan and line it with parchment paper. Leave about 2 inches of overhang on two opposite sides. This will act like handles later when you lift the bars out. Don’t skip this step—I learned the hard way that trying to pry bars out of an unlined pan is a messy disaster.
- Mix the dry ingredients. In your large mixing bowl, combine the rolled oats, vanilla protein powder, and salt. If you’re using chocolate chips or any other mix-ins, hold off on adding them for now. Whisk everything together with a fork so the protein powder is evenly distributed. Protein powder loves to clump, so break up any lumps you see.
- Add the wet ingredients. Pour in the creamy peanut butter, maple syrup, almond milk, and vanilla extract. Start with 1/4 cup of almond milk—you can always add more if the mixture feels too dry. Use your rubber spatula to fold everything together. At first, it might look like it won’t come together, but keep mixing. The peanut butter and maple syrup will work their magic.
- Check the consistency. The mixture should be thick and slightly sticky, similar to cookie dough. If it’s too crumbly and won’t hold together when pressed, add another tablespoon of almond milk. If it’s too wet and sticky, add a tablespoon of oats. This is where your judgment comes in—every brand of protein powder absorbs liquid differently, so trust your hands.
- Fold in mix-ins. If you’re adding chocolate chips, chopped peanuts, or seeds, gently fold them in now. Make sure they’re evenly distributed so every bar gets some goodies.
- Press into the pan. Transfer the mixture to your lined pan. Here’s the trick: wet your hands slightly with a little water. This prevents the mixture from sticking to your fingers as you press it down. Press firmly and evenly into the pan. I use the back of a measuring cup or a flat-bottomed glass to really compact it. The more evenly you press, the better your bars will hold together.
- Chill. Place the pan in the refrigerator for at least 2 hours. I know it’s tempting to cut into them right away, but patience pays off here. The chilling time allows the ingredients to set and the flavors to meld together. If you’re in a hurry, you can pop them in the freezer for 45 minutes, but don’t rush it.
- Cut and serve. Once chilled and firm, use the parchment paper handles to lift the entire block out of the pan. Place it on a cutting board and use a sharp knife to cut into 12 even bars. A clean cut is easier if you wipe the knife between slices. Store any leftovers in the fridge.
A quick note: if your bars feel too soft after chilling, they might need more time. Stick them back in the fridge for another hour. If they’re too hard, let them sit at room temperature for 5 minutes before eating. The texture should be fudgy but firm enough to hold its shape.
Cooking Tips & Techniques
I’ve made these bars probably twenty times by now, and I’ve made every mistake you can imagine. Let me save you some trouble.
The protein powder trap. Not all protein powders are created equal. Some are super absorbent and will suck up all the moisture, leaving you with a dry, crumbly mess. Others are less absorbent and might make your bars too sticky. If you’re using a new brand, start with slightly less almond milk and add more as needed. I once used a vegan pea protein that turned my bars into sawdust—never again.
Temperature matters. Make sure your peanut butter is at room temperature. Cold peanut butter straight from the fridge is stiff and hard to mix. If you forget to take it out ahead of time, microwave it for 10-15 seconds until it’s soft and drizzle-able.
Press with purpose. This is the most common mistake I see. People gently pat the mixture into the pan, and then their bars fall apart when they try to cut them. You need to really press down hard. I use the flat bottom of a glass and put my body weight into it. The mixture should feel compact and solid, not loose.
Patience is a virtue. I know you’re hungry. I know you want to eat one immediately. But if you cut into these bars before they’ve fully chilled, they’ll be a sticky, delicious mess that won’t hold its shape. Give them the full 2 hours. Your future self will thank you.
Double batch wisdom. These bars freeze beautifully. I always make a double batch and keep some in the freezer for emergencies. Just wrap each bar individually in plastic wrap, then store them in a freezer bag. They’ll keep for up to 3 months. Grab one straight from the freezer—it thaws in about 10 minutes.
Variations & Adaptations
One of the things I love most about this recipe is how customizable it is. Here are some variations I’ve tried and loved:
Chocolate Peanut Butter Dream
Swap 2 tablespoons of the oats for 2 tablespoons of unsweetened cocoa powder. Add an extra tablespoon of maple syrup to balance the bitterness. The result is a double-chocolate peanut butter bar that tastes dangerously like a brownie.
Vegan & Dairy-Free
Use a plant-based protein powder and make sure your chocolate chips are dairy-free. Maple syrup is already vegan, and peanut butter is naturally dairy-free. This version is just as fudgy and satisfying.
Nut-Free Option
Substitute the peanut butter with sunflower seed butter or tahini. The flavor will be different—more earthy—but still delicious. Add an extra tablespoon of maple syrup to compensate for the less sweet nut butter.
Low-Carb / Keto-Friendly
Use a low-carb protein powder, replace the oats with unsweetened shredded coconut and almond flour (about 1 cup total), and use sugar-free maple syrup. The texture will be denser but still fudgy and satisfying.
Berry Bliss
Fold in 1/3 cup of freeze-dried strawberries or raspberries instead of chocolate chips. The tartness of the berries cuts through the richness of the peanut butter beautifully. This is my go-to summer variation.
Don’t be afraid to experiment. I once made a batch with a scoop of instant coffee powder mixed in, and it was incredible—like a peanut butter latte in bar form. The key is to keep the wet-to-dry ratio balanced. If you add dry ingredients, add a splash more milk. If you add wet ingredients, add a tablespoon more oats.
Serving & Storage Suggestions
These bars are incredibly versatile when it comes to serving. Here’s how I enjoy them:
Straight from the fridge. This is my favorite way. They’re firm, fudgy, and perfectly chilled. It’s like eating a healthy peanut butter fudge.
At room temperature. Let them sit out for 5-10 minutes. They soften slightly and become even more fudgy and decadent.
Warmed up. Pop one in the microwave for 10-15 seconds. It gets soft and almost gooey, like a warm peanut butter cookie. Be careful not to overheat—they can get mushy.
Pairings. These bars are amazing with a glass of cold milk, a hot cup of coffee, or a smoothie for a complete meal. I’ve also crumbled one over Greek yogurt for a high-protein breakfast bowl.
Storage. Store the bars in an airtight container in the refrigerator for up to 2 weeks. They actually get better after a day or two as the flavors meld together. For longer storage, freeze them individually wrapped for up to 3 months. To thaw, just leave one at room temperature for 10-15 minutes or microwave for 20 seconds.
One thing I’ve noticed: the texture changes slightly over time. After about 5 days in the fridge, they become a bit denser and chewier. I actually prefer them this way, but if you like them softer, eat them within the first 3 days.
Nutritional Information & Benefits
Here’s the honest breakdown for one bar (based on 12 servings, using standard ingredients):
| Nutrient | Amount Per Bar |
|---|---|
| Calories | 210-230 |
| Protein | 12-15g |
| Carbohydrates | 22-25g |
| Fiber | 4-5g |
| Fat | 10-12g |
| Sugar | 8-10g (naturally occurring) |
These numbers will vary based on your specific ingredients, but the general idea is solid: these bars pack a serious protein punch without being calorie bombs.
Health benefits: Oats are rich in beta-glucan, a type of soluble fiber that supports heart health and keeps you full. Peanut butter provides healthy monounsaturated fats and vitamin E. Protein powder helps with muscle recovery and satiety. Together, these ingredients create a snack that stabilizes blood sugar and gives you sustained energy—not a crash.
Dietary considerations: This recipe is naturally gluten-free if you use certified gluten-free oats. It’s dairy-free if you choose a plant-based protein powder. For a nut-free version, use sunflower seed butter. Always check your protein powder and chocolate chips for potential allergens.
I’m not a nutritionist, but I’ve learned through trial and error that these bars hit the sweet spot between indulgence and nourishment. They satisfy my cravings without leaving me feeling heavy or guilty.
Conclusion
These Fudgy Protein-Packed Peanut Butter Oat Bars have become a staple in my kitchen for a reason. They’re the answer to that 10 PM craving, the post-workout refuel, and the afternoon slump all in one. They taste like a treat but work like fuel for your body.
What I love most about this recipe is how forgiving it is. You can tweak it, swap ingredients, add your favorite mix-ins, and it still turns out delicious. It’s the kind of recipe that builds confidence in the kitchen because it’s almost impossible to mess up.
I’d love to hear how yours turn out. Did you add chocolate chips? Try it with almond butter? Make a double batch and stash some in the freezer? Drop a comment below and let me know. And if you have a variation that blew your mind, share it—I’m always looking for new ideas.
Go ahead, make a batch tonight. Your future self—the one who’s hungry, tired, and needs something good—will thank you.
Frequently Asked Questions
Can I use quick oats instead of rolled oats?
Yes, you can. Quick oats will give your bars a softer, more tender texture. They won’t be as chewy, but they’ll still hold together well. If you use quick oats, you might need slightly less almond milk since they absorb liquid faster.
My bars are too crumbly. What went wrong?
This usually happens when the mixture is too dry. Next time, add an extra tablespoon of almond milk or peanut butter. Also, make sure you’re pressing the mixture firmly into the pan—a loose press leads to crumbly bars. If your bars are already made and falling apart, try chilling them longer or drizzling a little melted peanut butter over the top to help bind them.
Can I make these without protein powder?
Absolutely. Replace the protein powder with an equal amount of oat flour (just grind oats in a blender) or almond flour. The bars will be less protein-dense but still delicious and fudgy. You might need to adjust the liquid slightly since protein powder absorbs differently than flour.
How long do these bars last at room temperature?
I recommend storing them in the refrigerator for best texture and safety. They can sit at room temperature for a few hours, like in a lunchbox, but they’ll soften significantly. If you’re taking them on the go, pack them with an ice pack or eat them within 2-3 hours.
Can I double this recipe?
Yes, and I often do. Double all the ingredients and press the mixture into a 9×13 inch pan. Increase the chilling time to at least 3 hours to ensure the center sets properly. These freeze beautifully, so making a double batch is a great time-saver.
Pin This Recipe!
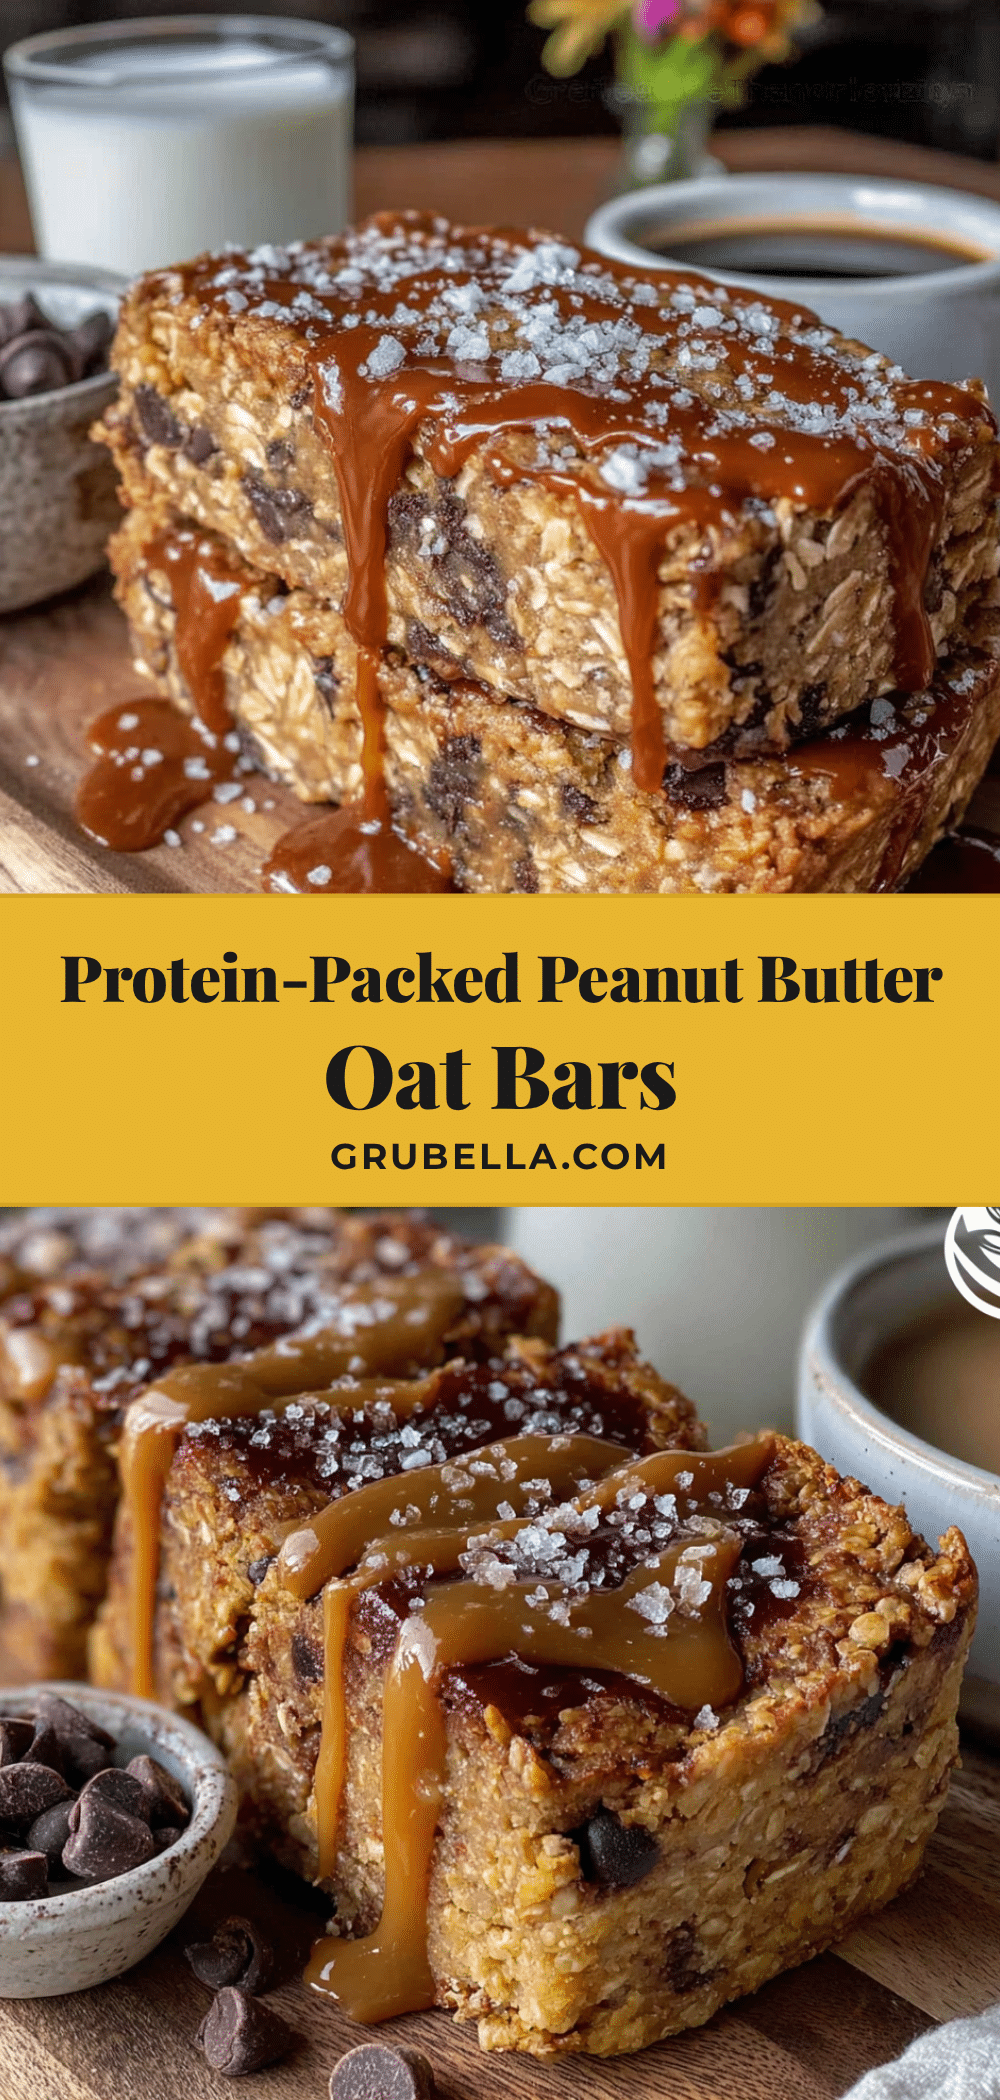
Fudgy Protein-Packed Peanut Butter Oat Bars (Easy No-Bake Recipe)
These no-bake protein bars are fudgy, chewy, and packed with peanut butter flavor. Made with simple ingredients like oats, peanut butter, and protein powder, they’re the perfect healthy snack or post-workout treat that tastes like dessert.
- Prep Time: 15 minutes
- Cook Time: 0 minutes
- Total Time: 2 hours 15 minutes (includes chilling)
- Yield: 12 bars 1x
- Category: Snack
- Cuisine: American
Ingredients
- 2 cups rolled oats (use certified gluten-free if needed)
- 1 cup creamy peanut butter (natural, room temperature)
- 1/2 cup vanilla protein powder (whey or plant-based)
- 1/3 cup maple syrup
- 1/4 cup unsweetened almond milk (or any milk, plus more if needed)
- 1 teaspoon vanilla extract
- 1/4 teaspoon salt (skip if peanut butter is salted)
- 1/3 cup dark chocolate chips (optional)
- 2 tablespoons chia seeds or flax seeds (optional)
- 1/4 cup chopped peanuts (optional)
Instructions
- Line an 8×8 inch baking pan with parchment paper, leaving about 2 inches of overhang on two opposite sides.
- In a large mixing bowl, combine the rolled oats, vanilla protein powder, and salt. Whisk with a fork to break up any clumps.
- Add the creamy peanut butter, maple syrup, almond milk, and vanilla extract. Fold together with a rubber spatula until a thick, slightly sticky dough forms. If too crumbly, add more almond milk 1 tablespoon at a time; if too wet, add more oats.
- If using, gently fold in chocolate chips, chia seeds, or chopped peanuts until evenly distributed.
- Transfer the mixture to the lined pan. Wet your hands slightly with water to prevent sticking, then press the mixture firmly and evenly into the pan. Use the back of a measuring cup or a flat-bottomed glass to compact it well.
- Refrigerate for at least 2 hours, or until firm. For a quicker set, freeze for 45 minutes.
- Once chilled and firm, use the parchment paper handles to lift the block out of the pan. Place on a cutting board and cut into 12 even bars with a sharp knife, wiping the knife between slices for clean cuts.
- Store in an airtight container in the refrigerator for up to 2 weeks, or freeze individually wrapped for up to 3 months.
Notes
For best texture, use room temperature peanut butter. Press the mixture firmly into the pan to prevent crumbling. Bars can be stored at room temperature for a few hours but are best kept refrigerated. For a vegan version, use plant-based protein powder and dairy-free chocolate chips. For a nut-free version, substitute sunflower seed butter. The bars freeze well for up to 3 months.
Nutrition
- Serving Size: 1 bar
- Calories: 210230
- Sugar: 810
- Sodium: 100150
- Fat: 1012
- Saturated Fat: 23
- Carbohydrates: 2225
- Fiber: 45
- Protein: 1215
Keywords: protein bars, no-bake, peanut butter, oat bars, healthy snack, post-workout, gluten-free, dairy-free option



