Love this? Save it for later!
Share the inspiration with your friends
By the fourth batch in three days, I finally stopped scraping raw dough off my fingers and started paying attention to what the pumpkin was actually doing in there. Not the flavor — that part was obvious from the first bite. But the texture. The way the pumpkin puree keeps these cookies pillowy on the inside while the cinnamon-sugar crust turns all crackly and golden. I had been chasing a soft-baked snickerdoodle for years — the kind that stays tender even on day three, not the ones that turn into hockey pucks by morning. And honestly? I wasn’t even trying to make a pumpkin version. I just had half a can of puree sitting in the fridge after making a batch of cozy maple pumpkin sourdough discard bread, and throwing it into the snickerdoodle dough felt like a happy accident waiting to happen.
The first batch came out too flat. The second was cakey — almost muffin-like, which wasn’t what I wanted either. But the third? That was the one where everything clicked. The dough chilled just long enough, the oven temperature was right, and the pumpkin-to-flour ratio finally made sense. These Soft Baked Pumpkin Snickerdoodle Cookies with Cinnamon Sugar are the result of three days of obsessive testing, and I’m pretty sure I’ll never make a regular snickerdoodle again. There’s something about the way pumpkin keeps them soft without making them heavy — like the cookie equivalent of a cozy sweater you never want to take off.
Why You’ll Love This Recipe
I’ve tested a lot of pumpkin cookie recipes over the years, and most of them fall into one of two camps: too cakey or too greasy. These cookies hit that sweet spot where the edges are set, the centers are soft, and the cinnamon-sugar coating stays crunchy against the tender crumb. Here’s why they work:
- Perfectly Soft-Baked Texture — The pumpkin puree adds moisture without making the dough sticky or wet. Combined with the right ratio of butter to flour, these cookies stay soft for days without turning gummy.
- Simple Pantry Ingredients — You probably have everything you need already. No specialty flours, no obscure extracts, no trips to three different stores. Just basic baking staples plus one can of pumpkin puree.
- Ready in Under 30 Minutes — From mixing bowl to cooling rack in about 25 minutes. The dough needs a quick chill (20 minutes in the freezer does the trick), but the actual hands-on time is minimal.
- Perfect for Fall Baking — These are the cookies you bring to a pumpkin carving party, pack in lunchboxes, or serve alongside a hot mug of pumpkin spice latte on a crisp October afternoon.
- Crowd-Pleaser Guaranteed — I brought a batch to my neighbor’s potluck last week, and they disappeared faster than the store-bought cookies. Someone even asked if I had a bakery side hustle. (I don’t. But I’m flattered.)
What makes these different from every other pumpkin cookie recipe out there? It’s the technique. Most recipes skip the chilling step or use too much pumpkin, which makes the cookies spread into sad, flat discs. I tested this recipe with different chilling times, oven temperatures, and flour-to-pumpkin ratios until I found the combination that gives you that bakery-style domed top with a soft, almost melt-in-your-mouth center. This isn’t just another pumpkin cookie — it’s the one you’ll actually want to make again.
What Ingredients You Will Need
This recipe uses simple, wholesome ingredients that come together to create cookies with a tender crumb, warm spice flavor, and that signature crackly cinnamon-sugar crust. Nothing fancy here — just smart baking basics that work together beautifully.
- Unsalted butter — 1/2 cup (1 stick), softened to room temperature. I prefer using unsalted so I can control the salt level. If you only have salted butter, reduce the added salt to 1/4 teaspoon.
- Granulated sugar — 3/4 cup for the dough, plus 1/4 cup for the cinnamon-sugar coating. Regular white sugar gives the cookies that classic snickerdoodle texture and helps the coating stick.
- Pumpkin puree — 1/3 cup. Make sure you’re using 100% pure pumpkin puree, not pumpkin pie filling. The pie filling has added sugar and spices that will throw off the balance. I like Libby’s brand for consistent results.
- Large egg yolk — Just the yolk, not the whole egg. This adds richness and helps keep the cookies tender without making the dough too wet.
- Vanilla extract — 1 teaspoon. Pure vanilla extract makes a difference here, but imitation works fine in a pinch. The pumpkin and cinnamon are strong enough to carry the flavor either way.
- All-purpose flour — 1 and 1/2 cups, spooned and leveled. Don’t scoop directly from the bag — that packs the flour and leads to dry, dense cookies. Spoon it into the measuring cup and level it off with a knife.
- Cream of tartar — 1 teaspoon. This is the secret ingredient that gives snickerdoodles their signature tangy flavor and soft texture. Don’t skip it — baking powder won’t give you the same result.
- Baking soda — 1/2 teaspoon. Works with the cream of tartar to help the cookies rise just enough.
- Salt — 1/2 teaspoon. Balances the sweetness and enhances the pumpkin and spice flavors.
- Ground cinnamon — 1 teaspoon in the dough, plus 2 tablespoons for the coating. Use a good-quality cinnamon — I prefer Saigon cinnamon for its bold, warm flavor.
- Ground nutmeg — 1/4 teaspoon. Freshly grated if you have it, but pre-ground works perfectly fine.
- Ground ginger — 1/4 teaspoon. Adds a gentle warmth that complements the pumpkin without overpowering it.
- Ground cloves — 1/8 teaspoon. Just a pinch — cloves are potent and can easily take over if you’re heavy-handed.
Equipment Needed
You don’t need any fancy equipment for these cookies, which is part of why I love this recipe so much. Here’s what you’ll need:
- Large mixing bowl — For creaming the butter and sugar together. Any medium-to-large bowl works.
- Medium mixing bowl — For whisking the dry ingredients.
- Hand mixer or stand mixer — A hand mixer works perfectly here. You can also mix by hand with a wooden spoon, but it takes a bit more elbow grease to get the butter and sugar properly creamed.
- Measuring cups and spoons — For accurate measurements. I can’t stress this enough — baking is science, and eyeballing ingredients leads to inconsistent results.
- Baking sheet — A standard half-sheet pan works great. Line it with parchment paper or a silicone baking mat for easy cleanup and even browning.
- Cookie scoop — A 1.5-tablespoon scoop gives you perfectly portioned cookies that bake evenly. If you don’t have one, use a spoon and roll the dough into balls with your hands.
- Cooling rack — Lets air circulate around the cookies so they cool properly without getting soggy on the bottom.
- Small bowl — For mixing the cinnamon-sugar coating.
If you don’t have cream of tartar, you can substitute 2 teaspoons of lemon juice or white vinegar mixed with 1/2 teaspoon of baking soda, but honestly, just buy the cream of tartar. It’s cheap, lasts forever, and gives snickerdoodles their signature texture and flavor that nothing else quite replicates.
Preparation Method
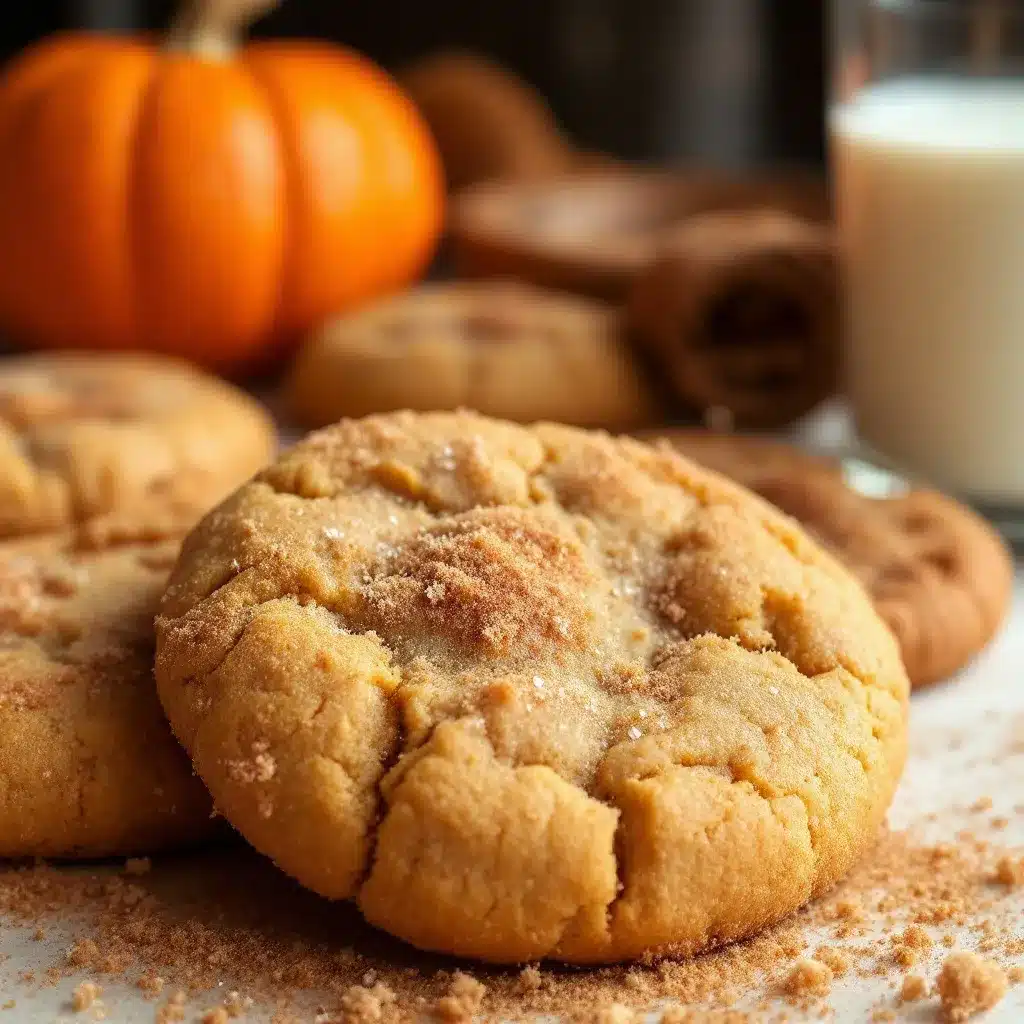
These cookies come together quickly, but the chilling step is non-negotiable. Trust me on this — I learned the hard way after my first batch turned into pumpkin-flavored pancakes. Here’s how to do it right:
- Preheat your oven to 350°F (175°C) and line two baking sheets with parchment paper. Don’t use wax paper — it will melt in the oven.
- In a large mixing bowl, beat the softened butter and 3/4 cup granulated sugar together until light and fluffy, about 2-3 minutes with a hand mixer on medium speed. You want the mixture to look pale and slightly increased in volume. Scrape down the sides of the bowl halfway through.
- Add the pumpkin puree, egg yolk, and vanilla extract to the butter-sugar mixture. Beat on low speed until just combined. The mixture might look slightly separated at this point — that’s normal. Don’t overmix.
- In a separate medium bowl, whisk together the flour, cream of tartar, baking soda, salt, 1 teaspoon cinnamon, nutmeg, ginger, and cloves. Whisking ensures the leavening agents and spices are evenly distributed throughout the flour.
- Gradually add the dry ingredients to the wet ingredients, mixing on low speed until just combined. You should see a few streaks of flour remaining — stop mixing at this point. Overmixing develops gluten and makes the cookies tough.
- Cover the bowl with plastic wrap and refrigerate for at least 20 minutes. I usually pop it in the freezer for 20 minutes if I’m in a hurry, which works just as well. The dough will be slightly sticky but manageable.
- While the dough chills, mix together the remaining 1/4 cup granulated sugar and 2 tablespoons cinnamon in a small bowl. Set aside.
- Using a cookie scoop or tablespoon, portion out the dough into 1.5-tablespoon balls. Roll each ball between your palms until smooth, then roll generously in the cinnamon-sugar mixture. Place them on the prepared baking sheets about 2 inches apart — these cookies spread a bit.
- Bake for 10-12 minutes, or until the edges are set and the tops look slightly cracked. The centers will still look soft and slightly underdone — that’s exactly what you want. They’ll continue baking from residual heat as they cool.
- Let the cookies cool on the baking sheet for 5 minutes before transferring them to a wire rack to cool completely. This resting time lets them set up properly without breaking apart.
A few things I’ve learned from making these over and over: If your dough feels too sticky to roll, chill it for an additional 10 minutes. If it feels too dry (which can happen if you measured the flour incorrectly), add a teaspoon of milk at a time until it comes together. And whatever you do, don’t flatten the dough balls before baking — let them do their own thing in the oven. The domed tops are part of what makes these cookies so irresistible.
Cooking Tips & Techniques
After making these cookies more times than I care to count, I’ve picked up a few tricks that make the process smoother and the results more consistent. Here’s what I wish someone had told me before my first attempt:
Measure your flour correctly. This is the number one mistake I see in baking. Scooping directly from the bag compacts the flour, giving you up to 25% more than the recipe calls for. Spoon the flour into your measuring cup and level it off with the back of a knife. Your cookies will thank you.
Don’t overmix the dough. Once you add the dry ingredients, mix just until you don’t see any more flour streaks. Overmixing develops gluten, which makes cookies tough and dense instead of tender and soft. I’ve ruined plenty of batches this way — it’s a hard habit to break.
Chill the dough — really. I know it’s tempting to skip this step when you’re craving cookies, but the chill is what prevents the cookies from spreading into thin, flat discs. It also gives the flavors time to meld together. Twenty minutes in the freezer is the bare minimum; if you have time, an hour in the fridge is even better.
Use a cookie scoop for even sizing. Cookies that are the same size bake at the same rate. A 1.5-tablespoon scoop gives you about 18 cookies per batch. If you don’t have a scoop, use a measuring tablespoon and roll the dough into balls with your hands — just make sure they’re all roughly the same size.
Rotate your baking sheet halfway through. Most ovens have hot spots, and rotating the sheet halfway through baking ensures even browning. I usually rotate at the 5-minute mark for these cookies.
Let them cool on the pan. I know it’s tempting to move them to a cooling rack immediately, but those 5 minutes on the hot baking sheet are crucial for the cookies to set up properly. Moving them too early can cause them to fall apart or lose their soft center.
One mistake I made early on was using too much pumpkin puree because I thought “more pumpkin = more flavor.” Turns out, too much pumpkin throws off the moisture balance and makes the cookies gummy. Stick with the 1/3 cup — it’s the sweet spot where you taste the pumpkin without the texture suffering.
Variations & Adaptations
One of the best things about this recipe is how adaptable it is. Here are some variations I’ve tried and loved:
Gluten-Free Version — Swap the all-purpose flour with a 1:1 gluten-free baking flour blend. I’ve had good results with Bob’s Red Mill and King Arthur brands. Add an extra tablespoon of flour to compensate for the denser texture of gluten-free blends.
Dairy-Free Version — Use vegan butter sticks (not the spreadable kind in a tub) in place of regular butter. I’ve tested this with Earth Balance and Miyoko’s, and both worked well. The cookies might spread slightly more, so chill the dough for an extra 10 minutes.
Spice It Up — If you love warm spices, add 1/4 teaspoon of cardamom or allspice to the dough. I sometimes add a pinch of black pepper for a subtle heat that plays beautifully with the cinnamon and pumpkin.
Add Mix-Ins — Fold in 1/2 cup of white chocolate chips, chopped pecans, or dried cranberries after mixing the dough. White chocolate and pumpkin are a match made in heaven, and the crunch of pecans adds a nice textural contrast.
Pumpkin-Free Version — If you’re out of pumpkin puree, substitute 1/3 cup of unsweetened applesauce. The cookies will be slightly less pumpkin-forward but still soft and delicious. You might need to add an extra tablespoon of flour to compensate for the extra moisture.
Bigger Cookies — Use a 2-tablespoon scoop for jumbo cookies and increase the baking time to 13-15 minutes. You’ll get about 12 cookies instead of 18, but they’re perfect for sharing (or not sharing — no judgment here).
My personal favorite variation? I add a tablespoon of cozy slow cooker chicken and wild rice soup inspiration to the dough — just kidding. But seriously, I love folding in 1/4 cup of toasted pepitas (pumpkin seeds) for extra crunch. It feels fitting for a pumpkin cookie, and the seeds add a nice savory note that balances the sweetness.
Serving & Storage Suggestions
These cookies are best served slightly warm, when the cinnamon-sugar coating is still crackly and the centers are soft and tender. Let them cool on the baking sheet for 5 minutes, then transfer to a wire rack. If you can wait that long — I usually can’t.
For serving, I love pairing these cookies with a hot cup of coffee or a cold glass of milk. They’re also fantastic crumbled over vanilla ice cream for a quick dessert, or sandwiched with cream cheese frosting for an indulgent treat. During the holidays, I arrange them on a platter with cozy small batch pumpkin dump cake and watch them disappear.
Storage Instructions:
- Room Temperature: Store in an airtight container at room temperature for up to 5 days. Place a slice of bread in the container to keep them soft — the bread absorbs excess moisture and releases it back to the cookies.
- Refrigerator: These cookies actually stay softer at room temperature, so I don’t recommend refrigerating them unless you live in a very warm climate.
- Freezer: Freeze baked cookies in a single layer on a baking sheet, then transfer to a freezer-safe bag for up to 3 months. Thaw at room temperature for about 15 minutes before serving. You can also freeze the unbaked dough balls — just roll them in cinnamon sugar before baking straight from frozen, adding 2-3 minutes to the baking time.
One thing I love about these cookies is that they actually get better on day two. The flavors meld together, and the texture stays perfectly soft. If you can resist eating them all on day one, you’re in for a treat.
Nutritional Information & Benefits
Here’s the estimated nutritional breakdown for one cookie (based on 18 cookies per batch):
| Nutrient | Amount Per Cookie |
|---|---|
| Calories | 145 |
| Total Fat | 7g |
| Saturated Fat | 4g |
| Cholesterol | 25mg |
| Sodium | 95mg |
| Total Carbohydrates | 20g |
| Dietary Fiber | 1g |
| Sugars | 12g |
| Protein | 2g |
While these are definitely a treat (they’re cookies, after all), the pumpkin puree adds a boost of vitamin A and fiber that you don’t get from regular snickerdoodles. Pumpkin is also rich in antioxidants like beta-carotene, which supports eye health and immune function. Plus, the cinnamon in the coating has anti-inflammatory properties — so you can feel slightly virtuous while eating three of them.
For those with dietary restrictions, this recipe contains gluten, dairy, and eggs. I’ve included gluten-free and dairy-free variations above. The cookies are nut-free as written, making them a safe option for school lunches or parties where allergies might be a concern.
Conclusion
These Soft Baked Pumpkin Snickerdoodle Cookies with Cinnamon Sugar have become my go-to fall baking project for a reason. They’re simple enough for a weekday baking session but impressive enough to bring to any gathering. The pumpkin keeps them tender, the cinnamon-sugar coating adds that irresistible crunch, and the warm spices make your whole kitchen smell like autumn.
I’ve made these for Halloween parties, Thanksgiving dessert tables, and lazy Sunday afternoons when I just need something cozy to bake. Every time, they disappear faster than I expect. There’s something about that combination of soft, spiced cookie and crackly cinnamon coating that people just can’t resist.
If you try this recipe, I’d love to hear how it goes. Drop a comment below and let me know if you added any variations, or tag me in your photos if you share them online. And if you’re looking for more fall baking inspiration, check out my easy one bowl pumpkin chocolate chip bread or these perfect pumpkin cream cheese muffins — they’re both reader favorites for a reason.
Happy baking, friends. Here’s to soft cookies, warm spices, and the kind of fall baking that makes you want to curl up with a blanket and a cup of tea.
Frequently Asked Questions
Can I use pumpkin pie filling instead of pumpkin puree?
No, I don’t recommend it. Pumpkin pie filling has added sugar, spices, and thickeners that will throw off the balance of the recipe. Stick with 100% pure pumpkin puree for the best results. If you only have pumpkin pie filling on hand, you can try using it, but reduce the sugar in the dough by half and skip the additional spices.
Why did my cookies turn out flat?
Flat cookies usually mean one of three things: the butter was too soft or melted, the dough wasn’t chilled long enough, or the flour was under-measured. Make sure your butter is softened but not melted (it should hold a slight indent when pressed), chill the dough for at least 20 minutes, and spoon and level your flour properly.
Can I make the dough ahead of time?
Absolutely. You can prepare the dough up to 3 days in advance and keep it covered in the refrigerator. When you’re ready to bake, let it sit at room temperature for about 10 minutes to soften slightly, then roll and coat as directed. You can also freeze the dough balls for up to 3 months — just bake straight from frozen, adding 2-3 minutes to the baking time.
How do I know when the cookies are done baking?
Look for set edges and slightly cracked tops. The centers will still look soft and slightly underdone — that’s the sign of a perfectly baked soft cookie. If the centers look fully set, they’re overbaked. Remember, they continue to bake from residual heat as they cool on the baking sheet.
Can I double this recipe?
Yes, this recipe doubles beautifully. Just make sure your mixing bowl is large enough to accommodate the extra dough, and don’t overcrowd your baking sheets — bake in batches if needed. The chilling time remains the same, but you might need to add a minute or two to the baking time if you’re baking multiple sheets at once (rotate them halfway through for even baking).
Pin This Recipe!
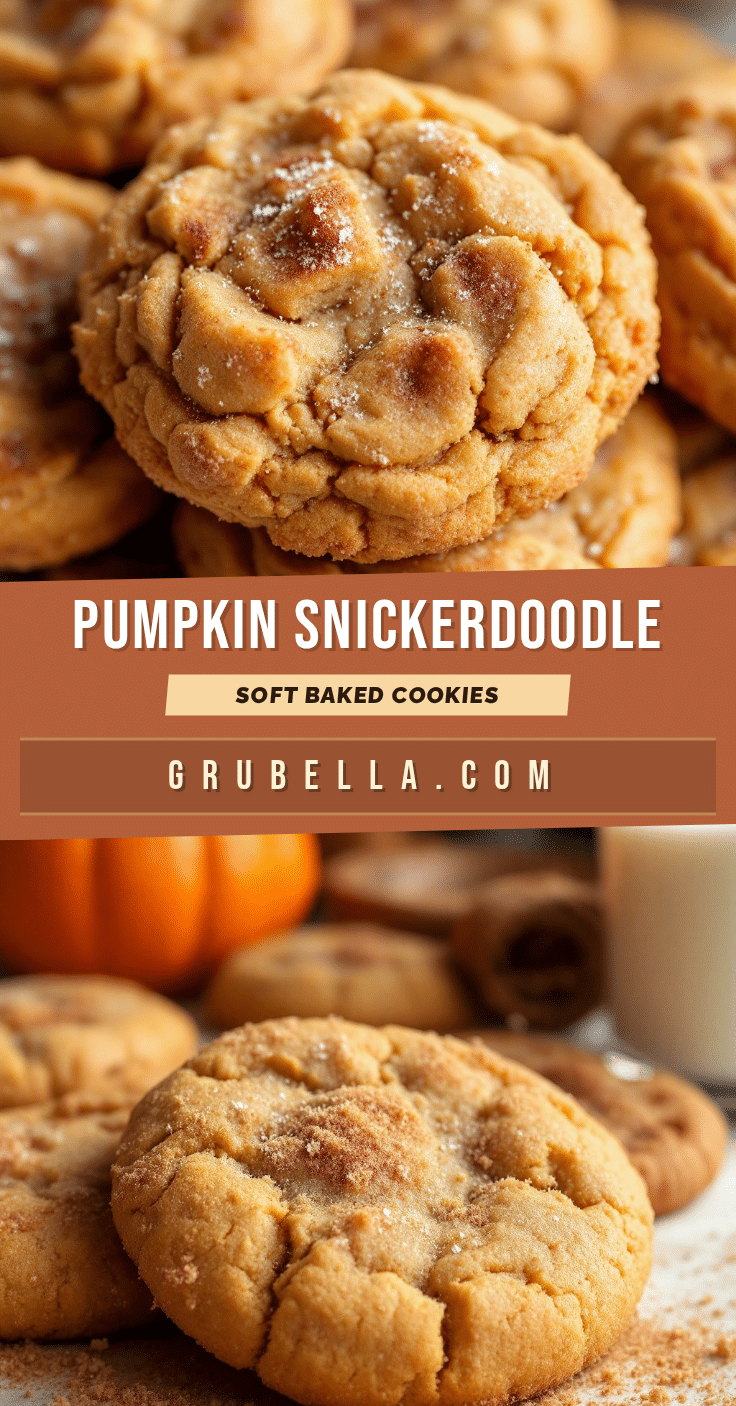
Soft Baked Pumpkin Snickerdoodle Cookies – Easy Fall Recipe
These Soft Baked Pumpkin Snickerdoodle Cookies are pillowy on the inside with a crackly cinnamon-sugar crust, made with simple pantry ingredients and ready in under 30 minutes. Perfect for fall baking, they stay tender for days and are a guaranteed crowd-pleaser.
- Prep Time: 15 minutes
- Cook Time: 12 minutes
- Total Time: 27 minutes
- Yield: 18 cookies 1x
- Category: Dessert
- Cuisine: American
Ingredients
- 1/2 cup (1 stick) unsalted butter, softened to room temperature
- 3/4 cup granulated sugar (for dough)
- 1/4 cup granulated sugar (for coating)
- 1/3 cup pumpkin puree (100% pure, not pumpkin pie filling)
- 1 large egg yolk
- 1 teaspoon vanilla extract
- 1 and 1/2 cups all-purpose flour, spooned and leveled
- 1 teaspoon cream of tartar
- 1/2 teaspoon baking soda
- 1/2 teaspoon salt
- 1 teaspoon ground cinnamon (for dough)
- 2 tablespoons ground cinnamon (for coating)
- 1/4 teaspoon ground nutmeg
- 1/4 teaspoon ground ginger
- 1/8 teaspoon ground cloves
Instructions
- Preheat your oven to 350°F (175°C) and line two baking sheets with parchment paper.
- In a large mixing bowl, beat the softened butter and 3/4 cup granulated sugar together until light and fluffy, about 2-3 minutes with a hand mixer on medium speed. Scrape down the sides of the bowl halfway through.
- Add the pumpkin puree, egg yolk, and vanilla extract to the butter-sugar mixture. Beat on low speed until just combined. The mixture might look slightly separated — that’s normal. Don’t overmix.
- In a separate medium bowl, whisk together the flour, cream of tartar, baking soda, salt, 1 teaspoon cinnamon, nutmeg, ginger, and cloves.
- Gradually add the dry ingredients to the wet ingredients, mixing on low speed until just combined. You should see a few streaks of flour remaining — stop mixing at this point.
- Cover the bowl with plastic wrap and refrigerate for at least 20 minutes (or freeze for 20 minutes if in a hurry). The dough will be slightly sticky but manageable.
- While the dough chills, mix together the remaining 1/4 cup granulated sugar and 2 tablespoons cinnamon in a small bowl. Set aside.
- Using a cookie scoop or tablespoon, portion out the dough into 1.5-tablespoon balls. Roll each ball between your palms until smooth, then roll generously in the cinnamon-sugar mixture. Place them on the prepared baking sheets about 2 inches apart.
- Bake for 10-12 minutes, or until the edges are set and the tops look slightly cracked. The centers will still look soft and slightly underdone — that’s exactly what you want.
- Let the cookies cool on the baking sheet for 5 minutes before transferring them to a wire rack to cool completely.
Notes
Chill the dough for at least 20 minutes to prevent spreading. Measure flour correctly by spooning and leveling. Don’t overmix the dough. Let cookies cool on the baking sheet for 5 minutes before transferring. For best results, use 100% pure pumpkin puree, not pumpkin pie filling. Cookies stay soft for up to 5 days at room temperature in an airtight container; add a slice of bread to keep them soft. Freeze baked cookies for up to 3 months.
Nutrition
- Serving Size: 1 cookie
- Calories: 145
- Sugar: 12
- Sodium: 95
- Fat: 7
- Saturated Fat: 4
- Carbohydrates: 20
- Fiber: 1
- Protein: 2
Keywords: pumpkin snickerdoodle cookies, soft baked pumpkin cookies, fall cookies, cinnamon sugar cookies, easy pumpkin recipe



