Love this? Save it for later!
Share the inspiration with your friends
The zucchini was threatening me from the back of the crisper drawer. You know the one — that lone squash you bought with good intentions, now slightly softer than it was three days ago, staring you down every time you open the fridge. It was a Tuesday evening, the kind where you want something snacky but not heavy, and I was tired of the same old roasted vegetables. I wanted crunch. I wanted salt. I wanted that satisfied feeling of biting into something crispy without the guilt that usually follows. So I grabbed the zucchini, a block of Parmesan, and decided to experiment.
Honestly, I wasn’t expecting much. Zucchini is, let’s face it, mostly water. Getting it crispy in the oven seemed like a long shot. But I had this hunch — if I could coax out enough moisture and pair it with the salty, nutty power of Parmesan, maybe, just maybe, I could create something special. And that’s exactly what happened. The first batch came out of the oven, and I stood there at the counter, eating them straight off the baking sheet. They were golden, shatteringly crisp at the edges, and so deeply savory that I forgot they were vegetables entirely.
That moment stuck with me. Not because it was fancy or complicated, but because it solved a very real problem: how to make a healthy snack that actually feels like a treat. This recipe for crispy baked Parmesan zucchini chips is the result of that Tuesday night experiment, refined through a few more trials (and a couple of batches I burned, because I got distracted). It’s become my go-to for those afternoons when I need something to munch on, or when I want to sneak more vegetables into my life without feeling like I’m suffering for it. Trust me on this one — you’ll want to make these chips your new kitchen staple.
Why You’ll Love This Recipe
I’ve tested this recipe more times than I care to admit, tweaking the temperature, the coating, the thickness of the slices. What I landed on is, without exaggeration, the best version of crispy baked zucchini chips I’ve ever made. Here’s why you’ll feel the same way:
- Incredibly Easy: You don’t need a deep fryer or any fancy equipment. Just a baking sheet, an oven, and about 10 minutes of prep time. The oven does the hard work.
- Simple, Wholesome Ingredients: Zucchini, Parmesan, breadcrumbs, and a few pantry staples. That’s it. No strange additives or hard-to-find items.
- Perfect for Snacking or Side Dishes: These chips vanish at parties, make a fantastic afternoon snack, and pair beautifully with grilled chicken or fish for a light dinner.
- A Crowd-Pleaser: I’ve served these to zucchini skeptics and watched them go back for seconds. The crispy, cheesy exterior wins everyone over.
- Baked, Not Fried: You get all the crunch of a fried chip without the heavy oil. They feel indulgent but are genuinely good for you.
What makes this recipe different from the dozens of others out there is the technique. I figured out that salting the zucchini slices first — drawing out that excess moisture — is the non-negotiable secret to achieving a crisp that lasts. Skipping this step leads to soggy, sad chips. I also nailed the perfect coating ratio: enough Parmesan to create a deeply savory crust, but not so much that it overwhelms the delicate zucchini flavor. This isn’t just another baked zucchini chip recipe. It’s the one you’ll bookmark and make on repeat.
There’s something deeply satisfying about pulling a tray of these out of the oven. They smell incredible — nutty, cheesy, a little bit garlicky — and they look like something you’d pay good money for at a restaurant. But the best part is the first bite. That initial crunch gives way to a tender, almost creamy center, and the combination is pure comfort. It’s the kind of snack that makes you feel good about what you’re eating, both in the moment and after. Honestly, that’s a win in my book.
What Ingredients You Will Need
This recipe relies on a short list of ingredients, each playing a specific role in creating that perfect crispy, cheesy chip. Here’s what you’ll need and why they matter.
- Zucchini (2 medium, about 8-10 ounces each): The star of the show. Look for firm, medium-sized zucchini. Avoid the giant ones — they tend to be watery and seedy. You’ll slice them into 1/4-inch thick rounds. No need to peel them; the skin adds color and a bit of texture.
- Kosher salt (1 teaspoon, plus more for sprinkling): This is your secret weapon. Salting the zucchini draws out excess moisture, which is the single most important step for achieving crispiness. I use kosher salt because it dissolves easily and doesn’t make the chips overly salty.
- Grated Parmesan cheese (1/2 cup, finely grated): Not the powdery stuff from a green can. I strongly recommend buying a block of real Parmesan and grating it yourself on the fine side of a box grater. It melts more evenly and has a far superior flavor. The Parmesan creates a savory, nutty crust that gets beautifully golden in the oven.
- Panko breadcrumbs (1/2 cup): Panko is key here. They are larger and flakier than regular breadcrumbs, which means they create a lighter, crunchier coating. Regular breadcrumbs will work in a pinch, but the texture won’t be as shatteringly crisp.
- Garlic powder (1/2 teaspoon): Adds a subtle savory depth without the burn risk of fresh garlic. It blends into the coating and makes everything taste more complex.
- Dried oregano (1/2 teaspoon): A little herbaceous note that pairs beautifully with the zucchini and Parmesan. You could substitute dried basil or Italian seasoning if you prefer.
- Black pepper (1/4 teaspoon, freshly ground): A must for balancing the richness of the cheese.
- Olive oil spray or cooking spray: A light misting helps the coating crisp up without making the chips greasy. You can also use a pastry brush to apply a thin layer of olive oil to the baking sheet.
- Optional for serving: Marinara sauce, ranch dressing, or a squeeze of lemon: These chips are fantastic on their own, but a dipping sauce takes them to the next level.
One thing I’ve learned: don’t skimp on the Parmesan. It’s not just a flavoring — it’s a structural component of the crust. The cheese melts and crisps up, creating those irresistible golden-brown edges. If you’re looking for a dairy-free option, you can try using a high-quality nutritional yeast, but the texture will be different. For a gluten-free version, use gluten-free panko breadcrumbs — they work beautifully.
I usually buy my Parmesan from Trader Joe’s or Costco — they have good blocks at reasonable prices. And for panko, I’m partial to the Kikkoman brand, but any brand will work. The key is to keep the ingredients simple and let the quality of the zucchini and cheese shine through.
Equipment Needed
You don’t need a lot of fancy gear to make these chips, which is part of why I love this recipe. Here’s what you’ll want to have on hand:
- Baking sheet (1 large, rimmed): A standard half-sheet pan works perfectly. The rim is important to catch any oil or cheese drips. I recommend lining it with parchment paper for easy cleanup — the chips can stick to an unlined pan, especially around the edges.
- Wire rack (optional but helpful): Placing a wire rack on the baking sheet allows air to circulate around the chips, helping them crisp up more evenly. If you don’t have one, you can flip the chips halfway through baking.
- Box grater or Microplane: For grating the Parmesan. A Microplane creates an incredibly fine grate that melts beautifully. A box grater’s fine side works just as well.
- Sharp knife and cutting board: For slicing the zucchini into even rounds. A mandoline would also work if you have one — it ensures perfectly uniform slices.
- Paper towels or clean kitchen towels: For drying the zucchini slices after salting. This step is crucial for removing the drawn-out moisture.
- Mixing bowls (2 small): One for the coating mixture, one for the beaten eggs (if you use an egg wash). I’ve found that using a shallow bowl or pie plate makes it easier to coat the slices.
- Tongs or a fork: For transferring the coated zucchini slices to the baking sheet. Tongs give you more control and keep your fingers clean.
If you don’t have a wire rack, don’t worry. I’ve made these chips plenty of times without one, and they still come out wonderfully crisp. Just make sure to flip them halfway through baking. And if you’re using a non-stick baking sheet, you might still want to use parchment paper — the Parmesan can stick and burn onto the surface.
Preparation Method
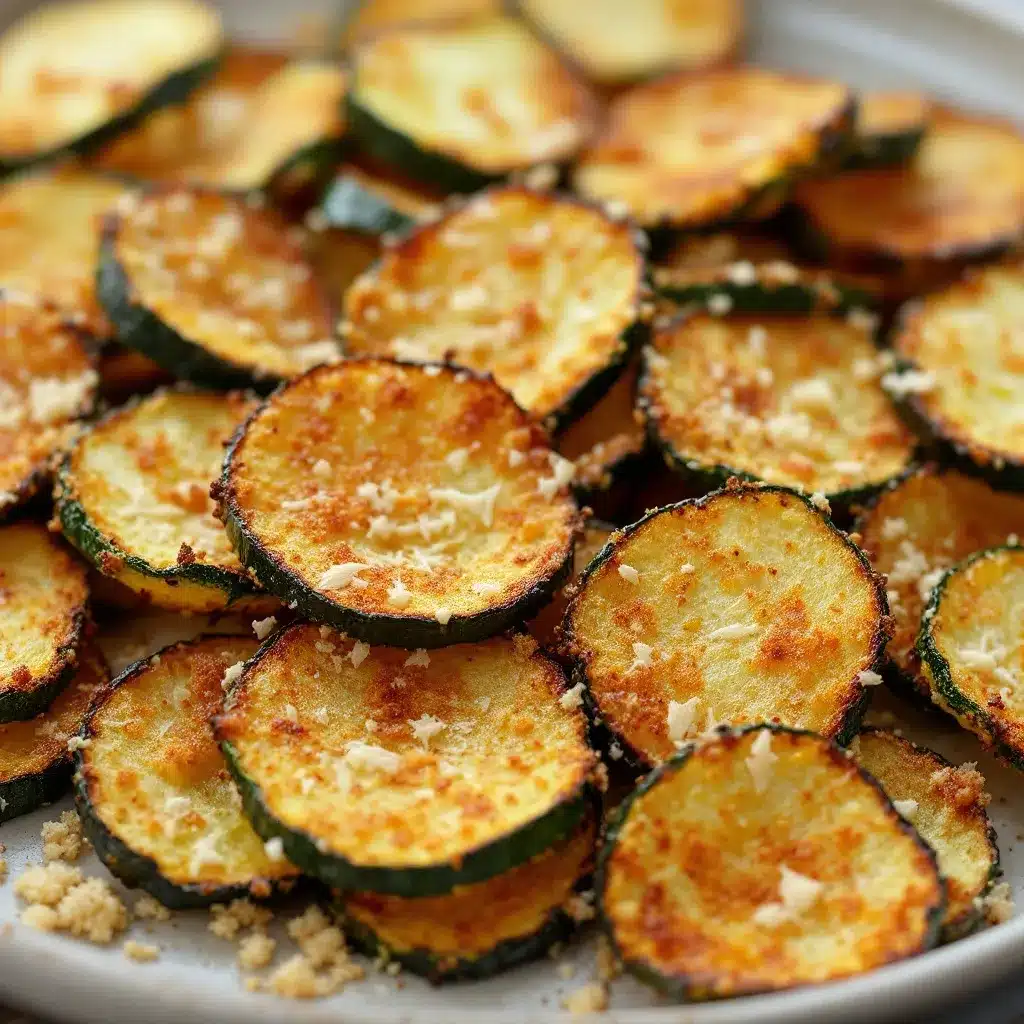
Let’s get to the good part. This method is straightforward, but each step matters. Follow along, and you’ll have a tray of perfectly crispy zucchini chips in about 30 minutes.
- Preheat your oven to 425°F (220°C). This high temperature is essential for creating that golden, crispy crust. Let the oven fully preheat before you put the chips in — a hot oven is your best friend here.
- Prepare the zucchini. Wash and dry the zucchini. Trim off the ends, then slice them into 1/4-inch thick rounds. Try to keep them as uniform as possible so they cook evenly. I usually get about 20-24 slices per medium zucchini.
- Salt the zucchini. Place the slices in a single layer on a paper towel-lined baking sheet or cutting board. Sprinkle them lightly with kosher salt on both sides. Let them sit for 10 minutes. You’ll see beads of water forming on the surface — that’s the excess moisture being drawn out. This step is non-negotiable. Skip it, and you’ll end up with soggy chips.
- Pat them dry. After 10 minutes, use a clean paper towel to gently press the zucchini slices and absorb all the released moisture. They should feel dry to the touch. This is the most important step for achieving crispiness.
- Prepare the coating. In a shallow bowl, combine the grated Parmesan, panko breadcrumbs, garlic powder, dried oregano, and black pepper. Mix well with a fork to distribute the seasonings evenly.
- Set up your assembly line. Have your dried zucchini slices, the coating mixture, and your prepared baking sheet (lined with parchment paper and lightly sprayed with olive oil) ready to go.
- Coat the zucchini. Working with one slice at a time, press both sides of the zucchini into the coating mixture. Make sure each slice is evenly coated. You want a nice, thick layer of the Parmesan-breadcrumb mixture. Gently shake off any excess.
- Arrange on the baking sheet. Place the coated slices in a single layer on the prepared baking sheet. Don’t overcrowd them — leave a little space between each slice so the hot air can circulate. If you crowd them, they’ll steam instead of crisp.
- Spray with oil. Lightly spray the tops of the coated zucchini slices with olive oil spray. This helps the coating turn golden and crispy. Don’t skip this step — the oil is what creates that beautiful, crunchy texture.
- Bake for 12-15 minutes. Place the baking sheet on the middle rack of your preheated oven. Bake for 12 minutes, then check for doneness. The chips should be golden brown and crispy around the edges. If they need more time, bake for an additional 2-3 minutes. Keep a close eye on them in the last few minutes — they can go from golden to burnt very quickly.
- Flip halfway (optional but recommended). If you’re not using a wire rack, flip each chip over halfway through baking (around the 6-7 minute mark). This ensures even browning on both sides.
- Cool on the baking sheet. Once they’re done, remove the baking sheet from the oven. Let the chips cool on the sheet for 2-3 minutes. They will continue to crisp up as they cool. Resist the urge to eat them immediately — they’re hot, and the cooling time is crucial for the final texture.
- Serve immediately. Transfer the chips to a plate or serving platter. They are best enjoyed fresh out of the oven, while they’re still warm and crispy. Serve with your favorite dipping sauce or enjoy them on their own.
One thing I learned the hard way: don’t try to rush the salting step. I’ve skipped it in a hurry, and the result was a tray of limp, sad chips that tasted more like steamed zucchini than crispy snacks. Patience pays off here. Also, if your chips seem a little pale after 12 minutes, give them an extra minute or two. Ovens vary, and you want that deep golden color.
Cooking Tips & Techniques
Over the many batches I’ve made, I’ve picked up a few tricks that make a real difference. Here are my best tips for perfect zucchini chips every time:
- Don’t skip the salting. I can’t emphasize this enough. Zucchini is about 95% water. If you don’t draw out that moisture, it will release in the oven and turn your coating into a soggy mess. The 10-minute salt rest is the foundation of a crispy chip.
- Use a wire rack if you have one. Placing the coated zucchini on a wire rack set inside the baking sheet allows hot air to circulate underneath, preventing the bottom from getting soggy. If you don’t have one, flipping the chips halfway through is a good alternative.
- Don’t overcrowd the pan. Give each chip a little breathing room. If they’re touching, they’ll steam each other. I usually get about 20 chips per large baking sheet. If you’re making a double batch, use two sheets or bake in batches.
- Keep an eye on the oven. The line between perfectly golden and burnt is thin. Check your chips at the 12-minute mark and watch them closely after that. Every oven runs a little differently, so trust your eyes more than the timer.
- Let them cool on the pan. The chips continue to crisp as they cool. If you move them too soon, they might break or lose some of their crunch. A few minutes of patience makes a big difference.
- Season after baking. If you want a little extra salt or a sprinkle of fresh herbs, do it after they come out of the oven. Salting before baking can draw out more moisture and make the coating less crispy.
I once made the mistake of using a non-stick baking sheet without parchment paper. The Parmesan stuck to the surface, and I spent 20 minutes scrubbing it off. Lesson learned: parchment paper is your friend. It makes cleanup a breeze and prevents any sticking issues.
Variations & Adaptations
This recipe is wonderfully flexible. Here are some of my favorite ways to change it up:
- Spicy Chipotle Version: Add 1/2 teaspoon of chipotle powder or smoked paprika to the coating mixture. The smoky heat pairs beautifully with the Parmesan. Serve with a cooling ranch or Greek yogurt dip.
- Herb and Garlic Lovers: Increase the dried oregano to 1 teaspoon and add 1/2 teaspoon of dried thyme or rosemary. You can also add a pinch of red pepper flakes for a subtle kick.
- Gluten-Free Adaptation: Substitute the panko breadcrumbs with gluten-free panko or finely crushed pork rinds (for a low-carb option). Both work surprisingly well and maintain a good crunch.
- Dairy-Free Option: Replace the Parmesan with 1/4 cup of nutritional yeast mixed with 1/4 cup of almond flour. The texture will be slightly different — more delicate — but the flavor is still deeply savory and cheesy.
- Air Fryer Method: If you have an air fryer, you can make these chips in about 8-10 minutes at 400°F (200°C). Arrange them in a single layer in the basket, spray with oil, and cook until golden and crispy. No flipping needed.
My personal favorite variation is the spicy chipotle version. I discovered it by accident when I was out of oregano and grabbed the chipotle powder instead. It was a happy accident — the heat and smokiness add a whole new dimension. Serve them alongside a batch of loaded cowboy caviar for a game-day snack spread that will disappear in minutes.
Serving & Storage Suggestions
These chips are best enjoyed fresh, but here’s how to make the most of them:
- Serving Temperature: Serve warm, straight from the oven. They’re at their crispiest within the first 30 minutes. If you’re making them for a party, try to time them so they come out just before guests arrive.
- Presentation Ideas: Arrange them on a wooden board or a simple white platter. A small bowl of warm marinara sauce or a creamy garlic aioli in the center makes for a beautiful and inviting presentation. A sprinkle of fresh parsley or basil adds a pop of color.
- Complementary Dishes: These chips are fantastic alongside a creamy dill cucumber salad for a light, refreshing meal. They also pair beautifully with grilled garlic butter salmon or a simple roast chicken.
- Storage: If you have leftovers (unlikely, but possible), store them in an airtight container at room temperature for up to 1 day. Do not refrigerate them — the moisture in the fridge will make them soggy.
- Reheating: To revive leftover chips, place them on a baking sheet in a 350°F (175°C) oven for 3-5 minutes. They won’t be quite as crispy as the first time, but they’ll still be delicious. Avoid the microwave — it will turn them into sad, chewy discs.
- Flavor Development: Honestly, these chips don’t improve with time. They’re a “make and eat” kind of recipe. That’s part of their charm — they’re meant to be enjoyed immediately, in the moment.
Nutritional Information & Benefits
Per serving (about 10 chips, based on the full recipe yielding 4 servings):
- Calories: Approximately 120-140
- Protein: 8-10 grams
- Fat: 6-8 grams
- Carbohydrates: 8-10 grams
- Fiber: 2-3 grams
- Sugar: 2-3 grams
These chips are a nutritional powerhouse disguised as a snack. Zucchini is low in calories but high in vitamins A and C, potassium, and antioxidants. The Parmesan adds a good dose of calcium and protein, making this a more satisfying snack than plain vegetables. The panko adds a little carbohydrate, but the overall carb count is still reasonable.
This recipe is naturally vegetarian and can be made gluten-free with a simple swap. It’s also relatively low in carbs compared to traditional potato chips, making it a great option for anyone watching their intake. The fiber from the zucchini helps with satiety, so you’ll feel full and satisfied after a serving.
From a wellness perspective, I love that this snack feels indulgent without the guilt. It’s the kind of recipe that makes you feel good about what you’re eating — both in the moment and after. And honestly, that’s a rare and wonderful thing.
Conclusion
These crispy baked Parmesan zucchini chips are more than just a snack — they’re proof that healthy eating doesn’t have to be boring or bland. With a handful of simple ingredients and a little patience, you can create something that’s genuinely crave-worthy. The salty, cheesy crunch is deeply satisfying, and the tender zucchini center is a delightful surprise.
I hope you give this recipe a try. Don’t be afraid to make it your own — experiment with different seasonings, try the air fryer version, or serve them alongside your favorite dipping sauce. The beauty of this recipe is its simplicity and flexibility. It’s a blank canvas for your creativity.
If you make these chips, I’d love to hear about it. Leave a comment below and let me know how they turned out, or share your own variation. Tag me in your photos on social media — I love seeing your kitchen creations. And if you’re looking for more easy, healthy snack ideas, check out my recipe for no-bake peanut butter protein balls or these 5-minute energy bites for another quick and satisfying option.
Happy cooking, and remember — the best snacks are the ones you make yourself.
Frequently Asked Questions
Can I make these zucchini chips ahead of time?
These chips are best enjoyed fresh out of the oven. They lose their crispiness over time, especially if stored in the refrigerator. If you need to make them ahead, bake them, let them cool completely, and store them in an airtight container at room temperature for up to a day. Reheat them in a 350°F oven for a few minutes to restore some crunch.
Why are my zucchini chips soggy?
Soggy chips are usually the result of not removing enough moisture from the zucchini. Make sure you salt the slices and let them sit for at least 10 minutes, then pat them thoroughly dry with paper towels. Also, avoid overcrowding the baking sheet — the chips need space for hot air to circulate and crisp them up.
Can I use regular breadcrumbs instead of panko?
Yes, you can use regular breadcrumbs, but the texture will be different. Panko breadcrumbs are larger and flakier, which creates a lighter, crunchier coating. Regular breadcrumbs are finer and will produce a denser, less crispy crust. If you only have regular breadcrumbs, consider toasting them lightly in a dry pan first to improve their crunch.
Can I freeze these zucchini chips?
Freezing is not recommended. The high water content in zucchini means they will become mushy when thawed and reheated. These chips are truly a “make and eat” recipe. If you have leftovers, it’s better to store them at room temperature and reheat in the oven.
Are these chips keto-friendly?
They can be, with a simple modification. Replace the panko breadcrumbs with almond flour or crushed pork rinds. This significantly reduces the carbohydrate content. The Parmesan provides plenty of flavor and helps create a crispy crust. Serve them with a high-fat dip like ranch or aioli for a fully keto-friendly snack.
Pin This Recipe!
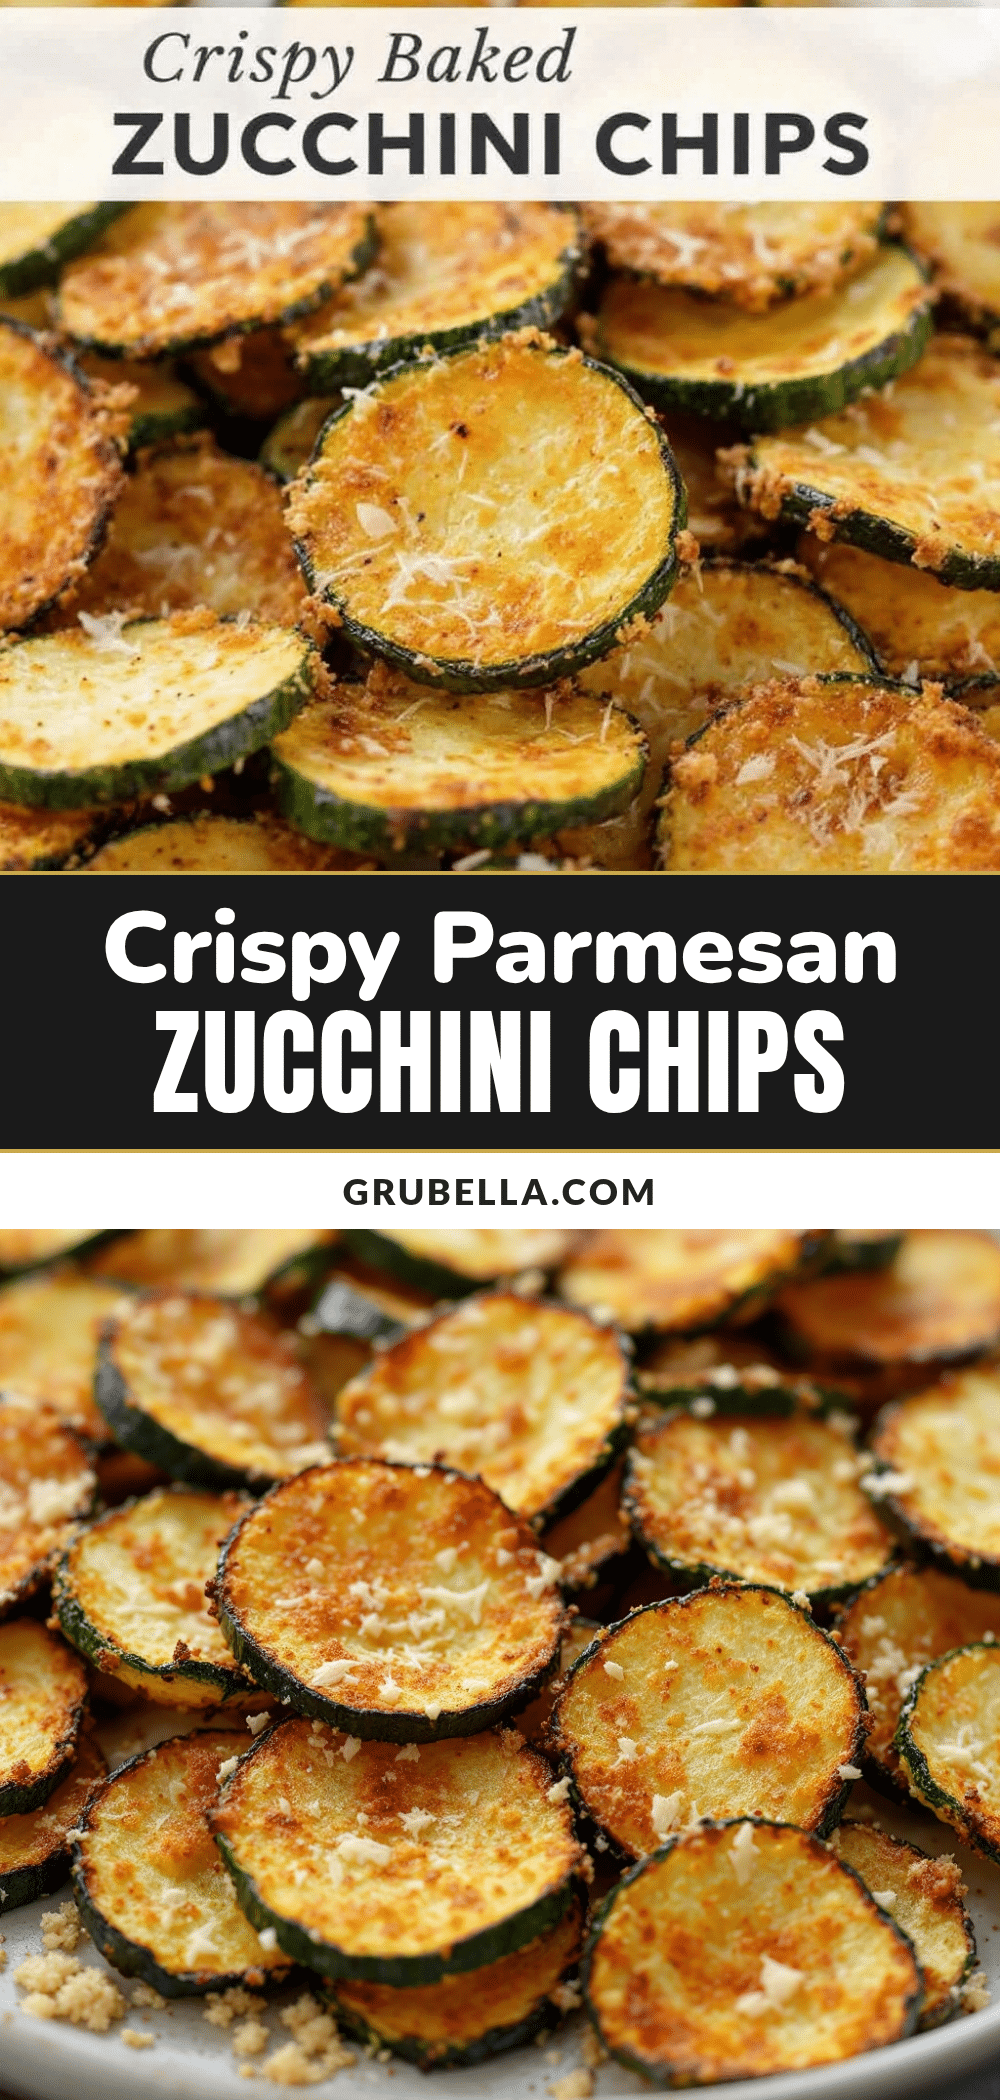
Best Crispy Baked Parmesan Zucchini Chips Recipe (Easy!)
These crispy baked Parmesan zucchini chips are a healthy, guilt-free snack that delivers all the crunch of a fried chip. With a simple technique and wholesome ingredients, you can enjoy a savory, cheesy treat that’s perfect for snacking or as a side dish.
- Prep Time: 15 minutes
- Cook Time: 15 minutes
- Total Time: 30 minutes
- Yield: 4 servings 1x
- Category: Snack
- Cuisine: American
Ingredients
- 2 medium zucchini (about 8–10 ounces each)
- 1 teaspoon kosher salt, plus more for sprinkling
- 1/2 cup finely grated Parmesan cheese
- 1/2 cup panko breadcrumbs
- 1/2 teaspoon garlic powder
- 1/2 teaspoon dried oregano
- 1/4 teaspoon freshly ground black pepper
- Olive oil spray or cooking spray
- Optional for serving: marinara sauce, ranch dressing, or lemon wedge
Instructions
- Preheat your oven to 425°F (220°C).
- Wash and dry the zucchini. Trim off the ends, then slice into 1/4-inch thick rounds.
- Place the slices in a single layer on a paper towel-lined baking sheet. Sprinkle lightly with kosher salt on both sides. Let sit for 10 minutes.
- After 10 minutes, use a clean paper towel to gently press the zucchini slices and absorb all released moisture. They should feel dry to the touch.
- In a shallow bowl, combine the grated Parmesan, panko breadcrumbs, garlic powder, dried oregano, and black pepper. Mix well.
- Line a baking sheet with parchment paper and lightly spray with olive oil.
- Working with one slice at a time, press both sides of the zucchini into the coating mixture. Ensure each slice is evenly coated. Gently shake off any excess.
- Place the coated slices in a single layer on the prepared baking sheet, leaving space between each slice.
- Lightly spray the tops of the coated zucchini slices with olive oil spray.
- Bake for 12-15 minutes, until golden brown and crispy around the edges. If not using a wire rack, flip halfway through (at 6-7 minutes).
- Remove from oven and let cool on the baking sheet for 2-3 minutes. They will continue to crisp up as they cool.
- Serve immediately, warm, with your favorite dipping sauce or on their own.
Notes
Don’t skip the salting step—it draws out moisture and is essential for crispiness. Use a wire rack if possible for even air circulation. Avoid overcrowding the baking sheet. Let chips cool on the pan for a few minutes to maximize crunch. For best results, serve immediately.
Nutrition
- Serving Size: about 10 chips
- Calories: 130
- Sugar: 2
- Sodium: 350
- Fat: 7
- Saturated Fat: 3
- Carbohydrates: 9
- Fiber: 2
- Protein: 9
Keywords: zucchini chips, baked zucchini chips, Parmesan zucchini chips, crispy zucchini chips, healthy snack, easy snack, vegetarian snack



