Love this? Save it for later!
Share the inspiration with your friends
My nephew, Leo, had sworn off sandwiches for six months. Six months. He’d peer into his lunchbox, see two slices of bread, and slide it back across the table like I’d packed him a live snake. I tried everything—different breads, fancy fillings, even cookie cutters. Nothing. Then, on a random Tuesday, I made these ham and cheese pinwheels just to use up some leftover crescent roll dough. I didn’t tell him what they were. I just put them in a little container. That afternoon, I got a text from my sister: “What did you put in his lunch? He ate everything and asked for more.” Honestly, I felt a little smug. But mostly, I felt relieved. You know that feeling when you finally crack the code on a picky eater? It’s a small victory, but it’s a victory.
These ham and cheese pinwheels are my secret weapon now. They’re not just another lunch idea; they’re the lunch idea that broke a six-month sandwich boycott. They come together in about fifteen minutes of hands-on time, they use ingredients you probably already have, and they somehow taste better than the sum of their parts. The flaky pastry, the salty ham, the melty cheese—it’s a combo that’s hard to resist, even for the most stubborn of eaters. I keep making them because they work. And honestly, they make me look like a hero.
Why You’ll Love This Recipe
Let me tell you why these little spirals have become a staple in my kitchen. I’ve tested this recipe more times than I can count, tweaking the filling ratios and baking times to get it just right. It’s been kid-approved, husband-approved, and even survived a preschool class party without a single leftover. Here’s what makes them so special:
- Quick & Easy: From start to finish, you’re looking at about 20 minutes. Perfect for those mornings when you realize you forgot to pack lunch. (We’ve all been there.)
- Simple Ingredients: You need exactly four main ingredients. No special trips to the grocery store. I bet you have them all right now.
- Perfect for Lunchboxes: They hold their shape, don’t get soggy, and are easy for little fingers to handle. No more sad, squashed sandwiches.
- Crowd-Pleaser: I’ve served these at playdates, birthday parties, and even a casual brunch. They disappear every single time.
- Unbelievably Delicious: The secret is in the layering. The cheese gets all bubbly and the ham crisps up just a little at the edges. It’s comfort food in a bite-sized package.
What makes this version different from the rest? It’s the technique. I don’t over-stuff them, which keeps them from unrolling. I also use a specific type of cheese—sharp cheddar—that stands up to the salty ham without getting greasy. This isn’t just another pinwheel recipe; it’s the one I’ve perfected through trial and error so you don’t have to. It’s the kind of recipe that makes you close your eyes after the first bite, even if you’re just standing over the kitchen counter stealing one before it makes it into a lunchbox.
What Ingredients You Will Need
This recipe uses simple, everyday ingredients to create something that feels a little bit special. Nothing fancy here—just good, honest food that works together perfectly. I’ve tested a few variations, and this combination gives you the best texture and flavor every time.
- 1 can (8 oz) refrigerated crescent roll dough: This is your shortcut to flaky, buttery goodness. I prefer the Pillsbury brand for consistent results, but any store brand works fine. Make sure it’s the sheet-style dough, not the perforated triangles, if you can find it. If you only have the perforated kind, just pinch the seams together well.
- 6 slices of deli ham: Go for quality here. I like black forest ham or honey ham for a touch of sweetness. Avoid the super thin-shaved stuff—it can make the pinwheels soggy. You want slices that are sturdy enough to hold their shape.
- 1 cup shredded sharp cheddar cheese: Sharp cheddar gives you the most flavor. Pre-shredded cheese works in a pinch, but freshly shredded melts so much better. It’s one of those small things that makes a big difference.
- 2 tablespoons cream cheese, softened: This is my secret ingredient. It acts like a glue to hold everything together and adds a creamy tang that balances the saltiness of the ham. Make sure it’s softened to room temperature, or you’ll have lumps.
- 1 tablespoon Dijon mustard (optional): A little smear of mustard cuts through the richness and adds a nice kick. You can leave it out if you’re feeding picky eaters, but I think it really makes the flavors pop.
- 1 tablespoon melted butter: For brushing on top before baking. This gives them that gorgeous golden-brown color and a little extra buttery flavor. You can skip it, but why would you?
- Everything bagel seasoning (optional): A sprinkle on top before baking adds texture and flavor. I’m obsessed with this stuff. It makes them look fancy with zero extra effort.
Equipment Needed
You don’t need a fully stocked kitchen to make these. I’ve made them in a tiny apartment oven and a fancy convection oven, and they turn out great either way. Here’s what you’ll need:
- Baking sheet: A standard half-sheet pan works perfectly. Line it with parchment paper for easy cleanup. Trust me on this—the cheese will try to escape.
- Rolling pin: You’ll need this to smooth out the crescent dough. If you don’t have one, a clean wine bottle works in a pinch. I’ve done it. It’s fine.
- Sharp knife or pizza cutter: A pizza cutter makes slicing the pinwheels so much easier. A sharp chef’s knife works too, but a pizza cutter gives you cleaner cuts without squishing the roll.
- Pastry brush: For brushing on the melted butter. You can use a spoon if you’re in a hurry, but a brush gives you a more even coat.
- Small bowl: For mixing the cream cheese and mustard together. Any small bowl will do.
- Parchment paper: Not strictly necessary, but it makes cleanup a breeze. I’m all about less dishes.
Budget-friendly tip: If you don’t have a pastry brush, just use a folded paper towel dipped in the melted butter. It works surprisingly well.
Preparation Method
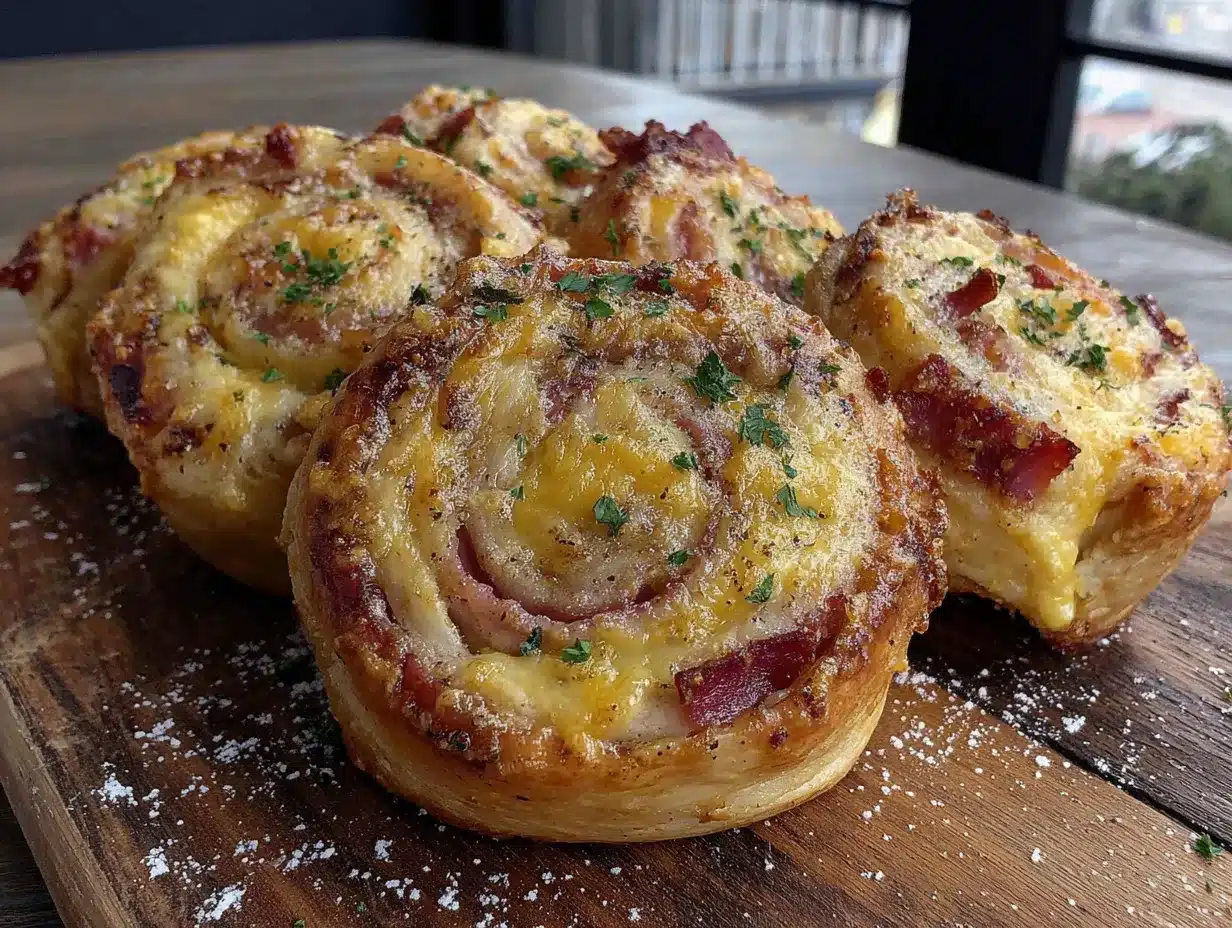
Alright, let’s get to the fun part. I’m going to walk you through this step-by-step, with all the little tricks I’ve learned from making these about a hundred times. Don’t skip the cream cheese step—it’s the glue that holds everything together.
- Preheat your oven to 375°F (190°C). Line a baking sheet with parchment paper. While it’s heating up, take your cream cheese out of the fridge so it can soften. If you forget, pop it in the microwave for about 10 seconds. Just don’t melt it.
- Unroll the crescent dough onto a lightly floured surface. If you have the sheet-style dough, great. If you have the perforated triangles, press the seams together with your fingers until they disappear. Use a rolling pin to gently roll it out into a rectangle, about 10×14 inches. Don’t roll it too thin, or it might tear.
- In a small bowl, mix the softened cream cheese and Dijon mustard (if using) until smooth. Spread this mixture evenly over the dough, leaving a 1-inch border at the top edge. This border will help seal the roll. I use a rubber spatula for this, but the back of a spoon works too.
- Layer the ham slices over the cream cheese mixture. Overlap them slightly so there are no gaps. You want every bite to have a little bit of ham. If your ham slices are really big, you might only need 4 or 5. If they’re small, use 7 or 8.
- Sprinkle the shredded cheddar cheese evenly over the ham. Don’t go overboard here—a generous cup is plenty. Too much cheese will ooze out while baking and make a mess. I learned this the hard way.
- Starting at the bottom edge, carefully roll the dough up tightly. Use both hands and roll it like a jelly roll. Keep it as tight as you can without squeezing the filling out the ends. When you get to the top, press the border to seal the seam. Give it a gentle roll so the seam is on the bottom.
- Using a sharp knife or pizza cutter, slice the log into 12 even pinwheels. Each one should be about 1 inch thick. If the log squishes a little, don’t panic. Just reshape the pinwheels with your fingers after you cut them. A pizza cutter really does make this easier.
- Place the pinwheels on the prepared baking sheet, cut-side up. Leave about an inch of space between each one—they’ll expand a little while baking. Brush the tops with melted butter. Sprinkle with everything bagel seasoning if you’re using it.
- Bake for 12-15 minutes, or until the pinwheels are golden brown and the cheese is bubbly. The edges should be crispy and the tops should be a deep golden color. Let them cool on the baking sheet for 5 minutes before transferring to a wire rack. This is important—they need to set up a little or they might fall apart.
Sensory cue: Your kitchen will smell like buttery, cheesy heaven. The tops should look golden and slightly puffed. If you tap one, it should feel firm, not doughy. That’s how you know they’re done.
Cooking Tips & Techniques
I’ve made a lot of mistakes with these pinwheels so you don’t have to. Here are the biggest lessons I’ve learned:
Don’t over-stuff them. I know it’s tempting to pile on the ham and cheese, but less is more here. Too much filling makes the pinwheels hard to roll and they’ll unroll while baking. Trust the measurements in the recipe. They’re tested.
Keep the dough cold. If your kitchen is warm, the crescent dough can get sticky and hard to work with. If that happens, pop it in the fridge for 10 minutes before rolling. Cold dough is easier to handle and gives you cleaner cuts.
Use a serrated knife for cutting. If you don’t have a pizza cutter, a serrated knife works better than a straight blade. The sawing motion cuts through the dough without squishing it. I learned this after ruining a batch with a dull knife.
Let them cool completely before packing. If you put warm pinwheels in a lunchbox, they’ll steam and get soggy. Let them cool on a wire rack for at least 15 minutes. They’re actually better at room temperature anyway.
Make them ahead. You can assemble the pinwheels the night before, keep them in the fridge, and bake them in the morning. Just add a couple of minutes to the baking time since they’ll be cold. This is a game-changer for busy mornings.
Variations & Adaptations
This recipe is super flexible. Here are some ways I’ve tweaked it for different tastes and dietary needs:
- Turkey and Swiss: Swap the ham for sliced turkey and the cheddar for Swiss cheese. It’s a classic combo that feels a little more grown-up. My sister-in-law loves this version.
- Veggie Lover’s: Skip the ham and add sautéed mushrooms, bell peppers, and spinach. Use mozzarella and a sprinkle of Italian seasoning. Even my meat-loving husband will eat these.
- Spicy Southwest: Use pepper jack cheese and add a smear of salsa or chipotle mayo. Top with a little cumin and chili powder before baking. These are perfect for game day.
- Gluten-Free Option: Use a gluten-free crescent dough. The texture is a little different, but the flavor is still great. I’ve used the brand from Whole Foods with good results.
- Dairy-Free Adaptation: Use dairy-free cream cheese and shredded cheese. Miyoko’s makes a great cheddar-style shred that melts well. Just be gentle with the rolling—dairy-free dough can be more fragile.
My personal favorite variation? I add a thin layer of fig jam under the cream cheese. The sweet and salty combo is incredible. I tried it on a whim one day and now I can’t go back.
Serving & Storage Suggestions
These pinwheels are perfect at room temperature, which makes them ideal for lunchboxes. But they’re also delicious warm, right out of the oven. Here’s how to serve and store them:
Serving: I like to serve them on a platter with a little bowl of ranch dressing or honey mustard for dipping. For lunchboxes, I just pack them plain. They hold up really well and don’t need any accompaniment. They’re also great for picnics, potlucks, or as an after-school snack.
Storage: Store leftover pinwheels in an airtight container in the refrigerator for up to 4 days. Layer them with parchment paper so they don’t stick together. I’ve found they actually taste better on day two—the flavors meld together beautifully.
Freezing: You can freeze the baked pinwheels for up to 3 months. Let them cool completely, then place them in a single layer on a baking sheet and freeze until solid. Transfer to a freezer bag. To reheat, pop them in a 350°F oven for about 8 minutes, or microwave for 30 seconds. The oven gives you a crispier result.
Reheating: If you’re reheating from the fridge, the microwave works fine for a quick snack. But if you want them crispy again, use a toaster oven or air fryer at 350°F for about 5 minutes. The air fryer is my new favorite method—they come out almost as good as fresh.
Flavor development: The flavors actually get better after a day in the fridge. The cream cheese and mustard meld together, and the ham infuses the dough with its salty goodness. Don’t be afraid to make these a day ahead.
Nutritional Information & Benefits
Here’s the breakdown for one pinwheel (based on 12 servings). Keep in mind these are estimates and can vary based on the brands you use:
| Nutrient | Amount per Pinwheel |
|---|---|
| Calories | 145 |
| Total Fat | 9g |
| Saturated Fat | 4.5g |
| Cholesterol | 25mg |
| Sodium | 420mg |
| Total Carbohydrates | 11g |
| Protein | 7g |
These pinwheels offer a decent amount of protein from the ham and cheese, which helps keep kids full until lunchtime. The crescent dough provides quick energy, while the cheese adds calcium for strong bones. If you use the Dijon mustard, you get a tiny metabolism boost from the turmeric in it.
Dietary considerations: This recipe is not gluten-free (unless you use GF dough) and contains dairy. For a lower-sodium option, use low-sodium ham and reduce the cheese slightly. You can also use reduced-fat crescent dough and cheese to cut down on calories and fat.
My personal take: I don’t stress about the numbers here. These are a treat, not an everyday staple. They’re made with real ingredients and they bring joy to lunchtime. That’s a win in my book.
Conclusion
These easy ham and cheese pinwheels are the lunchbox solution you didn’t know you needed. They’re quick, simple, and absolutely delicious. I’ve seen them win over picky eaters, busy parents, and even people who claimed they didn’t like crescent rolls. There’s just something about that spiral of ham and cheese wrapped in flaky, buttery dough that’s impossible to resist.
I encourage you to make them your own. Add your favorite cheese, swap in different meats, or throw in some veggies. The possibilities are endless. And honestly, that’s the beauty of a good recipe—it’s a starting point, not a rulebook.
I’d love to hear how yours turn out. Leave a comment below and tell me what variations you tried. Did your kids love them? Did you sneak one before they made it into the lunchbox? (I won’t tell.) Share this recipe with a friend who needs a lunchbox win. And remember—sometimes the simplest recipes are the ones that make the biggest difference. Happy cooking!
Frequently Asked Questions
Can I make these ham and cheese pinwheels ahead of time?
Absolutely. You can assemble them the night before, keep them in the fridge, and bake them in the morning. Just add 2-3 minutes to the baking time. You can also bake them fully and reheat them later.
How do I keep the pinwheels from unrolling while baking?
Make sure you roll the dough tightly and pinch the seam to seal it. Also, don’t over-stuff them. Too much filling makes them harder to roll and more likely to come apart. Placing them cut-side up on the baking sheet helps too.
Can I use a different type of dough?
Yes. Puff pastry works beautifully for a flakier version. Just thaw it according to the package directions and roll it out slightly. You can also use pizza dough for a chewier texture. Adjust the baking time as needed.
What’s the best way to reheat leftover pinwheels?
For the crispiest results, use a toaster oven or air fryer at 350°F for about 5 minutes. The microwave works in 30 seconds, but the texture will be softer. For lunchboxes, I serve them cold or at room temperature—they’re still delicious.
Can I freeze these ham and cheese pinwheels?
Yes. Freeze the baked and cooled pinwheels in a single layer on a baking sheet, then transfer to a freezer bag. They’ll keep for up to 3 months. Reheat directly from frozen in a 350°F oven for about 8 minutes.
Pin This Recipe!

Easy Ham and Cheese Pinwheels: Best Lunchbox Idea

These ham and cheese pinwheels are the perfect lunchbox solution, made with flaky crescent roll dough, salty ham, and melty cheese. They come together in about 20 minutes and are a crowd-pleaser for kids and adults alike.
- Prep Time: 15 minutes
- Cook Time: 15 minutes
- Total Time: 30 minutes
- Yield: 12 pinwheels 1x
- Category: Appetizer
- Cuisine: American
Ingredients
- 1 can (8 oz) refrigerated crescent roll dough
- 6 slices deli ham
- 1 cup shredded sharp cheddar cheese
- 2 tablespoons cream cheese, softened
- 1 tablespoon Dijon mustard (optional)
- 1 tablespoon melted butter
- Everything bagel seasoning (optional)
Instructions
- Preheat your oven to 375°F (190°C). Line a baking sheet with parchment paper. Take your cream cheese out of the fridge to soften.
- Unroll the crescent dough onto a lightly floured surface. If using perforated triangles, press the seams together. Roll out into a rectangle, about 10×14 inches.
- In a small bowl, mix the softened cream cheese and Dijon mustard (if using) until smooth. Spread evenly over the dough, leaving a 1-inch border at the top edge.
- Layer the ham slices over the cream cheese mixture, overlapping slightly.
- Sprinkle the shredded cheddar cheese evenly over the ham.
- Starting at the bottom edge, carefully roll the dough up tightly. Press the border to seal the seam. Place seam-side down.
- Using a sharp knife or pizza cutter, slice the log into 12 even pinwheels, each about 1 inch thick.
- Place the pinwheels on the prepared baking sheet, cut-side up, about an inch apart. Brush tops with melted butter. Sprinkle with everything bagel seasoning if using.
- Bake for 12-15 minutes, until golden brown and cheese is bubbly. Let cool on the baking sheet for 5 minutes before transferring to a wire rack.
Notes
Don’t over-stuff the pinwheels to prevent unrolling. Keep the dough cold for easier handling. Let them cool completely before packing to avoid sogginess. You can assemble the night before and bake in the morning.
Nutrition
- Serving Size: 1 pinwheel
- Calories: 145
- Sugar: 2
- Sodium: 420
- Fat: 9
- Saturated Fat: 4.5
- Carbohydrates: 11
- Protein: 7
Keywords: ham and cheese pinwheels, lunchbox ideas, easy appetizer, crescent roll recipes, kid-friendly snacks



