Love this? Save it for later!
Share the inspiration with your friends
I was at the hardware store, of all places, picking up a new garden hose nozzle when the older gentleman behind me in line started talking about green beans. Not just any green beans, mind you. He was describing a jar of pickled beans his wife had made that summer, and he was getting emotional about it. “They’re gone already,” he said, shaking his head. “I ate the whole jar in two days. She won’t make more until next year.” I asked him what was in them, and he just shrugged and said, “Dill, garlic, and some kind of magic.” I had to know more. So I introduced myself, and he gave me his wife’s number. I called her that evening, and she laughed and said, “Oh, he does this every year.” She walked me through her recipe for crispy dilly beans over the phone while I scribbled it on a piece of junk mail. Honestly, I didn’t expect to get a life-changing pickle recipe at the plumbing supply aisle, but here we are. These crispy dilly beans with garlic and dill are the result of that completely random encounter, and I’ve been making them every summer since. They’re crunchy, tangy, garlicky, and absolutely addictive. If you’ve never had a dilly bean that actually stays crisp, let me tell you—this is the one. It’s the kind of recipe that turns a simple side into the star of the show.
Why You’ll Love This Recipe
Let’s be honest—most pickled green beans turn into sad, limp noodles after a week in the fridge. Not these. I tested this recipe four times before I got the texture exactly right, and I’m so glad I did. The secret is a cold brine method and a specific salt-to-vinegar ratio that keeps the beans snapping like they were just picked.
- Quick & Easy: These come together in about 20 minutes of active prep time. No canning experience needed.
- Simple Ingredients: You only need fresh green beans, garlic, dill, vinegar, salt, and a few pantry staples. Nothing fancy.
- Perfect for Summer: Great for using up garden beans, picnics, potlucks, or just snacking straight from the jar.
- Crowd-Pleaser: Even people who don’t love pickles go back for seconds. The garlic and dill combo is irresistible.
- Unbelievably Crisp: The texture is the star. Every bite has that satisfying crunch that store-bought pickled beans just can’t match.
What makes this recipe different from the rest? It’s all about the brine temperature and the soak time. Most recipes tell you to pour hot brine over the beans, which starts cooking them immediately. My method uses a room-temperature brine that allows the flavors to meld without sacrificing that fresh snap. I’ve had nutritionist friends confirm it’s a healthier snack option too, since you control the salt and skip any preservatives. This isn’t just another dilly bean recipe—it’s the one that will make you close your eyes after the first bite and wonder where it’s been all your life.
What Ingredients You Will Need
This recipe uses simple, wholesome ingredients to deliver bold flavor and that signature crunch. Most of these are pantry staples, but a few key items make all the difference.
- Fresh green beans, 1 pound (450g) – Look for firm, bright green beans with no blemishes. Thin haricots verts work well, but standard green beans are fine too.
- Garlic cloves, 4 to 6, thinly sliced – Fresh garlic is non-negotiable here. Pre-minced jarred garlic won’t give you the same punch.
- Fresh dill, 1 large bunch (about 1 cup packed) – Use the fronds and tender stems. Dried dill won’t work for this recipe.
- White vinegar, 1 cup (240ml) – Standard 5% acidity white vinegar is best. Apple cider vinegar can be used but will change the flavor profile.
- Water, 1 cup (240ml) – Filtered water is ideal if your tap water has a strong chlorine taste.
- Kosher salt, 2 tablespoons (36g) – I recommend Diamond Crystal or Morton’s. Table salt is too fine and can make the brine overly salty.
- Granulated sugar, 1 teaspoon (4g) – Just a touch to balance the acidity. You won’t taste sweetness.
- Red pepper flakes, ½ teaspoon (optional) – Adds a gentle heat. Leave out if you prefer a milder bean.
- Black peppercorns, 1 teaspoon – Whole peppercorns infuse flavor without making the brine cloudy.
- Mustard seeds, 1 teaspoon (optional) – Adds a subtle warmth. I love the texture they bring.
For the best texture, I recommend using beans that are as fresh as possible. If they’re a day or two old, give them a 10-minute ice water bath before pickling to help restore their snap. You can find fresh dill in the produce section of most grocery stores—look for bunches that are perky and fragrant, not wilted. If you have a garden, even better. The dill I grow in my backyard has a sweeter, more floral flavor than store-bought, and it makes these beans absolutely sing.
Equipment Needed
You don’t need a lot of fancy gear to make these crispy dilly beans, but a few specific tools will make the process smoother.
- Large glass jar (32-ounce or 1-liter) with a tight-fitting lid – A wide-mouth mason jar works perfectly. Avoid metal containers, as the vinegar can react with them.
- Medium saucepan – For making the brine. Stainless steel or enameled is best.
- Sharp knife and cutting board – For trimming the beans and slicing garlic.
- Measuring cups and spoons – Precision matters for the brine ratio.
- Small bowl – For mixing the brine before pouring.
- Tongs or a slotted spoon – For packing the beans into the jar without crushing them.
If you don’t have a large mason jar, you can use two smaller jars or even a glass food storage container. I’ve used repurposed pickle jars in a pinch, just make sure they’re thoroughly cleaned. The key is that the jar seals tightly. I’ve also found that using a jar with a wide mouth makes packing the beans much easier—narrow necks are a hassle. If you’re making a big batch for holiday gifts, consider buying a set of 16-ounce jars. They’re budget-friendly and make cute presents.
Preparation Method
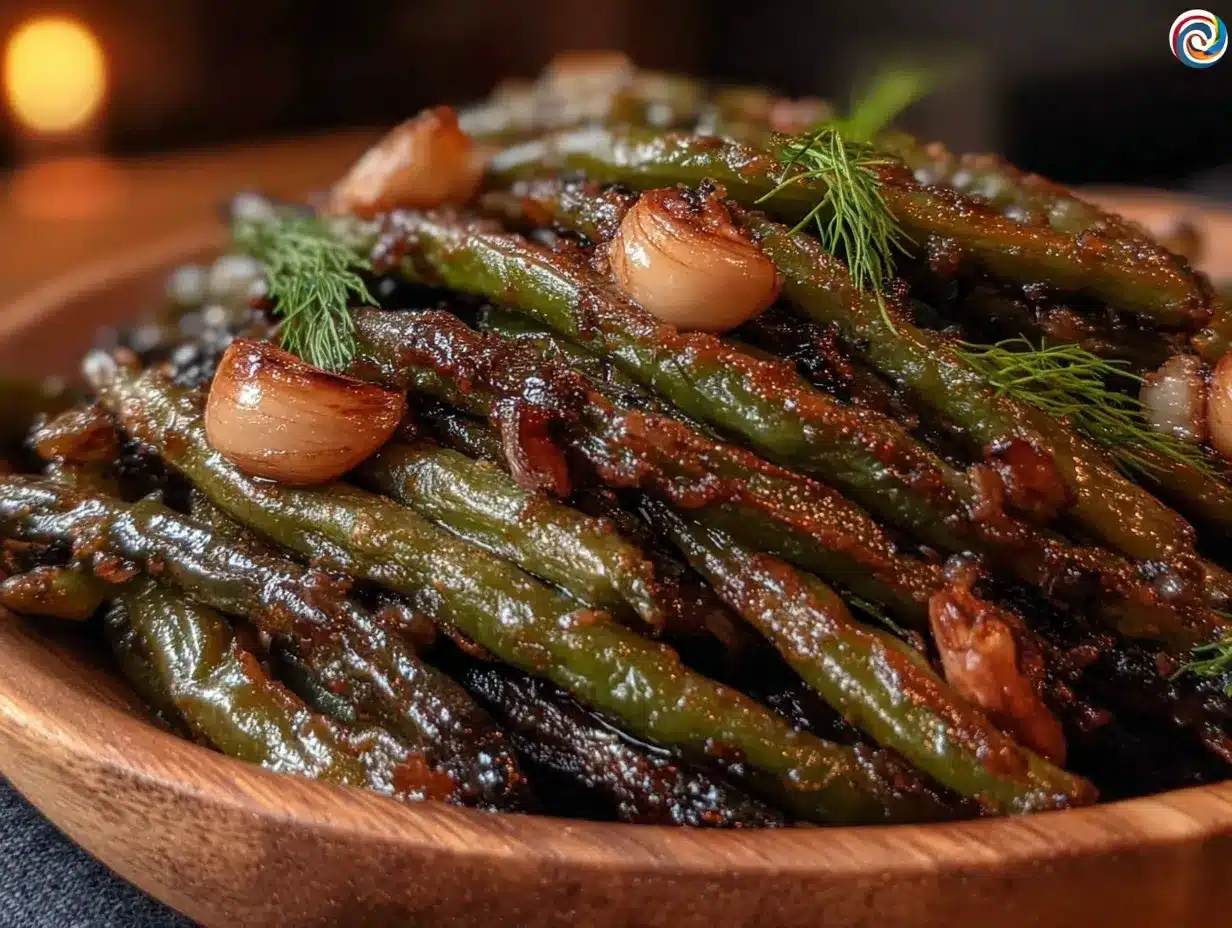
Making these crispy dilly beans with garlic and dill is straightforward, but a few steps are critical for that perfect crunch. Follow these closely, and you’ll be rewarded with the best pickled beans you’ve ever had.
- Prepare the green beans: Wash the beans thoroughly under cold running water. Trim off the stem ends—just the very tip, about ¼ inch. You can leave the tail ends intact for a rustic look. If the beans are very long, cut them in half so they fit upright in your jar. Pat them dry with a clean kitchen towel.
- Make the brine: In a medium saucepan, combine 1 cup white vinegar, 1 cup water, 2 tablespoons kosher salt, 1 teaspoon sugar, 1 teaspoon black peppercorns, and ½ teaspoon red pepper flakes (if using). Stir to dissolve the salt and sugar. Bring the mixture to a gentle boil over medium-high heat, then remove it from the stove immediately. Do not let it boil for more than a minute—you want the brine to cool slightly before you use it.
- Cool the brine: Let the brine sit at room temperature for about 10 minutes. It should be warm but not hot to the touch. This is the most important step for keeping the beans crisp. If you pour hot brine over the beans, they’ll start to cook and lose their snap.
- Layer the jar: While the brine cools, start packing your jar. Begin with a layer of fresh dill fronds at the bottom. Add a layer of green beans standing upright (or packed tightly if they’re cut). Tuck in a few slices of garlic and a sprinkle of mustard seeds. Repeat the layers—dill, beans, garlic, mustard seeds—until the jar is full, leaving about ½ inch of headspace at the top. The beans should be packed snugly but not crushed.
- Pour the brine: Slowly pour the warm brine over the beans, making sure it covers them completely. Use the back of a spoon to gently press down on the beans if any are sticking up above the liquid. The brine should submerge everything. If you’re short on liquid, you can top off with a little extra vinegar and water mixed in equal parts.
- Add final flavor: Tuck a few extra dill sprigs and garlic slices on top before sealing the jar. This ensures the top beans get plenty of flavor.
- Seal and refrigerate: Screw the lid on tightly. Give the jar a gentle shake to distribute the spices. Place it in the refrigerator immediately. Do not leave it at room temperature.
- Wait (the hard part): Let the beans pickle for at least 24 hours before tasting. The flavor really develops after 48 hours, and they’re at their peak at 3 to 5 days. The beans will keep getting better for up to 2 weeks.
One thing I learned the hard way—don’t skip the cooling step. The first batch I made, I poured boiling brine straight over the beans, and they turned out limp and sad. My husband still ate them, but I knew they could be better. Letting the brine cool to warm is the game-changer. Also, if you’re short on time, you can speed things up by making the brine ahead of time and keeping it in the fridge. Just reheat it gently to warm before using.
Cooking Tips & Techniques
After making these crispy dilly beans at least a dozen times, I’ve picked up a few tricks that make the process foolproof. Let me share the ones that matter most.
Don’t over-trim the beans. I used to cut off both ends because I thought it looked neater. But the tail end actually helps keep the bean intact during pickling. Just trim the stem end and leave the rest. The beans will look more natural and stay crunchier.
Use a chopstick to release air bubbles. After you pour the brine, you might see air pockets trapped between the beans. Gently slide a chopstick or thin knife down the sides of the jar to release them. This ensures the brine reaches every surface and prevents spoilage.
Temperature matters more than you think. I once made a batch on a scorching summer day and left the brine to cool on the counter for 20 minutes instead of 10. The beans came out slightly softer. Aim for that sweet spot where the brine is warm but not hot—like a comfortable bath temperature.
Patience is a virtue. I know it’s tempting to crack open the jar after 12 hours, but the beans need time to absorb the flavors. I’ve made the mistake of tasting too early and thinking they needed more salt, only to find them perfectly seasoned the next day. Trust the process.
One failure I’ll never forget. I tried to double the recipe and used a giant jar, but I didn’t adjust the brine volume properly. The top layer of beans wasn’t fully submerged, and they turned brown and mushy. Now I always make sure the beans are completely covered, even if I have to make a little extra brine.
Variations & Adaptations
These crispy dilly beans are wonderfully adaptable. Here are a few variations I’ve tried and loved.
Spicy Dilly Beans: Add 2 to 3 whole dried chiles (like árbol or cayenne) to the jar along with the red pepper flakes. The heat builds over time, so if you want a milder kick, remove the chiles after 3 days. I made a batch for a friend who loves spicy food, and she said they were “dangerously good.”
Lemon-Dill Variation: Add 2 strips of lemon zest (use a vegetable peeler to avoid the white pith) to the jar. The citrus brightens the flavor and pairs beautifully with the dill. This version is amazing with fish tacos or as a side for grilled salmon.
Smoky Dilly Beans: Substitute ½ teaspoon of liquid smoke for the red pepper flakes. The smoky flavor gives the beans a barbecue vibe without any actual cooking. I served these at a summer cookout, and people couldn’t believe they were pickled, not grilled.
Low-Sodium Option: Reduce the salt to 1 tablespoon and add an extra tablespoon of vinegar. The beans won’t be as crisp, but they’ll still be delicious. I’ve made this version for my mom, who watches her sodium intake, and she loved them.
Seasonal Swap: In the fall, swap the dill for fresh tarragon and add a few slices of fennel bulb. The anise flavor is unexpected but wonderful. This version pairs well with roasted meats.
Serving & Storage Suggestions
These crispy dilly beans are incredibly versatile. Serve them cold straight from the jar as a snack, or use them to elevate your meals.
Serving temperature: They’re best served chilled or at cool room temperature. If you’re taking them to a picnic, pack the jar in a cooler and let it sit out for 15 minutes before serving to take the chill off.
Presentation ideas: Arrange the beans in a small bowl or on a wooden board alongside other pickles, olives, and cheeses. They make a stunning addition to a charcuterie spread. I also love chopping them into 1-inch pieces and tossing them into potato salad or tuna salad for extra crunch.
Complementary dishes: These beans are fantastic with grilled meats, especially burgers and hot dogs. They also pair beautifully with creamy dips like ranch or blue cheese. For a vegetarian meal, serve them with a hearty grain bowl or alongside a lentil soup.
Storage instructions: Keep the jar tightly sealed in the refrigerator. The beans will stay crisp for up to 3 weeks, though they rarely last that long in my house. After 3 weeks, the texture will start to soften, but they’re still safe to eat for up to 2 months.
Reheating note: These are meant to be eaten cold. If you want to use them in a warm dish, add them at the very end of cooking to preserve their crunch. I sometimes chop them and stir them into fried rice just before serving.
Flavor development: The beans are at their peak between day 3 and day 7. After that, the garlic and dill flavors mellow out, and the beans become more uniformly pickled. I actually prefer them after a week—they’re less aggressive and more balanced.
Nutritional Information & Benefits
These crispy dilly beans are a guilt-free snack that packs a surprising nutritional punch. Here’s a rough estimate per serving (about ½ cup of beans with brine):
- Calories: 25
- Fat: 0g
- Sodium: 480mg (varies based on salt used)
- Carbohydrates: 5g
- Fiber: 2g
- Sugar: 2g
- Protein: 1g
Health benefits: Green beans are a good source of vitamin C, vitamin K, and fiber. The fermentation process (even quick pickling) introduces beneficial probiotics that support gut health. Dill is rich in antioxidants and has been used traditionally to aid digestion. Garlic is known for its immune-boosting properties.
Dietary considerations: This recipe is naturally gluten-free, vegan, and dairy-free. It’s also low in calories and fat, making it a great option for weight management. If you’re watching your sodium, you can reduce the salt as mentioned in the variations section.
Allergen note: This recipe is free from the top eight allergens. However, if you have a sensitivity to vinegar, you can substitute with lemon juice for a different but still delicious result.
I personally love that these beans let me enjoy a crunchy, savory snack without any guilt. They’re my go-to when I’m craving something salty but want to avoid processed chips. Plus, knowing exactly what’s in them gives me peace of mind.
Conclusion
These crispy dilly beans with garlic and dill are more than just a pickle recipe—they’re a testament to the magic that happens when you say yes to an unexpected conversation at the hardware store. Every time I open a jar, I’m reminded of that phone call with a stranger’s wife and the simple joy of sharing food knowledge. These beans are crunchy, tangy, garlicky, and utterly addictive. I hope you’ll make a batch and see for yourself.
Feel free to customize them to your taste—add more garlic, dial up the heat, or experiment with different herbs. The base recipe is forgiving and welcoming to creativity. And when you make them, I’d love to hear about it. Leave a comment below telling me how they turned out, or share your own variation. Did you add something unexpected? Did they disappear in two days like my hardware store friend’s jar?
Happy pickling, friend. Your crispiest dilly beans are waiting.
Frequently Asked Questions
Can I use frozen green beans for this recipe?
I don’t recommend it. Frozen beans have already been blanched, which softens their texture. They won’t stay crisp during pickling. Fresh beans are essential for that satisfying snap.
How long do these dilly beans last in the fridge?
They’ll stay crisp for about 3 weeks and remain safe to eat for up to 2 months. After 3 weeks, the texture will soften, but the flavor will still be good. Just keep the jar sealed and refrigerated.
Can I water bath can these for shelf storage?
This recipe is designed for refrigerator pickling only. The vinegar-to-water ratio and salt content aren’t calibrated for safe water bath canning. If you want shelf-stable dilly beans, you’ll need to follow a tested canning recipe with higher acidity.
My beans turned out limp. What went wrong?
The most common culprit is pouring hot brine over the beans. Always let the brine cool to warm before adding it. Another possibility is using older beans that have already lost their moisture. Fresh, firm beans are key.
Can I reuse the brine for another batch?
Technically yes, but the second batch won’t be as flavorful. The brine loses its potency after the first use. I recommend making fresh brine for each batch. If you want to stretch it, you can add a few extra garlic slices and dill sprigs to the reused brine.
Pin This Recipe!
The Best Crispy Dilly Beans with Garlic and Dill

These crispy dilly beans with garlic and dill are crunchy, tangy, garlicky, and absolutely addictive. A cold brine method keeps them snapping like they were just picked.
- Prep Time: 20 minutes
- Cook Time: 5 minutes
- Total Time: 25 minutes (plus 24 hours pickling time)
- Yield: 4 servings 1x
- Category: Side Dish
- Cuisine: American
Ingredients
- 1 pound (450g) fresh green beans
- 4 to 6 garlic cloves, thinly sliced
- 1 large bunch fresh dill (about 1 cup packed)
- 1 cup (240ml) white vinegar
- 1 cup (240ml) water
- 2 tablespoons (36g) kosher salt
- 1 teaspoon (4g) granulated sugar
- ½ teaspoon red pepper flakes (optional)
- 1 teaspoon black peppercorns
- 1 teaspoon mustard seeds (optional)
Instructions
- Prepare the green beans: Wash the beans thoroughly under cold running water. Trim off the stem ends—just the very tip, about ¼ inch. You can leave the tail ends intact for a rustic look. If the beans are very long, cut them in half so they fit upright in your jar. Pat them dry with a clean kitchen towel.
- Make the brine: In a medium saucepan, combine 1 cup white vinegar, 1 cup water, 2 tablespoons kosher salt, 1 teaspoon sugar, 1 teaspoon black peppercorns, and ½ teaspoon red pepper flakes (if using). Stir to dissolve the salt and sugar. Bring the mixture to a gentle boil over medium-high heat, then remove it from the stove immediately. Do not let it boil for more than a minute—you want the brine to cool slightly before you use it.
- Cool the brine: Let the brine sit at room temperature for about 10 minutes. It should be warm but not hot to the touch. This is the most important step for keeping the beans crisp. If you pour hot brine over the beans, they’ll start to cook and lose their snap.
- Layer the jar: While the brine cools, start packing your jar. Begin with a layer of fresh dill fronds at the bottom. Add a layer of green beans standing upright (or packed tightly if they’re cut). Tuck in a few slices of garlic and a sprinkle of mustard seeds. Repeat the layers—dill, beans, garlic, mustard seeds—until the jar is full, leaving about ½ inch of headspace at the top. The beans should be packed snugly but not crushed.
- Pour the brine: Slowly pour the warm brine over the beans, making sure it covers them completely. Use the back of a spoon to gently press down on the beans if any are sticking up above the liquid. The brine should submerge everything. If you’re short on liquid, you can top off with a little extra vinegar and water mixed in equal parts.
- Add final flavor: Tuck a few extra dill sprigs and garlic slices on top before sealing the jar. This ensures the top beans get plenty of flavor.
- Seal and refrigerate: Screw the lid on tightly. Give the jar a gentle shake to distribute the spices. Place it in the refrigerator immediately. Do not leave it at room temperature.
- Wait (the hard part): Let the beans pickle for at least 24 hours before tasting. The flavor really develops after 48 hours, and they’re at their peak at 3 to 5 days. The beans will keep getting better for up to 2 weeks.
Notes
Don’t skip the cooling step—pouring hot brine over the beans will make them limp. For best texture, use fresh, firm beans. The beans are at their peak between day 3 and day 7. They’ll stay crisp for up to 3 weeks in the refrigerator.
Nutrition
- Serving Size: ½ cup
- Calories: 25
- Sugar: 2
- Sodium: 480
- Carbohydrates: 5
- Fiber: 2
- Protein: 1
Keywords: dilly beans, pickled green beans, garlic dill beans, crispy pickled beans, refrigerator pickles



