Love this? Save it for later!
Share the inspiration with your friends
Introduction
“You know that moment when you’re waiting for your Olive Garden order, and those warm breadsticks arrive, soft and buttery, and suddenly the whole meal feels like a hug? Well, three months ago, I found myself staring at an empty bread basket and a very impatient toddler, so I decided to try making those famous breadsticks at home. Honestly, it started as a bit of a mess—I forgot the yeast was active and added cold water, so the dough took forever to rise. But after a few tweaks (and a flour explosion on my kitchen floor), I finally nailed that tender, melt-in-your-mouth texture that makes these breadsticks impossible to resist.
Maybe you’ve been there too—craving those Olive Garden breadsticks but not wanting to wait or pay delivery fees. Let me tell you, this recipe sticks with you because it’s not only simple but also reliably delicious. Every time I bake these, the smell fills the house and everyone crowds the kitchen like it’s a mini celebration. So, grab your mixing bowl and let’s get started on making the closest thing to Olive Garden breadsticks you can get without leaving your house!
Why You’ll Love This Recipe
I’m not just saying this because I love breadsticks (though I really, really do), but this copycat recipe is a gem for so many reasons:
- Quick & Easy: You can have fresh breadsticks ready in about an hour—perfect for those last-minute dinner plans or when you want a cozy snack.
- Simple Ingredients: No need to hunt down weird specialty items; most are pantry staples like flour, yeast, and garlic powder.
- Perfect for Any Occasion: Whether it’s a family dinner, a casual party, or just movie night, these breadsticks fit right in.
- Crowd-Pleaser: I’ve brought these to potlucks and trust me, they disappear faster than you can say “extra marinara.”
- Unbelievably Delicious: The way these breadsticks combine softness with a subtle garlicky butter glaze is honestly addictive.
What sets this recipe apart is the attention to the dough’s tenderness. I mix in a bit of sugar to feed the yeast and make the crust just right—not too hard, not too chewy. Plus, the buttery garlic topping is brushed on right out of the oven, so it soaks in perfectly while the breadsticks are still warm. You know that feeling when the outside is lightly crisp but each bite just melts inside your mouth? That’s the magic here.
What Ingredients You Will Need
This recipe uses simple, wholesome ingredients to deliver that bold flavor and satisfying texture without the fuss. Almost everything is probably already in your kitchen, making this a super accessible recipe.
- For the Dough:
- 2 ¼ teaspoons active dry yeast (one 7g packet)
- 1 cup warm water (110°F / 43°C) – make sure it’s warm, not hot, to activate yeast properly
- 3 cups all-purpose flour (I recommend King Arthur for best texture)
- 2 tablespoons granulated sugar (feeds yeast and adds slight sweetness)
- 2 tablespoons unsalted butter, melted (adds richness and tenderness)
- 1 teaspoon salt
- For the Garlic Butter Topping:
- 3 tablespoons unsalted butter, melted (for brushing)
- 1 teaspoon garlic powder (fresh garlic works too, but powder gives consistent flavor)
- 1 teaspoon dried parsley flakes (optional, for color and freshness)
- ½ teaspoon salt (to taste)
Substitution tip: For a gluten-free version, swap all-purpose flour with a cup-for-cup gluten-free baking mix. If you want dairy-free, use vegan butter or olive oil in place of butter. And if you like a bit of cheesy goodness, sprinkle some grated Parmesan on top before baking.
Equipment Needed
- Large mixing bowl – I prefer glass or stainless steel for easy cleanup
- Measuring cups and spoons – accurate measurements make a big difference here
- Whisk or fork – for activating yeast in water
- Wooden spoon or dough hook attachment (if you have a stand mixer)
- Baking sheet – a rimmed one works best to keep breadsticks from sliding off
- Parchment paper or silicone baking mat – helps prevent sticking and makes cleanup easier
- Basting brush – for applying that buttery garlic topping evenly
- Kitchen towel or plastic wrap – to cover dough while it rises
If you don’t have a stand mixer, no worries—mixing by hand works fine! Just be patient kneading the dough; it’s a good arm workout anyway. Also, I keep a spray bottle handy to lightly mist the dough if it feels dry during rising, which keeps things nice and soft.
Preparation Method
- Activate the yeast: In your large mixing bowl, combine 1 cup warm water (110°F / 43°C) with 2 ¼ teaspoons active dry yeast and 2 tablespoons sugar. Stir gently and let it sit for 5-10 minutes until foamy and bubbly. If it doesn’t foam, your yeast might be dead—start over with fresh yeast.
- Mix the dough: Add 3 cups all-purpose flour, 1 teaspoon salt, and 2 tablespoons melted butter to the yeast mixture. Stir with a wooden spoon or dough hook until combined. The dough will be slightly sticky but manageable. If too sticky, add flour one tablespoon at a time.
- Knead the dough: Turn the dough onto a lightly floured surface and knead for 8-10 minutes until smooth and elastic. If using a stand mixer, knead with the dough hook on medium speed for 6-7 minutes. You’ll know it’s ready when it springs back when poked.
- First rise: Shape the dough into a ball and place it in a greased bowl. Cover with a kitchen towel or plastic wrap. Let it rise in a warm, draft-free spot for about 45 minutes or until doubled in size.
- Shape the breadsticks: Punch down the risen dough gently to release air. Divide into 12 equal pieces (about 2 ounces / 56 grams each). Roll each piece into a 6-inch (15cm) long stick. Place them on a parchment-lined baking sheet, spaced slightly apart.
- Second rise: Cover the breadsticks loosely with a towel and let rise for another 20-30 minutes until puffy. Meanwhile, preheat your oven to 400°F (200°C).
- Bake: Bake the breadsticks for 12-15 minutes until golden on top. The bottoms should be firm but not hard. Keep an eye near the end to avoid overbaking—they should stay soft inside.
- Prepare garlic butter topping: While baking, mix 3 tablespoons melted butter with 1 teaspoon garlic powder, 1 teaspoon dried parsley, and ½ teaspoon salt.
- Brush and serve: As soon as the breadsticks come out of the oven, brush them generously with the garlic butter. Serve warm for the best experience!
Tip: If you want a little extra shine and softness, you can brush the breadsticks with the garlic butter twice—once right after baking and again about 5 minutes later.
Cooking Tips & Techniques
Making breadsticks that match the soft, buttery texture of Olive Garden’s can be tricky, but here are some tips I picked up through trial and error:
- Water temperature matters: Too hot and it kills the yeast; too cold and yeast won’t activate. Aim for about 110°F (43°C). If you don’t have a thermometer, it should feel warm but not hot on your wrist.
- Don’t skip the two rises: The first rise develops flavor and texture; the second makes the breadsticks soft and airy. Patience here pays off.
- Knead enough: Under-kneaded dough can be dense. The dough should be smooth and elastic. If you press it lightly, it should bounce back.
- Brush butter immediately: Brushing while hot lets it soak in better. Wait too long, and the butter just sits on top.
- Use parchment paper: It helps keep the bottoms soft and prevents sticking, which can ruin the tender texture.
I once tried skipping the garlic powder and used fresh minced garlic instead—it was tasty but burned quickly in the oven. Garlic powder gives consistent flavor without that risk. Also, baking on too dark a pan can brown the breadsticks too fast, so I recommend a light-colored baking sheet.
Variations & Adaptations
While this recipe nails the classic Olive Garden flavor, you can switch things up to match your mood or dietary needs:
- Cheesy Breadsticks: Sprinkle shredded mozzarella or Parmesan on top before baking for a melty, cheesy twist.
- Herb-Infused: Add fresh chopped rosemary or thyme to the dough or garlic butter for a fragrant, savory note.
- Gluten-Free: Use a gluten-free all-purpose flour blend and add a teaspoon of xanthan gum if your blend doesn’t contain it for structure.
- Spicy Kick: Mix a pinch of cayenne pepper or red pepper flakes into the garlic butter for a subtle heat.
- Dairy-Free: Swap butter for olive oil or a vegan margarine. The flavor shifts a bit, but still delicious.
I once made a batch with a mix of whole wheat and white flour—texture was slightly heartier but still soft enough to satisfy my breadstick craving. Feel free to experiment and make it your own!
Serving & Storage Suggestions
These breadsticks are best enjoyed warm, fresh out of the oven with a side of marinara or even Alfredo sauce. I love pairing them with a fresh garden salad or a hearty bowl of creamy tomato soup, which balances the buttery richness perfectly.
To store, place cooled breadsticks in an airtight container or resealable plastic bag. They keep well at room temperature for 2 days. For longer storage, freeze them wrapped individually and thaw at room temperature or warm in the oven at 300°F (150°C) for 5-7 minutes.
Reheating in the microwave works in a pinch but can make them chewy. Oven warming keeps that fresh-baked softness intact. Also, flavors actually deepen a bit after a day, so leftovers can taste even better the next day!
Nutritional Information & Benefits
Each breadstick (about 2 ounces / 56 grams) contains roughly 140-160 calories, with 5-7 grams of fat and around 20-22 grams of carbohydrates. They’re a moderate source of energy, making them a satisfying snack or side.
Key ingredients like garlic powder add antioxidants and have immune-supporting properties. Using unsalted butter keeps sodium levels manageable, and you can always reduce salt in the dough or topping based on your preference.
This recipe can fit well into balanced diets when enjoyed in moderation. For gluten-sensitive folks, the gluten-free adaptation offers a tasty alternative. I find these breadsticks a comforting treat that pairs nicely with nutrient-rich meals.
Conclusion
If you’ve ever wished for those soft, buttery Olive Garden breadsticks at home, this copycat recipe will quickly become a favorite. It’s straightforward, uses everyday ingredients, and delivers that signature tender texture and garlicky flavor that makes them so addictive.
Feel free to tweak the garlic butter or try the cheesy and herb variations to suit your taste buds. Honestly, I keep coming back to this recipe because it’s just so reliable—and it brings a little slice of Olive Garden magic into my kitchen whenever I need it.
Give it a shot, and let me know how your breadsticks turn out! Your kitchen might just become the new favorite spot for these melt-in-your-mouth treats.
FAQs About Tender Olive Garden Breadsticks Copycat Recipe
Can I make the dough ahead of time?
Absolutely! You can prepare the dough, let it rise once, then refrigerate it overnight. Take it out an hour before shaping and baking for best results.
What if my breadsticks come out too dense?
That usually means the dough wasn’t kneaded enough or didn’t rise fully. Make sure to knead until smooth and let the dough double in size during rising.
Can I freeze these breadsticks?
Yes, wrap them tightly after baking or freeze the shaped dough before the second rise. Thaw and bake or reheat as needed.
Is fresh garlic better than garlic powder for the topping?
Garlic powder gives consistent flavor and won’t burn easily, but fresh garlic can be used if applied carefully. Just watch the baking time closely.
How do I get the breadsticks soft on the inside but lightly crisp on the outside?
The key is the two rises and brushing with butter right after baking. Also, baking at 400°F (200°C) for about 12-15 minutes achieves that balance.
Pin This Recipe!
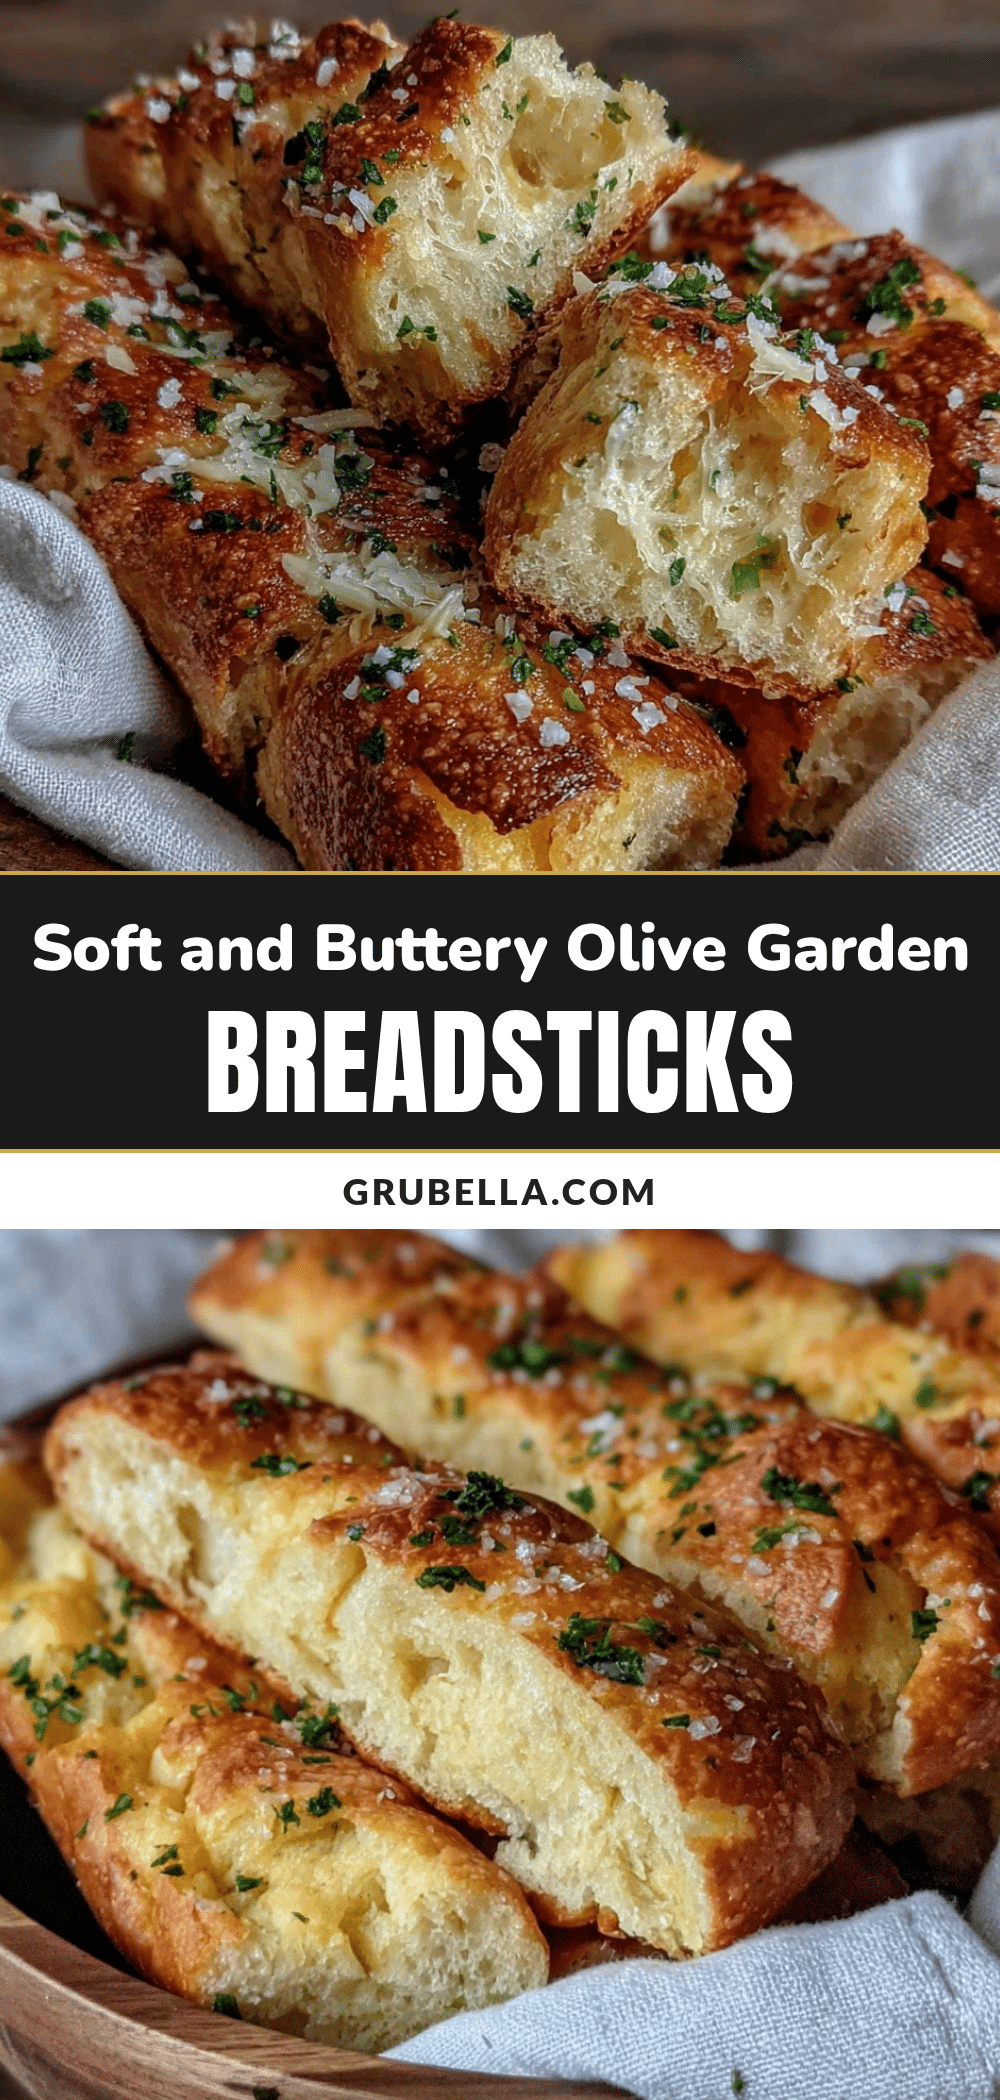
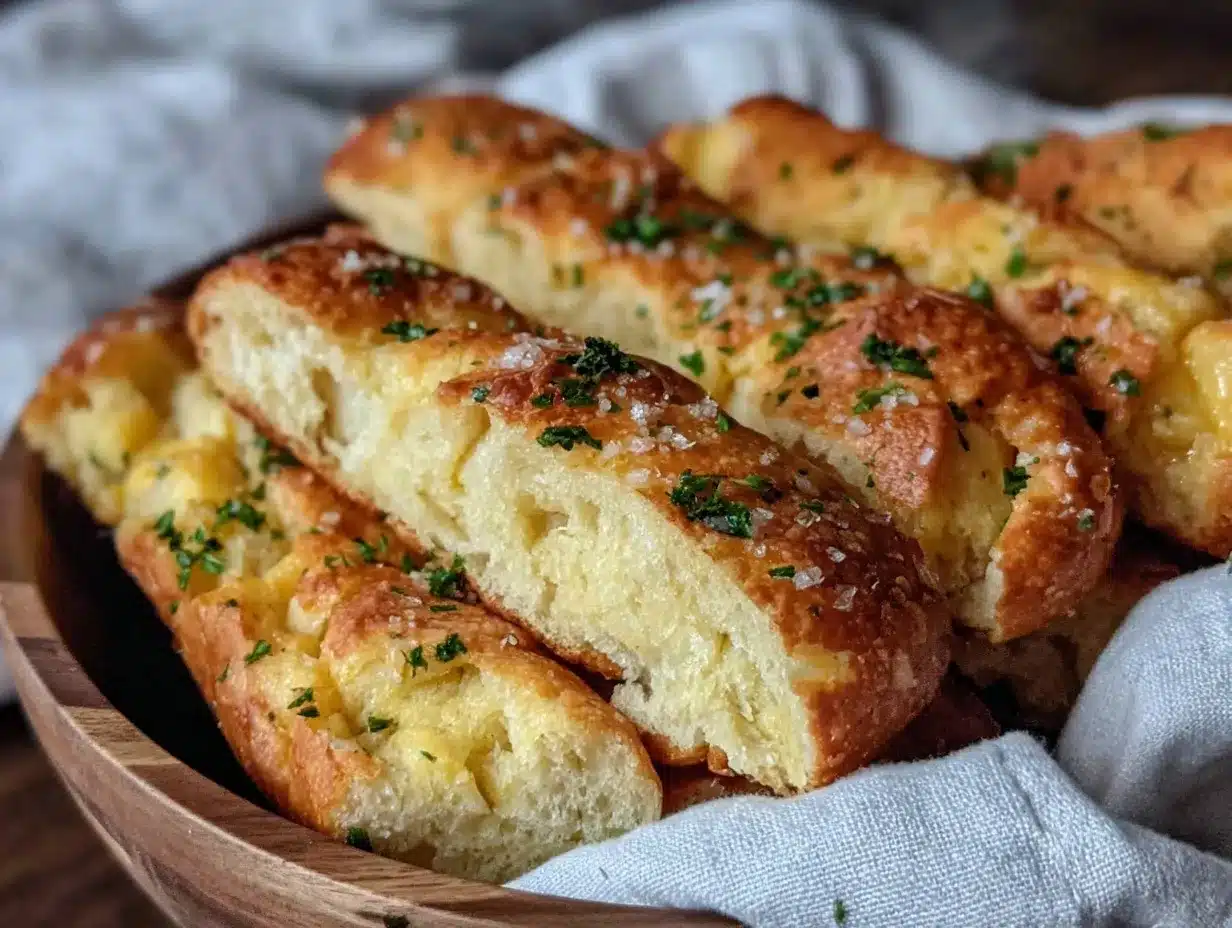
Tender Olive Garden Breadsticks Copycat Recipe

Easy homemade breadsticks that melt in your mouth, replicating the soft, buttery texture and garlicky flavor of Olive Garden’s famous breadsticks.
- Prep Time: 15 minutes
- Cook Time: 15 minutes
- Total Time: 1 hour
- Yield: 12 breadsticks 1x
- Category: Side Dish
- Cuisine: American
Ingredients
- 2 ¼ teaspoons active dry yeast (one 7g packet)
- 1 cup warm water (110°F / 43°C)
- 3 cups all-purpose flour
- 2 tablespoons granulated sugar
- 2 tablespoons unsalted butter, melted
- 1 teaspoon salt
- 3 tablespoons unsalted butter, melted (for brushing)
- 1 teaspoon garlic powder
- 1 teaspoon dried parsley flakes (optional)
- ½ teaspoon salt (to taste)
Instructions
- Activate the yeast: In a large mixing bowl, combine 1 cup warm water (110°F / 43°C) with 2 ¼ teaspoons active dry yeast and 2 tablespoons sugar. Stir gently and let it sit for 5-10 minutes until foamy and bubbly.
- Mix the dough: Add 3 cups all-purpose flour, 1 teaspoon salt, and 2 tablespoons melted butter to the yeast mixture. Stir with a wooden spoon or dough hook until combined. If too sticky, add flour one tablespoon at a time.
- Knead the dough: Turn the dough onto a lightly floured surface and knead for 8-10 minutes until smooth and elastic. If using a stand mixer, knead with the dough hook on medium speed for 6-7 minutes.
- First rise: Shape the dough into a ball and place it in a greased bowl. Cover with a kitchen towel or plastic wrap. Let it rise in a warm, draft-free spot for about 45 minutes or until doubled in size.
- Shape the breadsticks: Punch down the risen dough gently to release air. Divide into 12 equal pieces (about 2 ounces / 56 grams each). Roll each piece into a 6-inch long stick. Place on a parchment-lined baking sheet, spaced slightly apart.
- Second rise: Cover the breadsticks loosely with a towel and let rise for another 20-30 minutes until puffy. Meanwhile, preheat oven to 400°F (200°C).
- Bake: Bake the breadsticks for 12-15 minutes until golden on top. The bottoms should be firm but not hard.
- Prepare garlic butter topping: While baking, mix 3 tablespoons melted butter with 1 teaspoon garlic powder, 1 teaspoon dried parsley, and ½ teaspoon salt.
- Brush and serve: As soon as the breadsticks come out of the oven, brush them generously with the garlic butter. Serve warm.
Notes
Use warm water at about 110°F to activate yeast properly. Do not skip the two rises for best texture. Brush garlic butter immediately after baking for best absorption. Use parchment paper to keep bottoms soft. For gluten-free, substitute flour with gluten-free baking mix. For dairy-free, use vegan butter or olive oil. Brushing garlic butter twice enhances shine and softness.
Nutrition
- Serving Size: 1 breadstick (about
- Calories: 150
- Sugar: 3
- Sodium: 250
- Fat: 6
- Saturated Fat: 3.5
- Carbohydrates: 21
- Fiber: 1
- Protein: 4
Keywords: Olive Garden breadsticks, copycat recipe, homemade breadsticks, garlic butter breadsticks, soft breadsticks, easy breadsticks