Love this? Save it for later!
Share the inspiration with your friends
I wasn’t expecting cooking advice from a plumber, but there I was, standing in the hardware aisle at the home improvement store, listening to a man named Gary explain exactly how to make the best chicken of my life. He was holding a wrench in one hand and gesturing wildly with the other, describing how he gets his chicken thighs “restaurant-level crispy” in under twenty minutes. Honestly, I was just there to buy a new faucet gasket. But Gary, bless his heart, was on a mission. He scribbled the ingredients on the back of a receipt—honey, butter, garlic, soy sauce—and told me the secret was “a hot pan and no patience.”
I went home that night, skeptical but curious, and threw it together. The sizzle when those thighs hit the hot skillet was the first good sign. The second was the smell—sweet, savory, and deeply garlicky—filling my entire kitchen. I had a minor moment of panic when I thought I burned the garlic, but it turned out that was just the caramelization Gary was talking about. That first bite had this unexpected glossy glaze that was sticky, buttery, and perfectly salty. I mean, I almost called Gary to thank him. Maybe you’ve been there, getting a random life-changing tip from the most unlikely person. This recipe is the reason I keep making it—it’s fast, it’s foolproof, and it tastes like it took an hour.
Why You’ll Love This Recipe
Let me tell you, after testing this recipe about six times (much to my family’s delight), I can confidently say it’s a winner. It’s not just another chicken recipe—it’s the one you’ll memorize.
- Quick & Easy: Comes together in under 20 minutes, perfect for those nights when you forgot to defrost anything. From pan to plate, it’s faster than ordering takeout.
- Simple Ingredients: No fancy grocery trips needed. You likely already have honey, butter, garlic, and soy sauce in your kitchen right now.
- Perfect for Busy Weeknights: Great for a Tuesday dinner when everyone is hangry and you need something on the table, stat.
- Crowd-Pleaser: Always gets rave reviews from kids and adults alike. The sweet-salty combo is universally loved.
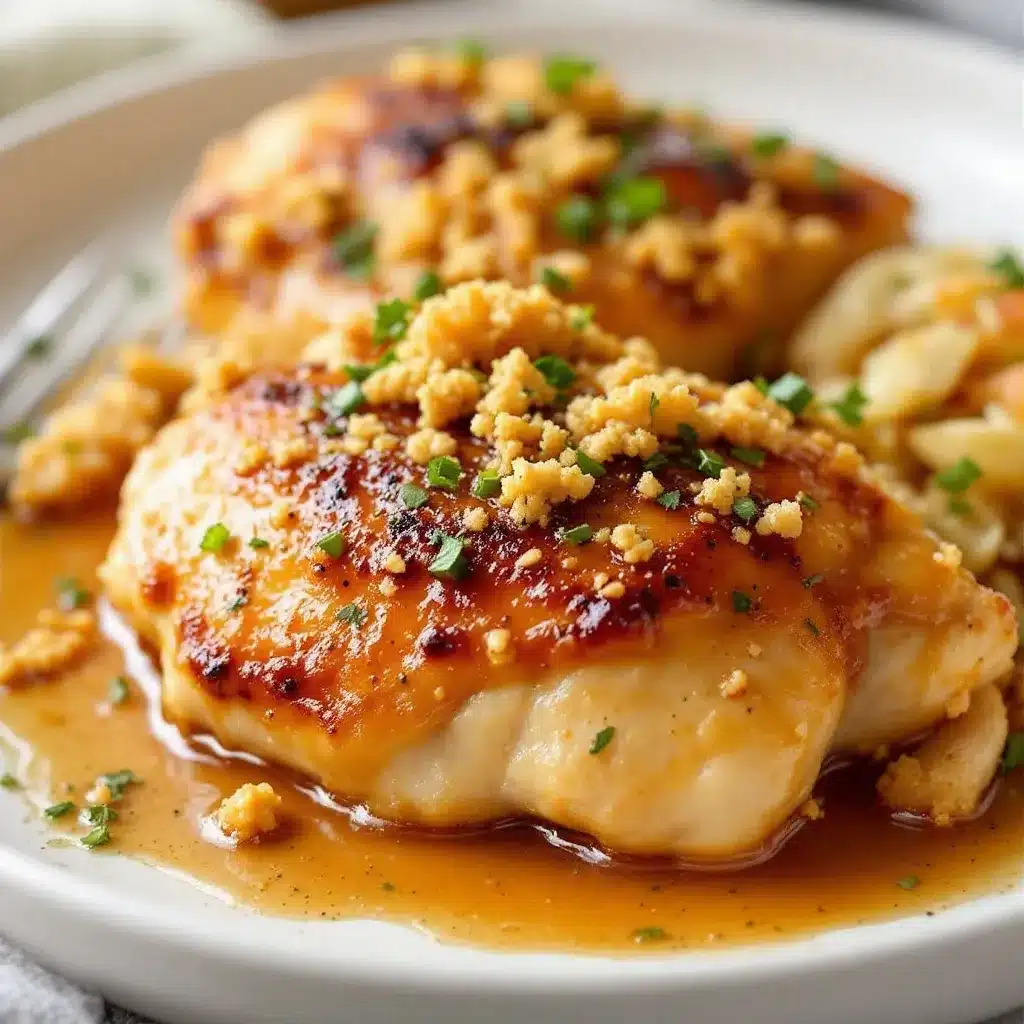
- Unbelievably Delicious: The texture—crispy skin coated in a sticky, glossy glaze—is next-level comfort food. It’s the kind of meal that makes you close your eyes after the first bite.
What makes this recipe different from the rest is the technique. Instead of drowning the chicken in sauce, you sear it hard to get that crackling skin, then add the garlic butter honey mixture at the very end. This keeps the glaze from burning and gives you that perfect lacquered finish. It’s comfort food reimagined—faster, but with the same soul-soothing satisfaction. Perfect for impressing guests without stress, or turning a simple Wednesday into something memorable.
What Ingredients You Will Need
This recipe uses simple, wholesome ingredients to deliver bold flavor and satisfying texture without the fuss. Most of these are pantry staples, which makes this dish a lifesaver on busy nights.
- Chicken Thighs (boneless, skin-on) — 4 to 6 thighs (about 1.5 lbs). Skin-on is key for that crispy texture. If you only have boneless skinless, it will still taste great, but you’ll miss that crunchy bite. I prefer organic, air-chilled thighs for better browning.
- Butter (unsalted) — 3 tablespoons, divided. We use some for searing and some for the glaze. Unsalted lets you control the salt level.
- Garlic (fresh) — 4 to 5 cloves, minced. Please don’t use the jarred stuff here. Fresh garlic makes a huge difference in this quick-cooking recipe. I usually add an extra clove because, honestly, you can never have too much.
- Honey — 3 tablespoons. Use a runny, liquid honey for easy mixing. If your honey is crystallized, warm it up for a few seconds in the microwave.
- Soy Sauce (low sodium) — 2 tablespoons. This adds that savory umami punch that balances the sweetness. Use tamari or coconut aminos for a gluten-free option.
- Salt & Black Pepper — To taste. I use about 1 teaspoon of salt and ½ teaspoon of pepper for the chicken.
- Red Pepper Flakes (optional) — ½ teaspoon. Adds a tiny kick of heat that cuts through the richness. Totally optional, but I highly recommend it.
- Fresh Parsley or Thyme (for garnish) — A handful, chopped. Not strictly necessary, but it makes the dish look gorgeous and adds a fresh note.
Ingredient Selection Tip: Look for chicken thighs that are roughly the same size so they cook evenly. If you can find them, bone-in thighs work too, but they’ll need an extra 5-7 minutes of cooking time.
Substitution Guidance: Use avocado oil instead of butter for a dairy-free version. Swap honey with maple syrup for a slightly different flavor profile—it’s a little earthier but still delicious. For a low-carb option, use a sugar-free honey substitute.
Equipment Needed
You don’t need a fancy kitchen to pull this off. Here’s what you’ll need:
- Large Skillet or Cast Iron Pan — A 12-inch skillet is ideal. Cast iron gives you the best sear, but a good non-stick or stainless steel pan works perfectly too. I’ve used my trusty Lodge cast iron for years, and it just gets better with age.
- Sharp Knife — For mincing garlic and chopping parsley. A dull knife makes mincing a chore and can bruise the garlic.
- Tongs — For flipping the chicken without piercing the skin. Silicone-tipped tongs are great for non-stick pans.
- Small Bowl — For mixing the honey garlic sauce.
- Meat Thermometer — Not strictly required, but it takes the guesswork out of cooking. Chicken thighs are done at 165°F (74°C). I love my instant-read Thermapen for this.
- Cutting Board — Preferably one with a groove to catch juices.
Budget-Friendly Tip: If you don’t own a cast iron skillet, a heavy-bottomed stainless steel pan is a great alternative. They’re often available at thrift stores for a few dollars.
Preparation Method
This comes together fast, so have everything prepped and ready before you start. Trust me, you don’t want to be mincing garlic while the pan is smoking hot.
- Prep the Chicken (5 minutes): Pat the chicken thighs completely dry with paper towels. This is the most important step for crispy skin. Season both sides generously with salt and black pepper. Let them sit at room temperature for 10 minutes if you have time—this helps them cook more evenly.
- Mix the Sauce (2 minutes): In a small bowl, whisk together the honey, soy sauce, and red pepper flakes (if using). Set it aside near the stove. Have your minced garlic ready in another small dish.
- Heat the Pan (2 minutes): Place your skillet over medium-high heat. Add 2 tablespoons of butter. Let it melt and foam—the sizzle should be lively but not smoking. If the butter burns, your pan is too hot. Swirl the pan to coat the surface evenly.
- Sear the Chicken (8-10 minutes): Place the chicken thighs skin-side down in the hot skillet. Listen for that satisfying sizzle. Press them down gently with a spatula for 30 seconds to ensure even contact. Cook without moving them for 5-6 minutes, until the skin is deep golden brown and crispy. Flip the thighs using tongs. Cook for another 3-4 minutes on the second side. The internal temperature should reach 160°F (71°C)—it will rise a bit more as it rests.
- Add Garlic (1 minute): Reduce the heat to medium-low. Push the chicken to one side of the pan. Add the remaining 1 tablespoon of butter to the empty space. Once melted, add the minced garlic. Stir it constantly for about 30 seconds—just until fragrant. Be careful not to let it burn, or it will turn bitter.
- Glaze the Chicken (2 minutes): Pour the honey-soy mixture into the pan. Swirl everything together. Let it bubble and thicken for about 1-2 minutes, spooning the glaze over the chicken thighs as it cooks. The sauce should become glossy and sticky, coating each thigh beautifully.
- Rest and Serve (3 minutes): Remove the pan from heat. Transfer the chicken to a serving platter. Let it rest for 3 minutes—this lets the juices redistribute. Spoon any remaining glaze from the pan over the top. Garnish with fresh parsley or thyme.
Sensory Cue: When the skin is ready to flip, it should release easily from the pan. If it sticks, give it another minute. The glaze should look like thick, golden honey when it’s done—not watery or burnt.
Personal Tip: Don’t crowd the pan. If your skillet is too small, cook the chicken in two batches. Overcrowding creates steam, and steam is the enemy of crispy skin.
Cooking Tips & Techniques
I’ve made this recipe enough times to know where things can go wrong. Here’s what I’ve learned the hard way so you don’t have to.
The Drying Trick: I cannot stress this enough—pat those thighs bone-dry. The first time I made this, I skipped this step because I was in a hurry. The skin turned out flabby and pale instead of crispy. Water is the enemy of a good sear. Use paper towels and really press into the skin.
Don’t Move the Chicken: Once the thighs hit the pan, leave them alone. I know it’s tempting to peek or shift them around, but that prevents the crust from forming. Let the heat do its job. You’ll know it’s ready when the edges look golden and the skin releases naturally.
Watch the Garlic: Garlic burns fast—like, in seconds. That’s why we add it at the end with the glaze rather than at the beginning. If you see it turning dark brown, add the honey mixture immediately to cool it down. I once got distracted by my phone and ended up with acrid, black garlic. Not a good look.
Multitasking Strategy: While the chicken is searing on the first side (those 5-6 minutes), use that time to mince your garlic and mix the sauce. This way, everything is ready to go when you need it. The active cooking time is only about 10 minutes, so stay at the stove.
Consistency Tip: For the most even cooking, let your chicken thighs come to room temperature before searing. Cold chicken hits a hot pan and lowers the temperature too quickly, leading to uneven browning. Just 10-15 minutes on the counter makes a difference.
Variations & Adaptations
This recipe is a fantastic base, and I’ve played around with it quite a bit. Here are some of my favorite twists.
Spicy Honey Sriracha Version: Add 1 tablespoon of sriracha to the honey-soy mixture. The heat balances the sweetness perfectly. I made this for a game day party, and it disappeared in minutes. You can also add a pinch of cayenne for extra kick.
Lemon Garlic Herb Variation: Add the zest of one lemon and 1 tablespoon of fresh lemon juice to the glaze. Toss in some fresh rosemary or thyme sprigs while the chicken sears. This version feels brighter and more elegant—perfect for a spring dinner.
Air Fryer Adaptation: Preheat your air fryer to 400°F (200°C). Season the chicken and place it skin-side up in the basket. Cook for 12-15 minutes, flipping halfway through. In the last 2 minutes, brush the honey garlic glaze on top. The air fryer gives you incredibly crispy skin with less oil.
Dairy-Free Version: Substitute the butter with a high-quality vegan butter or avocado oil. The flavor will be slightly different, but the glaze still works beautifully. I’ve used Miyoko’s European Style Cultured Vegan Butter with great results.
Herb Butter Twist: Before searing, mix 2 tablespoons of softened butter with minced garlic and chopped thyme. Rub this under the skin of the chicken thighs. The herb butter bastes the meat from the inside as it cooks, adding incredible depth of flavor.
Serving & Storage Suggestions
These chicken thighs are incredibly versatile. Here’s how I like to serve and store them.
Serving Temperature: Serve them hot, straight from the pan. The glaze is at its best when it’s warm and glossy. Let them rest for 3 minutes after cooking to keep the juices locked in.
What to Serve With: The sweet-savory glaze pairs wonderfully with steamed jasmine rice or fluffy mashed potatoes to soak up every drop. For a lighter option, serve with a simple green salad tossed in a lemon vinaigrette. Roasted asparagus or garlic green beans also work beautifully. If you want something starchy, try crusty bread to mop up the pan sauce.
Storage Instructions: Store leftover chicken in an airtight container in the refrigerator for up to 4 days. The flavors actually deepen overnight—the honey and garlic meld together even more. I’ve eaten these cold straight from the fridge, and they’re still delicious.
Freezing: You can freeze the cooked chicken for up to 3 months. Place the cooled thighs in a freezer-safe bag or container, separated by parchment paper. Thaw overnight in the refrigerator before reheating.
Reheating Methods: For the best texture, reheat in a skillet over medium heat with a splash of water or chicken broth. This helps revive the glaze without drying out the meat. You can also reheat in a 350°F (175°C) oven for about 10 minutes. Avoid the microwave if possible—it makes the skin rubbery.
How Flavors Develop: The honey and soy sauce continue to meld as the chicken sits. Leftovers often taste even better the next day because the seasoning has had time to penetrate deeper into the meat.
Nutritional Information & Benefits
Here’s a rough estimate for one serving (based on 4 servings, using boneless skin-on thighs):
| Nutrient | Amount per Serving |
|---|---|
| Calories | 385 |
| Protein | 28g |
| Fat | 22g |
| Saturated Fat | 9g |
| Carbohydrates | 18g |
| Sugar | 16g |
| Sodium | 620mg |
Health Benefits: Chicken thighs are a great source of protein, iron, and B vitamins, which support energy metabolism. Garlic is known for its anti-inflammatory properties and immune-boosting benefits. Honey provides natural antioxidants and can help soothe a sore throat—bonus!
Dietary Considerations: This recipe is naturally gluten-free if you use tamari or coconut aminos instead of soy sauce. It’s also nut-free and egg-free. For a low-carb or keto-friendly version, use a sugar-free honey substitute. The fat content from the butter and skin makes it quite satisfying for those on a higher-fat diet.
Personal Wellness Perspective: I love that this recipe feels indulgent but is made with whole, recognizable ingredients. There’s no processed sauce or mystery additives. It’s real food that happens to taste like a cheat meal.
Conclusion
Honestly, this Quick Garlic Butter Honey Chicken Thighs recipe has become my secret weapon. It’s the dish I make when I’m tired, when I’m short on time, or when I want to impress someone without breaking a sweat. The combination of crispy skin, sticky-sweet glaze, and savory garlic is just unbeatable. I love that it comes together in less time than it takes to decide what to order for delivery.
I hope you give this a try and make it your own. Play with the spice level, swap the herbs, or double the glaze—there’s no wrong way to do it. I’d love to hear how it turns out for you. Did you add extra garlic? Serve it with something unexpected? Drop a comment below and let me know your twist. And if you loved it, share this recipe with a friend who needs a quick dinner win. Happy cooking!
Frequently Asked Questions
Can I use chicken breasts instead of thighs?
Yes, you can. However, chicken breasts cook faster and can dry out more easily. Use boneless, skinless breasts and reduce the searing time to about 3-4 minutes per side. Check the internal temperature—it should reach 165°F (74°C). The glaze will still be delicious, but you’ll miss the crispy skin.
How do I prevent the honey from burning?
The key is adding the honey mixture at the end of cooking, not at the beginning. Keep the heat at medium-low when you add the glaze, and stir it constantly. If your pan is too hot, the sugar in the honey will caramelize too quickly and burn. A little browning is good—black is not.
Can I make this recipe ahead of time?
Absolutely. You can cook the chicken completely and store it in the refrigerator for up to 4 days. Reheat it in a skillet with a splash of water to revive the glaze. The flavors actually deepen overnight. I often make a double batch on Sunday for easy lunches during the week.
What if I don’t have a meat thermometer?
No worries. Cut into the thickest part of the thigh—the juices should run clear, and the meat should no longer be pink. Another sign is the texture: the chicken should feel firm to the touch but not hard. With practice, you’ll get a feel for it.
Is this recipe spicy?
The base recipe is not spicy at all—it’s sweet and savory. The red pepper flakes are optional. If you’re sensitive to heat, simply leave them out. If you love spice, feel free to add extra flakes or a drizzle of sriracha. It’s completely customizable to your taste.
Pin This Recipe!

Quick Garlic Butter Honey Chicken Thighs: Easy 20-Minute Dinner

Crispy, sticky, and savory chicken thighs with a garlic butter honey glaze, ready in under 20 minutes. A perfect weeknight dinner that tastes like it took an hour.
- Prep Time: 5 minutes
- Cook Time: 15 minutes
- Total Time: 20 minutes
- Yield: 4 servings 1x
- Category: Main Course
- Cuisine: American
Ingredients
- 4 to 6 boneless, skin-on chicken thighs (about 1.5 lbs)
- 3 tablespoons unsalted butter, divided
- 4 to 5 cloves garlic, minced
- 3 tablespoons honey
- 2 tablespoons low sodium soy sauce
- Salt and black pepper to taste (about 1 teaspoon salt and ½ teaspoon pepper)
- ½ teaspoon red pepper flakes (optional)
- Fresh parsley or thyme for garnish (chopped)
Instructions
- Pat the chicken thighs completely dry with paper towels. Season both sides generously with salt and black pepper. Let them sit at room temperature for 10 minutes if time allows.
- In a small bowl, whisk together the honey, soy sauce, and red pepper flakes (if using). Set aside. Have minced garlic ready in another small dish.
- Place a large skillet over medium-high heat. Add 2 tablespoons of butter. Let it melt and foam until the sizzle is lively but not smoking.
- Place the chicken thighs skin-side down in the hot skillet. Press down gently with a spatula for 30 seconds. Cook without moving for 5-6 minutes until the skin is deep golden brown and crispy. Flip and cook for another 3-4 minutes on the second side. Internal temperature should reach 160°F (71°C).
- Reduce heat to medium-low. Push chicken to one side. Add remaining 1 tablespoon of butter to the empty space. Once melted, add minced garlic and stir constantly for about 30 seconds until fragrant.
- Pour the honey-soy mixture into the pan. Swirl to combine. Let it bubble and thicken for 1-2 minutes, spooning the glaze over the chicken thighs.
- Remove from heat. Transfer chicken to a serving platter. Let rest for 3 minutes. Spoon remaining glaze over the top. Garnish with fresh parsley or thyme.
Notes
Pat chicken thighs bone-dry for crispy skin. Don’t crowd the pan. Add honey mixture at the end to prevent burning. Let chicken rest 3 minutes before serving.
Nutrition
- Serving Size: 1 serving (1 thigh w
- Calories: 385
- Sugar: 16
- Sodium: 620
- Fat: 22
- Saturated Fat: 9
- Carbohydrates: 18
- Protein: 28
Keywords: garlic butter honey chicken, quick chicken dinner, crispy chicken thighs, 20-minute meal, weeknight dinner



