Love this? Save it for later!
Share the inspiration with your friends
There used to be this tiny bakery tucked between a laundromat and a dusty thrift store on the edge of downtown—the kind of place with handwritten signs and a bell that jangled every time the door opened. They made these red velvet crinkle cookies that practically glowed behind the glass case, each one dusted with a snowfall of powdered sugar. When they closed without warning two years ago, I may or may not have stood outside the locked door like a fool, peering through the window. After eleven tries—some too cakey, some that spread into flat puddles, one batch I accidentally made with cocoa powder instead of flour (don’t ask)—I finally got it. Honestly, the first bite of this version made me text my sister a photo with the caption “We’re back, baby.”
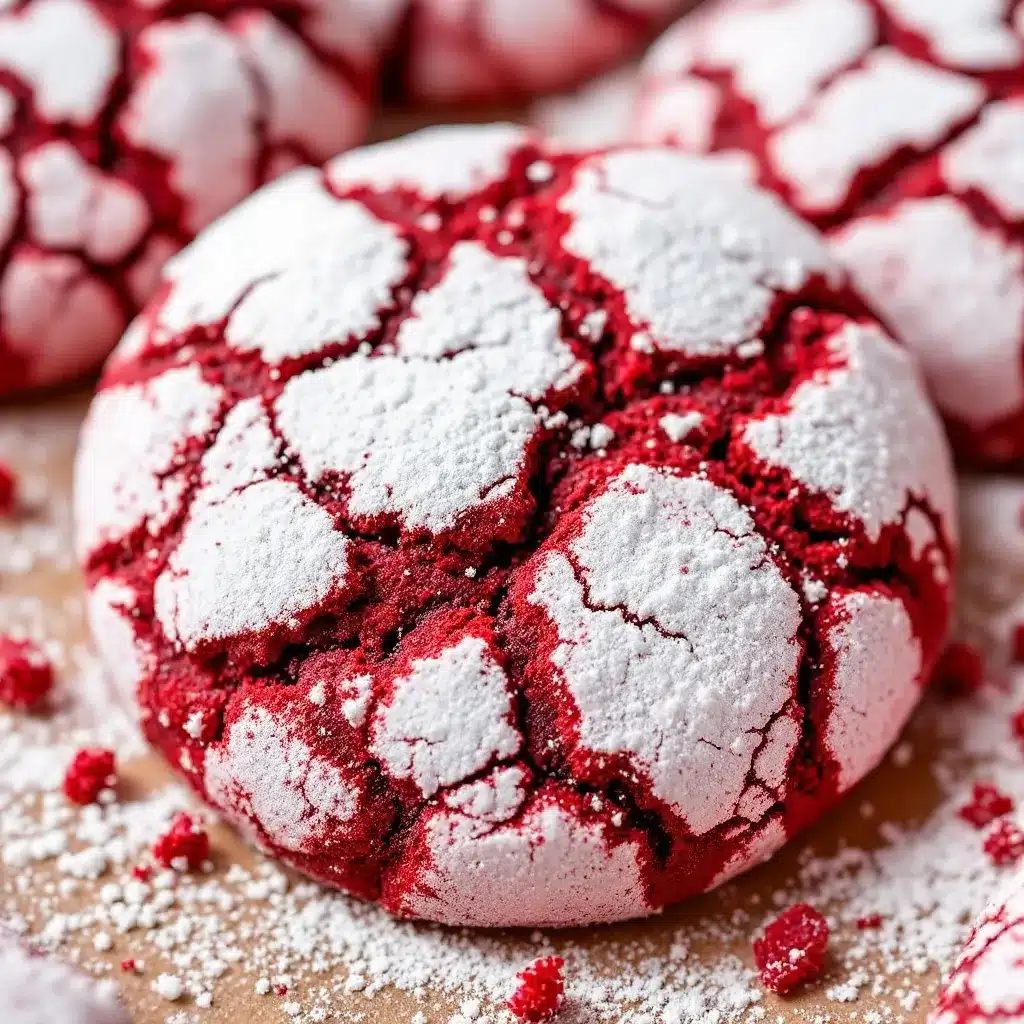
These Perfect Red Velvet Crinkle Cookies have that same soft, fudgy center I remember, with just enough chew around the edges to keep things interesting. The powdered sugar crackles on top like the first frost of winter, which is probably why I keep making them every December—and every March, and every random Tuesday. Maybe you’ve been there, chasing a ghost from a bakery that no longer exists. This recipe is for you.
What makes these cookies stick with me isn’t just the taste, though. It’s the way the dough feels when you roll it between your palms—cool and slightly tacky, like modeling clay that knows exactly what it wants to become. It’s the quiet satisfaction of watching the sugar crack open in the oven, revealing that deep crimson underneath. I keep making them because they remind me that some good things don’t have to disappear forever.
Why You’ll Love This Recipe
These red velvet crinkle cookies aren’t just another pretty face in the cookie jar. I’ve tested this recipe more times than I care to admit, tweaking the flour ratio, adjusting the chill time, and swapping different cocoa powders until the texture was absolutely right. Here is why these are the ones you will come back to:
- Quick & Easy: From mixing bowl to cooling rack in under an hour—perfect for when that cookie craving hits hard and fast.
- Simple Ingredients: No weird extracts or hard-to-find specialty flours. You probably have most of this in your pantry right now.
- Perfect for Holidays & Gifting: These cookies look like they came from a professional bakery. Stack them in a tin and watch people’s eyes light up.
- Crowd-Pleaser: Kids love the bright red color, adults appreciate the subtle cocoa flavor, and everyone fights over the ones with the most powdered sugar.
- Unbelievably Delicious: The outside has that delicate crinkle crust, but the inside stays soft and almost fudgy. It is the kind of texture that makes you close your eyes after the first bite.
What sets this version apart from all the other red velvet crinkle cookie recipes out there? It is the chill time. I know, I know—waiting is the worst part. But giving the dough a proper rest in the fridge is what creates those gorgeous cracks. I also use a blend of butter and a touch of oil, which gives you the flavor of butter with the softness that oil provides. It is comfort food reimagined—familiar enough to feel nostalgic, but perfected through trial and error so you don’t have to make the mistakes I did.
What Ingredients You Will Need
This recipe uses simple, pantry-friendly ingredients to create cookies that look impressive but come together without any fuss. Each ingredient plays a specific role in getting that perfect texture and flavor balance.
- Unsalted butter, softened (½ cup / 1 stick) – Make sure it is truly softened to room temperature, not melted. Melted butter will make your cookies spread too thin.
- Granulated sugar (1 cup) – Regular white sugar works best here. It helps create that slight crispness on the outside of the cookies.
- Large egg (1, room temperature) – Bring it to room temp by setting it in warm water for five minutes if you forgot to take it out earlier. Cold egg will seize the butter.
- Vegetable oil (2 tablespoons) – This is my secret weapon for keeping the cookies soft for days. Any neutral oil works—canola, avocado, or grapeseed.
- Buttermilk (2 tablespoons) – Adds tanginess and activates the baking soda for better rise. No buttermilk? Add ½ tablespoon of lemon juice or white vinegar to regular milk and let it sit for five minutes.
- Vanilla extract (1 teaspoon) – Pure vanilla adds warmth. Imitation works in a pinch but the real stuff makes a difference here.
- Red gel food coloring (1 tablespoon, or more for deeper color) – Gel coloring is much more concentrated than liquid drops. I use about a tablespoon for a classic red velvet shade, but you can adjust to your preference.
- All-purpose flour (1 ½ cups) – Spoon and level your flour. Scooping directly from the bag packs in too much flour and makes dry cookies.
- Unsweetened cocoa powder (¼ cup) – Natural cocoa powder works perfectly here. Dutch-processed will give a milder chocolate flavor.
- Baking soda (½ teaspoon) – Make sure it is fresh. Test it by dropping a pinch into vinegar—if it fizzes, you are good to go.
- Salt (¼ teaspoon) – Balances the sweetness and enhances the chocolate flavor.
- Powdered sugar (½ cup, for rolling) – This is what creates that signature crinkle look. Sift it first if it is lumpy.
Equipment Needed
You do not need a fancy kitchen setup for these cookies, which is part of their charm. Here is what you will need:
- Mixing bowls (one medium, one large) – Glass or metal works fine. Avoid plastic if you are using red food coloring—it can stain.
- Electric hand mixer or stand mixer – A hand mixer is totally fine. I actually prefer it because there is less to clean.
- Rubber spatula – For scraping down the bowl and folding in the flour mixture.
- Measuring cups and spoons – Liquid measuring cup for the buttermilk and oil, dry measuring cups for the flour and sugar.
- Baking sheets (2) – Light-colored metal sheets work best. Dark sheets can cause the bottoms to brown too quickly.
- Parchment paper or silicone baking mats – Parchment paper is my go-to. Silicone mats work too but the cookies might spread slightly more.
- Cooling rack – Essential for letting the cookies set properly.
- Small bowl – For the powdered sugar coating.
- Plastic wrap – For chilling the dough.
Budget-friendly tip: If you do not have a mixer, you can cream the butter and sugar by hand with a wooden spoon. It takes a bit of elbow grease, but it works. Just make sure your butter is really soft.
Preparation Method
- Cream the butter and sugar. In a large mixing bowl, beat the softened butter and granulated sugar together on medium speed until light and fluffy, about 2 to 3 minutes. You are looking for a pale, airy mixture. Scrape down the sides of the bowl with your spatula.
- Add the wet ingredients. Beat in the egg, vegetable oil, buttermilk, and vanilla extract until well combined. The mixture might look a little separated at this point—that is normal. Add the red gel food coloring and mix until the color is even throughout. I usually pause to scrape the bowl halfway through.
- Combine the dry ingredients. In a separate medium bowl, whisk together the all-purpose flour, cocoa powder, baking soda, and salt. Whisking aerates the flour and ensures the baking soda is evenly distributed. No one wants a pocket of baking soda in their cookie.
- Mix the wet and dry ingredients together. Gradually add the dry ingredients to the wet mixture, mixing on low speed or folding with a spatula. Mix just until the flour disappears—overmixing will make the cookies tough. The dough will be soft and slightly sticky, almost like a thick brownie batter.
- Chill the dough. Cover the bowl with plastic wrap and refrigerate for at least 30 minutes, or up to 2 hours. This step is non-negotiable. Chilling firms up the dough so the cookies hold their shape and develop those beautiful cracks instead of spreading into flat discs. I have forgotten this step before and ended up with sad, flat cookies that looked more like red pancakes.
- Preheat the oven. About 10 minutes before you are ready to bake, preheat your oven to 350°F (175°C). Line two baking sheets with parchment paper.
- Roll the dough balls. Scoop rounded tablespoons of dough (about 1.5 inches in diameter) and roll them between your palms into smooth balls. The dough should be firm enough to handle easily after chilling. If it gets too sticky, pop it back in the fridge for 10 minutes.
- Coat in powdered sugar. Place the powdered sugar in a small bowl. Roll each dough ball generously in the powdered sugar, making sure every surface is completely coated. This is what creates that crinkle effect—the sugar cracks as the cookie expands in the oven. Do not skimp here. I mean it.
- Bake the cookies. Place the coated dough balls on the prepared baking sheets, spacing them about 2 inches apart. Bake for 10 to 12 minutes. The cookies will look puffed and the tops will have visible cracks. The edges should be set but the centers will still look slightly soft. That is exactly what you want.
- Cool properly. Let the cookies cool on the baking sheet for 5 minutes. This allows them to set without breaking apart. Then transfer them to a wire cooling rack to cool completely. The cookies will continue to firm up as they cool.
Cooking Tips & Techniques
I have made these red velvet crinkle cookies more times than I care to count, and I have learned a few things the hard way. Here is what I wish someone had told me:
Chill time is not optional. I know it is tempting to skip ahead, but warm dough spreads into flat, ugly cookies with barely any crinkle. The first time I made these, I was in a hurry and only chilled the dough for 10 minutes. The cookies spread into red puddles that looked more like crime scene evidence than dessert. Give it the full 30 minutes minimum.
Powdered sugar application matters. Roll each dough ball until it looks like a snowball. If you can see any red peeking through, add more sugar. The cracks form because the dough expands and the sugar coating splits. If the coating is too thin, you will not get that dramatic crackle effect. I double-coat mine sometimes—roll once, then roll again for extra coverage.
Watch your oven temperature. Every oven runs a little differently. If your cookies are browning on the bottom before the centers are set, your oven might run hot. Try reducing the temperature by 25 degrees. If they are pale and underbaked after 12 minutes, your oven might run cool. An oven thermometer is a cheap investment that will save you from ruined batches.
Do not overbake. These cookies continue to cook on the hot baking sheet after you pull them out of the oven. If they look fully set and firm in the oven, they will be overbaked and dry by the time they cool. Pull them out when the edges are set but the centers still look slightly underdone and puffy.
Room temperature ingredients matter. Cold butter does not cream properly with sugar, which means less air in the dough and denser cookies. Cold egg can cause the butter to seize up. Take everything out of the fridge about 30 minutes before you start mixing.
Variations & Adaptations
One of the best things about this recipe is how easily it adapts to different needs and cravings. Here are some variations I have tried and loved:
- Gluten-Free Version: Swap the all-purpose flour with a 1:1 gluten-free baking flour blend that contains xanthan gum. I have tested this with Bob’s Red Mill 1-to-1 Baking Flour and the texture was remarkably close to the original. Chill the dough for an extra 15 minutes since gluten-free dough tends to be softer.
- Vegan Adaptation: Use a flax egg (1 tablespoon ground flaxseed mixed with 3 tablespoons water, let sit for 5 minutes) instead of the regular egg. Replace the butter with vegan butter or coconut oil, and use a plant-based milk with a splash of lemon juice instead of buttermilk. The texture will be slightly less tender but still delicious.
- Peppermint Red Velvet Crinkles: Add ½ teaspoon of peppermint extract along with the vanilla. Crush some candy canes and sprinkle them on top of the cookies right after baking. These are incredible for Christmas cookie exchanges.
- White Chocolate Drizzle: Once the cookies are completely cool, melt ½ cup of white chocolate chips with 1 teaspoon of coconut oil and drizzle it over the tops. The white chocolate against the red cookies is absolutely gorgeous.
- Spiced Red Velvet: Add ½ teaspoon of cinnamon and a pinch of nutmeg to the dry ingredients. The warm spices complement the cocoa beautifully and make the cookies feel extra cozy for fall baking.
My personal favorite variation is the peppermint one. I made a batch last December for a cookie swap and they disappeared within minutes. Someone actually asked me if I bought them from a bakery, which is basically the highest compliment a home baker can receive.
Serving & Storage Suggestions
These red velvet crinkle cookies are best served at room temperature with a tall glass of cold milk or a hot cup of coffee. The contrast between the chilly milk and the soft, fudgy cookie is pure magic. For a fancier presentation, arrange them on a white platter—the red and white color scheme looks stunning against a neutral background.
They also make excellent ice cream sandwiches. Take two cookies, scoop a generous portion of vanilla bean ice cream between them, and gently press together. Roll the edges in sprinkles or crushed cookies for extra crunch. This is dangerous knowledge, I warn you.
Storage Instructions:
Store the cookies in an airtight container at room temperature for up to 5 days. Place a slice of bread in the container to keep them soft—the cookies will absorb moisture from the bread instead of drying out. Replace the bread slice every other day.
Freezer Instructions:
These cookies freeze beautifully. You have two options:
- Freeze baked cookies: Place completely cooled cookies in a single layer in a freezer-safe container, with parchment paper between layers. Freeze for up to 3 months. Thaw at room temperature for about 30 minutes before serving.
- Freeze dough balls: Roll the dough into balls, coat them in powdered sugar, and place them on a baking sheet in the freezer until solid. Transfer to a freezer bag. When you are ready to bake, place the frozen dough balls on a baking sheet and add 2 to 3 minutes to the baking time. No need to thaw first.
The flavors actually deepen after a day or two in the fridge, oddly enough. If you can resist eating them all on day one, you will be rewarded with even better cookies on day two.
Nutritional Information & Benefits
Let’s be real—these are cookies, not health food. But here is a rough nutritional breakdown per cookie (based on 24 cookies):
- Calories: 145
- Total Fat: 7g
- Saturated Fat: 3.5g
- Carbohydrates: 20g
- Sugar: 13g
- Protein: 2g
- Sodium: 85mg
Health Highlights:
The cocoa powder in these cookies contains antioxidants called flavonoids, which can help reduce inflammation and support heart health. The buttermilk adds a small amount of calcium and probiotics. And honestly? Sometimes the best thing you can do for your mental health is eat a cookie that makes you happy. I firmly believe that joy is a nutrient, and these cookies deliver it in spades.
Dietary Considerations:
These cookies contain wheat, dairy, and eggs. For gluten-free or vegan options, check the variations section above. They are nut-free as written, making them safe for school bake sales and parties.
Conclusion
These Perfect Red Velvet Crinkle Cookies are everything I hoped they would be when I first started chasing that memory of the bakery that closed. They are soft, fudgy, beautifully crackled, and just the right amount of sweet. Every batch reminds me that sometimes the best recipes come from loss—from missing something so much that you teach yourself how to make it.
Whether you are baking these for a holiday cookie exchange, a Valentine’s Day treat, or just because it is Tuesday and you deserve something beautiful, I hope they bring you the same joy they have brought me. Feel free to make them your own—add some peppermint, drizzle on white chocolate, or stuff them with ice cream. The recipe is just a starting point.
I would love to hear how yours turn out! Drop a comment below and let me know if you tried any variations, or tag me in your photos if you share them online. Happy baking, friend. You have got this.
Frequently Asked Questions
Why did my cookies not crinkle?
The most common reason is not enough powdered sugar coating or dough that was not chilled long enough. Make sure each dough ball is completely covered in a thick layer of powdered sugar, and give the dough at least 30 minutes in the fridge. The sugar needs to crack as the cookie expands, and cold dough helps that happen.
Can I use liquid food coloring instead of gel?
You can, but you will need a lot more to achieve the same deep red color. Liquid coloring adds extra liquid to the dough, which can affect the texture. Gel coloring is much more concentrated and gives you that classic red velvet shade without throwing off the moisture balance. I recommend AmeriColor or Wilton gel colors.
How do I prevent my cookies from spreading too much?
Chill the dough thoroughly, do not over-cream the butter and sugar, and make sure your baking soda is fresh. Also, check that your oven is at the correct temperature—an oven that is too cool will cause cookies to spread before they set. Using parchment paper instead of greased baking sheets also helps control spread.
Can I make the dough ahead of time?
Absolutely. The dough can be refrigerated for up to 3 days before baking. In fact, the cookies tend to have even better flavor after the dough has rested. Just let the dough sit at room temperature for about 10 minutes before rolling if it feels too firm. You can also freeze the dough balls for up to 3 months.
Why did my cookies turn out dry?
Dry cookies usually come from overbaking or overmeasuring the flour. Pull the cookies out of the oven when the centers still look slightly underdone—they will continue to cook on the hot baking sheet. When measuring flour, spoon it into your measuring cup and level it off with a knife instead of scooping directly from the bag.
Pin This Recipe!

Perfect Red Velvet Crinkle Cookies Recipe: Easy Homemade Dessert

These Perfect Red Velvet Crinkle Cookies have a soft, fudgy center with just enough chew around the edges, topped with a crackled powdered sugar coating. They’re quick and easy to make with simple ingredients, perfect for holidays, gifting, or any occasion.
- Prep Time: 15 minutes
- Cook Time: 12 minutes
- Total Time: 57 minutes
- Yield: 24 servings 1x
- Category: Dessert
- Cuisine: American
Ingredients
- ½ cup (1 stick) unsalted butter, softened
- 1 cup granulated sugar
- 1 large egg, room temperature
- 2 tablespoons vegetable oil
- 2 tablespoons buttermilk
- 1 teaspoon vanilla extract
- 1 tablespoon red gel food coloring
- 1½ cups all-purpose flour
- ¼ cup unsweetened cocoa powder
- ½ teaspoon baking soda
- ¼ teaspoon salt
- ½ cup powdered sugar (for rolling)
Instructions
- Cream the butter and sugar: In a large mixing bowl, beat the softened butter and granulated sugar together on medium speed until light and fluffy, about 2 to 3 minutes. Scrape down the sides of the bowl.
- Add the wet ingredients: Beat in the egg, vegetable oil, buttermilk, and vanilla extract until well combined. Add the red gel food coloring and mix until the color is even throughout.
- Combine the dry ingredients: In a separate medium bowl, whisk together the all-purpose flour, cocoa powder, baking soda, and salt.
- Mix the wet and dry ingredients together: Gradually add the dry ingredients to the wet mixture, mixing on low speed or folding with a spatula. Mix just until the flour disappears. The dough will be soft and slightly sticky.
- Chill the dough: Cover the bowl with plastic wrap and refrigerate for at least 30 minutes, or up to 2 hours.
- Preheat the oven: About 10 minutes before baking, preheat your oven to 350°F (175°C). Line two baking sheets with parchment paper.
- Roll the dough balls: Scoop rounded tablespoons of dough (about 1.5 inches in diameter) and roll them between your palms into smooth balls.
- Coat in powdered sugar: Place the powdered sugar in a small bowl. Roll each dough ball generously in the powdered sugar, making sure every surface is completely coated.
- Bake the cookies: Place the coated dough balls on the prepared baking sheets, spacing them about 2 inches apart. Bake for 10 to 12 minutes. The edges should be set but the centers will still look slightly soft.
- Cool properly: Let the cookies cool on the baking sheet for 5 minutes, then transfer them to a wire cooling rack to cool completely.
Notes
Chill time is non-negotiable for proper crinkle effect. Roll dough balls generously in powdered sugar—if you can see red, add more. Do not overbake; cookies continue to cook on the hot sheet. Room temperature ingredients are important for best texture. For gluten-free, use a 1:1 gluten-free baking flour blend. For vegan, use a flax egg, vegan butter, and plant-based milk with lemon juice.
Nutrition
- Serving Size: 1 cookie
- Calories: 145
- Sugar: 13
- Sodium: 85
- Fat: 7
- Saturated Fat: 3.5
- Carbohydrates: 20
- Fiber: 1
- Protein: 2
Keywords: red velvet crinkle cookies, easy cookie recipe, homemade dessert, holiday cookies, red velvet, crinkle cookies, soft fudgy cookies



