Love this? Save it for later!
Share the inspiration with your friends
I burned banana bread more times than I’d like to admit before I figured out the real problem. It wasn’t the oven temperature, the pan, or even my impatience. It was the bananas themselves. I kept using barely spotted bananas because that’s what the recipes called for, and I ended up with dry, dense loaves that tasted more like sad banana cake than the real deal. The first time I let my bananas go completely black—I mean, borderline offensive-looking—everything changed. That dark, goopy mess of a fruit turned into the most tender, fragrant loaf I’d ever pulled from my oven.
This Perfect Classic Banana Bread with Walnuts is the result of years of trial and error, and honestly, a lot of wasted butter and flour. I stopped trying to force the recipe to be something it wasn’t. I stopped swapping half the sugar for applesauce and pretending it tasted the same. I just let the bananas do what they do best when they’re at their ugliest. And now? This is the only banana bread recipe I make. It’s the one my family asks for by name, the one that disappears from the counter within hours, and the one I actually feel confident sharing with people who know good food.
There’s something about that first slice, still warm, with a pat of butter melting into the crumb. It’s not fancy. It’s not trying to be. It’s just exactly what banana bread should be—moist, nutty, and full of real banana flavor.
Why You’ll Love This Recipe
This isn’t just another banana bread recipe floating around the internet. I’ve tested this version dozens of times, and every single batch comes out consistently perfect. The walnuts add a toasty crunch that balances the soft, tender crumb, and the bananas do all the heavy lifting when it comes to moisture and sweetness.
- Simple Ingredients : You probably already have everything you need in your pantry and fruit bowl. No weird extracts or specialty flours required.
- Foolproof Method : I’ve included all the little tricks I learned the hard way, so you don’t have to learn them yourself. This recipe works every single time.
- Perfect for Any Occasion : Breakfast, snack time, dessert, or a thoughtful homemade gift. This bread fits into any part of your day without fuss.
- Crowd-Pleaser : Kids love it, adults love it, and people who claim they don’t like banana bread have been converted after trying this version.
- Freezes Beautifully : Make two loaves and stash one in the freezer for later. It thaws perfectly and tastes just as fresh as the day you baked it.
What makes this banana bread different is the texture. It’s not dense or gummy like some recipes that use too much flour or under-ripe fruit. The crumb is tender and moist, with a slight give when you press it. The walnuts are distributed evenly throughout, so every bite gets that nutty crunch. And the flavor? Deeply banana-forward with a buttery richness that comes from using the right fat at the right temperature.
This is the kind of recipe that makes you feel like a good baker, even on days when you’re just trying to use up sad bananas. It’s reliable, forgiving, and genuinely delicious.
What Ingredients You Will Need
This recipe uses simple, everyday ingredients that work together to create something special. The quality of your bananas matters more than anything else here, so don’t skimp on letting them get properly ripe.
- Very ripe bananas, mashed (about 3 medium or 2 large, the blacker the better) — These are non-negotiable for natural sweetness and moisture. Green or barely spotted bananas will give you a dry, flavorless loaf.
- Unsalted butter, melted and slightly cooled (½ cup, 1 stick) — I use salted butter in a pinch and just reduce the added salt, but unsalted gives you better control over the flavor.
- Granulated sugar (¾ cup) — Adds sweetness and helps create that tender crumb. You can reduce this to ½ cup if your bananas are extremely sweet.
- Light brown sugar, packed (¼ cup) — Adds depth and a subtle molasses flavor that pairs beautifully with the walnuts. Don’t skip it.
- Large eggs, room temperature (2) — Room temperature eggs incorporate more easily into the batter and create a better texture. Leave them on the counter for 30 minutes before baking.
- Vanilla extract (1 teaspoon) — Pure vanilla extract makes a difference here. The imitation stuff has a chemical aftertaste that you’ll notice in a simple recipe like this.
- All-purpose flour (1 ½ cups) — Spoon and level your flour for accuracy. Scooping directly from the bag packs in too much flour and makes the bread dry.
- Baking soda (1 teaspoon) — This is the only leavening agent you need. Make sure it’s fresh by testing a spoonful in vinegar—it should bubble vigorously.
- Salt (½ teaspoon) — Balances the sweetness and enhances the banana and walnut flavors. I use fine sea salt.
- Ground cinnamon (1 teaspoon) — Optional but highly recommended. It adds warmth without overpowering the banana.
- Chopped walnuts (¾ cup, plus extra for topping) — Toast them lightly before adding to the batter for deeper flavor. I buy raw walnut halves and chop them myself for the best texture.
For the walnuts, I recommend picking up a bag from the baking aisle rather than the snacking section—they’re usually fresher and less expensive. If you can’t find walnuts, pecans work beautifully here too. I’ve also made this with a mix of both, and it’s fantastic.
Equipment Needed
You don’t need a fancy kitchen to pull off this recipe. Here’s what you’ll need:
- 9×5-inch loaf pan — A standard metal or glass loaf pan works great. Darker pans brown the crust faster, so keep an eye on it during the last 10 minutes of baking.
- Mixing bowls — One large bowl for the wet ingredients and one medium bowl for the dry ingredients.
- Whisk and spatula — A whisk for combining the dry ingredients and a rubber spatula for folding everything together without overmixing.
- Fork or potato masher — For mashing the bananas. I prefer a fork because it gives me more control over the texture, but a masher works faster.
- Parchment paper — Lining the pan with parchment paper makes lifting the finished loaf out incredibly easy. No scraping, no sticking.
- Cooling rack — Essential for even cooling. Placing the hot pan directly on the counter can trap steam and make the bottom soggy.
If you don’t have a 9×5-inch pan, you can use an 8×4-inch pan, but you’ll need to increase the baking time by about 10 minutes. Just keep testing with a toothpick until it comes out clean.
Preparation Method
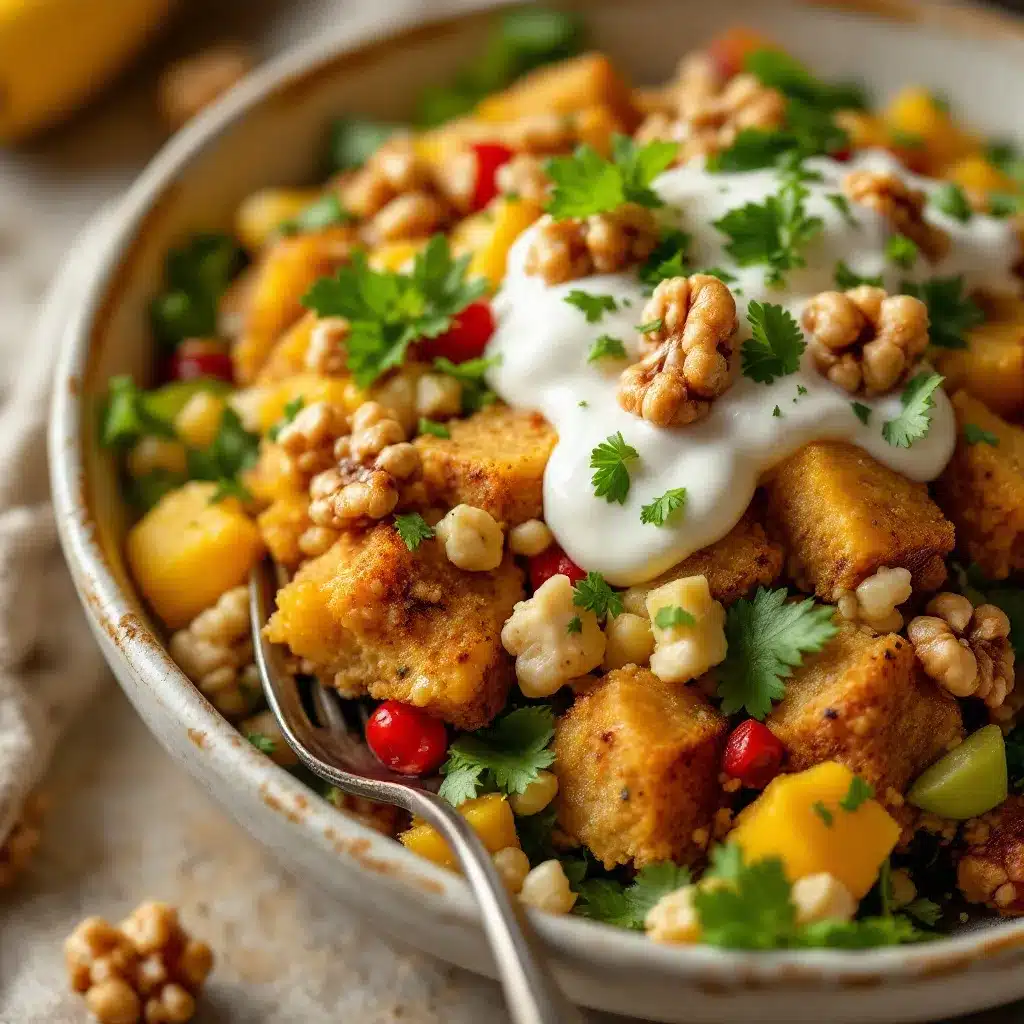
- Preheat your oven to 350°F (175°C). Position the rack in the center of the oven. Grease your 9×5-inch loaf pan with butter or nonstick spray, then line it with a strip of parchment paper that hangs over the two long sides. This creates handles for easy removal.
- Mash the bananas. In a large mixing bowl, mash your very ripe bananas with a fork until they’re mostly smooth with a few small lumps remaining. You should have about 1 cup of mashed banana. Don’t puree them completely—those little pockets of banana add nice texture to the finished bread.
- Combine the wet ingredients. Add the melted butter, granulated sugar, brown sugar, eggs, and vanilla extract to the mashed bananas. Whisk everything together until smooth and well combined. The mixture should look glossy and smell incredibly fragrant at this point.
- Mix the dry ingredients. In a separate medium bowl, whisk together the all-purpose flour, baking soda, salt, and ground cinnamon. Whisking aerates the flour and ensures the baking soda and salt are evenly distributed throughout.
- Fold the dry ingredients into the wet. Pour the dry ingredients over the wet mixture. Use your rubber spatula to gently fold everything together. Stop mixing as soon as you no longer see streaks of flour. A few lumps are totally fine—overmixing develops gluten and makes the bread tough.
- Add the walnuts. Gently fold in the chopped walnuts until they’re evenly distributed throughout the batter. Reserve about 2 tablespoons of walnuts to sprinkle on top of the batter before baking.
- Pour the batter into the prepared pan. Use your spatula to spread it evenly into the corners. Sprinkle the reserved walnuts on top, pressing them gently into the batter so they stick during baking.
- Bake for 55-65 minutes. Start checking at the 50-minute mark. The bread is done when a toothpick inserted into the center comes out clean or with just a few moist crumbs attached. If the top is browning too quickly, tent the pan loosely with aluminum foil for the last 15 minutes of baking.
- Cool in the pan for 10 minutes. Place the pan on a cooling rack. After 10 minutes, use the parchment paper handles to lift the loaf out of the pan and transfer it directly to the cooling rack. Let it cool completely before slicing—about 1 hour. I know it’s tempting, but slicing too early will give you a gummy, crumbly mess.
The smell that fills your kitchen during baking is absolutely intoxicating. It’s that warm, cozy aroma that makes everyone wander into the kitchen asking, “Is it ready yet?”
Cooking Tips & Techniques
I’ve made every mistake in the book with banana bread, so you don’t have to. Here are the lessons I learned the hard way:
- Don’t rush the bananas. I cannot stress this enough. If your bananas aren’t black and spotty, your bread will be dry and less flavorful. If you’re in a hurry, you can roast unpeeled bananas in a 300°F oven for 15-20 minutes until they’re soft and dark. Let them cool before mashing.
- Measure your flour correctly. Use a spoon to fluff the flour in its bag, then spoon it into your measuring cup and level it off with a knife. Scooping directly with the measuring cup packs in up to 25% more flour, which guarantees a dry loaf.
- Room temperature eggs matter. Cold eggs can seize the melted butter and create a lumpy batter. If you forgot to take them out of the fridge, place them in a bowl of warm water for 5 minutes before using.
- Toast your walnuts. Spread the walnuts on a baking sheet and toast them in the preheating oven for 5-7 minutes until fragrant. This deepens their flavor and keeps them crunchy in the finished bread. Let them cool completely before adding to the batter.
- Check for doneness with a toothpick. If the toothpick comes out wet with batter, it needs more time. If it comes out dry with a few crumbs, it’s perfect. If it comes out completely clean and the bread is pulling away from the sides of the pan, you’ve slightly overbaked it—still delicious, just a bit drier.
One thing I learned from my early failures is that oven temperatures vary wildly. My old oven ran hot and would brown the outside long before the inside was done. An oven thermometer is a cheap investment that saves a lot of heartache.
Variations & Adaptations
This banana bread is incredibly versatile. Here are some ways I’ve adapted it over the years:
- Chocolate Chip Banana Bread : Fold in ¾ cup of semi-sweet chocolate chips along with the walnuts. The combination of chocolate and banana is absolutely irresistible. My kids prefer this version and ask for it every time we have spotty bananas on the counter.
- Gluten-Free Version : Substitute the all-purpose flour with a 1-to-1 gluten-free baking flour blend. I’ve had great results with the King Arthur brand. Add 1 teaspoon of xanthan gum if your blend doesn’t already include it. The texture is slightly more delicate but still delicious.
- Vegan Adaptation : Replace the eggs with two flax eggs (2 tablespoons ground flaxseed mixed with 5 tablespoons water, let sit for 5 minutes) and use melted coconut oil instead of butter. The bread will be a bit denser but still moist and flavorful.
- Spiced Banana Bread : Add ½ teaspoon of ground nutmeg and ¼ teaspoon of ground cloves along with the cinnamon. This gives the bread a warm, holiday-inspired flavor that’s perfect for fall and winter baking.
- Nut-Free Option : If you’re baking for someone with nut allergies, simply omit the walnuts and add ¾ cup of raisins, dried cranberries, or even chopped dried apricots. The texture changes but the bread is still fantastic.
I once made a version with toasted coconut flakes folded into the batter, and it was surprisingly good. The coconut added a chewy texture and a subtle tropical note that paired beautifully with the banana. Don’t be afraid to experiment—banana bread is forgiving.
Serving & Storage Suggestions
This banana bread is best served slightly warm or at room temperature. Here’s how I like to enjoy it:
- Serve it warm. Slice a piece and toast it lightly in a skillet with a pat of butter. The butter melts into the warm crumb, and the edges get slightly crispy. It’s pure comfort.
- Pair it with coffee or tea. A slice of this banana bread alongside a hot cup of coffee or a chai latte is my favorite afternoon pick-me-up. It’s also wonderful with a glass of cold milk.
- Store it properly. Wrap the cooled loaf tightly in plastic wrap or aluminum foil and store it at room temperature for up to 4 days. Do not refrigerate it—the cold air dries out the bread and makes it stale faster.
- Freeze for later. This bread freezes beautifully. Wrap the completely cooled loaf in plastic wrap, then a layer of aluminum foil, and freeze for up to 3 months. To thaw, leave it on the counter overnight or warm individual slices in the microwave for 20 seconds.
- Flavor development. Honestly, this bread tastes even better on day two. The flavors meld together overnight, and the texture becomes even more moist. If you can resist eating it all on day one, you’re in for a treat.
I’ve also been known to slice and freeze individual pieces for quick breakfasts. Just grab a slice, pop it in the toaster, and you have a warm, homemade breakfast in under two minutes.
Nutritional Information & Benefits
This banana bread is a treat, but it does have some redeeming qualities. Here’s a rough estimate per slice (based on 10 slices):
- Calories : Approximately 280 per slice
- Fat : 14g (mostly from butter and walnuts)
- Carbohydrates : 36g
- Fiber : 2g
- Sugar : 18g
- Protein : 5g
Bananas are a great source of potassium and vitamin B6, and walnuts provide healthy omega-3 fatty acids and antioxidants. This isn’t health food by any stretch, but it’s a more wholesome option than store-bought pastries or packaged snacks. I feel good about giving this to my family for breakfast because I know exactly what’s in it.
If you’re watching your sugar intake, you can reduce the granulated sugar to ½ cup without sacrificing too much texture. The bananas provide natural sweetness, so the bread will still be satisfyingly sweet.
Conclusion
This Perfect Classic Banana Bread with Walnuts is the recipe I keep coming back to, again and again. It’s simple without being boring, and it delivers that nostalgic, comforting feeling that only homemade banana bread can provide. Whether you’re using up sad bananas on your counter or baking a gift for a friend, this recipe will not let you down.
I encourage you to make it your own. Add chocolate chips if that’s your thing, swap the walnuts for pecans, or throw in a handful of dried fruit. The base is solid, and it welcomes customization. That’s the beauty of a good classic recipe.
If you try this banana bread, I’d love to hear how it turned out for you. Drop a comment below and let me know if you made any changes or if it became a new favorite in your kitchen. Happy baking, friends!
Frequently Asked Questions
Can I use frozen bananas for this recipe?
Absolutely. In fact, frozen bananas work perfectly. Thaw them completely at room temperature, then drain off any excess liquid before mashing. The texture will be softer, but the flavor is even more concentrated.
Why did my banana bread sink in the middle?
This usually happens when the bread is underbaked or when the oven temperature is too low. Make sure your oven is fully preheated to 350°F and that you’re baking it long enough. A toothpick inserted in the center should come out clean or with just a few moist crumbs.
Can I make this recipe into muffins instead?
Yes! Grease a 12-cup muffin tin and fill each cup about ¾ full. Bake at 350°F for 18-22 minutes, or until a toothpick inserted into the center of a muffin comes out clean. This is a great option for portion control and grab-and-go breakfasts.
How do I know when my bananas are ripe enough?
You want the peel to be mostly black with some brown spots. The banana inside should be soft and almost mushy. If you can smell the banana through the peel, it’s ready. Don’t be afraid of the dark spots—that’s where all the sweetness lives.
Can I reduce the sugar in this recipe?
You can reduce the granulated sugar to ½ cup without major issues. The bread will be slightly less sweet and the texture might be a touch denser, but it will still be delicious. If your bananas are extremely ripe and sweet, you can even get away with ½ cup total sugar.
Pin This Recipe!
Perfect Classic Banana Bread with Walnuts

This is the only banana bread recipe you’ll ever need—moist, nutty, and full of real banana flavor. Made with very ripe bananas and toasted walnuts, it’s a foolproof, crowd-pleasing loaf that freezes beautifully.
- Prep Time: 15 minutes
- Cook Time: 55-65 minutes
- Total Time: 1 hour 20 minutes
- Yield: 10 servings 1x
- Category: Dessert
- Cuisine: American
Ingredients
- 3 medium or 2 large very ripe bananas, mashed (about 1 cup)
- 1/2 cup (1 stick) unsalted butter, melted and slightly cooled
- 3/4 cup granulated sugar
- 1/4 cup light brown sugar, packed
- 2 large eggs, room temperature
- 1 teaspoon vanilla extract
- 1 1/2 cups all-purpose flour, spooned and leveled
- 1 teaspoon baking soda
- 1/2 teaspoon salt
- 1 teaspoon ground cinnamon (optional)
- 3/4 cup chopped walnuts, plus extra for topping
Instructions
- Preheat your oven to 350°F (175°C). Position the rack in the center of the oven. Grease a 9×5-inch loaf pan with butter or nonstick spray, then line it with a strip of parchment paper that hangs over the two long sides.
- In a large mixing bowl, mash the very ripe bananas with a fork until mostly smooth with a few small lumps remaining (about 1 cup).
- Add the melted butter, granulated sugar, brown sugar, eggs, and vanilla extract to the mashed bananas. Whisk until smooth and well combined.
- In a separate medium bowl, whisk together the all-purpose flour, baking soda, salt, and ground cinnamon.
- Pour the dry ingredients over the wet mixture. Use a rubber spatula to gently fold together until just combined—a few lumps are fine. Do not overmix.
- Gently fold in the chopped walnuts until evenly distributed. Reserve about 2 tablespoons of walnuts for topping.
- Pour the batter into the prepared pan and spread evenly. Sprinkle the reserved walnuts on top, pressing them gently into the batter.
- Bake for 55-65 minutes, or until a toothpick inserted into the center comes out clean or with a few moist crumbs. If the top browns too quickly, tent loosely with aluminum foil for the last 15 minutes.
- Cool in the pan on a wire rack for 10 minutes. Then use the parchment paper handles to lift the loaf out and transfer to the rack to cool completely (about 1 hour) before slicing.
Notes
Use very ripe (black-spotted) bananas for best moisture and sweetness. Toast walnuts before adding for deeper flavor. Do not refrigerate the bread; store at room temperature for up to 4 days or freeze for up to 3 months. For best texture, let the bread cool completely before slicing.
Nutrition
- Serving Size: 1 slice
- Calories: 280
- Sugar: 18
- Sodium: 220
- Fat: 14
- Saturated Fat: 6
- Carbohydrates: 36
- Fiber: 2
- Protein: 5
Keywords: banana bread, classic banana bread, banana bread with walnuts, easy banana bread, moist banana bread



