Love this? Save it for later!
Share the inspiration with your friends
The crumb. That’s what I was after. Not the taste first, not even the smell—the crumb. I wanted a cupcake so deeply, darkly black it looked like velvet crushed under moonlight, with a crumb so tender it barely held its own weight. Everything else about this recipe came second to that single, almost obsessive detail. I’d been chasing it for weeks, through failed batches that were either too dry, too dense, or just gray—sad, disappointing gray. You know that feeling when you have a specific vision for a recipe and nothing else will do? That was me, staring at a bowl of batter that finally looked right. Dark, silky, almost liquid in its richness. And when those cupcakes came out of the oven? The crumb was perfect. Fine, soft, with that slight springback when you pressed a finger to the top. I almost didn’t want to frost them. Almost.
But the orange cream cheese frosting? That’s the other half of the story. I needed something to cut through all that darkness, something bright and tangy that wouldn’t just sit on top but would actually talk to the cake. The first time I made these for a friend’s Halloween party, I brought a dozen and watched them disappear in about fifteen minutes. Someone actually asked if they were from a bakery. That’s when I knew the crumb wasn’t just good—it was right. These Perfect Black Velvet Cupcakes with Orange Cream Cheese Frosting aren’t just a pretty face. They’re the kind of cupcake that makes you close your eyes on the first bite, because the texture and flavor hit you at the same time. And honestly? That’s the whole point.
Why You’ll Love This Recipe
I’ve tested this recipe six times to get it exactly right. Six times. The first batch was too dry. The second was too crumbly. The third? Let’s not talk about the third. But by the fourth, I had it dialed in, and by the sixth, I knew this was the version I’d make for every Halloween party, every birthday, every random Tuesday that calls for something special. Here’s why you’ll love it too:
- Perfectly Moist Crumb: The combination of buttermilk and oil keeps these cupcakes incredibly tender without being greasy. You’ll get that velvety texture every single time.
- No Artificial Colors: I use black cocoa powder for that deep, dark color. It’s the same stuff used in Oreos, and it gives you the blackest velvet without any food coloring.
- Bold Orange Flavor: The cream cheese frosting gets a serious upgrade with fresh orange zest and a splash of juice. It’s bright, tangy, and cuts through the richness perfectly.
- Easy Enough for Beginners: No fancy techniques here. Just a bowl, a whisk, and a little patience. I promise you can nail these on your first try.
- Crowd-Pleaser: I’ve brought these to parties, potlucks, and family dinners. They disappear every single time. Kids love the color, adults love the flavor.
- Perfect for Any Occasion: Halloween is the obvious one, but honestly? These work for birthdays, Valentine’s Day, or just because you want something dramatic and delicious on your counter.
What makes this recipe different from the dozens of black velvet recipes out there? It’s the crumb. Seriously. Most black velvet cupcakes are dry or dense because black cocoa powder is more alkaline than regular cocoa. I’ve balanced the acidity with just the right amount of buttermilk and vinegar to give you a cupcake that’s tender, light, and deeply chocolatey without being bitter. And that orange cream cheese frosting? It’s not an afterthought. It’s the star of the show. The zest gets steeped in the cream cheese for a few minutes before you mix everything together, which gives you a brighter, more natural orange flavor instead of that artificial extract taste. It’s a small step, but it makes all the difference.
This recipe isn’t just good—it’s the kind that makes you text your friends a photo before you’ve even frosted them. It’s comfort food with a little drama, the perfect balance of dark and bright, rich and tangy. And honestly? It’s the cupcake I’m most proud of.
What Ingredients You Will Need
This recipe uses simple, pantry-friendly ingredients to create something that looks and tastes like it came from a high-end bakery. The magic is in the details, so let’s talk about what each ingredient does and why I chose it.
For the Black Velvet Cupcakes
- All-Purpose Flour (1 ½ cups / 188g): Provides structure without making the cupcakes tough. I use unbleached all-purpose flour for the best texture. Spoon and level your flour—don’t scoop directly from the bag or you’ll end up with dry cupcakes.
- Black Cocoa Powder (½ cup / 50g): This is the star of the show. Black cocoa powder is Dutch-processed cocoa that’s been heavily alkalized, giving it that dark, almost black color and a mild, Oreo-like flavor. I recommend buying from a brand like King Arthur Flour or Rodelle. Regular cocoa powder won’t give you the same color or flavor, so don’t substitute it.
- Granulated Sugar (1 cup / 200g): Adds sweetness and helps with tenderness. Regular white sugar works perfectly here.
- Baking Soda (1 teaspoon): The main leavening agent. It reacts with the acidic ingredients (buttermilk and vinegar) to help the cupcakes rise.
- Salt (½ teaspoon): Balances the sweetness and enhances the chocolate flavor. I use fine sea salt.
- Buttermilk (¾ cup / 180ml), room temperature: Adds tanginess and reacts with the baking soda for lift. If you don’t have buttermilk, you can make a quick substitute by adding 1 tablespoon of lemon juice or white vinegar to ¾ cup of milk and letting it sit for 5 minutes.
- Vegetable Oil (½ cup / 120ml): Keeps the cupcakes moist and tender. I use a neutral oil like canola or avocado oil. Don’t use olive oil—the flavor is too strong.
- Large Eggs (2), room temperature: Provide structure and richness. Room temperature eggs emulsify better into the batter, giving you a smoother texture.
- Vanilla Extract (2 teaspoons): Enhances the chocolate flavor. I use pure vanilla extract, not imitation.
- White Vinegar (1 teaspoon): This is the secret ingredient. The vinegar reacts with the baking soda to create extra lift, making the cupcakes even more tender. Don’t worry—you won’t taste it.
- Hot Coffee (½ cup / 120ml): Yes, coffee. It deepens the chocolate flavor without making the cupcakes taste like coffee. You can use hot water instead, but coffee gives you a richer, more complex flavor.
For the Orange Cream Cheese Frosting
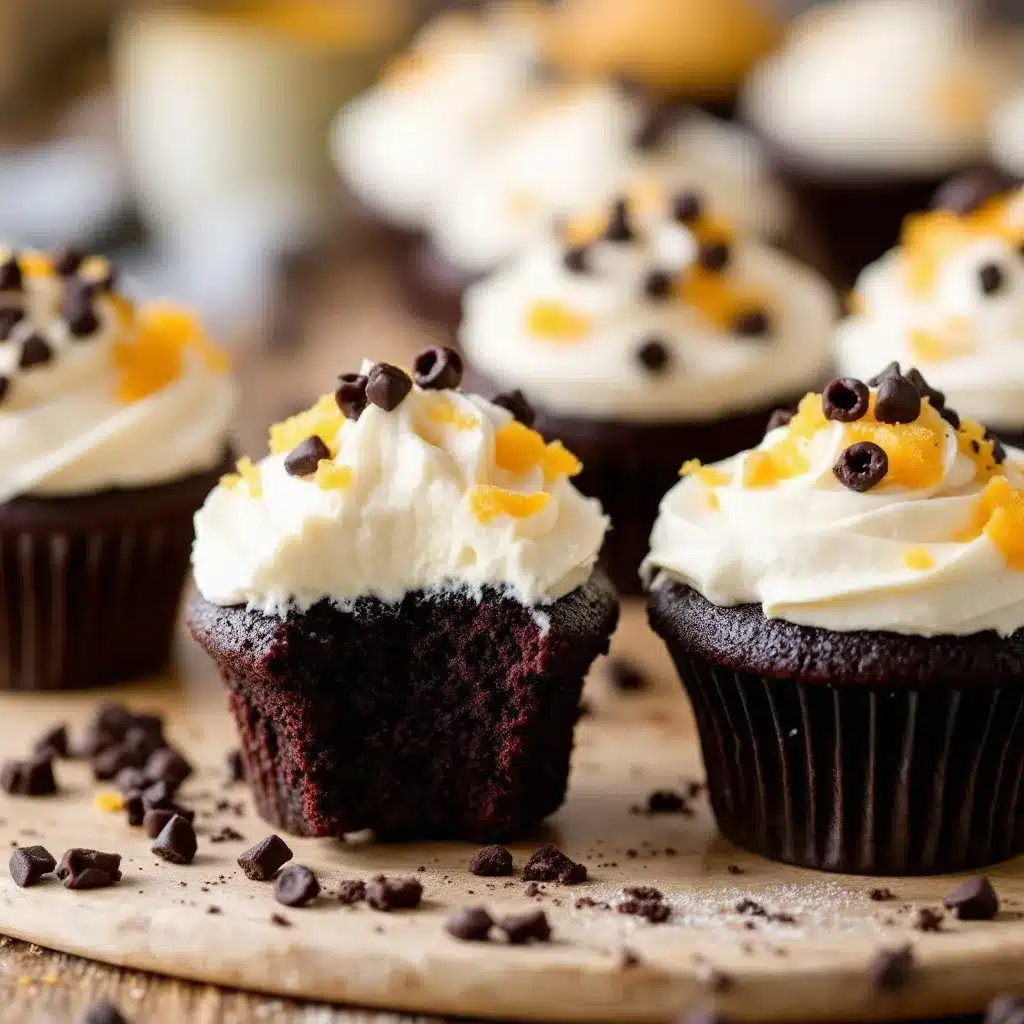
- Cream Cheese (8 oz / 226g), softened: Use full-fat block cream cheese, not the spreadable kind in a tub. The block cream cheese has less water content, which means a thicker, more stable frosting.
- Unsalted Butter (¼ cup / 57g), softened: Adds richness and helps stabilize the frosting. Make sure it’s at room temperature but not too soft—you want it to hold its shape slightly.
- Powdered Sugar (3 cups / 360g), sifted: Sweetens and thickens the frosting. Sifting removes lumps and gives you a silky smooth texture.
- Fresh Orange Zest (2 tablespoons): This is where the magic happens. The oils in the orange zest give you that bright, natural citrus flavor. Zest your oranges before juicing them—it’s easier that way.
- Fresh Orange Juice (2 tablespoons): Adds flavor and thins the frosting slightly. Use freshly squeezed juice, not from concentrate.
- Vanilla Extract (1 teaspoon): Rounds out the flavors and adds warmth.
- Pinch of Salt: Balances the sweetness and enhances the tanginess of the cream cheese.
Ingredient Tip: For the best black cocoa powder, I’ve had great results with the brand from King Arthur Flour. It’s consistently dark and has that perfect mild chocolate flavor. If you can’t find black cocoa powder, you can use a combination of ¼ cup Dutch-processed cocoa and ¼ cup black cocoa, but the color won’t be as dramatic.
Equipment Needed
You don’t need a fancy kitchen to make these cupcakes. Here’s what you’ll need:
- 12-Cup Muffin Pan: A standard muffin pan works perfectly. I prefer a non-stick pan for easy release.
- Paper Cupcake Liners: Use black or white liners. Black liners make the cupcakes look extra dramatic, especially for Halloween.
- Large Mixing Bowls: You’ll need at least two—one for the dry ingredients and one for the wet ingredients.
- Whisk: For mixing the dry ingredients and combining the batter. A balloon whisk works best.
- Electric Hand Mixer or Stand Mixer: For the frosting. You can whisk it by hand, but it’ll take some elbow grease and you won’t get it as fluffy.
- Rubber Spatula: For scraping down the sides of the bowl and folding ingredients together.
- Cooling Rack: Essential for cooling the cupcakes evenly so the frosting doesn’t melt.
- Piping Bag and Star Tip: Optional, but it makes the frosting look professional. I use a Wilton 1M tip for those beautiful swirls. If you don’t have a piping bag, you can use a zip-top bag with the corner snipped off.
- Microplane or Fine Grater: For zesting the oranges. A microplane gives you the finest zest without the bitter white pith.
Budget-Friendly Alternatives: Don’t have a piping bag? No problem. You can spread the frosting with a knife or spatula for a rustic look. If you don’t have a cooling rack, let the cupcakes cool in the pan for 10 minutes, then transfer them to a plate. Just make sure they’re completely cool before frosting.
Preparation Method
Let’s get baking. This recipe comes together in about 45 minutes, and the results are worth every second. Here’s how to make Perfect Black Velvet Cupcakes with Orange Cream Cheese Frosting:
Step 1: Preheat and Prep
Preheat your oven to 350°F (175°C). Line a 12-cup muffin pan with paper liners. If you’re using black liners, you’ll thank yourself later—they make the dark cupcakes look even more dramatic. Set the pan aside while you mix the batter.
Step 2: Mix the Dry Ingredients
In a large mixing bowl, whisk together the all-purpose flour, black cocoa powder, granulated sugar, baking soda, and salt. Whisk for about 30 seconds to aerate everything and break up any lumps. The black cocoa powder can be stubborn, so make sure there are no visible clumps. You’ll see the mixture turn a deep, dark gray—that’s exactly what you want.
Step 3: Combine the Wet Ingredients
In a separate bowl or large liquid measuring cup, whisk together the buttermilk, vegetable oil, eggs, and vanilla extract. Whisk until the eggs are fully incorporated and the mixture is smooth. It should look like a pale, creamy liquid with no streaks of egg white.
Step 4: Create the Batter
Pour the wet ingredients into the dry ingredients and stir with a rubber spatula until just combined. Don’t overmix—you want to stop as soon as you see no more dry flour. The batter will be thick and dark, almost like black paint. Now add the white vinegar and hot coffee. Pour the coffee in slowly while stirring gently. The batter will thin out significantly and become more liquid. That’s okay. It should be pourable, not thick like a typical cupcake batter. Stir until the coffee is fully incorporated, but don’t go crazy. A few small lumps are fine.
Step 5: Fill the Liners
Divide the batter evenly among the 12 cupcake liners. I use a large cookie scoop or a ¼-cup measure to get consistent portions. Fill each liner about ⅔ full—you want them to rise just above the rim without spilling over. The batter will be thin, so pour carefully.
Step 6: Bake the Cupcakes
Bake at 350°F (175°C) for 18 to 22 minutes. Start checking at 18 minutes by inserting a toothpick into the center of a cupcake. If it comes out clean or with a few moist crumbs (not wet batter), they’re done. The tops should spring back when gently pressed. Don’t overbake or they’ll dry out. Every oven is different, so trust your toothpick more than the timer.
Step 7: Cool the Cupcakes
Let the cupcakes cool in the pan for 5 minutes. This allows them to set without sticking to the liners. Then transfer them to a wire cooling rack to cool completely. This is important—if you frost them while they’re still warm, the frosting will melt into a puddle. Let them cool for at least 30 minutes, or until they’re room temperature to the touch.
Step 8: Make the Orange Cream Cheese Frosting
While the cupcakes are cooling, make the frosting. In a large mixing bowl, beat the softened cream cheese and butter together with an electric mixer on medium speed until smooth and creamy, about 2 minutes. Scrape down the sides of the bowl with a rubber spatula. Add the orange zest and beat for another minute. This step is key—the zest releases its oils into the cream cheese mixture, giving you a more intense orange flavor. Add the orange juice, vanilla extract, and a pinch of salt, and beat until combined. With the mixer on low speed, gradually add the sifted powdered sugar, about ½ cup at a time. Mix until each addition is fully incorporated before adding the next. Once all the sugar is added, increase the speed to medium-high and beat for 2 to 3 minutes until the frosting is light, fluffy, and spreadable. If it’s too thick, add a teaspoon of orange juice. If it’s too thin, add a little more powdered sugar.
Step 9: Frost the Cupcakes
Once the cupcakes are completely cool, it’s time to frost. Transfer the frosting to a piping bag fitted with a large star tip (like Wilton 1M). Starting at the outer edge of the cupcake, pipe in a spiral motion toward the center, then lift straight up to create a swirl. Alternatively, you can spread the frosting with a knife for a more rustic look. Top with a pinch of orange zest or a small chocolate curl for a finishing touch.
Cooking Tips & Techniques
I’ve made these cupcakes more times than I can count, and I’ve learned a few things along the way. Here are my best tips for getting perfect results every time:
Don’t Skip the Coffee: I know it sounds weird, but the hot coffee does two things. First, it helps bloom the black cocoa powder, which deepens the chocolate flavor. Second, it thins the batter to the perfect consistency for tender cupcakes. You won’t taste the coffee at all—I promise.
Room Temperature Ingredients Matter: Cold buttermilk and eggs won’t emulsify properly into the batter, which can lead to a dense, uneven texture. Take them out of the fridge about 30 minutes before you start baking. If you’re in a hurry, you can warm the buttermilk in the microwave for 10 to 15 seconds and place the eggs in a bowl of warm water for 5 minutes.
Measure Your Flour Correctly: This is the most common mistake I see in baking. Scooping flour directly from the bag packs it down, giving you up to 20% more flour than the recipe calls for. Instead, spoon the flour into your measuring cup and level it off with a knife. If you have a kitchen scale, even better—weighing your ingredients is the most accurate method.
Don’t Overmix the Batter: Once you add the wet ingredients to the dry, mix only until the flour is incorporated. Overmixing develops the gluten in the flour, which can make your cupcakes tough and dense. A few small lumps in the batter are fine—they’ll bake out.
Let the Frosting Steep: That step where you beat the orange zest into the cream cheese mixture? Don’t skip it. Letting the zest sit in the cream cheese for a minute or two before adding the other ingredients allows the oils to infuse the frosting, giving you a much brighter, more natural orange flavor. It’s a small step that makes a big difference.
Chill the Frosting if Needed: If your kitchen is warm, the frosting might be too soft to pipe. Pop it in the fridge for 15 to 20 minutes to firm up. Just don’t leave it too long, or it’ll be too stiff to pipe. You want it to be spreadable but not runny.
My Biggest Failure: The first time I made these, I forgot to add the vinegar. The cupcakes came out flat and dense, with barely any rise. That vinegar reaction with the baking soda is crucial for lift. Don’t skip it, and don’t substitute it with anything else. White vinegar is the way to go.
Variations & Adaptations
One of the best things about this recipe is how versatile it is. Here are some ways to make it your own:
Gluten-Free Version: Substitute the all-purpose flour with a 1:1 gluten-free baking flour blend that contains xanthan gum. I’ve had good results with King Arthur Flour’s Measure for Measure blend. The texture will be slightly more delicate, but the flavor is still fantastic.
Dairy-Free Version: Use a dairy-free buttermilk substitute (like almond milk mixed with lemon juice) and a dairy-free cream cheese alternative. I recommend Kite Hill’s cream cheese style spread for the frosting. The flavor will be slightly different, but it still works beautifully.
Spiced Version: Add 1 teaspoon of cinnamon and ½ teaspoon of nutmeg to the dry ingredients for a warm, cozy twist. This is perfect for fall baking or holiday parties. The spices pair beautifully with the orange frosting.
Chocolate Orange Version: Add ½ cup of mini chocolate chips to the batter before baking. The chocolate chips add little pockets of melted chocolate that complement the orange frosting perfectly. It’s like a chocolate orange in cupcake form.
Halloween Spiderweb Version: For a spooky Halloween look, pipe the frosting in a swirl, then use a toothpick to drag lines from the center outward to create a spiderweb pattern. Add a small candy spider on top for extra effect. I made these for a Halloween party last year and they were a huge hit. If you’re looking for more Halloween baking ideas, check out my recipe for Perfect Spiderweb Halloween Cookie Cake — it’s another showstopper for your spooky spread.
Mini Cupcakes: This recipe also works for mini cupcakes. Fill mini muffin liners about ⅔ full and bake for 10 to 12 minutes. You’ll get about 36 mini cupcakes. They’re perfect for parties or lunchbox treats.
Serving & Storage Suggestions
These cupcakes are best served at room temperature, which allows the cake to be tender and the frosting to be creamy. If you’ve stored them in the fridge, let them sit out for about 30 minutes before serving.
Presentation Ideas: For a dramatic presentation, arrange the cupcakes on a black or white cake stand. Sprinkle a little orange zest over the tops for a pop of color. If you’re serving them for Halloween, add a few candy pumpkins or spider rings around the base of the stand.
What to Serve With Them: These cupcakes pair beautifully with a hot cup of coffee or a glass of cold milk. For a dessert spread, serve them alongside a Cozy Slow Cooker Chicken and Wild Rice Soup for a cozy fall dinner, or bring them to a game day party with a batch of Best Slow Cooker Football Chili — the sweet and savory combo is surprisingly perfect.
Storage Instructions: Store unfrosted cupcakes in an airtight container at room temperature for up to 3 days. Frosted cupcakes should be stored in the refrigerator in an airtight container for up to 5 days. The cream cheese frosting needs to be refrigerated, but the cake stays moist thanks to the oil in the batter.
Freezing Instructions: You can freeze the unfrosted cupcakes for up to 3 months. Wrap each cupcake individually in plastic wrap, then place them in a freezer-safe bag. When you’re ready to serve, thaw them at room temperature for about an hour, then frost as directed. You can also freeze the frosting in an airtight container for up to 3 months. Thaw it in the refrigerator overnight, then re-whip it with a mixer before using.
How Flavors Develop: Honestly, these cupcakes taste even better the next day. The flavors meld together overnight, and the cake becomes even more moist. If you can, make them a day ahead and store them in the fridge. Just bring them to room temperature before serving.
Nutritional Information & Benefits
Here’s the nutritional breakdown for one cupcake with frosting (based on 12 servings):
| Nutrient | Amount Per Serving |
|---|---|
| Calories | 385 |
| Total Fat | 18g |
| Saturated Fat | 8g |
| Cholesterol | 55mg |
| Sodium | 290mg |
| Total Carbohydrates | 54g |
| Dietary Fiber | 2g |
| Sugars | 40g |
| Protein | 5g |
Health Benefits: While these are definitely a treat, there are a few redeeming qualities. Black cocoa powder is rich in antioxidants called flavonoids, which can help reduce inflammation. The cream cheese frosting provides a small amount of calcium and protein. And the fresh orange zest adds a dose of vitamin C. Of course, these are still cupcakes, so enjoy them in moderation. But hey, life is about balance, right?
Dietary Considerations: This recipe contains gluten, dairy, and eggs. For gluten-free and dairy-free options, see the variations section above. The cupcakes are nut-free as written, making them safe for school parties and nut-free households.
Conclusion
These Perfect Black Velvet Cupcakes with Orange Cream Cheese Frosting are everything I wanted them to be. That crumb I was chasing? It’s here. Tender, dark, and impossibly soft, with a flavor that’s rich without being heavy. And that frosting? Bright, tangy, and just sweet enough, with a pop of orange that makes every bite feel special. Whether you’re making them for Halloween, a birthday, or just because you want something beautiful on your counter, these cupcakes deliver.
I’d love to hear how yours turn out. Did you try a variation? Did you add something unexpected? Drop a comment below and let me know. And if you’re looking for more cozy baking inspiration, don’t miss my Easy Brown Butter Pumpkin Cinnamon Rolls with Cream Cheese Icing — they’re the perfect fall companion to these cupcakes. Happy baking, friends!
Frequently Asked Questions
Can I use regular cocoa powder instead of black cocoa powder?
You can, but the color won’t be as dark and the flavor will be more like a traditional chocolate cupcake. Black cocoa powder gives you that Oreo-like flavor and deep black color. If you can’t find it, use a combination of ¼ cup Dutch-processed cocoa and ¼ cup black cocoa for the best results.
Why did my cupcakes turn out dry?
The most common reason is overbaking. Start checking your cupcakes at 18 minutes and remove them as soon as a toothpick comes out clean. Another culprit is overmixing the batter, which develops gluten and makes the cupcakes tough. Mix until just combined.
Can I make these cupcakes ahead of time?
Absolutely. You can bake the cupcakes a day ahead and store them in an airtight container at room temperature. Make the frosting and frost them the day you plan to serve. The unfrosted cupcakes also freeze well for up to 3 months.
How do I get the frosting to be super fluffy?
Make sure your cream cheese and butter are at room temperature before you start. Beat them together for a full 2 minutes before adding anything else. Then, after you add the powdered sugar, beat on medium-high speed for another 2 to 3 minutes. The longer you beat it, the fluffier it gets.
Can I use bottled orange juice instead of fresh?
I don’t recommend it. Bottled orange juice has a cooked, sometimes bitter flavor that doesn’t work well in frosting. Fresh orange juice is brighter and sweeter, and the fresh zest is essential for that bold citrus flavor. It’s worth the extra minute to juice an orange.
Pin This Recipe!
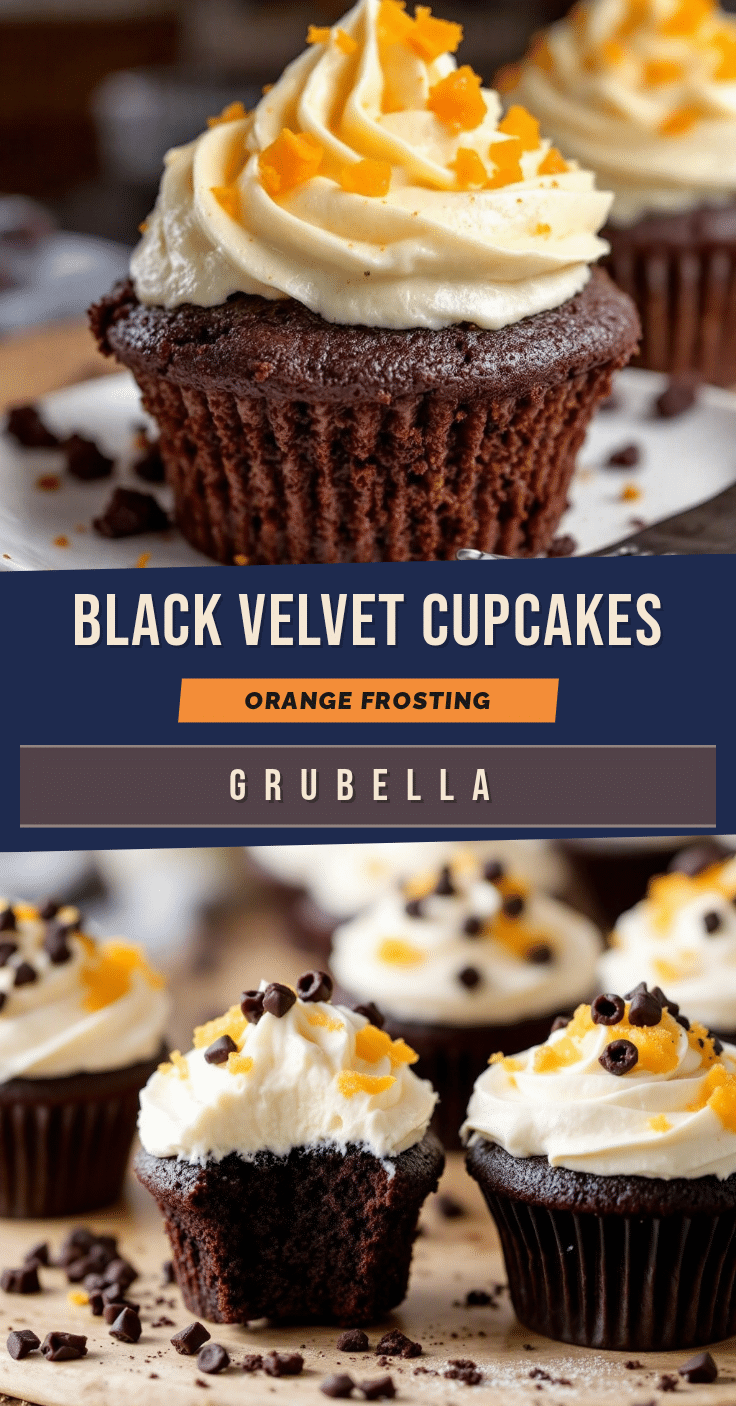
Perfect Black Velvet Cupcakes with Orange Frosting
Deeply dark, tender black velvet cupcakes with a bright and tangy orange cream cheese frosting. The perfect balance of rich chocolate and citrus, these cupcakes are a showstopper for any occasion.
- Prep Time: 15 minutes
- Cook Time: 20 minutes
- Total Time: 45 minutes
- Yield: 12 servings 1x
- Category: Dessert
- Cuisine: American
Ingredients
- 1 ½ cups (188g) all-purpose flour
- ½ cup (50g) black cocoa powder
- 1 cup (200g) granulated sugar
- 1 teaspoon baking soda
- ½ teaspoon fine sea salt
- ¾ cup (180ml) buttermilk, room temperature
- ½ cup (120ml) vegetable oil
- 2 large eggs, room temperature
- 2 teaspoons pure vanilla extract
- 1 teaspoon white vinegar
- ½ cup (120ml) hot coffee
- 8 oz (226g) cream cheese, softened
- ¼ cup (57g) unsalted butter, softened
- 3 cups (360g) powdered sugar, sifted
- 2 tablespoons fresh orange zest
- 2 tablespoons fresh orange juice
- 1 teaspoon pure vanilla extract
- Pinch of salt
Instructions
- Preheat oven to 350°F (175°C). Line a 12-cup muffin pan with paper liners.
- In a large bowl, whisk together flour, black cocoa powder, sugar, baking soda, and salt until well combined and no lumps remain.
- In a separate bowl, whisk together buttermilk, vegetable oil, eggs, and vanilla extract until smooth.
- Pour wet ingredients into dry ingredients and stir with a rubber spatula until just combined. Add white vinegar and hot coffee, stirring gently until incorporated. Batter will be thin.
- Divide batter evenly among the 12 liners, filling each about ⅔ full.
- Bake for 18 to 22 minutes, until a toothpick inserted in the center comes out clean or with a few moist crumbs. Cool in pan for 5 minutes, then transfer to a wire rack to cool completely.
- For the frosting: In a large bowl, beat cream cheese and butter with an electric mixer on medium speed until smooth and creamy, about 2 minutes. Add orange zest and beat for 1 minute. Add orange juice, vanilla extract, and salt; beat until combined.
- Gradually add sifted powdered sugar, ½ cup at a time, mixing on low speed until each addition is incorporated. Increase speed to medium-high and beat for 2 to 3 minutes until light and fluffy.
- Once cupcakes are completely cool, frost using a piping bag fitted with a star tip or spread with a knife. Garnish with extra orange zest if desired.
Notes
For best results, use room temperature ingredients. Do not overmix the batter. The hot coffee deepens the chocolate flavor without making the cupcakes taste like coffee. Let the frosting steep with orange zest for a more intense citrus flavor. Cupcakes taste even better the next day.
Nutrition
- Serving Size: 1 cupcake
- Calories: 385
- Sugar: 40
- Sodium: 290
- Fat: 18
- Saturated Fat: 8
- Carbohydrates: 54
- Fiber: 2
- Protein: 5
Keywords: black velvet cupcakes, orange cream cheese frosting, Halloween cupcakes, chocolate cupcakes, black cocoa powder, orange frosting, homemade cupcakes



