Love this? Save it for later!
Share the inspiration with your friends
“I wasn’t planning a big party this year,” I admitted to my neighbor, Jenna, as she peeked over the fence one sunny afternoon in early June. “But then I thought, how about something simple and fun for the kids and adults alike?” That’s when she mentioned her annual ice pop station, a hit from last July 4th that got everyone talking.
Picture this: a backyard table bursting with bright red, white, and blue ingredients, clear popsicle molds waiting patiently, and the laughter of kids deciding which flavors to mix. I’ll be honest — setting up that colorful station was a bit chaotic (I forgot to buy enough popsicle sticks, of course), but the smiles made it all worthwhile. Maybe you’ve been there, scrambling last minute for a festive dessert that doesn’t require a master’s degree in baking.
What started as a casual experiment turned into a new tradition that my whole family looks forward to. The best part? It’s so easy to customize and perfect for all ages. Plus, it’s a great way to sneak in some fresh fruit and keep everyone cool on a hot summer day. In this post, I’ll walk you through setting up your own Fun Family July 4th Ice Pop Station for Patriotic Treats that anyone can enjoy — and trust me, you’ll want to make it a yearly must-have.
Why You’ll Love This Recipe
Honestly, this ice pop station is a game-changer for July 4th celebrations. I’ve tested several versions over the years — some too complicated, others too plain — but this setup strikes the perfect balance. Here’s why it’s become a family favorite:
- Quick & Easy: The station comes together in under 30 minutes, making it ideal for busy summer days or last-minute gatherings.
- Simple Ingredients: You probably already have most of the ingredients in your fridge or pantry — no need for a special trip to a gourmet store.
- Perfect for All Ages: Kids love customizing their own pops, and adults appreciate the fresh, light flavors that aren’t overly sweet.
- Crowd-Pleaser: Whether you’re hosting a backyard BBQ or a neighborhood potluck, these patriotic treats disappear fast.
- Unbelievably Delicious: The combination of real fruit, creamy yogurt, and a touch of natural sweetness makes these ice pops feel indulgent yet refreshing.
What makes this ice pop station stand apart? It’s the ability to mix and match flavors and textures — think vibrant strawberries, juicy blueberries, and creamy coconut yogurt layered just right. Plus, the no-fuss assembly means you can involve the whole family without the stress of complicated recipes. This isn’t just another frozen treat recipe; it’s a little celebration in every bite and a surefire way to create lasting memories.
What Ingredients You Will Need
To pull off this festive Fun Family July 4th Ice Pop Station for Patriotic Treats, you’ll want fresh, wholesome ingredients that bring color, flavor, and a touch of creaminess. Here’s what I recommend gathering:
- Fresh Strawberries, hulled and sliced (adds natural sweetness and a vibrant red)
- Blueberries, washed and patted dry (perfect for that patriotic blue pop)
- Greek Yogurt, plain or vanilla (I like Fage Total 2% for creaminess and protein)
- Honey or Maple Syrup, to taste (optional, for lightly sweetening the yogurt)
- Fresh Lemon Juice, a tablespoon (balances the sweetness and adds brightness)
- Coconut Milk, full-fat or light (for a dairy-free, tropical twist)
- Granola or Crushed Graham Crackers (optional, for a fun crunchy layer)
- Ice Pop Molds with sticks (if you don’t have molds, small paper cups and wooden sticks work too!)
For substitutions, feel free to swap Greek yogurt with dairy-free coconut yogurt or almond yogurt if you prefer. Frozen berries can work in a pinch, but fresh is best for that bright summer taste. I also like to have a squeeze bottle of pureed fruit or fruit juice on hand to drizzle inside the molds — makes the layering easier and prettier.
Equipment Needed
Setting up your ice pop station doesn’t require fancy gear. Here’s what I suggest having on hand:
- Ice Pop Molds: These come in all shapes and sizes. I prefer the silicone ones because they make unmolding easier, but plastic molds work just fine.
- Mixing Bowls: A few medium bowls for prepping different ingredients separately.
- Spoons and Small Whisks: For mixing yogurt and honey or stirring fruit.
- Measuring Cups and Spoons: To get your proportions just right.
- Squeeze Bottles or Small Pitchers: Optional but handy for layering fruit purees or juices neatly.
- Freezer Space: You’ll need room for your molds to chill for several hours — plan ahead to avoid overcrowding.
If you’re on a budget, paper cups and popsicle sticks are a great alternative — just make sure to cover the cups tightly with foil and poke a stick through before freezing. Personally, I keep a couple of different mold shapes to switch things up for each holiday.
Preparation Method

- Prep the Fruit: Rinse and slice the strawberries, wash blueberries, and set aside. This should take about 10 minutes. Fresh fruit is key here — the better the fruit, the better the pops!
- Sweeten the Yogurt: In a bowl, combine 2 cups (480 ml) of Greek yogurt with 2 tablespoons (30 ml) of honey or maple syrup and a tablespoon (15 ml) of fresh lemon juice. Whisk gently until smooth. Taste and adjust sweetness if needed.
- Prepare Coconut Milk (Optional): If using, give 1 cup (240 ml) of coconut milk a quick stir to mix the cream and liquid.
- Layer the Molds: Start by spooning a few strawberry slices into the bottom of each mold. Add a layer of sweetened yogurt, then blueberries. Repeat layers, alternating colors and textures, until molds are nearly full — leave a little space to insert sticks.
- Add Crunch (Optional): If you want a surprise crunch, sprinkle a teaspoon of granola or crushed graham crackers between layers.
- Insert Sticks: Place the sticks into the center of each mold. If using cups, cover tightly with foil before poking the sticks through.
- Freeze: Place molds on a baking sheet for stability and freeze for at least 4-6 hours, or until completely solid.
- Unmold and Serve: To remove the pops, run warm water briefly over the outside of the molds — this helps loosen them without melting the pops inside.
Pro tip: If you want to make this station self-serve for guests, prep the fruit and yogurt mixtures in bowls, then let everyone assemble their own pops. It’s a fun activity and keeps things interactive.
Cooking Tips & Techniques
Making an ice pop station sounds simple, but a few tricks can make the experience smoother and the treats tastier. Here’s what I’ve learned:
- Balance Sweetness: Yogurt can be tart, and fruit varies in sweetness. Taste your mixtures before freezing to avoid overly sour or bland pops.
- Layering Matters: For the prettiest tri-color effect, layer carefully and gently press down fruit to avoid gaps. I sometimes use a small spoon to push layers in tightly.
- Freeze Time: Don’t rush the freezing process. Pops need at least 4 hours to fully set — overnight is ideal if you can wait.
- Unmolding Hacks: Warm water works wonders but avoid soaking the molds to prevent melting the pops.
- Multitask: While waiting for the pops to freeze, it’s a great time to prep other July 4th dishes like a classic crispy garlic chicken or a fresh summer salad.
- Clean Up Quickly: Yogurt can stick to molds. Rinse immediately after unmolding to make washing easier.
Variations & Adaptations
This ice pop station is a blank canvas for creativity. Here are some ways to switch things up:
- Dairy-Free Option: Swap Greek yogurt for coconut or almond yogurt and use coconut milk instead of dairy milk for creaminess without dairy.
- Flavor Twists: Add fresh mint leaves or a splash of fresh lime juice for an extra zing. Another fun idea is adding a swirl of natural peanut butter or almond butter for richness.
- Seasonal Swaps: In late summer, try swapping strawberries for fresh peaches or nectarines, and blueberries for blackberries or raspberries.
- Adult-Friendly Pops: Mix in a bit of fresh lemonade or even a splash of vodka for a grown-up version to enjoy after the kids head inside.
- Personal Favorite: One year, I layered in a bit of homemade strawberry jam between the yogurt and fruit for an extra burst of sweetness — the family went wild for it!
Serving & Storage Suggestions
Serve your patriotic ice pops cold and fresh from the freezer for maximum enjoyment. They’re perfect as a light dessert after a hearty summer grilled steak or alongside a picnic spread.
For storage, keep leftover pops in an airtight container or tightly wrapped in plastic wrap in the freezer — they’ll last up to 2 weeks without losing flavor or texture. When reheating, avoid microwave use; simply let them sit at room temperature for a few minutes before enjoying.
Fun fact: the flavors mellow and blend beautifully if you let the pops sit in the freezer overnight after assembling, making them taste even better the next day.
Nutritional Information & Benefits
These ice pops are a lighter treat option, offering the benefits of real fruit and yogurt without added artificial flavors or excessive sugar.
- Calories: Approximately 70-90 calories per pop (varies by ingredients and size)
- Protein: Greek yogurt adds a good protein boost, keeping you fuller longer
- Vitamins: Fresh berries provide antioxidants and vitamin C
- Diet-Friendly: Easily adapted for gluten-free, dairy-free, and low-sugar diets
- Allergens: Contains dairy unless substituted; watch for nut allergies if adding nut butters
From a wellness perspective, these pops are a great way to enjoy a sweet treat without overindulgence — plus, they keep everyone hydrated and cool on hot summer days.
Conclusion
So there you have it — a Fun Family July 4th Ice Pop Station for Patriotic Treats that’s easy, interactive, and downright delicious. I love how this idea brings everyone together, letting kids and adults channel their inner artist while crafting tasty frozen treats. You can customize it to your heart’s content and make it your own tradition.
Give this a try for your next Independence Day celebration or any summer get-together. I’d love to hear how you personalize your pops — drop your favorite combos or tips in the comments below. Here’s to sweet, colorful celebrations that keep the whole family smiling!
Frequently Asked Questions
Can I make these ice pops without yogurt?
Absolutely! You can use fruit juice, coconut milk, or even lemonade as a base for dairy-free or lighter options.
How long do the ice pops keep in the freezer?
They stay fresh for up to two weeks when stored in an airtight container or wrapped tightly.
What if I don’t have ice pop molds?
Use small paper cups and wooden sticks as a simple alternative. Cover the cups with foil and poke the stick through before freezing.
Can I prepare the ice pops ahead of time for a party?
Yes, you can assemble them the day before and keep them in the freezer until ready to serve.
How do I prevent the fruit from sinking to the bottom?
Layer the fruit and yogurt carefully, pressing gently after each layer to keep everything evenly distributed.
Pin This Recipe!
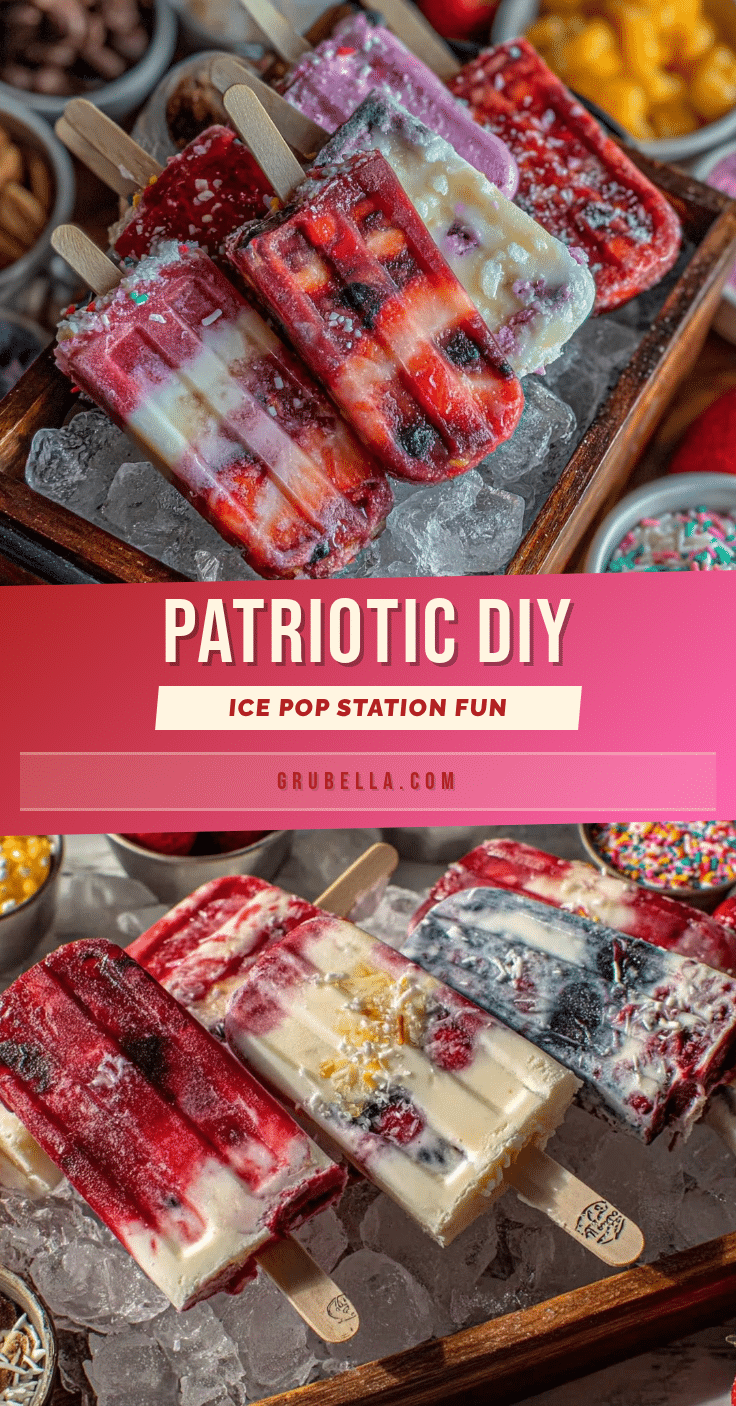
Fun Family July 4th Ice Pop Station Ideas for Easy Patriotic Treats

A simple and fun ice pop station perfect for July 4th celebrations, featuring fresh fruit, creamy yogurt, and customizable patriotic layers that everyone can enjoy.
- Prep Time: 15 minutes
- Cook Time: 4-6 hours (freezing time)
- Total Time: 4 hours 15 minutes to 6 hours 15 minutes
- Yield: 8-10 pops
- Category: Dessert
- Cuisine: American
Ingredients
- Fresh strawberries, hulled and sliced
- Blueberries, washed and patted dry
- Greek yogurt, plain or vanilla (e.g., Fage Total 2%)
- Honey or maple syrup, to taste (optional)
- Fresh lemon juice, 1 tablespoon
- Coconut milk, full-fat or light (optional)
- Granola or crushed graham crackers (optional)
- Ice pop molds with sticks (or small paper cups and wooden sticks as an alternative)
Instructions
- Rinse and slice the strawberries, wash blueberries, and set aside (about 10 minutes).
- In a bowl, combine 2 cups (16 fl oz) of Greek yogurt with 2 tablespoons (1 fl oz) of honey or maple syrup and 1 tablespoon (0.5 fl oz) of fresh lemon juice. Whisk gently until smooth and adjust sweetness if needed.
- If using, stir 1 cup (8 fl oz) of coconut milk to mix cream and liquid.
- Layer the molds by spooning a few strawberry slices into the bottom, add a layer of sweetened yogurt, then blueberries. Repeat layers until molds are nearly full, leaving space for sticks.
- Optionally, sprinkle a teaspoon of granola or crushed graham crackers between layers for crunch.
- Insert sticks into the center of each mold. If using cups, cover tightly with foil before poking sticks through.
- Place molds on a baking sheet for stability and freeze for at least 4-6 hours or until solid.
- To unmold, run warm water briefly over the outside of the molds to loosen the pops without melting them.
Notes
Use fresh fruit for best flavor. Layer carefully to avoid gaps and sinking fruit. Freeze pops for at least 4 hours or overnight for best results. Warm water helps unmold pops easily. Yogurt can be swapped for dairy-free alternatives. Store pops in airtight containers for up to 2 weeks.
Nutrition
- Serving Size: 1 ice pop
- Calories: 7090
- Sugar: 812
- Sodium: 3050
- Fat: 24
- Saturated Fat: 12
- Carbohydrates: 1215
- Fiber: 12
- Protein: 46
Keywords: July 4th, ice pops, patriotic treats, summer dessert, family-friendly, easy recipe, frozen treats, healthy snacks