Love this? Save it for later!
Share the inspiration with your friends
My roommate asked why I couldn’t just throw everything on one pan and call it dinner. I was midway through explaining the importance of cooking proteins and vegetables separately — how you need different temperatures, how the chicken releases juices that make the peppers soggy, the whole spiel. Then I stopped. Honestly? I had no good reason. I just assumed it wouldn’t work because that’s what I’d always been told.
So I tried it. That Tuesday night, I tossed sliced bell peppers, onions, and chicken strips onto a single sheet pan with some oil and seasoning, slid it into the oven, and waited to be proven right. I was not proven right. What came out was beautiful — the chicken was juicy, the peppers had those perfect charred edges, and the whole kitchen smelled like a tiny taqueria. My roommate just raised an eyebrow and said, “Told you.”
That moment changed how I think about weeknight dinners. I mean, we’ve all been there — standing in front of the stove at 6 PM with no energy and a fridge full of ingredients that somehow need to become a meal. This recipe for Easy Sheet Pan Chicken Fajitas became my answer to that exact problem. It’s the kind of dinner that makes you wonder why you ever complicated things in the first place. The recipe stays with me because it proved that sometimes the simplest approach is actually the smartest one, and maybe you’ve been overthinking your fajitas too.
Why You’ll Love This Recipe
Let me tell you why these Easy Sheet Pan Chicken Fajitas have earned a permanent spot in my weekly rotation. After testing this recipe about seven times — yes, seven — I can confidently say it delivers every single time without the fuss of traditional stovetop fajitas.
- Quick & Easy: Comes together in under 30 minutes, perfect for those evenings when you’re hangry and need food fast. The oven does all the work while you set the table or pour yourself a drink.
- Simple Ingredients: No fancy grocery trips needed. Chicken breasts, bell peppers, onions, and basic pantry spices — you probably have most of this stuff already.
- Perfect for Busy Weeknights: Great for feeding a hungry family after soccer practice or whipping up something impressive when friends drop by unexpectedly.
- Crowd-Pleaser: My picky nephew who “doesn’t like peppers” ate three of these last Tuesday. The caramelization changes everything.
- Unbelievably Delicious: The high heat creates those smoky, slightly charred edges that make fajitas taste like they came from a restaurant — without the sizzling skillet drama.
What makes this recipe different from the dozens of other fajita recipes out there is the technique. I learned through trial and error that spacing the ingredients properly on the pan matters more than you’d think. Crowd the pan and everything steams instead of roasting. Give them room and magic happens. This isn’t just another sheet pan dinner — it’s your best version of fajitas because it actually works.
This recipe is the kind that makes you close your eyes after the first bite. It’s comfort food reimagined — faster, simpler, but with the same soul-soothing satisfaction. Perfect for impressing guests without stress, or turning a simple Tuesday into something memorable.
What Ingredients You Will Need
This recipe uses simple, wholesome ingredients to deliver bold flavor and satisfying texture without the fuss. Most of these are pantry staples, which makes this dish perfect for last-minute dinner decisions.
For the Chicken and Vegetables
- 1.5 pounds boneless skinless chicken breasts, sliced into thin strips (about ½-inch thick) — I prefer organic chicken from local markets when possible, but any quality chicken works
- 3 bell peppers, sliced into strips (use a mix of colors — red, yellow, and orange for sweetness; green adds a slightly bitter edge if you like that)
- 1 large red onion, sliced into thin half-moons
- 3 tablespoons olive oil (adds richness and helps everything caramelize)
- Juice of 1 lime (fresh is non-negotiable here — bottled stuff tastes flat)
For the Fajita Seasoning
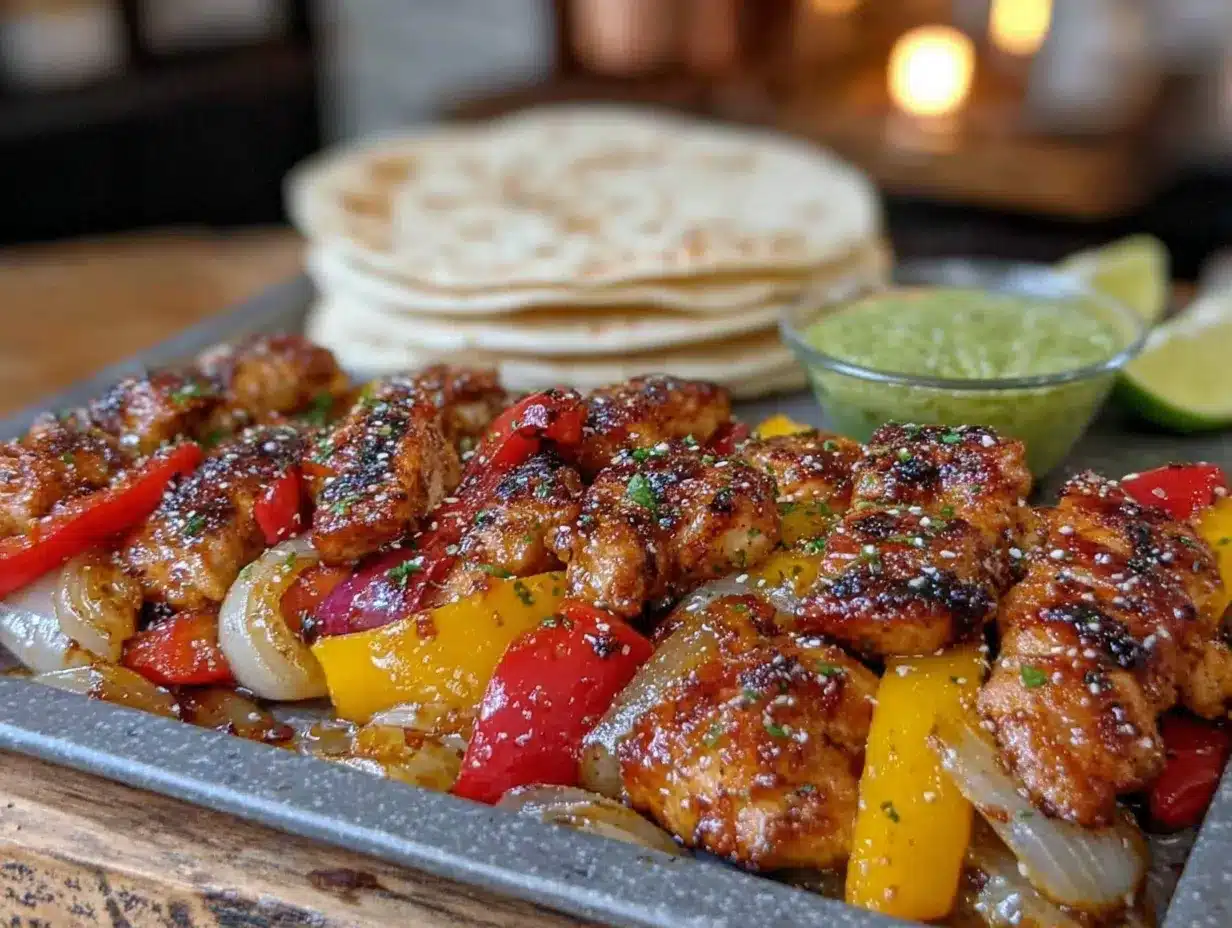
- 1 tablespoon chili powder — I recommend using a good quality brand like Spice Islands or Penzeys for deeper flavor
- 1 teaspoon smoked paprika (adds that subtle smoky campfire taste)
- 1 teaspoon ground cumin
- ½ teaspoon garlic powder
- ½ teaspoon onion powder
- ½ teaspoon salt (adjust to taste)
- ¼ teaspoon black pepper
- ¼ teaspoon cayenne pepper (optional, for heat lovers — I add this when I’m cooking just for myself)
For Serving
- 8 small flour tortillas (corn tortillas work great for gluten-free option)
- Optional toppings: sour cream, guacamole or sliced avocado, fresh salsa, chopped cilantro, shredded cheese, pickled jalapeños
Ingredient selection tip: Look for firm bell peppers with smooth, shiny skin — they’ll hold up better during roasting. If your chicken breasts are thick, butterfly them before slicing so the strips cook evenly. For a dairy-free option, skip the cheese and sour cream and load up on fresh salsa and avocado instead.
Equipment Needed
You don’t need much for this recipe, which is part of the beauty. Here’s what you’ll want to have handy:
- Large sheet pan (half-sheet size, about 18×13 inches) — I’ve used the same Nordic Ware pan for years and it’s never let me down. Avoid dark non-stick pans if possible; they can cause over-browning.
- Sharp knife and cutting board — A good chef’s knife makes slicing chicken and vegetables so much easier. Trust me, I learned this the hard way after struggling with a dull blade for way too long.
- Mixing bowls (one large, one small)
- Measuring spoons
- Kitchen tongs for flipping halfway through
- Aluminum foil or parchment paper (optional but makes cleanup a breeze)
If you don’t have a large sheet pan, you can use two smaller ones — just rotate them halfway through cooking. I once used a jelly roll pan in a pinch and it worked fine, though the edges got a bit more crowded. Budget-friendly option: dollar store sheet pans actually work surprisingly well for this recipe, just keep an eye on them as they can warp at high heat.
Preparation Method
Let me walk you through this step by step. I’ve made this recipe enough times to know exactly where things can go wrong, so I’ll point those out along the way.
- Preheat your oven to 400°F (200°C). This is important — don’t skip preheating. A hot oven is what gives you those beautiful charred edges. While the oven heats up, line your sheet pan with aluminum foil or parchment paper if you’re using it. I forgot to do this once and spent 20 minutes scrubbing burnt-on seasoning. Learn from my mistake.
- Make the seasoning mix. In a small bowl, combine the chili powder, smoked paprika, cumin, garlic powder, onion powder, salt, black pepper, and cayenne if using. Give it a good stir with a fork to break up any clumps. Smell it — that’s what your kitchen is about to smell like for the next half hour.
- Prep the chicken. Pat the chicken breasts dry with paper towels (this helps the seasoning stick better). Slice them into thin strips, about ½ inch wide. Try to keep them uniform in size so they cook at the same rate. I usually aim for strips about 3-4 inches long. Place them in a large mixing bowl.
- Prep the vegetables. Slice your bell peppers into strips about ½ inch wide, removing the seeds and white membranes as you go. Slice the red onion into thin half-moons. I like to keep the onion slices separate from the peppers at this stage because they cook slightly differently.
- Season everything. Add the sliced peppers and onions to the bowl with the chicken. Drizzle with 3 tablespoons of olive oil and the lime juice. Sprinkle the seasoning mix over everything. Use your hands (clean ones, obviously) to toss and coat everything evenly. This is the most satisfying part — the colors are gorgeous and the smell is already amazing. Make sure every piece of chicken and every pepper strip has some seasoning on it.
- Arrange on the sheet pan. Spread the chicken and vegetables in a single layer on your prepared sheet pan. Here’s the crucial part: do not overcrowd. If the pieces are piled on top of each other, they’ll steam instead of roast. Give them some breathing room. If you need to use two pans, do it. The spacing makes a real difference in the final texture.
- Roast for 15 minutes. Place the pan on the middle rack of your preheated oven. Set a timer — I’ve gotten distracted and let them go too long, and nobody likes dry chicken.
- Flip and rotate. After 15 minutes, pull the pan out and use tongs to flip the chicken strips and toss the vegetables around a bit. This ensures even cooking. The chicken should look opaque but not quite done yet. Spread everything back into an even layer and return to the oven.
- Roast for another 10-15 minutes. The total cooking time is usually 25-30 minutes depending on how thick your chicken strips are. You’re looking for the chicken to reach an internal temperature of 165°F (74°C) and the peppers to have nice charred spots on the edges. The onions should be soft and slightly caramelized.
- Rest and serve. Remove the pan from the oven and let it rest for 2-3 minutes. This lets the juices redistribute in the chicken. Squeeze a little extra lime juice over everything if you’re feeling fancy. Warm your tortillas in a dry skillet or directly over a gas flame for about 30 seconds per side, then fill with the chicken and pepper mixture. Add your favorite toppings and enjoy immediately.
Cooking Tips & Techniques
After making these Easy Sheet Pan Chicken Fajitas more times than I can count, I’ve picked up a few tricks that make a real difference. Let me share what I’ve learned — sometimes the hard way.
Don’t skip the lime juice in the marinade. I tried making these without it once because I was out of limes, and the flavor was noticeably flat. The acidity does something magical to the chicken — it tenderizes it slightly and brightens up all those warm spices. Fresh lime juice only, please. The bottled stuff has a weird metallic taste that just doesn’t work here.
Cut your ingredients uniformly. This sounds boring, but it matters. If some chicken strips are twice as thick as others, you’ll end up with dry pieces and undercooked pieces in the same pan. I learned this the hard way when I got lazy and just hacked at the chicken. Take the extra 30 seconds to make everything roughly the same size.
Watch your oven temperature. Every oven runs differently. My first apartment had an oven that ran 25 degrees hot, and I burned two batches before I figured it out. If your oven tends to run hot, check the fajitas at the 20-minute mark. If it runs cool, you might need an extra 5 minutes. Get to know your oven — it’s worth it.
Use the broiler for extra char. If you want those restaurant-style blackened edges, switch your oven to broil for the last 2 minutes of cooking. Keep a close eye on it though — things go from perfectly charred to burnt really fast. I may or may not have set off my smoke detector doing this. Twice.
Multitasking strategy: While the fajitas are roasting, warm your tortillas, prep your toppings, and set the table. The oven does all the heavy lifting, so use that time wisely. I usually make a quick guacamole or chop some cilantro while dinner cooks itself.
Variations & Adaptations
One of the best things about this recipe is how flexible it is. Here are some variations I’ve tried and loved:
Chicken Thigh Version: Swap the chicken breasts for boneless skinless thighs if you prefer darker meat. Thighs are more forgiving and stay juicier even if you overcook them slightly. The cooking time stays about the same, though you might need an extra 2-3 minutes depending on thickness.
Steak Fajitas: Replace the chicken with flank steak or skirt steak sliced thinly against the grain. Reduce cooking time by about 5 minutes since steak cooks faster than chicken. I did this for a Super Bowl party and it was gone in minutes.
Vegetarian Version: Skip the meat entirely and double up on the vegetables. Add sliced zucchini, mushrooms, or even chunks of sweet potato. Roast at 425°F for about 20-25 minutes. I make this version for Meatless Mondays and honestly don’t miss the chicken at all.
Low-Carb / Keto: Serve the fajita filling over a bed of lettuce or in large romaine leaves instead of tortillas. The filling itself is already low-carb and keto-friendly — just skip the tortillas and load up on guacamole and sour cream.
Spicy Version: Double the cayenne pepper and add a diced jalapeño or serrano pepper to the mix. I once added a habanero because I was feeling brave — let’s just say that was a mistake. Stick with jalapeños for manageable heat.
Seasonal Twist: In summer, throw in some sliced zucchini or yellow squash. In fall, add roasted corn or even some diced butternut squash. The basic technique stays the same, so feel free to experiment with whatever looks good at the market.
Serving & Storage Suggestions
These Easy Sheet Pan Chicken Fajitas are best served hot, straight from the oven, with warm tortillas and all your favorite toppings. The contrast between the warm, slightly charred filling and cool, creamy toppings is what makes this dish special.
What to serve alongside: A simple side of Mexican rice or refried beans rounds out the meal nicely. For a lighter option, serve with a crisp green salad dressed with lime vinaigrette. I also love serving these with black beans seasoned with cumin and garlic — it’s simple but satisfying.
Beverage pairing: A cold Mexican beer like Modelo or Corona works perfectly. For non-alcoholic options, try an agua fresca or sparkling water with lime. I’m partial to a good horchata on warm evenings.
Storage instructions: Store leftover fajita filling in an airtight container in the refrigerator for up to 4 days. Keep the tortillas and toppings separate to prevent sogginess. The filling actually gets better after a day or two as the flavors meld together — I love having leftovers for lunch.
Reheating: The best way to reheat is in a hot skillet over medium-high heat for 2-3 minutes, which brings back some of that charred texture. You can also use the microwave in a pinch, but the peppers will be softer. I’ve been known to eat cold fajita filling straight from the fridge — don’t judge me, it’s still delicious.
Freezing: This recipe freezes beautifully. Let the filling cool completely, then transfer to a freezer-safe bag or container. It will keep for up to 3 months. Thaw overnight in the refrigerator and reheat in a skillet. I make a double batch on purpose just so I can freeze half for busy weeks.
Nutritional Information & Benefits
Here’s the estimated nutritional breakdown for one serving (about ⅙ of the recipe, without tortillas or toppings):
| Nutrient | Amount |
|---|---|
| Calories | 285 |
| Protein | 32g |
| Carbohydrates | 12g |
| Fiber | 3g |
| Fat | 13g |
| Saturated Fat | 2g |
| Sodium | 520mg |
This recipe is naturally gluten-free (just use corn tortillas) and can easily be made dairy-free by skipping the cheese and sour cream. The bell peppers are packed with vitamin C — actually more than an orange — and the chicken provides lean protein that keeps you full and satisfied.
From a wellness perspective, I love that this recipe feels indulgent without being heavy. You get all the satisfaction of restaurant-style fajitas with way less oil and no hidden additives. It’s the kind of meal that makes eating well feel effortless, which is exactly what I need on busy weeknights.
Conclusion
These Easy Sheet Pan Chicken Fajitas have honestly changed my approach to weeknight cooking. They’re proof that you don’t need fancy techniques or a million dirty dishes to create something genuinely delicious. The oven does the work, the spices do the talking, and you get to sit down to a dinner that feels special without the stress.
I hope you give this recipe a try and make it your own. Maybe you’ll add extra heat, swap in steak, or load yours up with every topping in the fridge — that’s the beauty of fajitas. They’re forgiving, flexible, and always satisfying. I’d love to hear how yours turn out, so drop a comment below and let me know what variations you tried. Did you discover a new favorite topping? Did your family ask for seconds? Tell me about it!
Until next time, happy cooking — and remember, sometimes the best dinners are the simplest ones.
Frequently Asked Questions
Can I use frozen chicken for this recipe?
I don’t recommend using frozen chicken directly. The uneven cooking will leave you with dry edges and undercooked centers. Thaw the chicken completely in the refrigerator overnight before slicing and seasoning.
How do I prevent the chicken from drying out?
Don’t overcook it — that’s the main culprit. Use an instant-read thermometer to check for 165°F internal temperature. Also, cutting the chicken into uniform strips helps everything cook evenly so you don’t end up with some pieces overdone.
Can I prep this recipe ahead of time?
Absolutely! You can slice the chicken and vegetables and mix the seasoning up to 24 hours in advance. Store everything separately in the refrigerator, then toss with oil and seasoning just before cooking. The prep is the most time-consuming part, so getting it done ahead makes dinner a breeze.
What if I don’t have all the spices for the seasoning mix?
No problem! You can use a store-bought fajita seasoning packet in a pinch. Just use about 2 tablespoons of the mix. The flavor won’t be quite as complex, but it’ll still be delicious. I’ve done this when my spice rack was looking bare and nobody complained.
Can I make this recipe in an air fryer?
Yes, you can! Cook in batches at 375°F for about 12-15 minutes, shaking the basket halfway through. You’ll need to work in smaller batches to avoid overcrowding. The results are similar to the oven version, just with slightly crispier edges on the peppers.
Pin This Recipe!
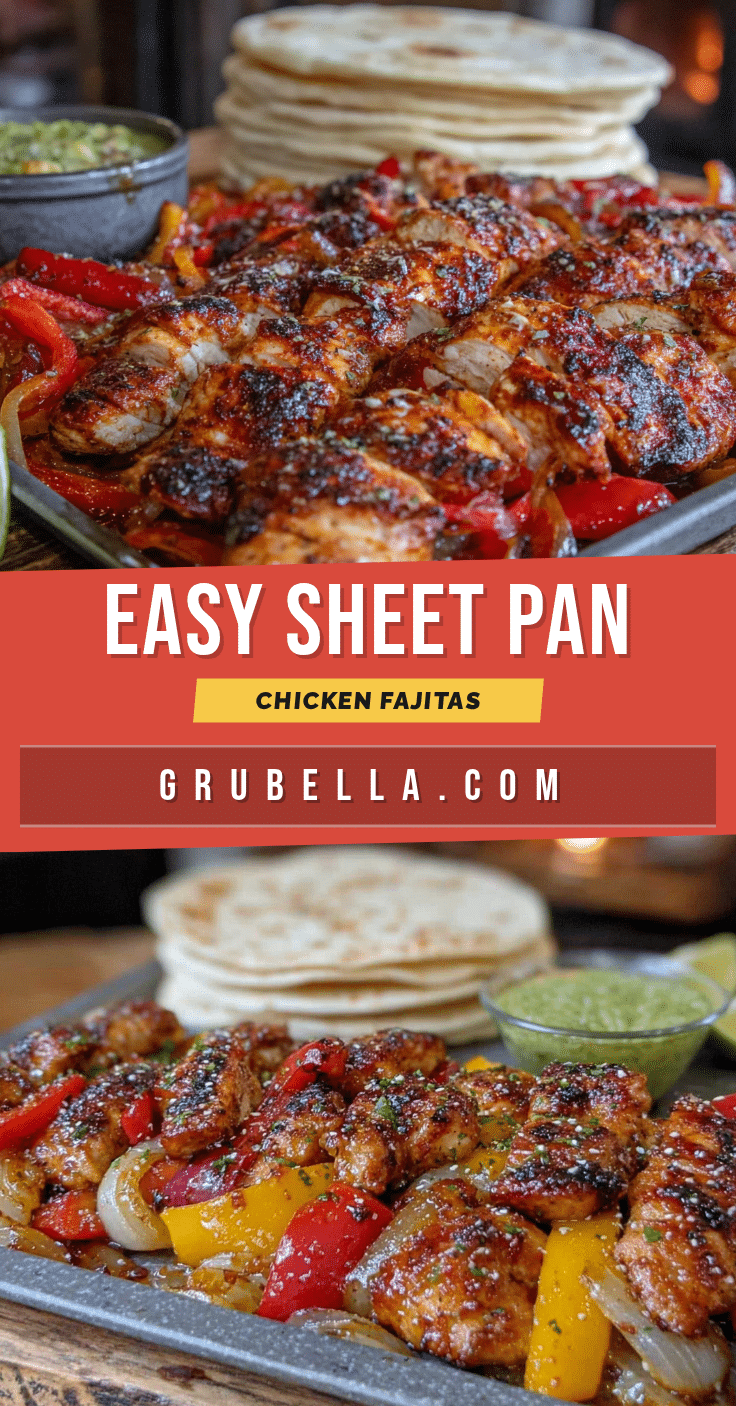
Easy Sheet Pan Chicken Fajitas: A 30-Minute Dinner

These Easy Sheet Pan Chicken Fajitas are a quick and delicious weeknight dinner that comes together in under 30 minutes. Juicy chicken, perfectly charred peppers and onions, all roasted on a single pan for minimal cleanup and maximum flavor.
- Prep Time: 10 minutes
- Cook Time: 25 minutes
- Total Time: 35 minutes
- Yield: 4 servings 1x
- Category: Main Course
- Cuisine: Mexican
Ingredients
- 1.5 pounds boneless skinless chicken breasts, sliced into thin strips (about ½-inch thick)
- 3 bell peppers, sliced into strips (mix of colors: red, yellow, orange)
- 1 large red onion, sliced into thin half-moons
- 3 tablespoons olive oil
- Juice of 1 lime
- 1 tablespoon chili powder
- 1 teaspoon smoked paprika
- 1 teaspoon ground cumin
- ½ teaspoon garlic powder
- ½ teaspoon onion powder
- ½ teaspoon salt
- ¼ teaspoon black pepper
- ¼ teaspoon cayenne pepper (optional)
- 8 small flour tortillas (or corn tortillas for gluten-free)
- Optional toppings: sour cream, guacamole or sliced avocado, fresh salsa, chopped cilantro, shredded cheese, pickled jalapeños
Instructions
- Preheat your oven to 400°F (200°C). Line a sheet pan with aluminum foil or parchment paper if desired.
- In a small bowl, combine chili powder, smoked paprika, cumin, garlic powder, onion powder, salt, black pepper, and cayenne (if using). Stir to combine.
- Pat chicken breasts dry with paper towels and slice into thin strips, about ½ inch wide and 3-4 inches long. Place in a large mixing bowl.
- Slice bell peppers into ½-inch strips, removing seeds and membranes. Slice red onion into thin half-moons. Add to the bowl with the chicken.
- Drizzle the chicken and vegetables with olive oil and lime juice. Sprinkle the seasoning mix over everything. Use your hands to toss and coat evenly.
- Spread the chicken and vegetables in a single layer on the prepared sheet pan. Do not overcrowd; use two pans if needed.
- Roast for 15 minutes on the middle rack.
- Remove the pan from the oven and use tongs to flip the chicken strips and toss the vegetables. Spread back into an even layer.
- Return to the oven and roast for another 10-15 minutes, until chicken reaches an internal temperature of 165°F (74°C) and peppers have charred edges.
- Remove from oven and let rest for 2-3 minutes. Squeeze extra lime juice over if desired. Warm tortillas in a dry skillet or over a gas flame for about 30 seconds per side. Fill with the chicken and pepper mixture, add toppings, and serve immediately.
Notes
Don’t skip the lime juice in the marinade; it tenderizes the chicken and brightens the flavors. Cut ingredients uniformly for even cooking. If your oven runs hot, check at the 20-minute mark. For extra char, broil for the last 2 minutes, watching carefully. Leftover filling can be stored in an airtight container in the refrigerator for up to 4 days or frozen for up to 3 months.
Nutrition
- Serving Size: 1 serving (about ⅙ o
- Calories: 285
- Sodium: 520
- Fat: 13
- Saturated Fat: 2
- Carbohydrates: 12
- Fiber: 3
- Protein: 32
Keywords: sheet pan chicken fajitas, easy fajitas, 30-minute dinner, weeknight dinner, chicken fajitas, sheet pan dinner



