Love this? Save it for later!
Share the inspiration with your friends
The crack in the surface of my fourth test batch was tiny, almost invisible, but I noticed it. That tiny crack was the whole reason I started tinkering with pumpkin cheesecake in the first place. You see, I have this thing about textures, and the way a baked cheesecake pulls away from the pan, leaving that thin, dry edge, has always bothered me. It’s not a big deal to most people, but to me, it’s the difference between a good dessert and one I can’t stop thinking about. So, when the idea for these Easy No-Bake Mini Pumpkin Cheesecake Cups hit me, it wasn’t about the flavor first, it was about the promise of a perfectly smooth, un-cracked surface, every single time.
I was standing in my kitchen last October, staring at a can of pumpkin puree and a block of cream cheese that was perfectly at room temperature. I had just pulled a batch of my cozy brown butter pumpkin sourdough bread out of the oven, and the whole house smelled like fall. But I wanted something different, something that didn’t require the oven to be on for an hour. Something that felt fancy but was secretly the easiest thing in the world. That smooth, cold, velvety texture of a no-bake cheesecake filling, layered with a buttery crust and that signature pumpkin spice warmth, it just clicked. It was the kind of recipe that solves a problem you didn’t even know you had.
These aren’t just desserts, they are little cups of pure, uncomplicated joy. No water baths, no worrying about over-baking, no waiting for hours to cool down slowly in the oven. You mix, you layer, you chill, and you eat. Honestly, that’s the kind of cooking I live for. And let me tell you, the first time I pressed a spoon through that silky pumpkin layer and into the crunchy graham cracker crust, I knew I had stumbled onto something special. It’s the kind of dessert that makes you feel like a genius with almost zero effort, and that’s a feeling I want everyone to have.
Why You’ll Love This Recipe
These mini cheesecake cups are a total game-changer for fall baking. They have all the rich, spiced flavor of a traditional pumpkin cheesecake, but without any of the stress. I’ve tested this recipe more times than I can count to make sure the texture is perfectly creamy and not too dense, because nobody wants a heavy dessert after a big meal.
- No-Bake & Incredibly Easy: You don’t even need to turn on the oven. This is a perfect recipe for busy weeknights, Thanksgiving prep, or when you just want a quick dessert fix. It comes together in about 20 minutes of active work.
- Perfectly Portioned & No Cracking: Each person gets their own little cup, which makes serving a breeze. And since there’s no baking, there’s zero chance of a cracked cheesecake top. It’s flawless every single time.
- Make-Ahead Magic: These cups actually get better after a few hours in the fridge. You can make them a day or two in advance, which is a lifesaver for holiday entertaining. The flavors meld together beautifully.
- Crowd-Pleasing Fall Favorite: The combination of creamy pumpkin, warm spices, and a buttery crust is a classic for a reason. Kids and adults both go crazy for them. They’re like a bite of autumn in a cup.
- Simple, Everyday Ingredients: You probably already have most of these ingredients in your pantry. No fancy pastry skills or special equipment required. It’s the kind of recipe you can whip up on a whim.
What really makes this recipe different is the texture. We’re not using any gelatin or weird thickeners. The secret is in how you handle the cream cheese and the ratio of pumpkin to cream cheese. It’s silky, luscious, and has just the right amount of structure. It is comfort food reimagined—faster, easier, but with the same soul-soothing satisfaction as a classic slice. Perfect for impressing guests without stress, or turning a simple Tuesday into something memorable.
What Ingredients You Will Need
This recipe uses simple, wholesome ingredients to deliver that classic pumpkin cheesecake flavor and a perfectly creamy texture. You’ll find most of these items are standard fall pantry staples, making this an easy last-minute dessert.
For the Graham Cracker Crust
- Graham Cracker Crumbs (1 ½ cups / 180g): You can buy pre-made crumbs or crush your own. I prefer using full sheets and pulsing them in a food processor for a more consistent texture. If you’re in a pinch, crushed vanilla wafers or ginger snaps work beautifully for a different flavor profile.
- Granulated Sugar (3 tablespoons / 36g): Just enough to sweeten the crust and help it bind. You can use brown sugar for a deeper, more molasses-like flavor that pairs wonderfully with the pumpkin.
- Unsalted Butter (6 tablespoons / 85g), melted: The butter is the glue that holds the crust together. Make sure it’s melted but not hot, or it will make the crumbs greasy. I use salted butter in a pinch and just skip adding any extra salt.
For the No-Bake Pumpkin Cheesecake Filling
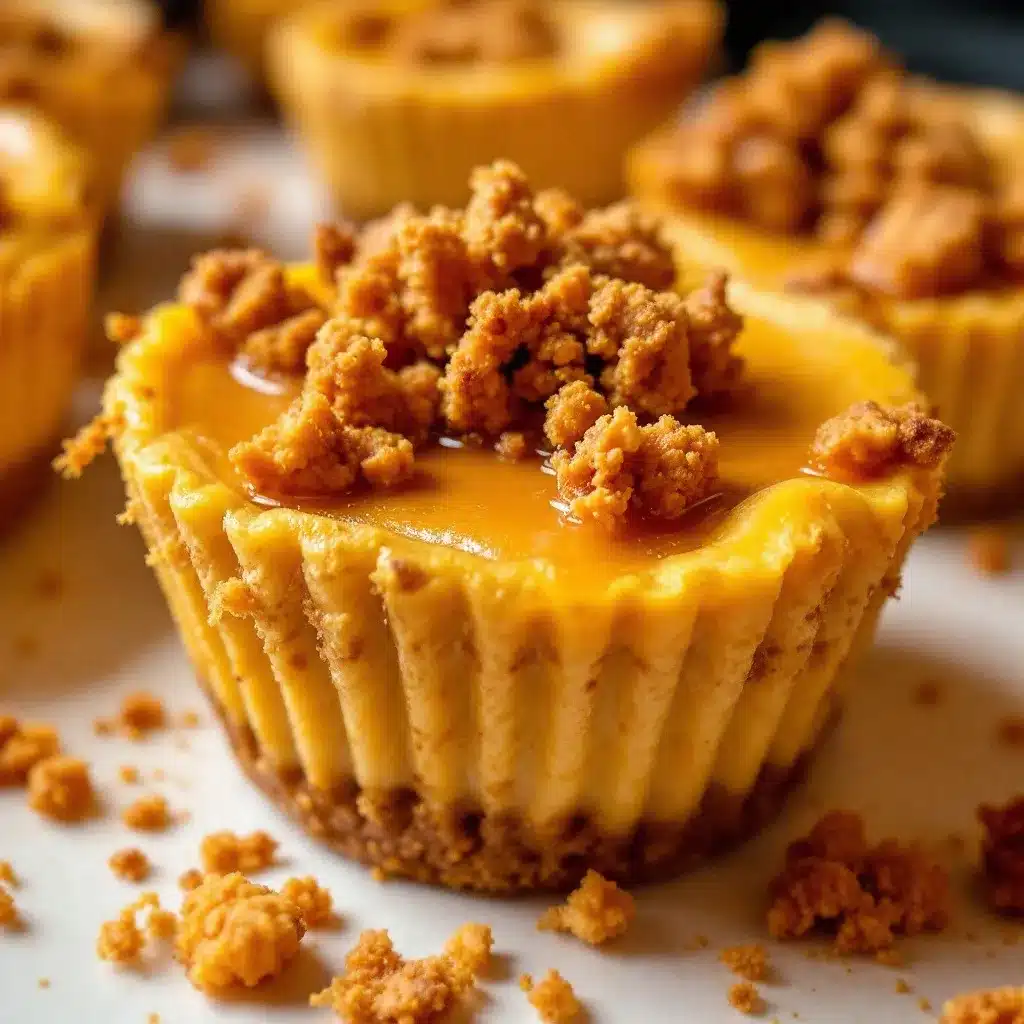
- Full-Fat Cream Cheese (16 oz / 450g), softened: This is non-negotiable for the creamiest texture. Pull it out of the fridge at least an hour before you start. Low-fat cream cheese contains more water and can result in a runny filling. I recommend Philadelphia brand for its consistent quality.
- Pumpkin Puree (1 cup / 240g): Make sure you’re using 100% pure pumpkin puree, not pumpkin pie filling. The pie filling has added sugar and spices that will throw off the balance. Libby’s is my go-to brand.
- Powdered Sugar (1 cup / 120g): This dissolves instantly into the cream cheese, giving you a silky-smooth filling without any graininess. Sifting it is a good idea if your sugar is a little clumpy.
- Heavy Whipping Cream (1 cup / 240ml), cold: This is what gives the filling its light, mousse-like texture. It needs to be very cold to whip up properly. You can substitute with a can of cold coconut cream for a dairy-free option.
- Pumpkin Pie Spice (2 teaspoons): The heart of the fall flavor. You can use a store-bought blend or make your own with cinnamon, nutmeg, ginger, and cloves. I often add an extra ½ teaspoon of cinnamon because I love it.
- Vanilla Extract (1 teaspoon): Enhances all the other flavors and adds depth. Use pure vanilla extract if you have it, but imitation works just fine.
For the Topping (Optional but Recommended)
- Whipped Cream: A dollop on top is the classic finish. You can use homemade or store-bought.
- Caramel Sauce: A drizzle of salted caramel takes these over the top. I love using a good quality jarred sauce.
- Chopped Pecans or Toasted Coconut: For a little crunch. Toasting the pecans for a few minutes in a dry pan really brings out their flavor.
Equipment Needed
You don’t need a lot of fancy gear for this recipe, which is part of its charm. Here’s what you’ll need to have on hand.
- Mixing Bowls (2-3): You’ll need one for the crust, one for the cream cheese mixture, and one for whipping the cream. I prefer glass or stainless steel bowls because they stay cooler.
- Electric Hand Mixer or Stand Mixer: A hand mixer is perfect for this. You need to whip the cream and beat the cream cheese until smooth, and doing it by hand is a real arm workout. A stand mixer with the whisk attachment works great too.
- Spatula: A good rubber spatula is your best friend for scraping down the sides of the bowl and making sure everything is combined.
- Small Serving Cups or Jars (8-10): I love using 6-ounce mason jars or small glass dessert cups. You can also use small ramekins or even a small trifle dish for a more casual presentation.
- Measuring Cups and Spoons: For accurate measurements. Baking is a science, even when it’s no-bake!
- Food Processor (optional): Makes quick work of crushing the graham crackers if you’re using full sheets. A zip-top bag and a rolling pin work just as well.
Pro tip: If you don’t have a hand mixer, you can whip the cream in a stand mixer or even by hand with a whisk, but it will take a good 5-7 minutes of vigorous whisking.
Preparation Method
Get ready to make the easiest, most impressive fall dessert of your life. Follow these steps, and you’ll have perfect little cups of pumpkin heaven in no time. The key is making sure your cream cheese is properly softened.
- Make the Crust (5 minutes): In a medium bowl, combine the graham cracker crumbs and granulated sugar. Pour the melted butter over the top and stir with a fork until the mixture looks like wet sand and all the crumbs are moistened. It should clump together when you press it in your hand.
- Press the Crust (5 minutes): Evenly divide the crust mixture among your 8-10 serving cups. Use the back of a small spoon or a shot glass to press the crumbs down firmly into an even layer. Set the cups aside while you make the filling. A firm crust is a non-crumbly crust.
- Whip the Cream (3-4 minutes): In a clean, chilled bowl, pour the cold heavy whipping cream. Using an electric hand mixer on medium-high speed, whip the cream until stiff peaks form. This means when you lift the beaters, the cream stands up straight without flopping over. Be careful not to over-whip it into butter! Place the bowl in the fridge while you work on the next step.
- Beat the Cream Cheese (3 minutes): In a large separate bowl, beat the softened cream cheese with the hand mixer on medium speed until it is completely smooth and fluffy, with no lumps. This is the most important step. If your cream cheese is lumpy, your filling will be lumpy. Scrape down the sides of the bowl with a spatula at least once.
- Add the Pumpkin and Sugar (2 minutes): Add the pumpkin puree, powdered sugar, pumpkin pie spice, and vanilla extract to the smooth cream cheese. Beat on low speed at first to avoid a sugar cloud, then increase to medium and mix until everything is fully combined and the mixture is a uniform, beautiful orange color. It will look thick and glossy.
- Fold in the Whipped Cream (2 minutes): Take your bowl of whipped cream out of the fridge. Add about one-third of the whipped cream to the pumpkin mixture. Using your rubber spatula, gently fold it in. This means you cut down through the middle, scrape along the bottom, and bring it up over the top, turning the bowl as you go. Once it’s mostly incorporated, add the rest of the whipped cream and fold until no white streaks remain. The mixture will become light, airy, and incredibly silky.
- Fill the Cups (5 minutes): Spoon or pipe the cheesecake filling into the cups over the prepared crusts. You can use a piping bag with a large round tip for a cleaner look, or just use a spoon. Fill them almost to the top, leaving a little room for your toppings. Gently tap the cups on the counter to settle the filling and remove any air bubbles.
- Chill (4 hours or overnight): This is the hardest part! Cover the cups with plastic wrap or a lid and place them in the refrigerator for at least 4 hours, but overnight is best. This allows the filling to set up completely and the flavors to meld together. The texture will be much firmer and more cheesecake-like after a long chill.
- Add Toppings and Serve: Just before serving, add a generous dollop of whipped cream, a drizzle of caramel sauce, and a sprinkle of chopped pecans. Serve cold.
Cooking Tips & Techniques
I’ve made this recipe a dozen times, and I’ve learned a few things the hard way so you don’t have to. Here are my best tips for perfect no-bake mini pumpkin cheesecake cups.
- The Cream Cheese Must Be Soft: This is the number one rule. If your cream cheese is cold, your filling will be lumpy no matter how long you beat it. Leave it on the counter for at least an hour. You should be able to press your finger into it and leave a deep indent. In a pinch, you can cut it into small cubes and microwave it for 10-15 seconds, but be careful not to melt it.
- Don’t Over-Whip the Cream: Whip the cream just until stiff peaks form. If you keep going, it will separate and turn into butter and buttermilk. The texture will be grainy and won’t fold into the filling properly. Watch it closely in the last 30 seconds.
- Fold, Don’t Stir: When combining the whipped cream and the pumpkin mixture, use a gentle folding motion. Stirring vigorously will deflate the air you just whipped into the cream, making your filling dense and heavy instead of light and mousse-like.
- Chill Time is Crucial: I know it’s tempting to dig in right away, but the filling needs time to set. After 2 hours, it will still be quite soft. After 4 hours, it’s sliceable. After 8 hours, it’s perfect. Patience is a virtue with no-bake desserts.
- Use a Ziploc Bag for Piping: If you don’t have a piping bag, no problem. Spoon the filling into a large zip-top bag, snip off a corner, and pipe it into the cups. It’s so much cleaner and faster than using a spoon.
Variations & Adaptations
One of the best things about this recipe is how easily it adapts to different tastes and dietary needs. Don’t be afraid to make it your own!
- Gluten-Free Version: Simply swap the graham cracker crumbs for gluten-free graham crackers or crushed gluten-free shortbread cookies. The rest of the ingredients are naturally gluten-free, so this is an easy fix.
- Dairy-Free Version: Use a high-quality dairy-free cream cheese alternative (like Kite Hill or Tofutti) and make sure it’s softened. For the whipped cream, use a can of full-fat coconut cream that has been chilled overnight. Whip it the same way you would heavy cream. The coconut flavor pairs surprisingly well with pumpkin.
- Spiced Ginger Snap Crust: For a more intense fall flavor, replace the graham crackers with crushed ginger snaps. The spicy, molasses flavor of the cookies is a fantastic match for the creamy pumpkin filling. I actually prefer this version for Thanksgiving.
- Chocolate Pumpkin Cheesecake: Add ¼ cup of unsweetened cocoa powder to the cream cheese mixture along with the pumpkin. The chocolate and pumpkin spice combination is absolutely divine. You can also add a layer of melted dark chocolate on top of the crust before adding the filling.
- Pumpkin Pie Parfaits: Instead of a single crust layer at the bottom, layer the crust, filling, and a layer of crushed ginger snaps or toasted pecans. Repeat the layers in the cup for a beautiful parfait effect. It’s a stunning presentation for a party.
Serving & Storage Suggestions
These little cups are perfect for any occasion, from a casual weeknight treat to a fancy holiday dinner table. They look so pretty and festive.
Serving: Serve the cheesecake cups directly from the fridge. They are best enjoyed cold. For a more elegant presentation, add a final dollop of whipped cream, a drizzle of homemade or store-bought caramel sauce, and a light dusting of pumpkin pie spice or cinnamon. A few toasted pecan halves or a sprinkle of flaky sea salt on top of the caramel is a game-changer.
Storage: Store any leftover cups covered in the refrigerator. They will keep well for up to 4-5 days. The texture stays perfectly creamy. I actually think they taste even better on day two after the flavors have had more time to meld together.
Freezing: You can absolutely freeze these! Make them in freezer-safe containers or silicone cups. Freeze them solid (without the toppings), then wrap each cup individually in plastic wrap and store them in a freezer bag for up to 2 months. To serve, thaw them overnight in the refrigerator. The texture remains excellent. Add fresh toppings after thawing.
Nutritional Information & Benefits
While these are definitely a treat, they aren’t completely devoid of nutritional value. Here’s a rough estimate per serving (assuming 10 servings).
- Calories: 320-350
- Fat: 22g
- Carbohydrates: 30g
- Protein: 4g
- Vitamin A: High (from pumpkin!)
Pumpkin is a fantastic source of Vitamin A, which is great for your immune system and eye health. It is also packed with fiber. The cream cheese and cream provide calcium and protein. Of course, it’s a dessert, so enjoy it in moderation. I love that I can give my family a dessert that has a little bit of a vegetable hiding in it. It’s a nice way to sneak in some nutrients while satisfying a sweet tooth.
Conclusion
These Easy No-Bake Mini Pumpkin Cheesecake Cups are more than just a recipe, they’re a solution. They solve the problem of wanting a spectacular, satisfying fall dessert without the stress, the long oven times, or the risk of a cracked top. They are the perfect way to celebrate the season with minimal effort and maximum flavor.
I love this recipe because it feels like a little hug in a cup. It’s creamy, it’s spiced, it’s cold, and it’s just the right amount of sweet. Whether you’re making them for a big Thanksgiving gathering or just a quiet night in, they never disappoint. Don’t be shy about customizing them to your taste, that’s the whole point of cooking.
I’d love to hear how yours turn out! Did you try a fun variation? What toppings did you use? Drop a comment below and let me know. And if you loved these, please share this post with a friend who needs a little fall dessert in their life. Happy no-baking!
Frequently Asked Questions (FAQs)
Can I use pumpkin pie filling instead of pumpkin puree?
No, I really don’t recommend it. Pumpkin pie filling is pre-sweetened and already has spices added. Using it will throw off the sugar and spice balance in the recipe, making the filling overly sweet and potentially runny. Always use 100% pure pumpkin puree for the best results.
Why is my cheesecake filling runny?
A runny filling usually happens for two reasons. First, your cream cheese wasn’t soft enough and didn’t incorporate properly, or you over-whipped the cream. Second, and most commonly, the filling hasn’t had enough time to set in the fridge. Give it the full 4 hours, or better yet, overnight. The cold temperature is what firms it up.
Can I make this in a regular pie dish instead of cups?
Absolutely! You can press the crust into the bottom of a standard 9-inch pie dish or an 8×8-inch square pan. Pour the filling on top, spread it evenly, and chill. You’ll have a beautiful no-bake pumpkin cheesecake pie. The serving size will be larger, and it’s perfect for slicing.
How long do these mini cheesecake cups last in the fridge?
They will stay fresh in the refrigerator for 4 to 5 days when stored in an airtight container or covered tightly with plastic wrap. The texture remains creamy, and the flavor actually improves after a day or two as the spices meld with the cream cheese.
Can I use a sugar substitute to make this low-carb or keto-friendly?
Yes, you can! Use a powdered monk fruit or erythritol sweetener in place of the powdered sugar. For the crust, you can use crushed pecans or almonds mixed with melted butter and a little sweetener instead of graham crackers. The filling will still set up beautifully and be delicious.
Pin This Recipe!
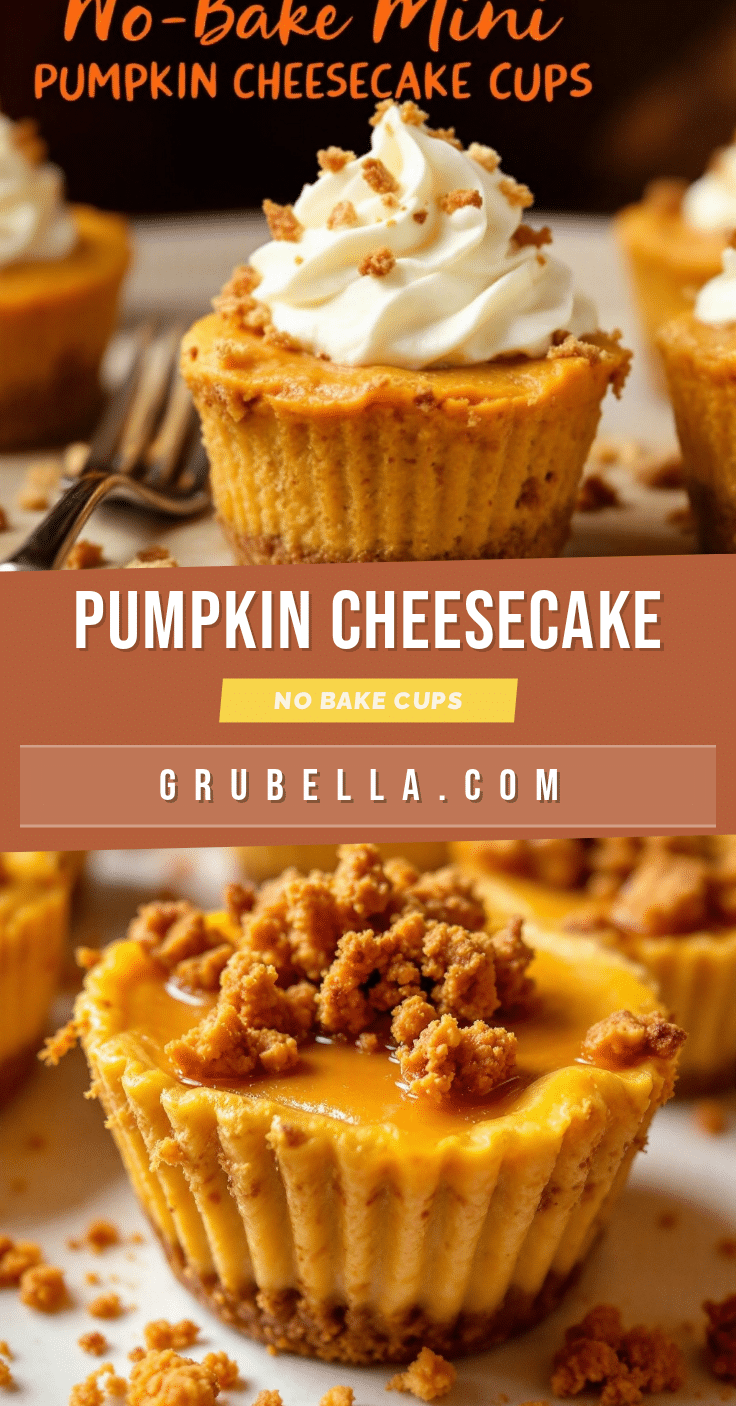
Easy No-Bake Mini Pumpkin Cheesecake Cups: Best Fall Dessert
These no-bake mini pumpkin cheesecake cups are a perfect fall dessert with a creamy, spiced pumpkin filling and a buttery graham cracker crust. They are incredibly easy to make, require no oven, and are perfect for Thanksgiving or any autumn gathering.
- Prep Time: 20 minutes
- Cook Time: 0 minutes
- Total Time: 4 hours 20 minutes (includes chilling)
- Yield: 8-10 servings 1x
- Category: Dessert
- Cuisine: American
Ingredients
- 1 ½ cups (180g) graham cracker crumbs
- 3 tablespoons (36g) granulated sugar
- 6 tablespoons (85g) unsalted butter, melted
- 16 oz (450g) full-fat cream cheese, softened
- 1 cup (240g) pumpkin puree (not pumpkin pie filling)
- 1 cup (120g) powdered sugar
- 1 cup (240ml) cold heavy whipping cream
- 2 teaspoons pumpkin pie spice
- 1 teaspoon vanilla extract
- Whipped cream, for topping (optional)
- Caramel sauce, for topping (optional)
- Chopped pecans or toasted coconut, for topping (optional)
Instructions
- Make the crust: In a medium bowl, combine graham cracker crumbs and granulated sugar. Pour melted butter over the top and stir with a fork until the mixture looks like wet sand and all crumbs are moistened.
- Press the crust: Evenly divide the crust mixture among 8-10 serving cups. Use the back of a small spoon or a shot glass to press the crumbs down firmly into an even layer. Set aside.
- Whip the cream: In a clean, chilled bowl, pour the cold heavy whipping cream. Using an electric hand mixer on medium-high speed, whip the cream until stiff peaks form. Place the bowl in the fridge while you work on the next step.
- Beat the cream cheese: In a large separate bowl, beat the softened cream cheese with the hand mixer on medium speed until completely smooth and fluffy, with no lumps. Scrape down the sides of the bowl with a spatula at least once.
- Add the pumpkin and sugar: Add the pumpkin puree, powdered sugar, pumpkin pie spice, and vanilla extract to the smooth cream cheese. Beat on low speed at first, then increase to medium and mix until everything is fully combined and the mixture is a uniform, beautiful orange color.
- Fold in the whipped cream: Take your bowl of whipped cream out of the fridge. Add about one-third of the whipped cream to the pumpkin mixture. Using a rubber spatula, gently fold it in. Once mostly incorporated, add the rest of the whipped cream and fold until no white streaks remain.
- Fill the cups: Spoon or pipe the cheesecake filling into the cups over the prepared crusts. Fill them almost to the top, leaving a little room for toppings. Gently tap the cups on the counter to settle the filling and remove any air bubbles.
- Chill: Cover the cups with plastic wrap or a lid and place them in the refrigerator for at least 4 hours, but overnight is best.
- Add toppings and serve: Just before serving, add a generous dollop of whipped cream, a drizzle of caramel sauce, and a sprinkle of chopped pecans. Serve cold.
Notes
Make sure cream cheese is fully softened to avoid lumps. Do not over-whip the cream. Chill time is crucial for the filling to set properly. For a gluten-free version, use gluten-free graham crackers. For a dairy-free version, use dairy-free cream cheese and coconut cream.
Nutrition
- Serving Size: 1 mini cheesecake cu
- Calories: 320350
- Sugar: 22
- Sodium: 250
- Fat: 22
- Saturated Fat: 13
- Carbohydrates: 30
- Fiber: 2
- Protein: 4
Keywords: no-bake pumpkin cheesecake, mini cheesecake cups, fall dessert, pumpkin dessert, easy cheesecake, Thanksgiving dessert, no-bake dessert



