Love this? Save it for later!
Share the inspiration with your friends
I was elbow-deep in frosting last October when my phone buzzed with a text from my sister-in-law. “Please tell me you’re bringing something to the Halloween party that isn’t another batch of those pumpkin cupcakes everyone makes.” I looked at my kitchen counter—covered in sprinkles, candy eyeballs, and three different colors of buttercream—and laughed. I mean, she wasn’t wrong. Every year, I’d show up with the same Pinterest-perfect treats that took hours to assemble and about thirty seconds to disappear. But this time, I was onto something different.
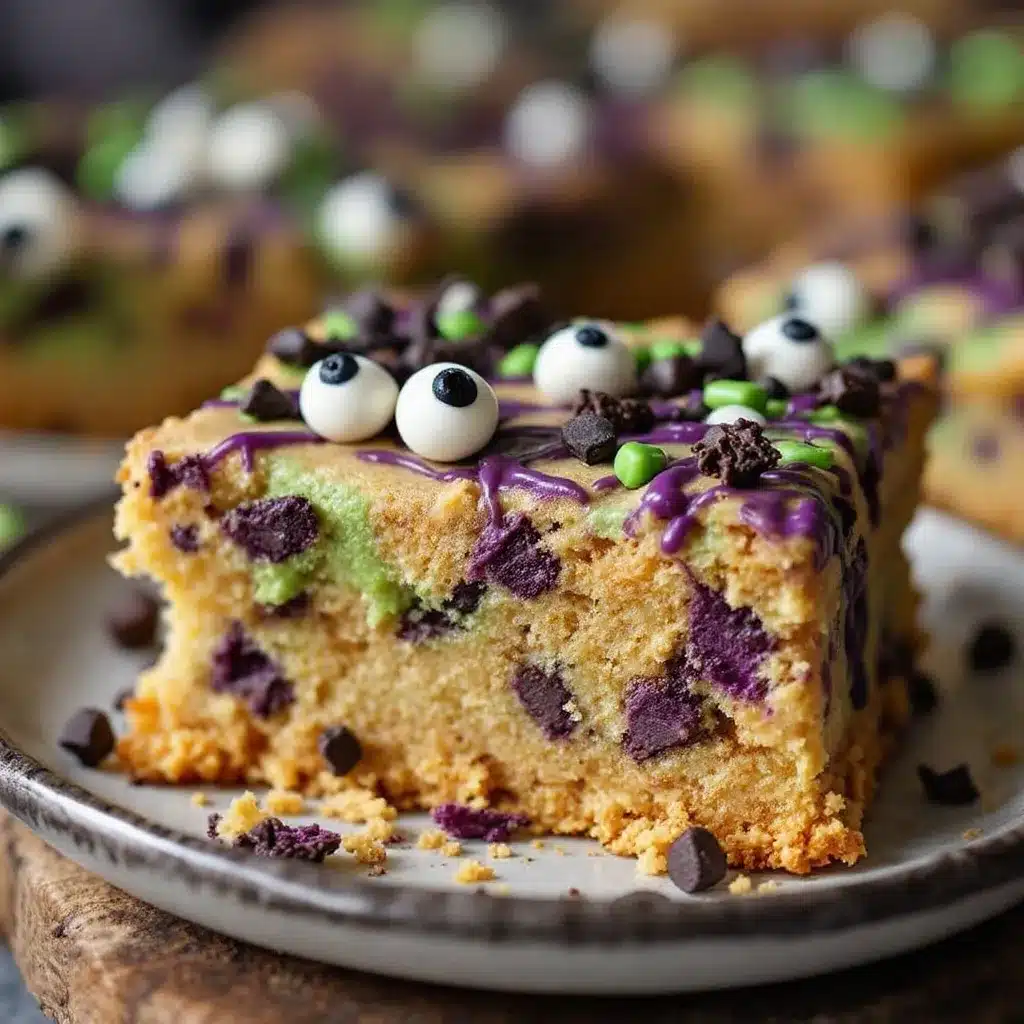
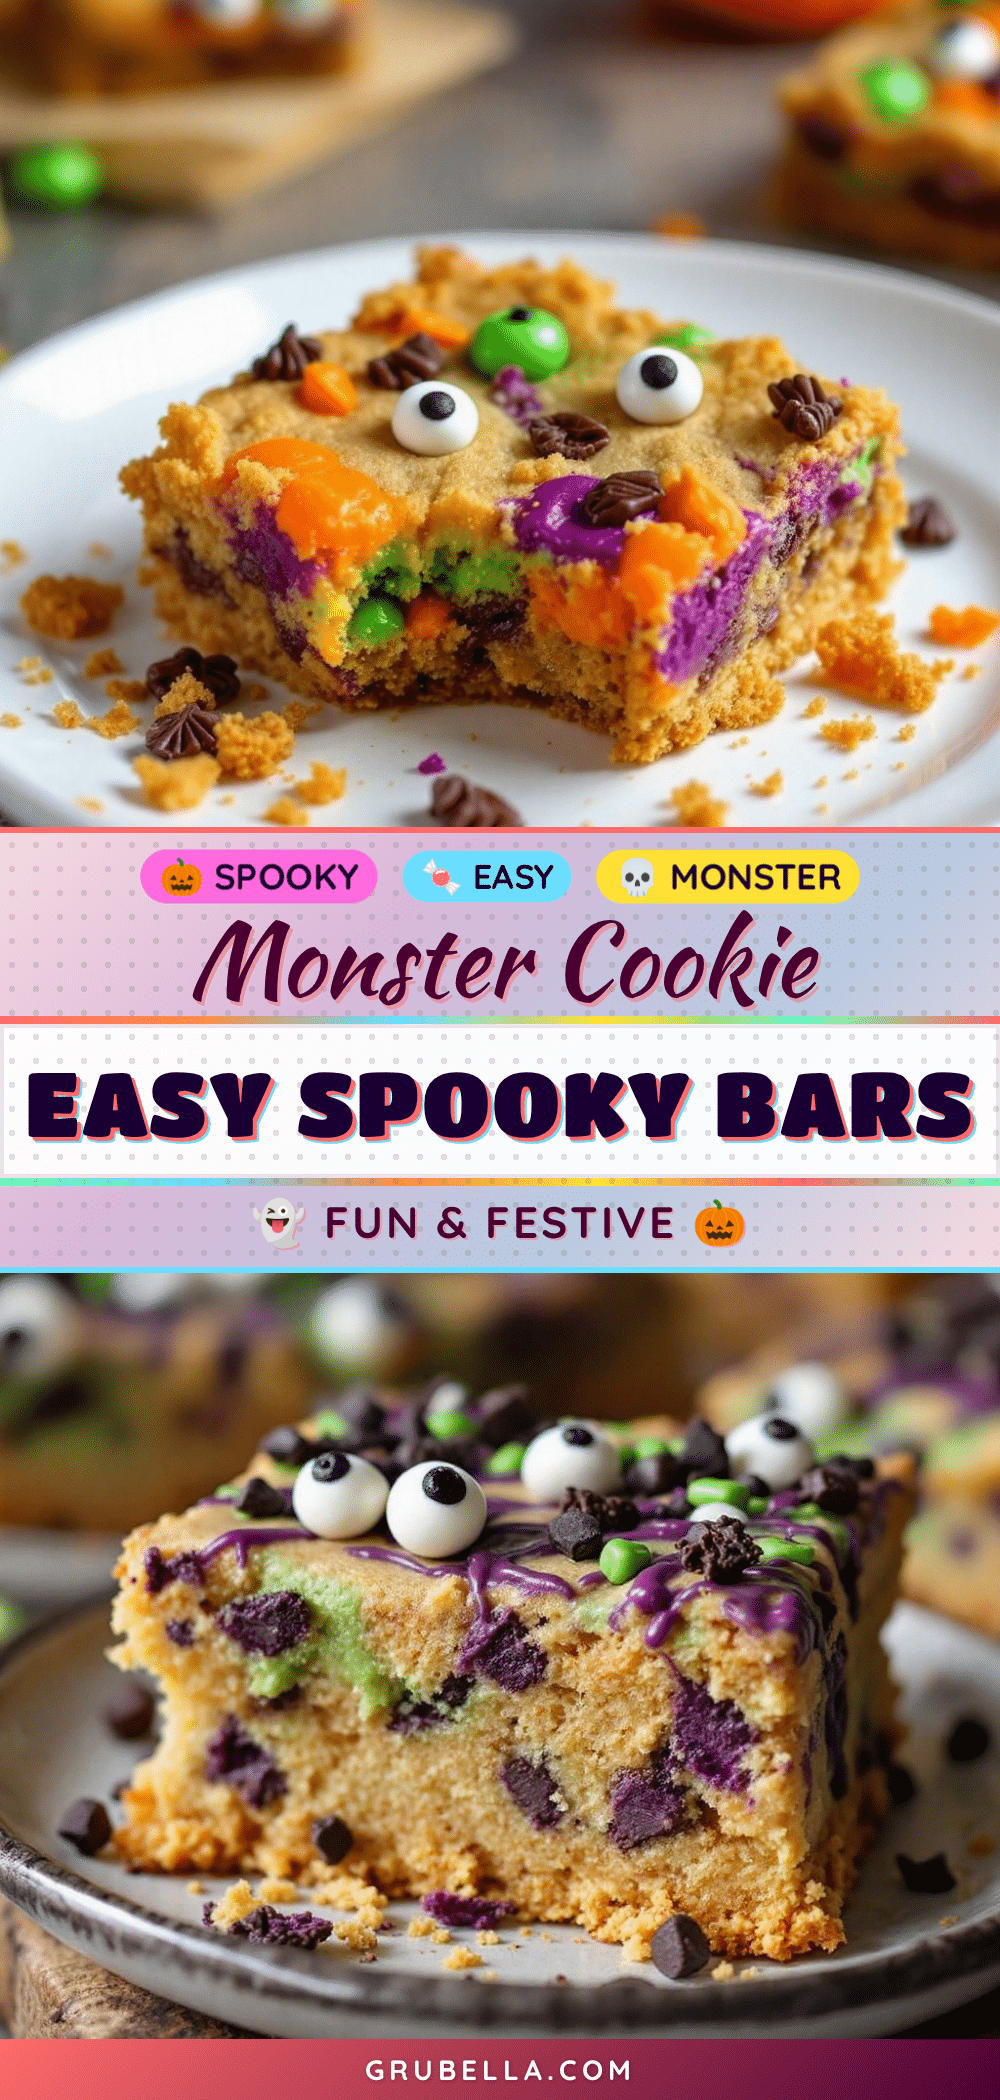
It started with a mistake, honestly. I was trying to make sugar cookies for my son’s preschool class, but I forgot to chill the dough. You know that moment when you realize you can’t just throw cookie dough in the oven and hope for the best? Yeah, that was me. So I did what any reasonable person would do—I pressed the whole mess into a baking sheet and called it a bar. And let me tell you, that happy accident turned into the easiest Halloween treat I’ve ever made. These monster sugar cookie bars are soft, chewy, and absolutely covered in festive toppings that make them look like they crawled out of a cartoon monster movie.
Maybe you’ve been there too—staring at a complicated recipe that requires three different chilling steps and a degree in pastry arts just to make something that looks decent. That’s why these bars exist. They give you that wow factor without the stress. The first time I brought them to that Halloween party, they were gone before the punch bowl was empty. Someone actually asked me if I owned a bakery. I told them the truth: I just owned a baking sheet and a whole lot of sprinkles.
Why You’ll Love This Recipe
Look, I’ve tested a lot of Halloween recipes over the years—some that worked beautifully, and others that ended up in the trash. These monster sugar cookie bars are the ones I keep coming back to, and here’s why they’ll become your go-to too:
- Quick & Easy: From start to finish, you’re looking at about 35 minutes. No chilling the dough, no rolling out individual cookies, no piping intricate designs. Just mix, press, bake, and decorate.
- Simple Ingredients: You probably have most of these in your pantry right now. Butter, sugar, flour, eggs, vanilla—the usual suspects. No weird specialty items that cost a fortune.
- Perfect for Halloween Parties: Whether it’s a school celebration, a neighborhood gathering, or just a spooky movie night at home, these bars fit right in. They’re portable, easy to cut into squares, and everyone grabs one without needing a plate and fork.
- Crowd-Pleaser: I’ve watched kids and adults alike go back for seconds. There’s something about the combination of soft, buttery cookie and that thick layer of frosting that hits different. Plus, the candy eyeballs and sprinkles make people smile.
- Unbelievably Delicious: The texture is where these bars really shine. They’re soft without being cakey, chewy without being tough. The frosting sets up just enough to hold the decorations but stays creamy and rich.
What makes these different from every other sugar cookie recipe out there? It’s the technique. By using melted butter instead of softened, you get that dense, fudgy texture that holds up to heavy frosting without falling apart. I learned this trick after years of making cookies that spread too thin or turned out dry. Trust me, this is the best version.
This recipe isn’t just good—it’s the kind that makes you close your eyes after the first bite. It’s comfort food with a spooky twist, perfect for creating those Halloween memories without spending all day in the kitchen.
What Ingredients You Will Need
This recipe uses simple, wholesome ingredients to deliver that classic sugar cookie flavor with a soft, bar-style texture. Most of these are pantry staples, so you might not even need a grocery run.
For the Cookie Bars
- 1 cup (226g) unsalted butter, melted (I use Land O’Lakes—melting the butter is the secret to that dense, chewy texture)
- 1 ½ cups (300g) granulated sugar (regular white sugar works perfectly; don’t substitute brown sugar here unless you want a different flavor profile)
- 2 large eggs, room temperature (cold eggs will seize the melted butter, so let them sit out for 20 minutes)
- 2 teaspoons vanilla extract (pure vanilla makes a difference, but imitation works in a pinch)
- 2 ½ cups (312g) all-purpose flour (spoon and level your flour—scooping directly from the bag packs it down and makes dry bars)
- 1 teaspoon baking powder (fresh baking powder is key; test it by dropping a bit in water—if it fizzes, you’re good)
- ½ teaspoon baking soda
- ½ teaspoon salt (fine sea salt or table salt both work)
For the Frosting & Decoration
- ½ cup (113g) unsalted butter, softened (let it sit out for an hour; you want it soft but not melty)
- 2 cups (240g) powdered sugar (sift it if you want extra smooth frosting, but I’m usually too impatient)
- 2-3 tablespoons milk or heavy cream (start with 2 tablespoons and add more if needed; heavy cream makes it richer)
- 1 teaspoon vanilla extract
- Food coloring (gel colors work best for vibrant shades; I use Wilton brand in neon green, purple, and orange)
- Candy eyeballs (the Wilton brand eyeballs are my favorite—they stick well and don’t bleed color)
- Halloween sprinkles (look for mixes with bats, ghosts, pumpkins, and fun shapes)
- Optional: Orange and black sanding sugar (adds that extra sparkle)
A quick note on substitutions: If you need a dairy-free version, you can swap the butter with a high-quality vegan butter like Earth Balance. The texture will be slightly different, but still delicious. For a gluten-free option, use a 1:1 gluten-free flour blend like King Arthur’s Measure for Measure. I’ve tested it, and it works beautifully—just don’t overmix the dough.
Equipment Needed
You don’t need a fancy kitchen to make these monster sugar cookie bars. Here’s what you’ll need:
- 9×13-inch baking pan (metal pans work better than glass for even baking; I prefer USA Pan because they never warp)
- Parchment paper (non-negotiable—it makes lifting the bars out so much easier)
- Large mixing bowl (any bowl will do, but a wide one makes mixing easier)
- Whisk and rubber spatula (the whisk for dry ingredients, the spatula for folding everything together)
- Electric hand mixer or stand mixer (you can do this by hand, but a mixer makes the frosting silky smooth)
- Offset spatula (for spreading the frosting evenly; a butter knife works too, but an offset spatula gives you that clean, professional look)
- Cooling rack (lets air circulate under the pan so the bars cool evenly)
- Small bowls (for dividing frosting if you’re doing multiple colors)
If you don’t have an offset spatula, don’t worry. I’ve used the back of a spoon more times than I can count. And if you don’t have a 9×13 pan, you can use a 9×9 square pan—just bake it a few minutes longer and expect thicker bars. My first batch of these was made in a disposable aluminum pan because that’s all I had, and they turned out great.
Preparation Method
- Preheat your oven to 350°F (175°C). Line your 9×13-inch baking pan with parchment paper, leaving some overhang on the long sides. This creates handles that let you lift the entire batch out later. Lightly spray the parchment with nonstick cooking spray.
- Melt your butter in a microwave-safe bowl or in a saucepan over low heat. Let it cool for about 5 minutes—you don’t want it hot enough to cook the eggs when you mix them in. I usually melt it and then walk away to measure out my dry ingredients. Perfect timing.
- In a large bowl, whisk together the melted butter and granulated sugar until smooth. It should look like wet sand. Add the eggs one at a time, whisking well after each addition. Stir in the vanilla extract. The mixture should be glossy and smooth.
- In a separate bowl, whisk together the flour, baking powder, baking soda, and salt. This ensures the leavening agents are evenly distributed—nobody wants a pocket of baking powder in their cookie bar.
- Gradually add the dry ingredients to the wet ingredients, stirring with a rubber spatula until just combined. Stop mixing as soon as you no longer see streaks of flour. Overmixing develops gluten and makes the bars tough. A few lumps are totally fine.
- Press the dough evenly into your prepared pan. The dough will be thick and slightly sticky—that’s normal. I use a piece of parchment paper or lightly greased hands to press it down evenly. Make sure it reaches all four corners.
- Bake for 18-22 minutes, or until the edges are golden brown and the center looks set but still soft. A toothpick inserted into the center should come out with a few moist crumbs—not wet batter. The top should be lightly golden. Don’t overbake! These bars continue cooking in the pan as they cool.
- Let the bars cool completely in the pan on a wire rack. This takes about 1-2 hours. I know it’s tempting to frost them while they’re warm, but the frosting will melt and slide right off. Patience, my friend.
- Make the frosting: In a large bowl, beat the softened butter with an electric mixer until creamy, about 2 minutes. Gradually add the powdered sugar, one cup at a time, beating on low speed. Add the vanilla and 2 tablespoons of milk, then beat on medium-high for 2-3 minutes until light and fluffy. If it’s too thick, add another tablespoon of milk. If it’s too thin, add more powdered sugar.
- Divide and color the frosting into separate bowls if you want multiple colors. I usually do one batch of green (for Frankenstein vibes), one of purple (for a spooky witchy look), and leave some white. Mix in the food coloring one drop at a time until you reach your desired shade.
- Spread the frosting evenly over the cooled bars using your offset spatula. You can do a single color or swirl different colors together for a marbled effect. Get creative—there are no rules here.
- Decorate immediately while the frosting is still wet so everything sticks. Press candy eyeballs into the frosting, sprinkle on the Halloween sprinkles, and add sanding sugar. I like to create “monster faces” by grouping three eyeballs together with some sprinkle “hair.” Let the kids help—this is the fun part.
- Let the frosting set for about 30 minutes before cutting into squares. Use the parchment paper handles to lift the entire batch out of the pan and place it on a cutting board. Cut into 12-16 squares using a sharp knife. Wipe the knife clean between cuts for neat edges.
Pro tip: If you want cleaner cuts, chill the bars in the refrigerator for 15 minutes before slicing. The frosting firms up and doesn’t stick to the knife as much.
Cooking Tips & Techniques
I’ve made these monster sugar cookie bars about a dozen times now, and I’ve learned a few things the hard way. Let me save you some trouble.
Don’t overbake. This is the number one mistake I see people make with bar cookies. They look underdone when you pull them out, but they firm up as they cool. If you wait until the center is fully set in the oven, you’ll end up with dry, crumbly bars. Trust the toothpick test—moist crumbs are your friend.
Room temperature eggs matter. I learned this lesson when I was rushing one afternoon and used cold eggs straight from the fridge. The melted butter started to solidify when I added the eggs, and the dough turned out lumpy and uneven. Let your eggs sit on the counter for 20 minutes, or place them in a bowl of warm water for 5 minutes.
Press the dough evenly. If your dough is thicker in some spots than others, you’ll end up with uneven baking. I use a piece of parchment paper on top of the dough and press down with a flat-bottomed measuring cup. It distributes the pressure evenly and gives you a perfectly level surface.
Let them cool completely. I know, I know. The smell of fresh-baked sugar cookies is intoxicating. But frosting warm bars is a recipe for disaster. The frosting melts into a puddle, and your decorations slide right off. I’ve done it. It’s not pretty. Give them the full two hours.
Scale up for crowds. Need to feed a classroom or a party? This recipe doubles beautifully. Just use a half-sheet pan (18×13 inches) and increase the baking time to 25-28 minutes. Check for doneness the same way.
Variations & Adaptations
One of the best things about these monster sugar cookie bars is how customizable they are. Here are some variations I’ve tried and loved:
- Chocolate Monster Bars: Replace ½ cup of the flour with ½ cup of unsweetened cocoa powder. The chocolate base pairs amazingly with the colorful frosting and candy eyeballs. My nephew called these “dirt monsters” and ate three in one sitting.
- Peanut Butter Monster Bars: Swap ¼ cup of the melted butter for ¼ cup of creamy peanut butter. Reduce the sugar by 2 tablespoons since peanut butter adds sweetness. The nutty flavor with the vanilla frosting is incredible.
- Vegan-Friendly Version: Use vegan butter instead of regular butter, and replace the eggs with flax eggs (1 tablespoon ground flaxseed mixed with 3 tablespoons water per egg, let sit for 5 minutes). The texture is slightly denser but still delicious. I tested this for a friend’s vegan Halloween party, and nobody could tell the difference.
- Gluten-Free Adaptation: As mentioned earlier, a 1:1 gluten-free flour blend works perfectly. Just be careful not to overmix, and let the bars cool completely before cutting—gluten-free baked goods are more delicate when warm.
- Spiced Pumpkin Monster Bars: Add ½ cup of pumpkin puree and 1 teaspoon of pumpkin pie spice to the wet ingredients. Reduce the butter by 2 tablespoons to compensate for the extra moisture. These are perfect for a fall-themed Halloween party.
- Double the Frosting: If you’re a frosting fanatic like me, go ahead and make 1.5 times the frosting recipe. I’ve never met a person who complained about too much frosting on a sugar cookie bar.
Serving & Storage Suggestions
These monster sugar cookie bars are best served at room temperature. The frosting is soft and creamy, and the cookie base has that perfect chewy texture. If you’ve refrigerated them, let them sit out for about 15 minutes before serving.
For presentation, I like to arrange the bars on a large platter or cake stand. Group them by frosting color for a rainbow effect, or mix them all together for a chaotic monster vibe. Add a few extra candy eyeballs scattered around the platter for fun. If you’re serving at a party, label them with a cute sign like “Monster Munch” or “Frankenstein’s Favorite Treats.”
These pair beautifully with a glass of cold milk, a warm cup of apple cider, or even a scoop of vanilla ice cream. For a Halloween movie night, I serve them alongside a bowl of popcorn and some hot chocolate with marshmallows.
Storage: Store the bars in an airtight container at room temperature for up to 4 days. Layer them with parchment paper between each layer to prevent the frosting from sticking. If your kitchen is warm, you can refrigerate them, but let them come to room temperature before serving for the best texture.
Freezing: These freeze beautifully! Freeze the unfrosted bars in an airtight container for up to 3 months. When you’re ready to serve, thaw them at room temperature, then make the frosting and decorate. You can also freeze the fully decorated bars, but the candy eyeballs might lose some of their crunch. I usually freeze a batch in late September so I have a head start on Halloween baking.
Make-Ahead Tip: The cookie bars can be baked a day in advance. Just wrap them tightly in plastic wrap once they’re completely cool, and frost them the next day. The flavors actually meld together overnight, making them even better.
Nutritional Information & Benefits
Let’s be real—these are a treat, not a health food. But here’s the estimated nutritional breakdown per bar (based on 16 servings):
- Calories: 320-350
- Fat: 16g
- Carbohydrates: 45g
- Protein: 3g
- Sugar: 30g
- Sodium: 180mg
That said, there are a few redeeming qualities. The butter provides a small amount of vitamin A, and the eggs contribute protein and choline, which is good for brain health. If you use the gluten-free version, you’re accommodating dietary needs without sacrificing flavor.
For those watching their sugar intake, you can reduce the sugar in the cookie base to 1 cup without affecting the texture too much. The frosting is where most of the sweetness comes from, so you could also use a cream cheese frosting instead of buttercream for a tangier, less sweet option.
Potential allergens include dairy (butter, milk), eggs, gluten (flour), and depending on your sprinkles, possible artificial colors. Always check your candy eyeballs and sprinkles for allergen information if you’re serving a crowd.
My personal philosophy? Life is short. Eat the cookie. Balance it out with a salad for lunch or an extra walk around the block. These bars are about joy and celebration, not guilt.
Conclusion
These monster sugar cookie bars have become my Halloween tradition, and I hope they become yours too. They’re easy enough for a beginner baker to nail, fun enough to get the kids involved, and delicious enough to impress even the pickiest party guests. That first bite—soft cookie, creamy frosting, that satisfying crunch of sprinkles—is pure October magic.
I love this recipe because it’s forgiving. You can mess up the measurements, forget to set a timer, or let the kids go wild with the decorations, and they’ll still turn out amazing. It’s not about perfection; it’s about having fun and creating something that makes people smile. And honestly, isn’t that what Halloween is all about?
So grab your sprinkles, dig out those candy eyeballs from last year’s stash, and get baking. When you make these, I’d love to hear how they turned out. Did your kids design a particularly terrifying monster face? Did you try a wild flavor combination? Drop a comment below and share your creation. And if you’re looking for more Halloween inspiration, check out my spiderweb cupcakes or these pumpkin cheesecake bars for another easy treat that disappears fast.
Happy Halloween, and happy baking!
Frequently Asked Questions
Can I use a different pan size?
Absolutely. A 9×9-inch pan will give you thicker bars—just increase the baking time by 3-5 minutes. A half-sheet pan (18×13 inches) will give you thinner bars; bake for 15-18 minutes and check early.
Can I make these ahead of time?
Yes! Bake the cookie base up to 2 days ahead and store it wrapped tightly at room temperature. Frost and decorate the day you plan to serve them for the best presentation.
My frosting turned out too runny. What did I do wrong?
This usually happens if the butter was too soft or if you added too much milk. Fix it by adding more powdered sugar, one tablespoon at a time, until it reaches a spreadable consistency.
Can I use store-bought frosting?
You can, but homemade frosting tastes so much better and only takes 5 minutes to make. If you’re short on time, a can of cream cheese frosting works well and pairs nicely with the sugar cookie base.
How do I get clean cuts without the frosting smearing?
Chill the bars in the refrigerator for 15-20 minutes before slicing. Use a sharp knife and wipe it clean with a damp paper towel between each cut. This gives you those beautiful, bakery-style squares.
Pin This Recipe!
Easy Monster Sugar Cookie Bars: Best Halloween Treat
Soft, chewy sugar cookie bars topped with creamy frosting and festive Halloween decorations. This easy, no-chill recipe is perfect for parties and guaranteed to disappear fast.
- Prep Time: 15 minutes
- Cook Time: 20 minutes
- Total Time: 35 minutes
- Yield: 16 servings 1x
- Category: Dessert
- Cuisine: American
Ingredients
- 1 cup (226g) unsalted butter, melted
- 1 ½ cups (300g) granulated sugar
- 2 large eggs, room temperature
- 2 teaspoons vanilla extract
- 2 ½ cups (312g) all-purpose flour
- 1 teaspoon baking powder
- ½ teaspoon baking soda
- ½ teaspoon salt
- ½ cup (113g) unsalted butter, softened
- 2 cups (240g) powdered sugar
- 2–3 tablespoons milk or heavy cream
- 1 teaspoon vanilla extract
- Food coloring (gel colors recommended)
- Candy eyeballs
- Halloween sprinkles
- Optional: Orange and black sanding sugar
Instructions
- Preheat your oven to 350°F (175°C). Line your 9×13-inch baking pan with parchment paper, leaving some overhang on the long sides. Lightly spray the parchment with nonstick cooking spray.
- Melt your butter in a microwave-safe bowl or in a saucepan over low heat. Let it cool for about 5 minutes.
- In a large bowl, whisk together the melted butter and granulated sugar until smooth. Add the eggs one at a time, whisking well after each addition. Stir in the vanilla extract.
- In a separate bowl, whisk together the flour, baking powder, baking soda, and salt.
- Gradually add the dry ingredients to the wet ingredients, stirring with a rubber spatula until just combined.
- Press the dough evenly into your prepared pan. The dough will be thick and slightly sticky.
- Bake for 18-22 minutes, or until the edges are golden brown and the center looks set but still soft. A toothpick inserted into the center should come out with a few moist crumbs.
- Let the bars cool completely in the pan on a wire rack, about 1-2 hours.
- Make the frosting: In a large bowl, beat the softened butter with an electric mixer until creamy, about 2 minutes. Gradually add the powdered sugar, one cup at a time, beating on low speed. Add the vanilla and 2 tablespoons of milk, then beat on medium-high for 2-3 minutes until light and fluffy. If too thick, add another tablespoon of milk; if too thin, add more powdered sugar.
- Divide and color the frosting into separate bowls if desired. Mix in food coloring one drop at a time.
- Spread the frosting evenly over the cooled bars using an offset spatula.
- Decorate immediately while the frosting is still wet: press candy eyeballs into the frosting, sprinkle on Halloween sprinkles, and add sanding sugar.
- Let the frosting set for about 30 minutes before cutting into squares. Use the parchment paper handles to lift the entire batch out of the pan. Cut into 12-16 squares using a sharp knife.
Notes
Don’t overbake; bars continue cooking as they cool. Room temperature eggs are important to prevent butter from solidifying. For cleaner cuts, chill bars for 15 minutes before slicing. Bars can be stored in an airtight container at room temperature for up to 4 days, or frozen unfrosted for up to 3 months.
Nutrition
- Serving Size: 1 bar
- Calories: 335
- Sugar: 30
- Sodium: 180
- Fat: 16
- Saturated Fat: 10
- Carbohydrates: 45
- Fiber: 1
- Protein: 3
Keywords: Halloween, sugar cookie bars, monster cookies, easy dessert, party treat, no-chill cookie bars



