Love this? Save it for later!
Share the inspiration with your friends
“You know what would be great? Something I can just grab from the freezer and have zero guilt about.” My sister said this while standing in front of my open freezer, one hand on her hip, the other holding a bag of frozen peas like it had personally offended her. It was one of those afternoons where everything felt a little chaotic—her kids were running around, I had flour on my shirt, and somehow there were three different half-empty containers of cream cheese in my fridge. But that comment stuck with me. Because honestly? She was right. We all need those meals that don’t require a second thought. And that’s how these ham and cheese pinwheels for the freezer were born—out of a real need for something easy, something reliable, something that tastes like you actually tried.
I started experimenting that same week. I wanted a recipe that could handle the freezer without turning into a sad, soggy mess. Something that would taste just as good on a random Tuesday night as it would for a last-minute party or a lunchbox surprise. After a few batches (and one that I’ll politely describe as “a learning experience”), I landed on these little spirals of goodness. They’re buttery, flaky, stuffed with melty cheese and savory ham, and they freeze like absolute champs. No thawing required before baking—just straight from freezer to oven. That’s the kind of convenience we all deserve.
These pinwheels became my go-to for everything. Busy mornings when I forgot to plan dinner. After-school snacks that actually fill hungry bellies. Game day appetizers that disappear before halftime. And every time I pull a batch from the freezer, I think about my sister standing there, wanting something easy. These ham and cheese pinwheels for the freezer are exactly that—easy, dependable, and secretly a little bit genius.
Why You’ll Love This Recipe
Let me tell you why these pinwheels have earned a permanent spot in my freezer rotation. I’ve tested this recipe more times than I can count, and each batch has taught me something new about making them even better. Here’s what makes them special:
- Freezer-Friendly Magic : You can bake them straight from frozen with zero thawing needed. That’s not a typo—just pop them in the oven and go about your day.
- Simple Ingredients : No weird specialty items here. You probably have most of this stuff in your kitchen right now, or you can grab it all in one quick trip to the store.
- Perfect for Busy Days : Whether it’s a hectic weekday dinner, a last-minute party snack, or something to pack in lunchboxes, these pinwheels have your back.
- Crowd-Pleaser Status : Kids devour them. Adults sneak extras. I’ve watched a full tray disappear at a potluck in under fifteen minutes.
- Unbelievably Delicious : The buttery, flaky layers wrapped around savory ham and melty cheese? It’s comfort food at its finest, and it tastes like you spent way more effort than you actually did.
What makes this version different from other pinwheel recipes? It’s the technique. I use a combination of cream cheese and shredded cheese that creates this ultra-creamy, perfectly seasoned filling that doesn’t get greasy or separate when frozen. Plus, the way I assemble them ensures every single bite has the perfect ratio of dough to filling. This isn’t just another recipe—it’s the one I’ve perfected through trial and error so you don’t have to go through the same learning curve.
These ham and cheese pinwheels for the freezer are the kind of recipe that makes you feel like you’ve got your life together. And honestly? That feeling is priceless.
What Ingredients You Will Need
This recipe uses simple, wholesome ingredients that come together to create something truly satisfying. No fancy stuff, just good food that works. Here’s what you’ll need:
For the Filling
- 8 ounces cream cheese, softened to room temperature (this is important for smooth mixing)
- 1 cup shredded mozzarella cheese (adds that perfect stretchy meltiness)
- 1/2 cup shredded cheddar cheese (gives it a little sharpness and color)
- 1/4 cup grated Parmesan cheese (trust me on this one—it adds depth)
- 1/2 teaspoon garlic powder
- 1/4 teaspoon onion powder
- 1/4 teaspoon black pepper
- Pinch of salt (go easy, the ham adds saltiness)
- 8 ounces thinly sliced deli ham, chopped into small pieces (I prefer black forest ham for the flavor, but any good quality ham works)
- 2 tablespoons fresh chives or green onions, finely chopped (optional, but they add a nice fresh pop)
For the Dough

- 2 cans (8 ounces each) refrigerated crescent roll dough (I use Pillsbury, but store brands work just fine)
- 1 tablespoon melted butter, for brushing the tops
- 1 teaspoon everything bagel seasoning or sesame seeds (optional, for a pretty finish)
That’s it. Seven ingredients for the filling plus the dough and a few optional extras. The beauty of these ham and cheese pinwheels for the freezer is how such a short list of everyday ingredients can create something so good.
A few notes on ingredient selection: I recommend using block-style cream cheese rather than the spreadable tub version—it has a better texture for mixing and holds up better through freezing. For the shredded cheese, freshly shredding it yourself will give you the best melt, but pre-shredded works in a pinch (just know it might not be quite as creamy). And for the ham, avoid the super thin shaved-style ham; you want slices that are thin but still have some body to them so they don’t disappear into the filling.
If you’re looking to make substitutions, here are a few that work well: swap the mozzarella for provolone or Swiss cheese for a different flavor profile. Use turkey instead of ham if that’s what you have. And if you’re dairy-free, there are decent cream cheese alternatives out there—just make sure to get one that’s meant for cooking, not just spreading on bagels.
Equipment Needed
You don’t need a fancy kitchen to make these pinwheels. Here’s what you’ll actually use:
- Mixing bowls (one medium, one small)
- Hand mixer or sturdy wooden spoon (for getting that cream cheese perfectly smooth)
- Cutting board and sharp knife (for chopping the ham and slicing the pinwheels)
- Baking sheets (two standard half-sheet pans, or you can bake in batches)
- Parchment paper or silicone baking mats (absolute lifesavers for easy cleanup)
- Plastic wrap (for wrapping the logs before freezing)
- Freezer-safe zip-top bags or airtight containers
- Pastry brush (for the melted butter on top)
- Sharp serrated knife (this is key—a dull knife will squish your beautiful pinwheels)
If you don’t have a hand mixer, no worries—just make sure your cream cheese is really soft and give it some elbow grease with a wooden spoon. I’ve done it both ways, and honestly, the arm workout is kind of nice. For the baking sheets, any rimmed pan will work. And if you don’t have a pastry brush, just use a spoon to drizzle the melted butter over the tops—it’ll still be delicious.
Preparation Method
Alright, let’s get to the fun part. I’ve broken this down into clear steps so you can follow along without any confusion. Take your time with the first batch—once you get the hang of it, you’ll be able to whip these up in no time.
Step 1: Make the Filling
In a medium mixing bowl, beat the softened cream cheese with a hand mixer until it’s smooth and fluffy—about 2 minutes. You want zero lumps here. Add the mozzarella, cheddar, Parmesan, garlic powder, onion powder, pepper, and salt. Mix until everything is well combined. Fold in the chopped ham and chives (if using) with a spatula. The mixture should be thick and spreadable, not runny. If it seems too stiff, let it sit at room temperature for 5 minutes and try again.
Step 2: Prep Your Workspace
Lightly flour your counter or a large cutting board. Open one can of crescent roll dough and unroll it onto your floured surface. Press the perforated seams together gently with your fingers to create one solid rectangle. Don’t stress about making it perfect—just get those seams closed so your filling doesn’t leak out later.
Step 3: Assemble the First Log
Spread half of the cream cheese mixture evenly over the dough rectangle, leaving a 1/2-inch border along one of the long edges (this helps seal the roll). Get the filling all the way to the other three edges. Starting from the long edge opposite the bare border, roll the dough up tightly, like you’re making cinnamon rolls. Roll it evenly and snugly, but not so tight that the filling squeezes out the ends. Pinch the bare edge to seal the log. Repeat with the second can of dough and remaining filling.
Step 4: Chill and Slice
Wrap each log tightly in plastic wrap and refrigerate for at least 30 minutes. This step is non-negotiable—chilling firms up the filling and makes slicing so much easier. I’ve tried skipping this, and let’s just say my pinwheels looked more like sad, smeared blobs. After chilling, use a sharp serrated knife to slice each log into 12 even pieces, about 3/4-inch thick. Wipe the knife clean between cuts for the cleanest slices.
Step 5: Freeze for Later
Arrange the sliced pinwheels in a single layer on a parchment-lined baking sheet, making sure they’re not touching. Pop the sheet in the freezer for 1-2 hours, or until the pinwheels are frozen solid. Once frozen, transfer them to a freezer-safe bag or container. They’ll keep for up to 3 months. Label the bag with the date and baking instructions—future you will be so grateful.
Step 6: Bake from Frozen
When you’re ready to eat, preheat your oven to 375°F (190°C). Place the frozen pinwheels on a parchment-lined baking sheet, spacing them about 1 inch apart. Brush the tops with melted butter and sprinkle with everything bagel seasoning if you’re using it. Bake for 18-22 minutes, or until the tops are golden brown and the filling is bubbly. Let them cool on the pan for 5 minutes before serving—the filling is lava-hot straight out of the oven.
If you’re baking them fresh (not from frozen), bake at 375°F for 14-16 minutes, keeping an eye on them toward the end. They should be golden and puffed up.
Cooking Tips & Techniques
Over the years of making these ham and cheese pinwheels for the freezer, I’ve picked up a few tricks that make a real difference. Let me share them with you so you can skip the mistakes I made.
Don’t overfill the dough. I know it’s tempting to pile on the filling, but too much will cause the pinwheels to burst open during baking. Stick to the amounts in the recipe, and spread the filling evenly. Think of it like a good handshake—firm but not too aggressive.
Use a serrated knife for slicing. This was a game-changer for me. A sharp serrated knife cuts through the dough and filling cleanly without squishing everything flat. If you use a straight-edge knife, even a sharp one, you’ll end up with misshapen pinwheels. I learned this the hard way after ruining an entire batch.
Chill the logs thoroughly. I mentioned this earlier, but it bears repeating. Thirty minutes in the fridge is the minimum. If you’re in a hurry, pop them in the freezer for 15 minutes instead. The firmer the log, the cleaner the slices. And cleaner slices mean prettier pinwheels.
Space them out on the baking sheet. These little guys expand as they bake, so give them room to breathe. If they’re too close together, they’ll steam instead of getting that beautiful golden-brown exterior. Nobody wants soggy pinwheels.
Brush with butter before baking. That simple step of melted butter on top transforms the dough from pale and sad to golden and glorious. Don’t skip it. And if you want to get fancy, a sprinkle of flaky sea salt or everything bagel seasoning takes them to another level.
Let them rest after baking. I know the smell is intoxicating and you want to dive right in, but the filling is extremely hot. Give them 5 minutes on the pan. Use that time to make a dipping sauce or pour yourself a drink. Your patience will be rewarded.
Variations & Adaptations
One of the best things about this recipe is how customizable it is. I’ve tried several variations over the years, and here are my favorites:
Turkey and Swiss Pinwheels : Swap the ham for thinly sliced turkey and use Swiss cheese in place of the cheddar. The nutty flavor of Swiss pairs beautifully with turkey, and it feels a little more grown-up. This version is great for holiday leftovers.
Spicy Jalapeño Popper Pinwheels : Add 2 tablespoons of diced pickled jalapeños and 4 slices of cooked, crumbled bacon to the cream cheese mixture. Use pepper jack cheese instead of cheddar. The heat is mild but present, and the bacon adds a smoky crunch. These disappear fast at parties.
Vegetarian Spinach and Artichoke Pinwheels : Omit the ham and add 1/2 cup of thawed, squeezed-dry frozen spinach and 1/4 cup of chopped marinated artichoke hearts to the filling. Use a mix of mozzarella and Parmesan. This version is so good that even meat-eaters won’t miss the ham.
Breakfast Pinwheels : Use breakfast sausage crumbles instead of ham, and add 2 tablespoons of finely diced bell pepper to the filling. Sprinkle the tops with a little paprika before baking. These are perfect for weekend brunch or make-ahead breakfasts.
Gluten-Free Option : Use gluten-free crescent roll dough if you can find it (some brands make decent versions). Alternatively, you can use gluten-free puff pastry sheets, though the baking time will need to be adjusted—check for golden brown color rather than relying on the timer.
I personally love the jalapeño popper version for game day gatherings. It pairs perfectly with a cold beer and some good company. And if you’re putting together a spread, these pinwheels go great alongside a loaded cowboy caviar with easy lime vinaigrette for a crowd-pleasing combo.
Serving & Storage Suggestions
These ham and cheese pinwheels for the freezer are incredibly versatile when it comes to serving. Here’s how I like to enjoy them:
Serving Temperature : They’re best served warm, straight from the oven. The cheese is melty, the dough is flaky, and everything is just right. That said, they’re also delicious at room temperature, which makes them perfect for parties and picnics. I’ve even eaten them cold straight from the fridge in a moment of weakness—no regrets.
Dipping Sauces : A simple honey mustard or ranch dressing is perfect for dipping. For a little kick, mix some sriracha into mayo. My personal favorite is a quick Dijon-honey sauce (equal parts Dijon mustard and honey, stirred together). It cuts through the richness beautifully.
What to Serve Alongside : These pinwheels are great on their own, but they also pair well with a simple green salad, some fresh fruit, or a bowl of tomato soup. For a heartier meal, serve them alongside a creamy dill cucumber salad for a refreshing contrast. If you’re hosting a game day party, add these to a spread with ultimate loaded buffalo chicken dip and watch them disappear.
Storage : Baked pinwheels will keep in an airtight container in the refrigerator for up to 4 days. To reheat, pop them in a 350°F oven for 5-8 minutes, or microwave for 30-45 seconds (though the oven method keeps them crispier). For unbaked frozen pinwheels, they’ll keep for up to 3 months in a freezer-safe bag or container. Make sure to press out as much air as possible before sealing to prevent freezer burn.
Reheating from Frozen : As I mentioned earlier, you can bake them straight from frozen with no thawing needed. Just add a few extra minutes to the baking time. This is my favorite way to use them—I grab a handful from the freezer, pop them in the oven, and by the time I’ve changed out of my work clothes, dinner is ready.
Flavor Development : Here’s a little secret—these pinwheels actually taste better after they’ve been frozen. Something about the flavors melding together in the freezer makes them even more delicious. So don’t be afraid to make a double batch. Your future self will thank you.
Nutritional Information & Benefits
Let’s talk numbers. Per pinwheel (based on 24 servings), here’s the approximate nutritional breakdown:
- Calories : 145
- Protein : 7g
- Carbohydrates : 9g
- Fat : 9g
- Saturated Fat : 4g
- Cholesterol : 28mg
- Sodium : 380mg
- Fiber : 0g
- Sugar : 2g
These numbers are estimates and will vary based on the specific brands and ingredients you use. But they give you a good idea of what you’re working with.
Health Benefits : While these pinwheels are definitely a treat, they do offer some nutritional perks. The ham provides a solid amount of protein, which helps keep you full and satisfied. The cheese adds calcium for bone health. And because you’re making them at home, you have control over the quality of ingredients—no weird preservatives or artificial flavors like you’d find in store-bought versions.
Dietary Considerations : This recipe is not gluten-free as written, but as I mentioned, you can use gluten-free dough. It’s also not low-carb due to the crescent roll dough, but the protein and fat content make it more satisfying than a carb-heavy snack. If you’re watching your sodium intake, look for low-sodium ham or reduce the added salt in the filling.
Potential Allergens : This recipe contains dairy (cream cheese, mozzarella, cheddar, Parmesan, butter) and gluten (crescent roll dough). It also contains ham, which is a processed meat. If you’re serving these to a crowd, it’s always good to have a dairy-free or gluten-free option available for those who need it.
I personally view these pinwheels as a balanced indulgence. They’re not an everyday food, but they’re a fantastic option for busy days when you need something quick and satisfying. Having a batch in the freezer means you’re less likely to reach for fast food or processed snacks, which is a win in my book.
Conclusion
These ham and cheese pinwheels for the freezer have become a staple in my kitchen for good reason. They’re easy to make, they freeze beautifully, and they taste like comfort food should—warm, satisfying, and familiar. Whether you’re a seasoned cook or someone who’s just starting to build a freezer stash, this recipe is for you.
I love that I can make a big batch on a Sunday afternoon and have ready-to-bake snacks for weeks. I love that they’re versatile enough to serve at a fancy brunch or a casual weeknight dinner. But most of all, I love that they solve that “what’s for dinner?” panic that hits on busy days. Having these in the freezer feels like having a secret weapon against chaos.
Now I want to hear from you. Have you tried making freezer-friendly snacks before? What’s your go-to recipe for busy days? Drop a comment below and let me know how these pinwheels turn out for you. And if you come up with a fun variation, please share it—I’m always looking for new ideas to try. Happy cooking, friends!
Frequently Asked Questions
Can I use puff pastry instead of crescent roll dough?
Absolutely! Puff pastry will give you a flakier, more buttery result. Just thaw the pastry sheets according to package directions, roll them out slightly, and proceed with the same filling and assembly method. Note that puff pastry pinwheels may need a slightly longer baking time—check for golden brown color.
How long do these pinwheels last in the freezer?
Properly stored in a freezer-safe bag or container, these pinwheels will stay fresh for up to 3 months. After that, they’re still safe to eat but may start to develop freezer burn or lose some flavor. I recommend labeling your bag with the date so you know when you made them.
Can I add vegetables to the filling?
Yes! Just make sure to cook and drain any vegetables first to remove excess moisture. Mushrooms, bell peppers, and spinach all work well. Sauté them briefly, let them cool, and pat them dry before adding to the cream cheese mixture. Too much moisture will make your pinwheels soggy.
Why did my pinwheels come out flat or misshapen?
This usually happens for one of three reasons: the cream cheese mixture was too soft when you sliced the logs (chill them longer next time), you used a dull knife that squished the dough, or you overfilled the pinwheels. Try chilling the logs for a full hour and using a sharp serrated knife for cleaner cuts.
Can I double this recipe?
Definitely! This recipe doubles beautifully. Just make sure you have enough freezer space and baking sheets to work in batches. The filling can be made in one large batch, and the assembly goes quickly once you get into a rhythm. I often make quadruple batches for holiday prep.
Pin This Recipe!
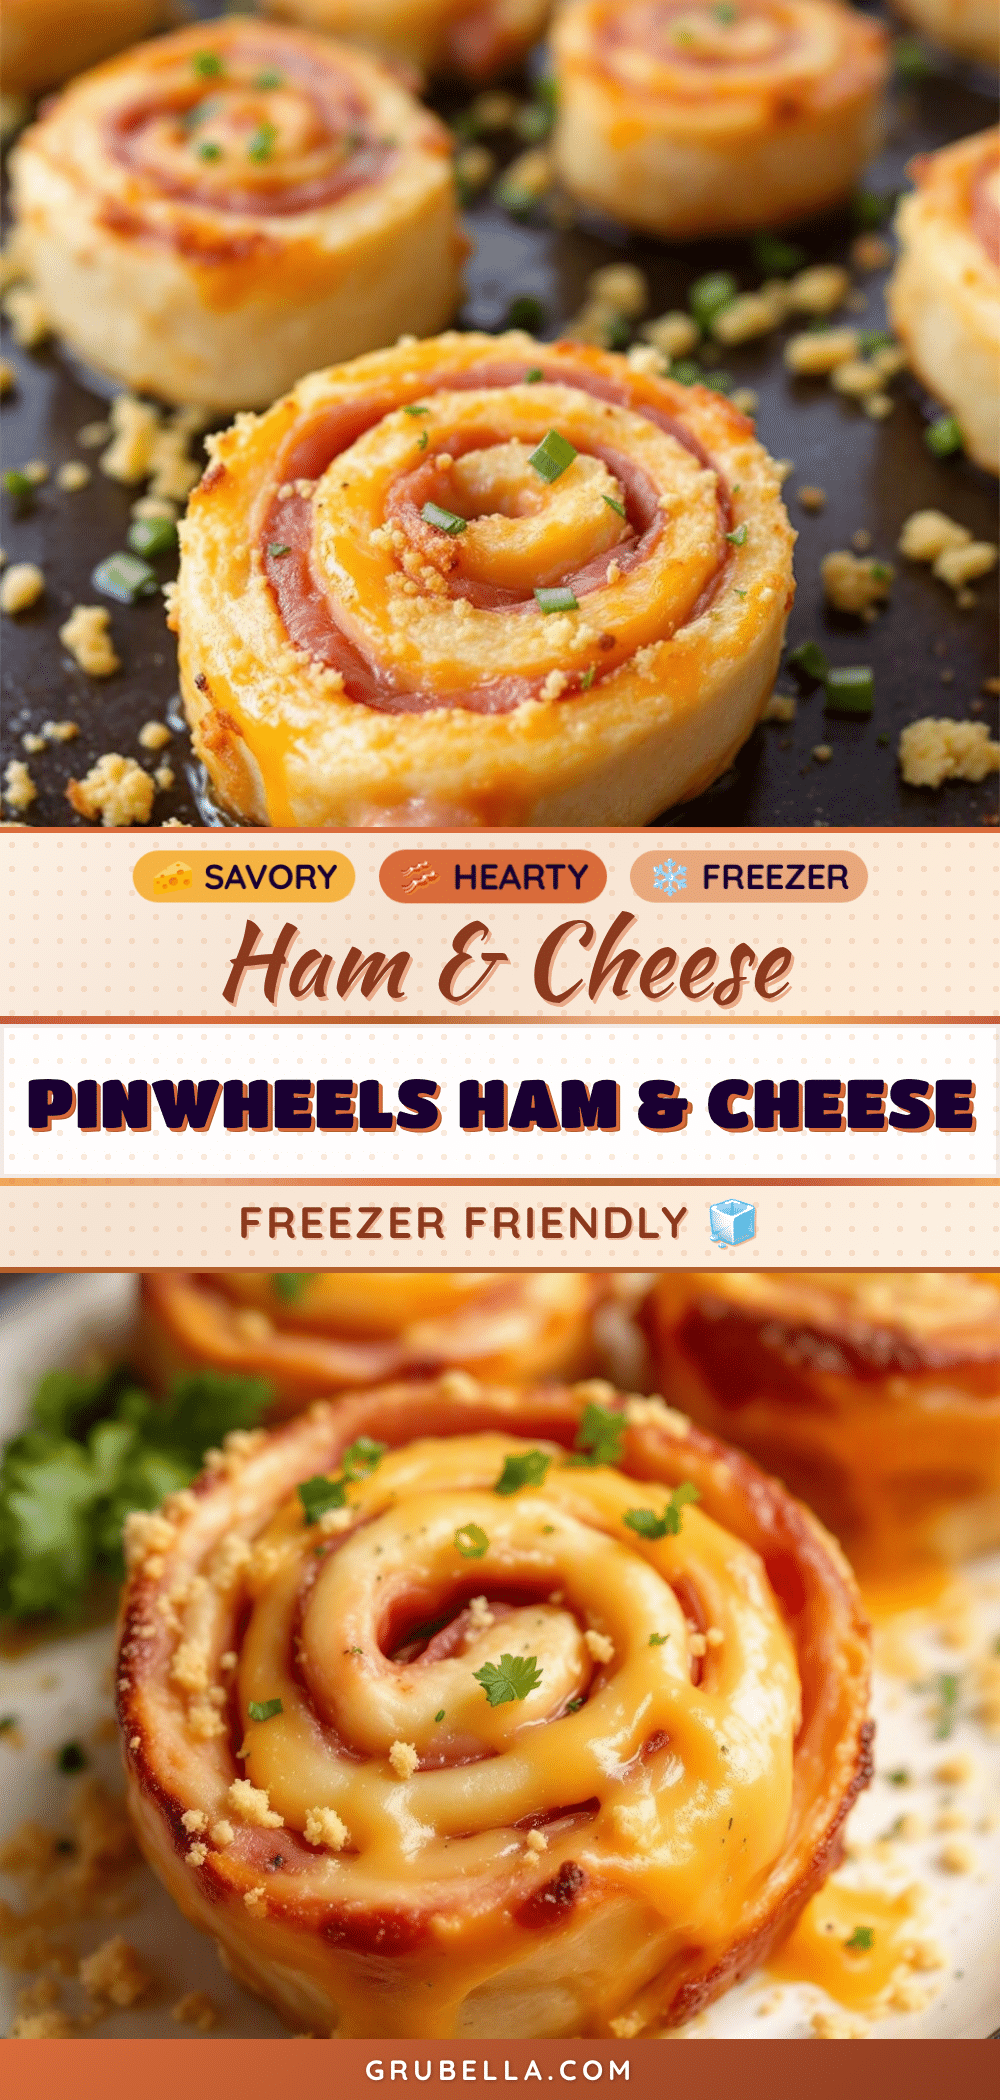
Easy Ham and Cheese Pinwheels for the Freezer

Buttery, flaky pinwheels stuffed with melty cheese and savory ham that freeze beautifully. Bake straight from frozen for a quick, satisfying meal or snack any time.
- Prep Time: 30 minutes
- Cook Time: 20 minutes
- Total Time: 50 minutes
- Yield: 24 servings 1x
- Category: Appetizer
- Cuisine: American
Ingredients
- 8 ounces cream cheese, softened to room temperature
- 1 cup shredded mozzarella cheese
- 1/2 cup shredded cheddar cheese
- 1/4 cup grated Parmesan cheese
- 1/2 teaspoon garlic powder
- 1/4 teaspoon onion powder
- 1/4 teaspoon black pepper
- Pinch of salt
- 8 ounces thinly sliced deli ham, chopped into small pieces
- 2 tablespoons fresh chives or green onions, finely chopped (optional)
- 2 cans (8 ounces each) refrigerated crescent roll dough
- 1 tablespoon melted butter, for brushing the tops
- 1 teaspoon everything bagel seasoning or sesame seeds (optional)
Instructions
- In a medium mixing bowl, beat the softened cream cheese with a hand mixer until smooth and fluffy, about 2 minutes. Add mozzarella, cheddar, Parmesan, garlic powder, onion powder, pepper, and salt. Mix until well combined. Fold in chopped ham and chives (if using) with a spatula.
- Lightly flour your counter or a large cutting board. Open one can of crescent roll dough and unroll it onto the floured surface. Press the perforated seams together gently to create one solid rectangle.
- Spread half of the cream cheese mixture evenly over the dough rectangle, leaving a 1/2-inch border along one long edge. Starting from the long edge opposite the bare border, roll the dough up tightly. Pinch the bare edge to seal the log. Repeat with the second can of dough and remaining filling.
- Wrap each log tightly in plastic wrap and refrigerate for at least 30 minutes. After chilling, use a sharp serrated knife to slice each log into 12 even pieces, about 3/4-inch thick.
- Arrange the sliced pinwheels in a single layer on a parchment-lined baking sheet, making sure they’re not touching. Freeze for 1-2 hours, or until frozen solid. Transfer to a freezer-safe bag or container. They’ll keep for up to 3 months.
- When ready to bake, preheat oven to 375°F (190°C). Place frozen pinwheels on a parchment-lined baking sheet, spacing them about 1 inch apart. Brush tops with melted butter and sprinkle with everything bagel seasoning if using. Bake for 18-22 minutes, or until golden brown and bubbly. Let cool on the pan for 5 minutes before serving.
Notes
Chill the logs thoroughly for clean slicing. Use a sharp serrated knife to avoid squishing the pinwheels. Bake straight from frozen—no thawing needed. Let rest 5 minutes after baking before serving.
Nutrition
- Serving Size: 1 pinwheel
- Calories: 145
- Sugar: 2
- Sodium: 380
- Fat: 9
- Saturated Fat: 4
- Carbohydrates: 9
- Protein: 7
Keywords: ham and cheese pinwheels, freezer snacks, easy appetizer, make-ahead, crescent roll recipe



