Love this? Save it for later!
Share the inspiration with your friends
The crumble. That first spoonful breaking through the dark, crumbly surface—that’s the whole point of these Easy Graveyard Dirt Cups with Oreo Crumbs and Gummy Worms. Not the taste (though that’s good too), but the way the spoon meets resistance and then gives way, sinking into something cool and creamy underneath. I made these for my nephew’s Halloween party two years ago, and I still remember the sound of six kids simultaneously cracking through their dirt layers. It’s a specific kind of chaos, and honestly? It’s perfect.
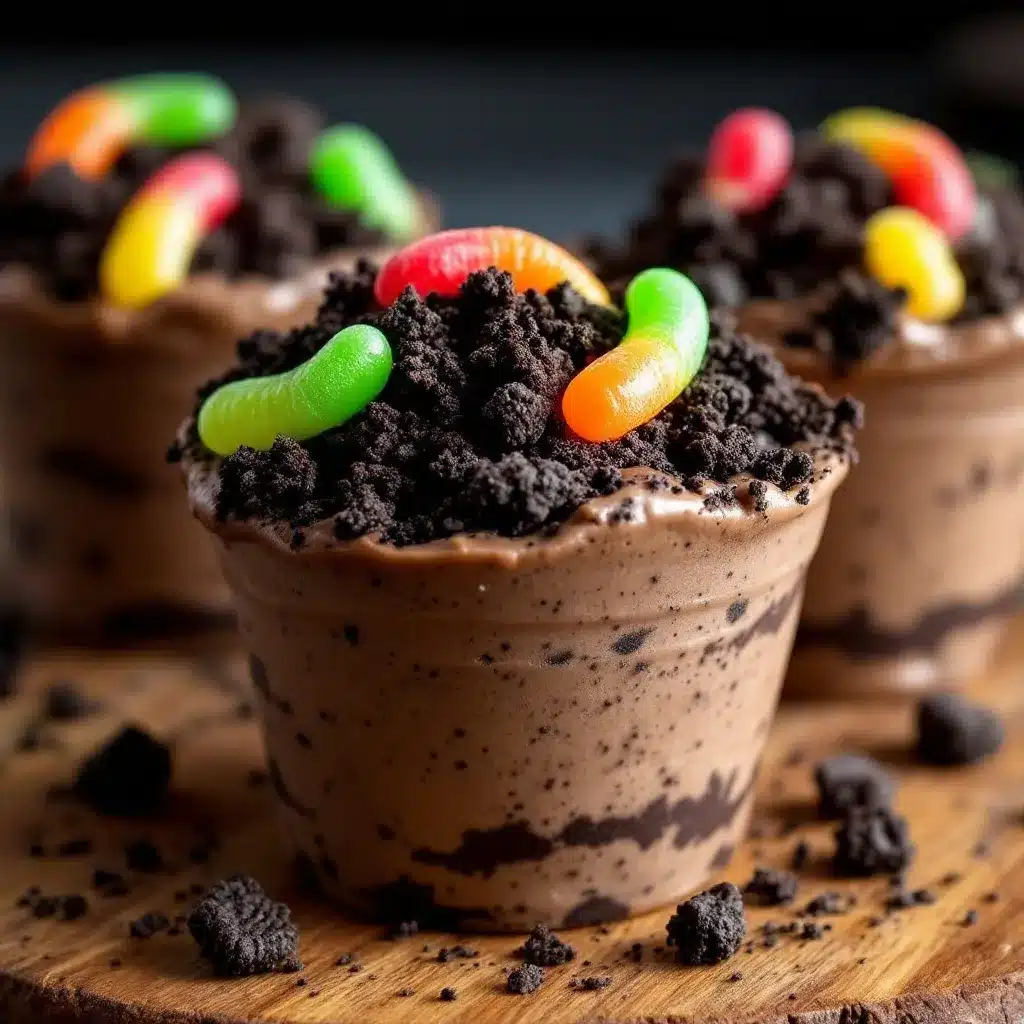
These little cups are basically a no-bake dessert that looks like a miniature graveyard scene. Chocolate pudding gets layered with crushed Oreos (that’s the “dirt”), and then you stick gummy worms poking out like they’re crawling up from the grave. Add a few tombstone cookies or candy pumpkins, and you’ve got a Halloween treat that takes maybe twenty minutes to throw together. No oven required. No fancy techniques. Just assembly and a little bit of patience while the pudding sets.
I’ve tried a lot of Halloween desserts over the years, and this one sticks because it delivers on the fun without making you stress. You know how some holiday recipes look amazing but take all day? This isn’t that. This is the one you pull out when the party starts in an hour and you forgot to plan anything. It’s saved me more times than I can count. And if you’re looking for other easy, crowd-friendly options, my candy corn popcorn Halloween party mix is another go-to when you need something sweet and salty fast.
There’s something satisfying about handing a kid a cup of dirt and watching their face light up. It’s silly, it’s messy, and it tastes exactly like childhood. That’s why this recipe stuck with me.
Why You’ll Love This Recipe
I’ve tested this recipe at three different Halloween gatherings, two classroom parties, and one very chaotic family movie night. Each time, the cups disappeared before I could grab one for myself. Here’s what makes them work so well:
- No Baking Required : You don’t even turn on the oven. This is a stovetop-and-fridge situation, which means it’s perfect for hot October days or when your oven is already full of other stuff.
- Simple Ingredients : Chocolate pudding mix, milk, Oreos, cream cheese, whipped topping, and gummy worms. That’s it. No weird specialty items you’ll never use again.
- Perfect for Halloween Parties : These look impressive on a dessert table but take almost no effort. Kids love them, adults secretly love them too, and they fit any spooky theme.
- Make-Ahead Friendly : You can assemble these the night before your party. The flavors actually get better as they sit, and the Oreo crumbs stay perfectly crumbly if you add them right before serving.
- Crowd-Pleaser Guaranteed : I’ve yet to meet a kid who doesn’t get excited about eating dirt with worms. It’s the kind of dessert that creates a memory, not just a full stomach.
What sets this version apart from other dirt cup recipes is the texture. Most recipes just layer pudding and crushed Oreos, and that’s fine. But I add a cream cheese layer that gives the whole thing a richer, creamier consistency. It’s not just chocolate pudding—it’s a layered dessert that feels more like a cheesecake parfait. The cream cheese layer adds tang and body, so each spoonful has a little more substance. Plus, the pudding is made from scratch on the stovetop, which gives it a silkier texture than instant mix alone.
This is the kind of dessert that makes you close your eyes after the first bite. It’s comfort food disguised as a Halloween craft. And honestly? That’s the best kind of recipe to have in your back pocket.
What Ingredients You Will Need
This recipe uses simple, everyday ingredients to create something that feels special. Most of these are pantry staples or easy to find at any grocery store. Here’s what you’ll need:
For the Pudding Layer
- 1 box (3.9 oz) instant chocolate pudding mix (I prefer Jell-O brand for consistent results, but any brand works)
- 2 cups cold whole milk (whole milk gives the richest texture, but 2% works fine too)
- 4 oz cream cheese, softened (this is my secret ingredient—it makes the pudding layer extra creamy and gives it a slight tang that balances the sweetness)
- 1/4 cup powdered sugar (to sweeten the cream cheese without graininess)
- 1/2 cup heavy whipping cream (or use 1 cup of Cool Whip if you want to skip the homemade whipped cream step)
For the Dirt Layer
- 1 package (14.3 oz) Oreo cookies (regular or Double Stuf—both work, but Double Stuf gives a slightly sweeter crumb)
- 2 tablespoons melted butter (optional, but it helps the crumbs clump together a bit more like real dirt)
For Decoration
- Gummy worms (about 2-3 per cup, depending on how creepy you want it)
- Optional decorations : candy pumpkins, tombstone cookies (like Milano cookies with “RIP” written in frosting), or small plastic skeletons
Ingredient Selection Tips : Look for Oreos that are fresh and not stale—the crunch is important for that dirt texture. If you’re using cream cheese, make sure it’s fully softened to room temperature so it blends smoothly into the pudding. Cold cream cheese will leave lumps, and nobody wants lumpy dirt.
Substitution Guidance : For a dairy-free version, use full-fat oat milk or coconut milk in the pudding, dairy-free cream cheese (Kite Hill makes a good one), and coconut cream instead of heavy cream. The texture will be slightly different but still delicious. For a gluten-free option, use gluten-free chocolate sandwich cookies—there are several good brands available now.
Equipment Needed
You don’t need anything fancy for this recipe, which is part of the appeal. Here’s what you’ll need:
- Medium saucepan (for making the pudding on the stovetop)
- Mixing bowls (one for the pudding, one for the cream cheese mixture, one for crushing Oreos)
- Whisk (for smooth pudding without lumps)
- Hand mixer or stand mixer (for whipping the cream and beating the cream cheese—though you can do it by hand if you’re feeling strong)
- Small cups or clear plastic cups (I use 8-ounce clear plastic cups so you can see the layers, but small mason jars or even paper cups work)
- Ziploc bag or food processor (for crushing Oreos into fine crumbs—a rolling pin over a sealed bag works great too)
- Spatula (for scraping every last bit of pudding into the cups)
Budget-Friendly Tip : Don’t have a hand mixer? You can whip the cream by hand with a whisk—it’ll take about 5-7 minutes of vigorous whisking, but it’s totally doable. And if you don’t have clear cups, any small container works. I’ve even used shot glasses for mini versions at adult parties.
Preparation Method
This recipe comes together in about 20 minutes of active time, plus 2 hours of chilling. Here’s how to do it:
- Crush the Oreos : Place all the Oreos (cream filling included) in a large Ziploc bag. Seal it, then use a rolling pin to crush them into fine crumbs. You want a mixture of fine powder and small pebbles—like real garden dirt. Alternatively, pulse them in a food processor until you get the same texture. Set aside about 1/4 cup of the crumbs for topping later. If using melted butter, stir it into the crumbs now.
- Make the cream cheese layer : In a medium bowl, beat the softened cream cheese with the powdered sugar until smooth and fluffy, about 2 minutes. In a separate bowl, whip the heavy cream until stiff peaks form. Gently fold the whipped cream into the cream cheese mixture until combined. This creates a light, airy layer that adds richness to the dessert. Set aside.
- Make the chocolate pudding : In a medium saucepan, whisk together the instant pudding mix and cold milk. Cook over medium heat, whisking constantly, until the mixture thickens and comes to a gentle boil, about 3-5 minutes. Remove from heat and let it cool for 5 minutes. The pudding will continue to thicken as it cools. If you prefer a shortcut, you can make the instant pudding according to package directions and skip the stovetop—but the stovetop method gives a silkier texture.
- Layer the cups : Start by adding a spoonful of crushed Oreos to the bottom of each cup—about 2 tablespoons per cup. This creates the “underground” layer. Next, add a layer of the cream cheese mixture (about 2 tablespoons), spreading it evenly. Then add a layer of chocolate pudding (about 3 tablespoons). Repeat the layers if your cups are tall enough—I usually do two rounds of each layer for a nice striped effect.
- Top with dirt : Finish with a generous layer of crushed Oreos on top. This is the “surface” of your graveyard. Use the reserved finer crumbs for this layer to make it look more like real dirt.
- Add the worms and decorations : Gently push gummy worms into the top layer so they look like they’re crawling out of the dirt. Add candy pumpkins, tombstone cookies, or any other Halloween decorations you like. For tombstones, I use Milano cookies with “RIP” written in black frosting—they stand up perfectly in the pudding.
- Chill before serving : Refrigerate the cups for at least 2 hours, or overnight. This allows the layers to set and the flavors to meld together. The Oreo crumbs will soften slightly, which actually makes them taste more like real dirt.
Pro Tip : If you’re making these for a party, assemble them the night before but wait to add the gummy worms and decorations until just before serving. The worms can bleed color into the pudding if they sit too long, and the tombstones might get soggy.
Cooking Tips & Techniques
I’ve made these dirt cups about a dozen times now, and I’ve learned a few things the hard way. Here are my best tips:
Don’t Overmix the Pudding : When you’re whisking the pudding on the stovetop, stop as soon as it thickens. Overcooking can make it grainy or cause it to separate. The pudding will continue to set as it cools, so pull it off the heat while it’s still a little loose.
Crush Oreos in Batches : The first time I made these, I tried to crush the entire package at once in a food processor. Big mistake. The bottom ones turned to powder while the top ones stayed in big chunks. Now I do it in two batches, pulsing in short bursts. You want a mix of textures—some fine powder for the top layer and some small chunks for texture.
Let the Cream Cheese Warm Up : Cold cream cheese is the enemy of smooth desserts. Leave it on the counter for 30 minutes before you start. If you forget, microwave it for 10-15 seconds, but be careful not to melt it. Lumpy cream cheese in the middle of your dirt cup is not a good look.
Use Clear Cups for the Full Effect : I know plastic cups aren’t fancy, but the visual of seeing those layers through the side is half the fun. You can find clear plastic cups at any party supply store or online. If you’re using mason jars, go with the short, wide ones so kids can easily spoon into them.
Don’t Skip the Chill Time : I know it’s tempting to serve these right away, but the texture is so much better after a few hours in the fridge. The layers set, the flavors meld, and the Oreo crumbs absorb just enough moisture to feel like actual dirt. Trust me on this one.
Variations & Adaptations
This recipe is endlessly adaptable. Here are some variations I’ve tried and loved:
Pumpkin Patch Dirt Cups : Swap the chocolate pudding for butterscotch or vanilla pudding, and use crushed graham crackers instead of Oreos. Top with candy pumpkins and a few green candy leaves. It’s like a pumpkin patch in a cup—perfect for fall parties that aren’t specifically Halloween.
Spiderweb Dirt Cups : After adding the top layer of Oreo crumbs, drizzle a thin stream of white chocolate or melted marshmallow in a spiral pattern, then drag a toothpick from the center outward to create a spiderweb effect. Add a plastic spider on top for extra creep factor.
Healthier Version : Use sugar-free chocolate pudding mix, low-fat milk, and reduced-fat cream cheese. Swap the Oreos for chocolate graham crackers or even dark chocolate cookies. The texture won’t be quite as rich, but it still hits the spot for a lighter treat.
Adult Version : Add a layer of chocolate mousse made with a splash of espresso or Kahlua between the pudding layers. Top with chocolate shavings instead of Oreos for a more sophisticated look. Serve in small whiskey glasses or espresso cups.
Kid-Friendly Make-Your-Own Bar : Set out bowls of crushed Oreos, gummy worms, candy pumpkins, sprinkles, and other decorations, and let kids assemble their own cups. It’s messy but so much fun, and it keeps them entertained for a good 20 minutes.
Serving & Storage Suggestions
These dirt cups are best served cold, straight from the fridge. The contrast between the cool, creamy layers and the slightly crunchy Oreo topping is what makes them so satisfying.
Serving Temperature : Serve them chilled, but not ice-cold. If they’ve been in the fridge overnight, let them sit on the counter for 5-10 minutes before serving. This softens the pudding just enough to make it spoonable without being runny.
Presentation Ideas : Arrange the cups on a tray lined with fake grass or black tablecloth. Add a few plastic skeletons, spider webs, or battery-operated candles for a spooky tablescape. For a classroom party, label each cup with a name tag so kids can find their own.
Storage Instructions : Store leftover dirt cups in the refrigerator, covered with plastic wrap or lids, for up to 3 days. The Oreo crumbs will soften over time, but the dessert will still taste good. If you want to keep the crunch, store the crumbs separately and add them just before serving.
Freezing : I don’t recommend freezing these. The pudding and cream cheese layers can separate when thawed, and the texture becomes watery. Stick to refrigeration.
Make-Ahead Tip : You can prepare the pudding and cream cheese layers up to 2 days in advance and store them separately in the fridge. Assemble the cups the day of your event for the best texture. The Oreo crumbs can be crushed and stored in an airtight container at room temperature for up to a week.
Nutritional Information & Benefits
Let’s be honest—this is a treat, not a health food. But if you’re going to indulge, here’s what you’re working with:
- Calories : Approximately 350-400 per cup (depending on size and toppings)
- Fat : 18-22g (mostly from cream cheese, heavy cream, and Oreo filling)
- Carbohydrates : 45-50g (from sugar, Oreos, and pudding mix)
- Protein : 5-7g (from milk and cream cheese)
Health Benefits : Okay, so there aren’t many. But the cream cheese does provide some calcium and protein, and the dark chocolate in Oreos contains a small amount of antioxidants. If you use dark chocolate cookies, you get a bit more. Plus, there’s something to be said for the mental health benefits of a fun, nostalgic dessert shared with people you love.
Dietary Considerations : This recipe contains dairy, gluten, and soy (from the Oreos). For a gluten-free version, use gluten-free chocolate sandwich cookies. For a dairy-free version, use plant-based milk, dairy-free cream cheese, and coconut cream. For a nut-free version, this recipe is naturally nut-free, but check your gummy worm labels—some brands are processed in facilities that handle nuts.
Conclusion
These Easy Graveyard Dirt Cups with Oreo Crumbs and Gummy Worms are exactly what a Halloween dessert should be—fun, simple, and absolutely delicious. They don’t require any baking skills or fancy equipment. They come together in minutes, look impressive on a dessert table, and make kids (and adults) genuinely happy. What more could you want from a recipe?
I love that this recipe lets you be creative. You can make it as spooky or as silly as you want. Add fake spiders, write names on tombstones, or go full-on graveyard with cookie headstones and candy bones. The base recipe is forgiving enough that you can experiment without worrying about ruining it.
If you try these dirt cups, I’d love to hear about it. Drop a comment below and tell me how you decorated yours—did you go full creepy or keep it cute? Tag me in your photos if you share them online. And if you’re looking for more easy Halloween treats, check out my candy corn popcorn Halloween party mix or these no-bake peanut butter oat energy bites for a slightly healthier option.
Happy Halloween, and happy eating!
Frequently Asked Questions
Can I use instant pudding instead of stovetop pudding?
Absolutely. The stovetop method gives a silkier texture, but instant pudding works perfectly fine. Just follow the package directions and let it set before layering. If you’re short on time, instant pudding is the way to go.
How far in advance can I make these dirt cups?
You can assemble them up to 2 days in advance, but wait to add the gummy worms and decorations until just before serving. The worms can bleed color into the pudding, and cookies might get soggy. The pudding and cream cheese layers actually taste better after a day in the fridge.
Can I make these without cream cheese?
Yes. The cream cheese adds richness and tang, but you can skip it and just use chocolate pudding and whipped cream. The texture will be lighter and less creamy, but still delicious. You can also use a layer of chocolate mousse instead.
What can I use instead of Oreos for the dirt?
Any chocolate sandwich cookie works—brands like Newman’s Own or store-brand versions are great. You can also use chocolate graham crackers, chocolate wafer cookies, or even crushed chocolate cereal like Cocoa Pebbles for a different texture.
How do I keep the gummy worms from sinking into the pudding?
Add the gummy worms just before serving, and push them in gently so they’re only halfway submerged. If you add them too early, they’ll sink into the soft pudding. For a more dramatic effect, let the cups chill for an hour before adding the worms—the pudding will be firmer and hold them in place better.
Pin This Recipe!
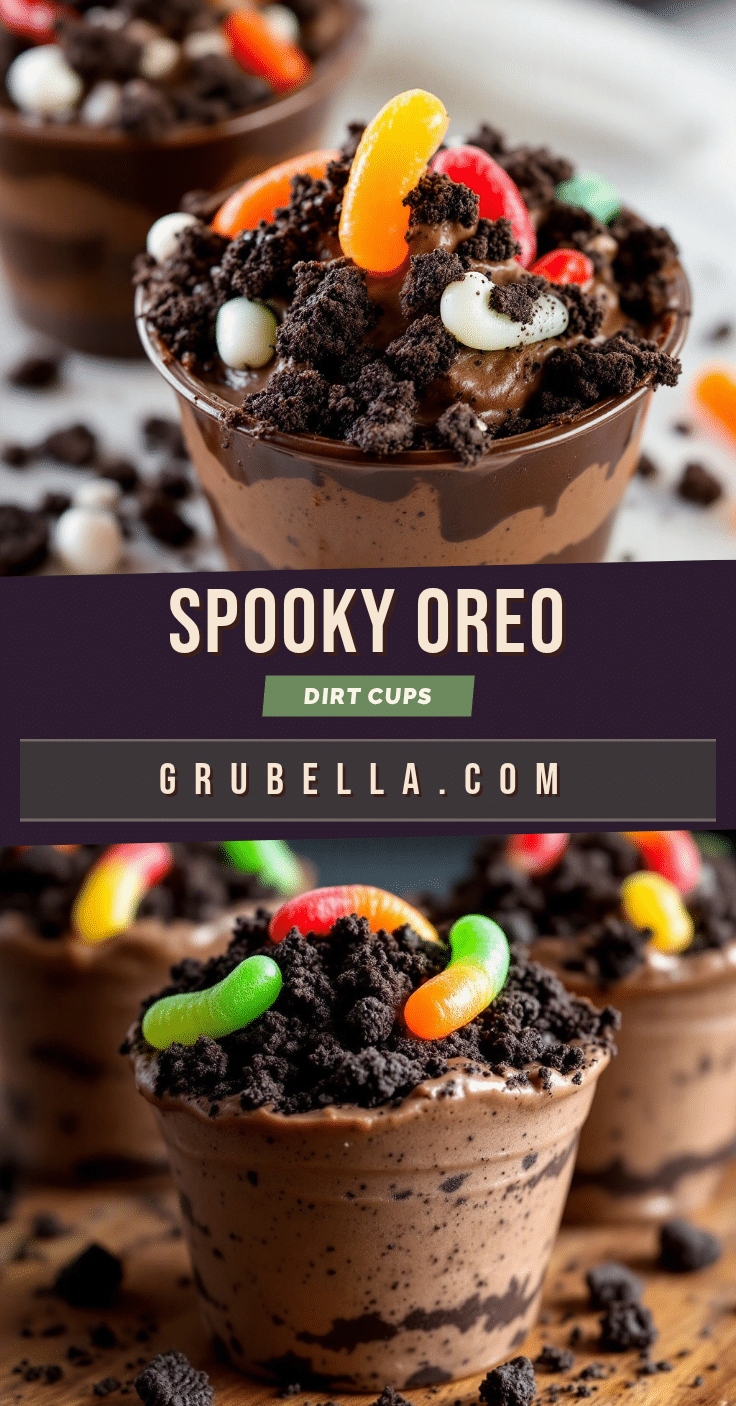
Easy Graveyard Dirt Cups with Oreo Crumbs and Gummy Worms

A no-bake Halloween dessert featuring layers of chocolate pudding, creamy cheesecake filling, and crushed Oreo ‘dirt,’ topped with gummy worms crawling out of the graveyard. Fun, simple, and perfect for parties.
- Prep Time: 20 minutes
- Cook Time: 5 minutes
- Total Time: 2 hours 25 minutes (includes chilling)
- Yield: 6-8 servings 1x
- Category: Dessert
- Cuisine: American
Ingredients
- 1 box (3.9 oz) instant chocolate pudding mix
- 2 cups cold whole milk
- 4 oz cream cheese, softened
- 1/4 cup powdered sugar
- 1/2 cup heavy whipping cream
- 1 package (14.3 oz) Oreo cookies
- 2 tablespoons melted butter (optional)
- Gummy worms (2-3 per cup)
- Optional decorations: candy pumpkins, tombstone cookies (e.g., Milano cookies with ‘RIP’ in frosting), small plastic skeletons
Instructions
- Crush the Oreos: Place all Oreos (cream filling included) in a large Ziploc bag. Seal and crush with a rolling pin into fine crumbs with some small pebbles. Alternatively, pulse in a food processor. Set aside 1/4 cup of crumbs for topping. If using melted butter, stir it into the crumbs.
- Make the cream cheese layer: In a medium bowl, beat softened cream cheese with powdered sugar until smooth and fluffy, about 2 minutes. In a separate bowl, whip heavy cream until stiff peaks form. Gently fold whipped cream into cream cheese mixture until combined. Set aside.
- Make the chocolate pudding: In a medium saucepan, whisk together instant pudding mix and cold milk. Cook over medium heat, whisking constantly, until thickened and gently boiling, about 3-5 minutes. Remove from heat and let cool for 5 minutes. (Alternatively, prepare instant pudding according to package directions.)
- Layer the cups: Add about 2 tablespoons crushed Oreos to the bottom of each cup. Add about 2 tablespoons cream cheese mixture, spreading evenly. Add about 3 tablespoons chocolate pudding. Repeat layers if cups are tall enough.
- Top with dirt: Finish with a generous layer of crushed Oreos on top, using reserved finer crumbs for a realistic dirt look.
- Add worms and decorations: Gently push gummy worms into the top layer so they appear to crawl out. Add candy pumpkins, tombstone cookies, or other decorations as desired.
- Chill before serving: Refrigerate cups for at least 2 hours, or overnight, to set layers and meld flavors.
Notes
For best results, assemble the night before but add gummy worms and decorations just before serving to prevent color bleeding and sogginess. Use clear cups to show layers. Let cream cheese soften to room temperature for smooth blending. Store leftovers covered in the fridge for up to 3 days; do not freeze.
Nutrition
- Serving Size: 1 cup
- Calories: 375
- Sugar: 33
- Sodium: 380
- Fat: 20
- Saturated Fat: 11
- Carbohydrates: 47
- Fiber: 1
- Protein: 6
Keywords: Halloween dessert, dirt cups, no-bake, Oreo, gummy worms, graveyard, chocolate pudding, kids treat, party dessert



