Love this? Save it for later!
Share the inspiration with your friends
There used to be a tiny Japanese lunch counter tucked inside a local grocery store that made the best chicken teriyaki bento boxes. When they closed during the pandemic, my son actually cried. Not a little whimper—real tears. After 12 attempts—some so dry they belonged in a science experiment—I finally got it. The secret wasn’t fancy ingredients or some ancient technique. It was patience and a little trick with the sauce that I stumbled on during a particularly chaotic Tuesday afternoon.
You know that feeling when you find a lunch solution that actually works? The kind where your kid comes home with an empty box and a smile? That’s this recipe. I mean, honestly, I’ve tried every pre-packaged bento option out there, and they’re either loaded with sugar or taste like cardboard. This homemade version hits that sweet spot between quick enough for a weekday morning and delicious enough that your kids won’t trade it for whatever their friend brought.
Let me tell you about that 12th attempt. I had a cracked measuring cup, the smoke detector went off, and I realized I was out of mirin. But somehow, that imperfect batch was the one that worked. My son took one bite and said, “Mom, it’s like the store’s, but better.” That’s when I knew I had to share this recipe. Maybe you’ve been there, standing in your kitchen wondering why something so simple feels so hard to get right.
Why You’ll Love This Recipe
After testing this recipe more times than I’d like to admit, I can confidently say this isn’t just another chicken teriyaki recipe. It’s the one that actually works for busy parents who want real food without the stress.
- Quick & Easy: Comes together in under 30 minutes, perfect for those mornings when you’re already running late. I’ve timed myself—25 minutes from start to finish, including cleanup.
- Simple Ingredients: No fancy grocery trips needed. Soy sauce, honey, garlic, and chicken thighs—you probably have most of these in your pantry right now.
- Perfect for Lunchboxes: This chicken teriyaki holds up beautifully in a bento box. It tastes just as good cold as it does warm, which is rare for chicken dishes.
- Crowd-Pleaser: My picky eater devours this, and so do the neighborhood kids when we have playdates. It’s that rare recipe that bridges the gap between kid-friendly and adult-approved.
- Unbelievably Delicious: The sauce caramelizes perfectly on the chicken, creating that glossy, sticky coating that makes teriyaki so irresistible. It’s comfort food that feels special without being complicated.
What makes this different from every other chicken teriyaki recipe? It’s the technique. Most recipes have you dump everything in a pan and hope for the best. I’ve developed a method where you sear the chicken first, then let the sauce reduce slowly. This creates layers of flavor without burning the sugar. Plus, I’ve adjusted the sweetness level so it appeals to kids without being cloying. This isn’t just another version—it’s the version I’d serve to my own family without hesitation.
This recipe is the kind that makes you close your eyes after the first bite. It’s lunchbox perfection reimagined—healthier than takeout, faster than you’d expect, but with the same soul-soothing satisfaction. Perfect for impressing your kids without spending hours in the kitchen, or turning a simple weekday lunch into something memorable.
What Ingredients You Will Need
This recipe uses simple, wholesome ingredients to deliver that classic teriyaki flavor without any artificial additives. You’ll find most of these in your pantry already, which makes this perfect for last-minute lunch prep.
- Chicken Thighs (1 lb, boneless skinless) – I prefer thighs over breasts for bento boxes because they stay juicy even when reheated. Look for organic if your budget allows, but regular works fine too.
- Soy Sauce (1/3 cup, low sodium) – I recommend Kikkoman for its consistent flavor. Low sodium is key here because you’ll be reducing the sauce, which concentrates the salt.
- Honey (3 tablespoons) – This gives the sauce that beautiful gloss and balances the saltiness. Local honey adds a nice floral note, but any honey works.
- Mirin (2 tablespoons) – Don’t skip this! Mirin adds that authentic Japanese sweetness and helps the sauce thicken. You can find it in the Asian section of most grocery stores.
- Rice Vinegar (1 tablespoon) – Adds a subtle tang that brightens the whole dish. Unseasoned rice vinegar is best.
- Garlic (3 cloves, minced) – Fresh garlic makes a huge difference here. I’ve tried the jarred stuff, and it’s just not the same.
- Fresh Ginger (1 teaspoon, grated) – Look for firm, smooth ginger root. I keep mine in the freezer so it grates easily.
- Cornstarch (1 tablespoon) – This thickens the sauce to that perfect glossy consistency. Mix it with 2 tablespoons of cold water before adding.
- Sesame Oil (1 teaspoon) – For toasting the chicken. It adds a nutty depth that vegetable oil just can’t replicate.
- Sesame Seeds (for garnish) – Optional but highly recommended. They add a nice visual touch and a subtle crunch.
- Cooked Rice (for serving) – Short-grain Japanese rice is traditional, but any rice works. I make a big batch on Sundays for easy lunch prep.
- Steamed Broccoli (for serving) – Adds color and nutrition. My kids actually eat their broccoli when it’s paired with this chicken.
For the bento box assembly, you’ll also want some fun picks or silicone cups to separate the components. It makes the lunch feel special without much extra effort.
Equipment Needed
You don’t need a fully stocked Japanese kitchen to make this recipe. Here’s what you’ll actually use:
- Large Skillet or Frying Pan – A 12-inch non-stick skillet works best for even cooking and easy cleanup. Cast iron works too, but watch the heat carefully so the honey doesn’t burn.
- Sharp Knife – For cutting the chicken into bite-sized pieces. A dull knife will shred the meat instead of slicing cleanly.
- Cutting Board – Preferably one with a groove to catch any juices.
- Small Bowl – For mixing the sauce ingredients together.
- Measuring Spoons and Cups – Accuracy matters here, especially with the soy sauce and honey.
- Bento Box or Lunch Container – I love the PlanetBox brand for their durability, but any compartmentalized container works. Even a simple glass meal prep container with silicone cups will do the job.
- Microplane or Fine Grater – For grating the ginger. A regular grater works, but a microplane gives you that fine paste that distributes evenly.
Budget-friendly tip: You don’t need a fancy bento box. I’ve used regular lunch containers with silicone muffin cups to separate the components, and it works perfectly. The key is having compartments so the rice doesn’t get soggy from the chicken sauce.
Preparation Method
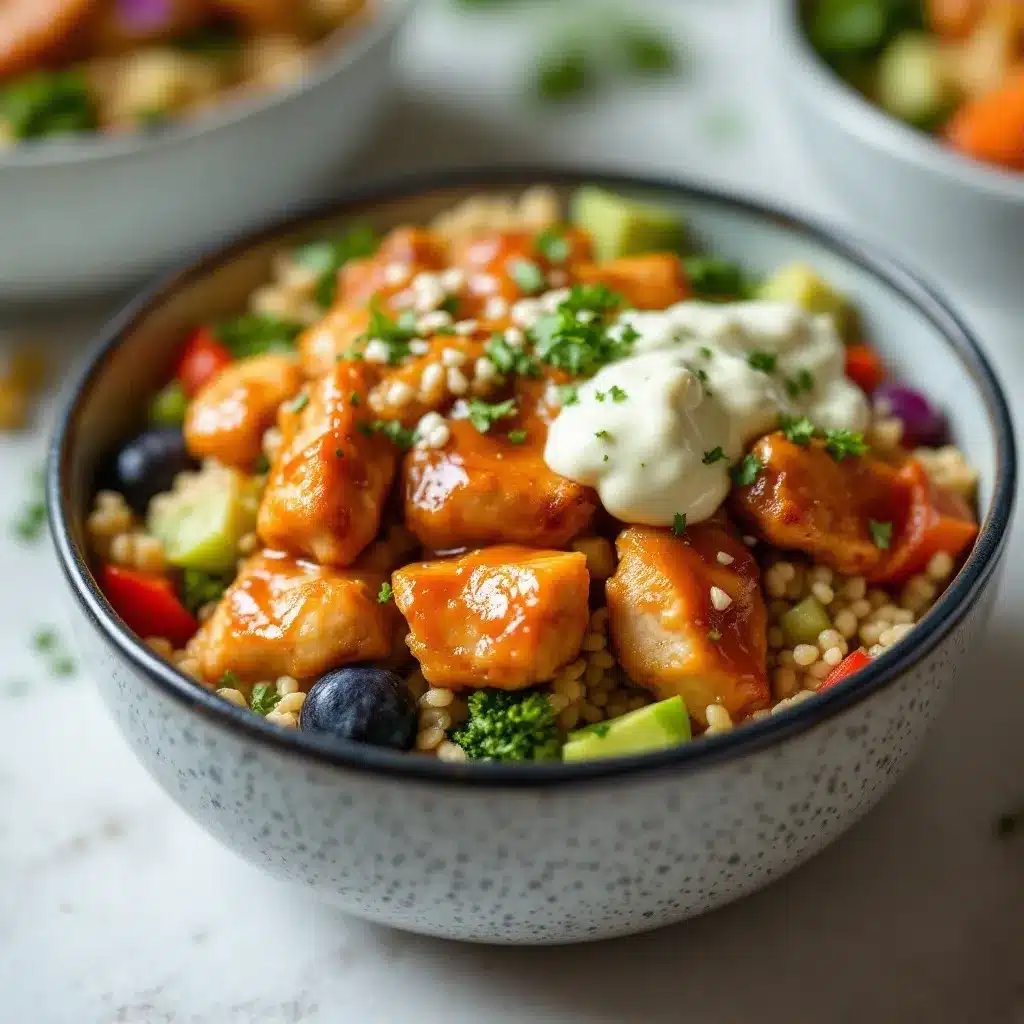
Let me walk you through this step by step. I’ve made this recipe dozens of times, so I’ve worked out all the kinks for you.
- Prep the chicken (5 minutes): Pat the chicken thighs dry with paper towels. This is crucial—wet chicken won’t sear properly. Cut them into bite-sized pieces, about 1-inch cubes. Season lightly with a pinch of salt and pepper. Don’t go heavy on the salt since the soy sauce will add plenty.
- Make the sauce (3 minutes): In a small bowl, whisk together the soy sauce, honey, mirin, rice vinegar, minced garlic, and grated ginger. Set it aside. In another small bowl, mix the cornstarch with 2 tablespoons of cold water until smooth. This is your slurry for later.
- Sear the chicken (8 minutes): Heat your skillet over medium-high heat and add the sesame oil. When it shimmers, add the chicken pieces in a single layer. Don’t crowd the pan—work in batches if needed. Let them cook undisturbed for 3-4 minutes until golden brown on the bottom. Flip and cook another 3-4 minutes. The chicken should be cooked through but still juicy. Transfer to a plate.
- Make the glaze (5 minutes): Reduce the heat to medium-low. Pour the sauce mixture into the same skillet. Let it simmer gently for 2-3 minutes, stirring occasionally. You’ll see it start to thicken slightly. Give the cornstarch slurry a quick stir and drizzle it into the sauce while whisking constantly. The sauce will thicken almost immediately—this is where the magic happens.
- Coat the chicken (2 minutes): Return the chicken to the skillet. Toss to coat each piece in the glossy sauce. Let it cook for another minute so the sauce caramelizes onto the chicken. The pieces should look sticky and shiny, like they do at your favorite Japanese restaurant.
- Cool and assemble (5 minutes): Remove from heat and let the chicken cool slightly before packing. This prevents the rice from getting steamy and soggy in the bento box. Arrange the chicken in one compartment of your bento box, rice in another, and steamed broccoli in the third. Sprinkle sesame seeds over the chicken for that finishing touch.
Here’s a tip I learned the hard way: Don’t skip the cooling step. I once packed hot chicken directly into a bento box, and by lunchtime, the rice was a mushy mess. Letting everything come to room temperature before packing makes a huge difference in texture.
Cooking Tips & Techniques
After making this recipe more times than I can count, here are the things I wish someone had told me:
The sauce will look thin at first—trust the process. I can’t tell you how many times I almost added more cornstarch because the sauce seemed too runny. But as it simmers, the honey and mirin work together to create that perfect consistency. Give it time.
Watch your heat like a hawk. Honey burns faster than you think. Medium-low heat is your friend here. If you see the sauce starting to darken too quickly, pull the pan off the heat immediately. I learned this lesson when I made a batch that tasted like burnt caramel—not the flavor profile I was going for.
Double the sauce if you’re making extra. This recipe makes just enough for the chicken. If you want extra sauce for dipping or drizzling over rice, multiply the sauce ingredients by 1.5. Just remember to let it reduce properly before serving.
Cut the chicken uniformly. This is one of those details that seems fussy but makes a real difference. When all the pieces are the same size, they cook evenly. No more dry bits mixed with undercooked pieces.
Let the chicken rest after cooking. I know you’re in a rush, but those 2-3 minutes of resting time allow the juices to redistribute throughout the meat. Your chicken will be noticeably juicier.
Variations & Adaptations
One of the best things about this recipe is how adaptable it is. Here are some variations I’ve tried and loved:
Gluten-Free Version: Swap the soy sauce for tamari or coconut aminos. Both work beautifully, though coconut aminos will give a slightly sweeter result. I’ve tested this multiple times and honestly prefer the tamari version—it’s almost indistinguishable from the original.
Spicy Adult Version: Add 1 teaspoon of sriracha or red pepper flakes to the sauce. My husband loves this version, and it’s great for parents who want a little heat while the kids eat the milder original. Just make sure to label the containers clearly!
Vegetable-Packed Bento: Add snap peas, carrot ribbons, or edamame to the box. I sometimes sneak in finely chopped mushrooms cooked with the chicken—my kids haven’t noticed yet, and I’m not telling.
Grilled Version: In summer, I marinate the chicken in the sauce (without the cornstarch) for 30 minutes, then grill it on skewers. The smoky char adds an amazing depth of flavor. Just baste with extra sauce while grilling.
Freezer-Friendly Prep: Make a double batch of the chicken and freeze half in a sealed container. It reheats beautifully in a skillet or microwave. I do this on Sundays for easy lunch prep throughout the week.
Serving & Storage Suggestions
This chicken teriyaki is incredibly versatile when it comes to serving. Here’s how I handle it:
Serving Temperature: The chicken tastes great warm, at room temperature, or even cold straight from the fridge. For bento boxes, I pack it at room temperature so everything stays fresh until lunchtime. If you’re serving it for dinner, serve it hot over steamed rice with a side of pickled vegetables.
Bento Box Assembly Tips: Use silicone cups or paper liners to separate the components. This keeps the rice from getting soggy and makes the lunch look more appealing. I add a small container of extra sauce on the side for dipping.
Storage: Store leftover chicken in an airtight container in the refrigerator for up to 4 days. The flavors actually deepen overnight, so day-old chicken teriyaki is sometimes even better than fresh. For longer storage, freeze the chicken in a freezer-safe bag for up to 3 months.
Reheating: The best way to reheat is in a skillet over medium heat with a splash of water. This restores the sauce’s glossiness. The microwave works in a pinch, but the sauce can become sticky and uneven. If using the microwave, cover the container and heat in 30-second bursts.
Flavor Development: Here’s something interesting—the chicken teriyaki actually tastes better after sitting in the sauce for a few hours. The flavors meld together beautifully. I sometimes make this the night before and pack it in the morning for an even more flavorful lunch.
Nutritional Information & Benefits
Here’s the approximate nutritional breakdown per serving (one bento box portion with rice and broccoli):
| Nutrient | Amount |
|---|---|
| Calories | 420 |
| Protein | 32g |
| Carbohydrates | 45g |
| Fat | 14g |
| Fiber | 3g |
| Sugar | 18g |
| Sodium | 680mg |
This recipe offers a good balance of protein from the chicken, carbohydrates from the rice, and fiber from the broccoli. Chicken thighs provide iron and B vitamins, while ginger offers anti-inflammatory benefits. The honey provides natural sweetness without refined sugar, and the sesame seeds add healthy fats and calcium.
For a lower-carb option, serve the chicken over cauliflower rice or zucchini noodles. For lower sodium, use low-sodium soy sauce and reduce the amount slightly—the flavor will still be delicious.
Conclusion
This easy bento box chicken teriyaki lunch has become a staple in our house, and I hope it becomes one in yours too. It’s the kind of recipe that solves a real problem—how to get a healthy, delicious lunch on the table (or in the lunchbox) without spending hours in the kitchen. The best part? Your kids will actually eat it.
I love this recipe because it reminds me that good food doesn’t have to be complicated. Sometimes the simplest techniques—a good sear, a slow-simmered sauce, a little patience—create the most memorable meals. And when my son comes home with an empty lunchbox and asks if I can make it again, I know I’ve done something right.
I’d love to hear how this recipe works for your family. Did your kids love it? Did you try any fun variations? Drop a comment below and share your experience. And if you found this helpful, please share it with a friend who’s also looking for easy lunch solutions. Happy cooking, friends!
Frequently Asked Questions
Can I use chicken breasts instead of thighs?
Yes, you absolutely can. Chicken breasts will work, but they tend to be drier, especially after reheating. If using breasts, reduce the cooking time slightly and watch carefully to avoid overcooking. I recommend pounding them to an even thickness first.
How do I prevent the sauce from burning?
Keep your heat at medium-low and watch the sauce carefully. Honey and mirin have natural sugars that burn easily. If you see the sauce starting to darken too much, remove the pan from the heat immediately. Stirring frequently also helps distribute the heat evenly.
Can I make this recipe ahead of time?
Absolutely! This recipe is perfect for meal prep. Make the chicken up to 4 days in advance and store it in the refrigerator. The flavors actually improve overnight. Just reheat gently in a skillet with a splash of water before assembling your bento boxes.
What other vegetables work well in a bento box with this chicken?
Snap peas, carrot sticks, cucumber slices, edamame, and cherry tomatoes all work beautifully. I also love adding a small portion of pickled ginger or a few slices of cucumber with rice vinegar for a refreshing contrast to the rich chicken.
Is this recipe suitable for freezing?
Yes! The chicken freezes beautifully for up to 3 months. Store it in a freezer-safe bag or container, and thaw overnight in the refrigerator. Reheat in a skillet with a splash of water to restore the sauce’s texture. I recommend freezing the chicken separately from the rice and vegetables for best results.
Pin This Recipe!
Easy Bento Box Chicken Teriyaki Lunch for Kids

This homemade chicken teriyaki is quick, easy, and perfect for lunchboxes. With a glossy, caramelized sauce and juicy chicken thighs, it’s a kid-friendly meal that comes together in under 30 minutes.
- Prep Time: 10 minutes
- Cook Time: 15 minutes
- Total Time: 25 minutes
- Yield: 4 servings 1x
- Category: Main Course
- Cuisine: Japanese
Ingredients
- 1 lb boneless skinless chicken thighs
- 1/3 cup low sodium soy sauce
- 3 tablespoons honey
- 2 tablespoons mirin
- 1 tablespoon rice vinegar
- 3 cloves garlic, minced
- 1 teaspoon fresh ginger, grated
- 1 tablespoon cornstarch
- 2 tablespoons cold water
- 1 teaspoon sesame oil
- Sesame seeds for garnish
- Cooked rice for serving
- Steamed broccoli for serving
Instructions
- Pat the chicken thighs dry with paper towels. Cut into bite-sized pieces, about 1-inch cubes. Season lightly with salt and pepper.
- In a small bowl, whisk together soy sauce, honey, mirin, rice vinegar, minced garlic, and grated ginger. Set aside. In another small bowl, mix cornstarch with 2 tablespoons cold water until smooth.
- Heat a large skillet over medium-high heat and add sesame oil. When shimmering, add chicken pieces in a single layer. Cook undisturbed for 3-4 minutes until golden brown, then flip and cook another 3-4 minutes until cooked through. Transfer to a plate.
- Reduce heat to medium-low. Pour sauce mixture into the same skillet and simmer for 2-3 minutes, stirring occasionally. Stir cornstarch slurry and drizzle into sauce while whisking constantly until thickened.
- Return chicken to skillet and toss to coat. Cook for 1 minute until sauce caramelizes onto the chicken.
- Remove from heat and let cool slightly before packing. Arrange chicken, rice, and steamed broccoli in a bento box. Sprinkle sesame seeds over chicken.
Notes
Don’t skip the cooling step before packing to prevent soggy rice. The sauce will look thin at first but thickens as it simmers. Watch heat carefully to prevent burning the honey. For extra sauce, multiply sauce ingredients by 1.5.
Nutrition
- Serving Size: 1 bento box portion
- Calories: 420
- Sugar: 18
- Sodium: 680
- Fat: 14
- Saturated Fat: 3
- Carbohydrates: 45
- Fiber: 3
- Protein: 32
Keywords: chicken teriyaki, bento box, kid-friendly lunch, easy lunch recipe, Japanese lunch



