Love this? Save it for later!
Share the inspiration with your friends
I had been looking for a chicken thigh recipe that actually delivered on the crispy-skin promise without needing a vat of oil or a messy stovetop setup. For a while, I just accepted that crispy chicken meant standing over a sputtering pan, wiping down grease splatters from three feet away, and hoping the smoke alarm didn’t chime in halfway through. It wasn’t a disaster exactly, but it was a routine I didn’t love. The air fryer sat on my counter for months before I really put it to work, and honestly, the first few attempts at chicken thighs were edible but nothing to write home about. The skin turned out chewy, the seasoning barely clung to the surface, and I started wondering if I’d been oversold on this whole air fryer chicken thing.
Then I tried a different approach. Instead of just tossing seasoned thighs in the basket, I started paying attention to how the fat renders, how the garlic powder behaves at high heat, and what actually makes that golden-brown crust form. It took a few rounds of trial and error, and one particularly sad batch that tasted more like burnt garlic than Parmesan. But somewhere around attempt number four, the pieces clicked. The skin came out shatter-crisp, the meat stayed juicy, and the garlic-Parmesan coating actually stayed put instead of falling off into the basket. I remember pulling the basket out and just staring at it for a second, because the color alone told me I’d finally cracked it.
That’s the recipe I’m sharing here. It’s not complicated, and it doesn’t require any special tricks. It just works the way you want crispy chicken thighs to work, without the mess or the fuss.
Why You’ll Love This Recipe
This isn’t just another chicken thigh recipe that promises crispiness and delivers something closer to baked. I’ve tested this enough times to know exactly what works and what doesn’t, and I’ve stripped away all the guesswork so you can get consistent results from the first try. Here’s what makes it stand out:
- Quick & Easy: From start to finish, you’re looking at about 30 minutes. No marinating overnight, no complicated steps, just straightforward cooking that fits into a busy weeknight.
- Simple Ingredients: Chicken thighs, garlic, Parmesan, a few pantry spices, and oil. You probably have most of this already, and if you don’t, a quick trip to the store covers everything.
- Perfect for Weeknights: It’s fast enough for a Tuesday dinner but impressive enough to serve when you have company. I’ve made this for casual family meals and for friends who showed up unannounced, and it works for both.
- Crowd-Pleaser: Every time I’ve made these, the plate empties fast. Even picky eaters go back for seconds. The garlic-Parmesan flavor is familiar enough to be comforting but bold enough to feel special.
- Unbelievably Delicious: The texture is what gets people. That crunchy, golden exterior gives way to tender, juicy chicken, and the seasoning clings to every bite. It’s the kind of meal that makes you close your eyes after the first bite without even thinking about it.
What makes this recipe different from the dozens of other air fryer chicken recipes out there is the method. I dry the skin thoroughly, use a specific oil-to-seasoning ratio that creates a proper crust, and arrange the thighs so the hot air circulates evenly. It’s not about fancy techniques. It’s about doing the small things right so the result speaks for itself.
What Ingredients You Will Need
This recipe uses simple, everyday ingredients that come together to create big flavor and that irresistible crispy texture. Most of these are pantry staples, and the few that aren’t are easy to find at any grocery store.
- Chicken Thighs (boneless, skin-on): About 1.5 pounds, which is usually 4 to 6 thighs depending on size. Skin-on is non-negotiable here if you want that crispy exterior. The skin acts as a protective barrier that keeps the meat moist while it crisps up beautifully. If you can only find bone-in thighs, the cooking time will increase by about 5 to 8 minutes, and you’ll want to check internal temperature carefully.
- Parmesan Cheese (finely grated): 1/3 cup. Skip the pre-shredded stuff in the bag, it doesn’t melt or crisp the same way. Grate it fresh from a block of Parmigiano-Reggiano if you can. The flavor is nuttier and more complex, and it browns beautifully in the air fryer. I’ve tried both, and fresh Parmesan makes a noticeable difference in both texture and taste.
- Garlic Powder: 1 teaspoon. Not garlic salt, not minced garlic, garlic powder. It distributes evenly and doesn’t burn the way fresh garlic can at high air fryer temperatures. If you only have garlic granules, use the same amount, they work well too.
- Onion Powder: 1/2 teaspoon. It adds a subtle savory depth that rounds out the garlic without being overpowering.
- Paprika: 1 teaspoon. I use sweet paprika for color and mild warmth. Smoked paprika works if you want a deeper, smokier flavor profile. I’ve done both, and they’re equally good, just different.
- Dried Italian Seasoning: 1 teaspoon. A blend of oregano, basil, thyme, and rosemary adds herbal notes that complement the Parmesan. If you don’t have Italian seasoning, use 1/2 teaspoon dried oregano and 1/2 teaspoon dried basil.
- Salt: 1/2 teaspoon, or to taste. I use fine sea salt. If you’re using kosher salt, you might need a bit more because the flakes are larger and less dense.
- Black Pepper: 1/4 teaspoon, freshly ground if possible.
- Olive Oil: 1 tablespoon. Avocado oil works too and has a higher smoke point, but olive oil adds a subtle fruitiness that I prefer here. Don’t skip the oil, it helps the seasoning stick and promotes even browning.
- Fresh Parsley (optional): For garnish. A sprinkle of chopped fresh parsley right before serving adds a pop of color and a fresh counterpoint to the rich, savory chicken.
I recommend using organic chicken thighs if your budget allows. The flavor difference is subtle but noticeable, especially when the skin is the star of the show. For the Parmesan, I’ve had great results with BelGioioso and Whole Foods 365 block Parmesan. Both grate well and melt evenly in the air fryer.
Equipment Needed
You don’t need much for this recipe, which is part of why I make it so often. Here’s what you’ll want to have on hand:
- Air Fryer: Any basket-style air fryer works. I use a 5.8-quart Cosori, which gives me enough room to cook six thighs without overcrowding. If yours is smaller, cook in batches. Overcrowding is the number one reason the skin doesn’t get crispy.
- Paper Towels: For drying the chicken skin thoroughly. This step matters more than you think. Wet skin steams instead of crisps.
- Mixing Bowl: A medium bowl for combining the seasoning mixture and coating the chicken.
- Tongs: For turning the chicken halfway through cooking. Silicone-tipped tongs won’t scratch your air fryer basket.
- Instant-Read Thermometer: Not strictly necessary, but highly recommended. Chicken thighs are done at 165°F, but I pull them at 170°F for the best texture. The extra few degrees help render more fat and keep the skin crispy.
- Cutting Board and Knife: For chopping the parsley garnish, if using.
If you don’t have an air fryer, you can adapt this recipe for the oven. Place the seasoned thighs on a wire rack set over a baking sheet and bake at 425°F for 25 to 30 minutes, flipping halfway through. The texture won’t be quite as crispy, but it’s still delicious. I’ve tested both methods, and the air fryer wins for convenience and crunch, but the oven version is a solid backup.
Preparation Method
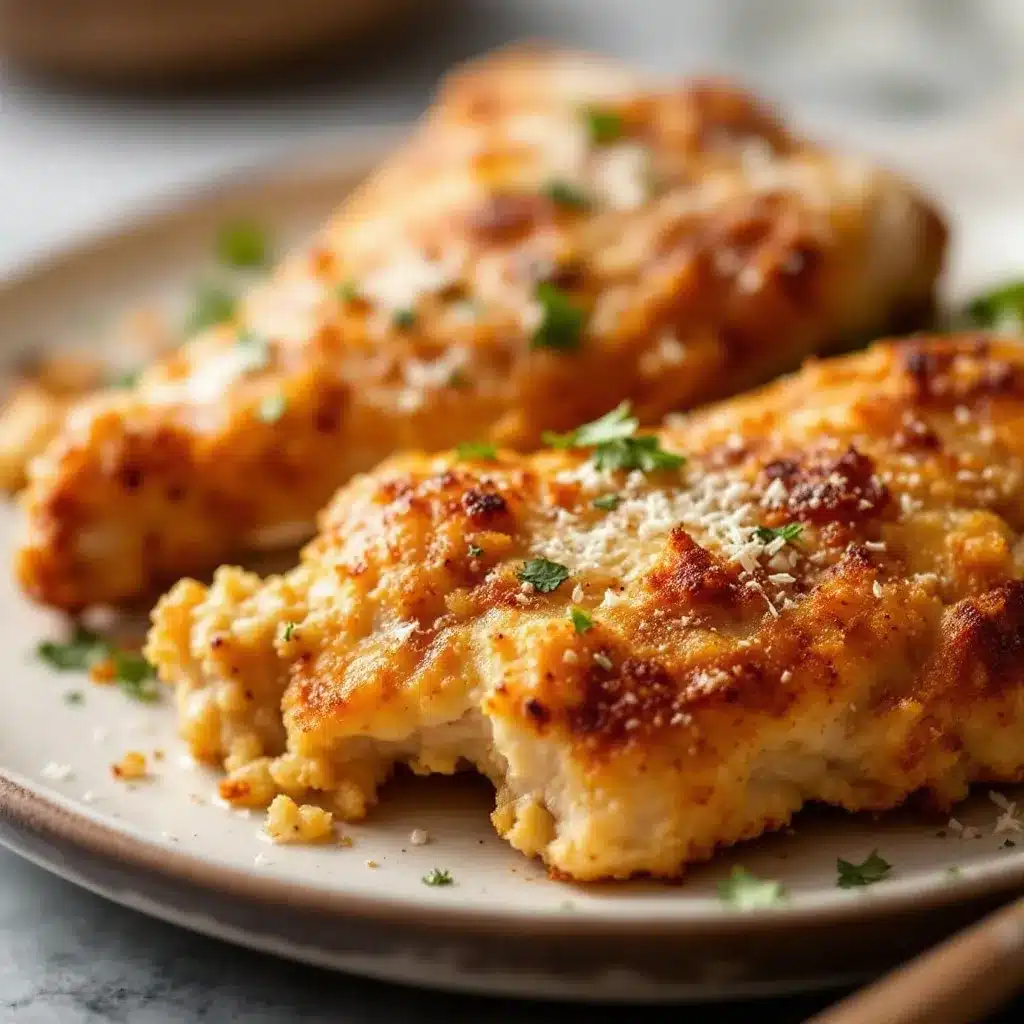
Follow these steps closely, and you’ll have perfectly crispy garlic Parmesan chicken thighs every time. I’ve included visual and sensory cues so you know exactly what to look for at each stage.
- Preheat your air fryer to 400°F (200°C). Let it run for 3 to 5 minutes while you prep the chicken. A hot start helps the skin begin crisping immediately.
- Pat the chicken thighs completely dry with paper towels. This is the most important step. Press firmly and use fresh paper towels if needed. The skin should feel tacky, not wet. Any moisture left on the surface will create steam instead of crispiness. I usually go through three or four paper towels for a full batch.
- In a medium mixing bowl, combine the grated Parmesan, garlic powder, onion powder, paprika, Italian seasoning, salt, and black pepper. Whisk or stir with a fork until everything is evenly distributed. The mixture should look like a coarse, fragrant powder with visible flecks of herbs and cheese.
- Drizzle the olive oil over the dried chicken thighs and toss gently to coat. Use your hands or tongs to make sure every surface gets a thin, even layer of oil. The oil helps the seasoning adhere and promotes even browning.
- Add the seasoning mixture to the bowl and toss again, pressing the mixture gently onto the skin side of each thigh. You want a generous, even coating. Don’t be shy with it, the Parmesan will crisp up and form a delicious crust. Make sure the underside gets some seasoning too, even though it won’t be as heavily coated.
- Place the thighs in the air fryer basket skin-side down in a single layer. Leave a little space between each piece for air circulation. If they’re touching, they won’t crisp evenly. Depending on your air fryer size, you may need to cook in two batches. I can fit six thighs comfortably in my 5.8-quart Cosori.
- Cook at 400°F for 12 minutes. Don’t open the basket during this time. Let the heat do its work. You’ll start smelling the garlic and Parmesan as they toast.
- Carefully flip each thigh using tongs. The skin side should be golden brown and starting to look crispy. If it looks pale, give it another 2 minutes before flipping. Flip gently to avoid dislodging the crust.
- Cook for another 8 to 10 minutes, or until the internal temperature reaches 170°F. Insert the thermometer into the thickest part of the thigh without touching the bone (if bone-in). The skin should be deep golden brown, shatter-crisp, and slightly puffed in places. The edges will be darker and extra crunchy.
- Remove the thighs from the air fryer and let them rest on a wire rack or plate for 5 minutes. This allows the juices to redistribute and the crust to set. Don’t skip this step, cutting into them immediately will release steam and soften the skin.
- Garnish with fresh chopped parsley if desired, and serve hot. The parsley adds a bright, fresh note that balances the richness of the chicken and Parmesan.
One thing I learned the hard way: don’t crowd the basket. I tried cooking eight thighs at once in a smaller air fryer, and the result was soggy skin and uneven cooking. It’s better to take the extra 15 minutes and cook in batches than to end up with disappointing chicken.
Cooking Tips & Techniques
After making this recipe more times than I can count, I’ve picked up a few things that make a real difference. Here are the tips I wish someone had told me earlier.
Dry the skin thoroughly. I cannot overstate this. The difference between a quick pat and really pressing the paper towels into the skin is night and day. Take the extra 30 seconds to get every bit of moisture off. I’ve forgotten to do this properly before, and the skin turned out chewy and pale. Never again.
Don’t skip the oil. Some recipes try to make air fryer chicken without any oil, and while it technically works, the texture suffers. A thin layer of olive oil helps the seasoning stick and encourages the Maillard reaction that creates that deep golden-brown color. You don’t need much, just enough to coat the surface lightly.
Let the air fryer preheat fully. I know it’s tempting to just throw the chicken in and start cooking, but that initial blast of heat is what sets the crust. A preheated air fryer makes a noticeable difference in the first few minutes of cooking.
Flip halfway through, but not too early. I used to flip at the 8-minute mark, and the skin wasn’t set enough, so it stuck to the basket. Now I wait the full 12 minutes before the first flip, and the crust holds together much better. The skin should look visibly browned and slightly puffed before you turn it.
Use an instant-read thermometer. Chicken thighs are forgiving, but they’re best at 170°F. At 165°F, they’re safe to eat, but the texture is a bit soft. At 175°F, they start drying out. 170°F is the sweet spot where the meat is juicy and the skin is perfectly crisp. I use a Thermapen, but any reliable instant-read thermometer works.
Let them rest. I know you’re hungry, and the kitchen smells amazing, but those 5 minutes of resting are non-negotiable. The carryover cooking finishes the chicken gently, and the crust stays crispy because the steam has a chance to escape slowly instead of all at once when you cut into it.
One mistake I made early on was using too much Parmesan. It sounds counterintuitive, but a thick layer of cheese can actually burn before the chicken is fully cooked. Stick to the measured amount, and grate it finely so it melts and crisps evenly rather than clumping.
Variations & Adaptations
This recipe is flexible enough to accommodate different tastes and dietary needs without losing its soul. Here are some variations I’ve tried and loved.
Spicy Buffalo Version: Add 1 tablespoon of Buffalo wing sauce to the oil before coating the chicken, and mix 1/2 teaspoon of cayenne pepper into the seasoning blend. The result is a spicy, tangy twist that’s perfect if you like heat. I serve this with ranch or blue cheese dressing on the side for dipping. It’s become my go-to game day dinner, especially alongside the ultimate loaded buffalo chicken dip for a full spicy spread.
Lemon Herb Variation: Add the zest of one lemon to the seasoning mixture and replace the Italian seasoning with 1 teaspoon of dried thyme and 1 teaspoon of dried rosemary. The bright citrus cuts through the richness of the chicken and Parmesan beautifully. I like to squeeze a little fresh lemon juice over the finished thighs right before serving.
Keto/Low-Carb Adaptation: This recipe is already keto-friendly as written, since it uses Parmesan instead of breadcrumbs. For an even lower-carb option, you can increase the Parmesan to 1/2 cup and add 2 tablespoons of almond flour to the coating. The almond flour helps the crust get even crispier without adding carbs. I’ve tested this version several times, and it’s indistinguishable from the original.
Dairy-Free Option: Substitute the Parmesan with 1/3 cup of nutritional yeast and 2 tablespoons of almond flour. Nutritional yeast has a cheesy, nutty flavor that mimics Parmesan surprisingly well. The texture won’t be exactly the same, but the flavor is still fantastic. I’ve served this to dairy-sensitive guests who didn’t notice the swap.
Oven-Baked Method: If you don’t have an air fryer, place the seasoned thighs on a wire rack set over a baking sheet and bake at 425°F for 25 to 30 minutes, flipping halfway through. The wire rack is important because it allows hot air to circulate underneath the chicken, preventing the bottom from getting soggy. I’ve done this when my air fryer was too small to cook a full batch, and it worked beautifully.
For a fun twist, try making these into crispy chicken sliders. Shred the cooked thighs, pile them onto soft brioche buns with a little coleslaw, and serve. It’s a completely different meal from the same base recipe, and it’s always a hit.
Serving & Storage Suggestions
These chicken thighs are best served hot and fresh, right out of the air fryer, when the skin is at its crispiest. But they’re versatile enough to work in a variety of serving scenarios.
Serving Temperature and Presentation: Serve the thighs hot, arranged on a platter with a sprinkle of fresh parsley and a few lemon wedges on the side. The bright green and yellow contrast nicely with the golden-brown chicken. For a complete meal, pair them with a simple side salad, roasted vegetables, or a grain like quinoa or rice. I often serve these alongside easy one-pan lemon garlic shrimp and zucchini skillet for surf and turf that comes together in about 30 minutes.
Complementary Dishes and Beverages: Garlic Parmesan chicken pairs well with light, crisp sides like a Caesar salad, steamed broccoli, or roasted asparagus. For starch, try garlic mashed potatoes, buttered egg noodles, or crusty bread to soak up any juices. A crisp white wine like Sauvignon Blanc or a light lager complements the garlic and Parmesan without overwhelming them.
Storage Instructions: Store leftover chicken thighs in an airtight container in the refrigerator for up to 4 days. The skin will soften as it sits, but the flavor remains delicious. To reheat, place them back in the air fryer at 375°F for 3 to 4 minutes, or until heated through and the skin re-crisps. The microwave works in a pinch, but the skin will be soft.
Freezing Instructions: These thighs freeze well for up to 3 months. Let them cool completely, then wrap each thigh individually in plastic wrap and place them in a freezer-safe bag or container. To reheat, thaw overnight in the refrigerator, then reheat in the air fryer at 375°F for 5 to 6 minutes. The texture won’t be quite as good as fresh, but it’s still miles better than most frozen meals.
How Flavors Develop Over Time: Interestingly, the garlic and Parmesan flavors meld and deepen after a day in the refrigerator. I’ve found that leftovers, when reheated properly, taste even more savory and complex than the freshly cooked version. The crust softens, but the flavor trade-off is worth it. I sometimes intentionally make extra just for next-day lunch.
Nutritional Information & Benefits
Here’s an approximate nutritional breakdown per serving (based on 4 servings, using boneless skin-on chicken thighs and the full seasoning mixture):
- Calories: 380
- Protein: 32g
- Fat: 26g
- Saturated Fat: 8g
- Carbohydrates: 3g
- Fiber: 0.5g
- Sugar: 0.5g
- Sodium: 520mg
Chicken thighs are an excellent source of high-quality protein, which supports muscle repair and keeps you feeling full and satisfied. They also provide important B vitamins, including niacin and B6, which play a role in energy metabolism and brain function. The skin contains healthy fats that help your body absorb fat-soluble vitamins like A, D, E, and K.
Parmesan cheese adds calcium and protein, while garlic powder offers allicin, a compound known for its potential immune-supporting properties. This recipe is naturally gluten-free and low-carb, making it suitable for a variety of dietary preferences. It’s also nut-free and egg-free, though it does contain dairy from the Parmesan.
From a wellness perspective, this recipe fits nicely into a balanced diet. It’s satisfying enough to keep you from reaching for snacks an hour later, and the protein-to-fat ratio is reasonable for most eating plans. I personally appreciate that I can serve it to my family without worrying about hidden additives or excessive sodium, since I control exactly what goes into the seasoning.
Conclusion
This crispy air fryer garlic Parmesan chicken thighs recipe has become a staple in my kitchen for good reason. It delivers on every promise: crispy skin, juicy meat, bold flavor, and minimal cleanup. It’s the kind of recipe that makes you feel like a confident cook, even on a busy Tuesday night when you’re juggling a dozen other things.
What I love most about this recipe is how adaptable it is. You can spice it up, keep it mild, serve it for a fancy dinner or a casual lunch, and it always works. It’s forgiving enough for beginners but satisfying enough for experienced home cooks who just want a reliable, delicious meal without the fuss.
I encourage you to make this recipe your own. Try the lemon herb variation, add a pinch of red pepper flakes for heat, or serve it over a big salad for a lighter meal. The base is solid, and the possibilities are endless. If you make it, I’d love to hear how it turned out. Drop a comment below, share your photos, or tag me in your posts. And if you’re looking for more quick dinner ideas, check out this easy garlic butter salmon in foil for another 20-minute meal that delivers big on flavor.
Happy cooking, and here’s to crispy chicken that actually stays crispy.
Frequently Asked Questions
Can I use chicken breasts instead of thighs?
Yes, but the cooking time will be different. Boneless skinless chicken breasts cook faster and can dry out more easily. Reduce the cooking time to 10 minutes per side at 400°F, and check the internal temperature at 165°F. The skin won’t be as crispy because chicken breast skin is thinner, but the seasoning will still taste great.
Why is my chicken skin not getting crispy?
The most common reasons are insufficient drying, overcrowding the basket, or not preheating the air fryer. Make sure you pat the skin completely dry with paper towels before adding any oil or seasoning. Leave space between each thigh in the basket, and always preheat the air fryer for at least 3 minutes before adding the chicken.
Can I make this recipe ahead of time for meal prep?
Absolutely. Cook the thighs as directed, let them cool completely, and store them in an airtight container in the refrigerator for up to 4 days. Reheat in the air fryer at 375°F for 3 to 4 minutes to bring back the crispiness. They also freeze well for up to 3 months.
What can I use instead of Parmesan cheese?
For a dairy-free option, use nutritional yeast combined with a little almond flour. For a different flavor, try Pecorino Romano, which is saltier and sharper, or Asiago, which has a nutty, buttery taste. Each will change the final flavor slightly, but all work well in this recipe.
How do I prevent the Parmesan from burning in the air fryer?
Use finely grated Parmesan, not coarsely shredded, and don’t pile it on too thickly. The cooking temperature of 400°F is high, but the 12-minute first cook time is short enough that the cheese browns without burning. If you notice the edges darkening too quickly, reduce the temperature to 375°F and add a few extra minutes of cooking time.
Pin This Recipe!
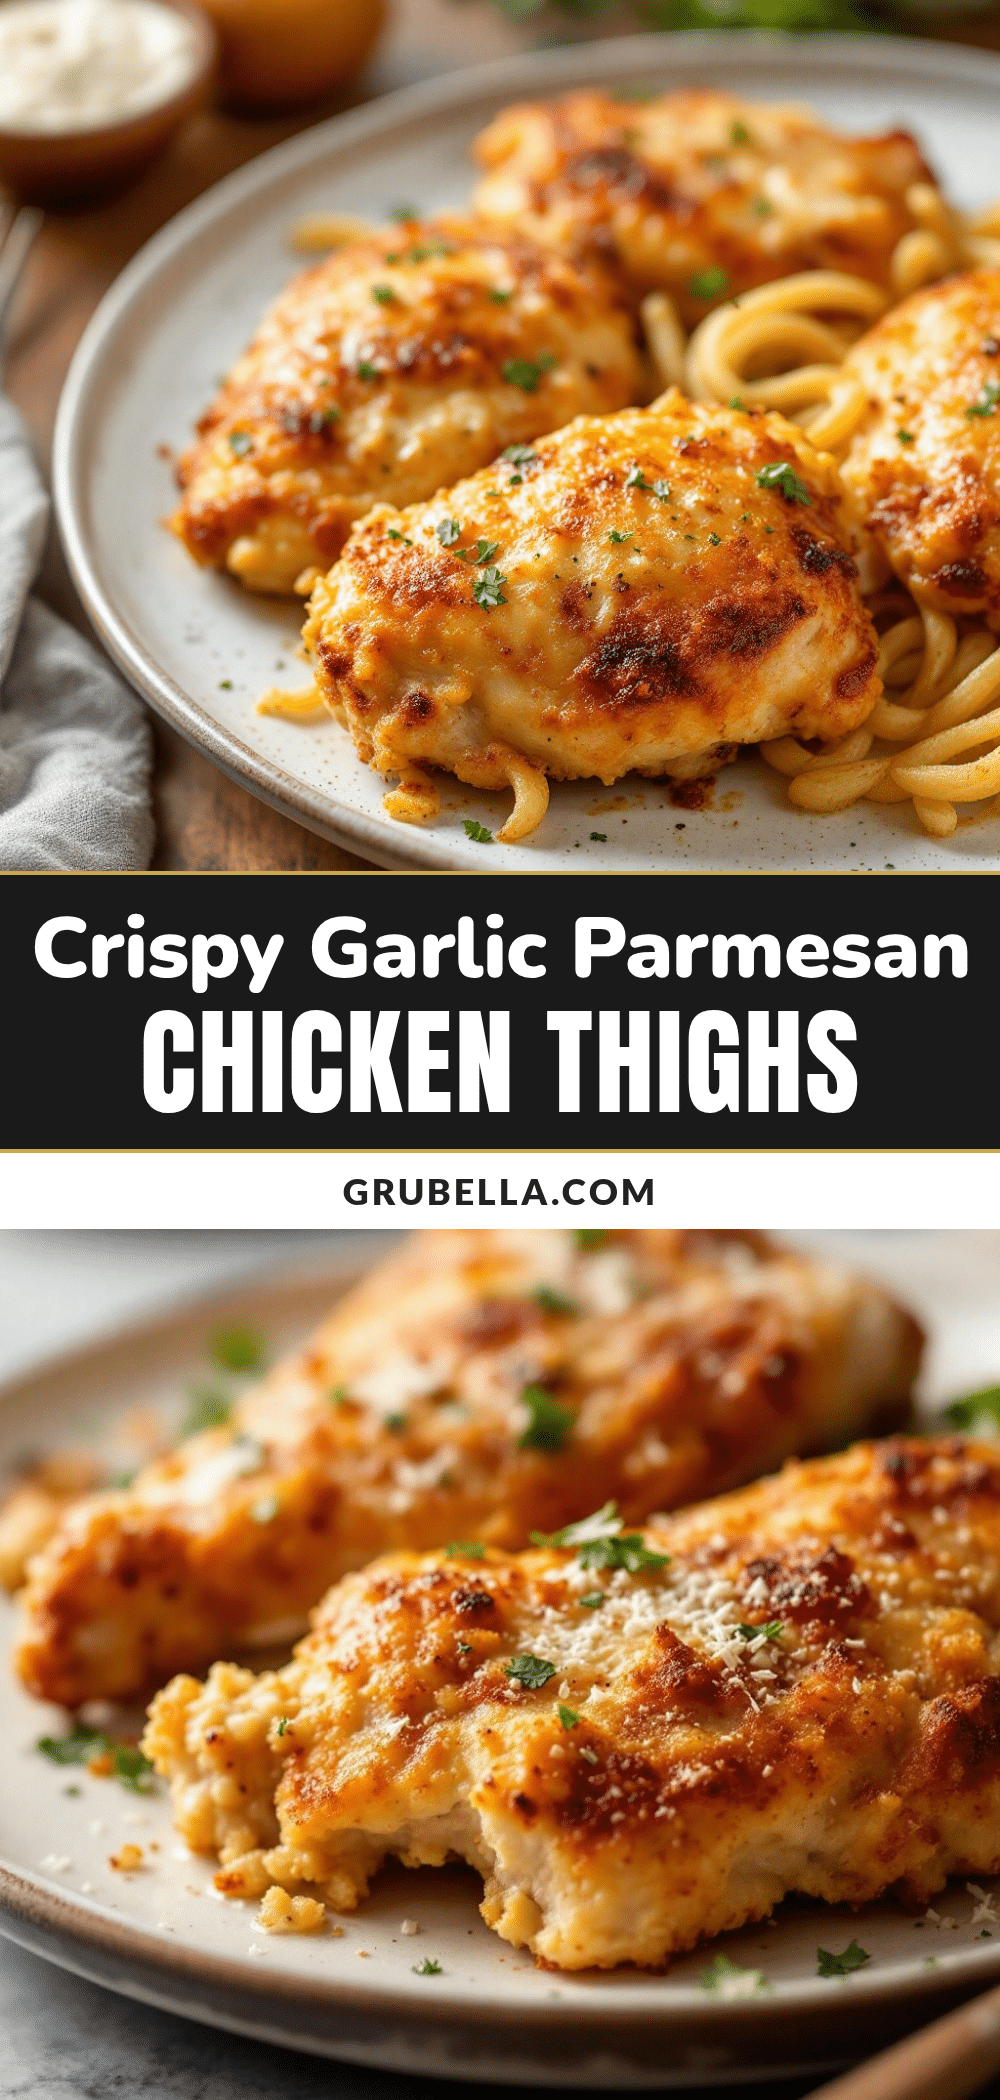
Crispy Air Fryer Garlic Parmesan Chicken Thighs (Easy Recipe)

This recipe delivers perfectly crispy, juicy chicken thighs with a flavorful garlic-Parmesan crust, all made in the air fryer in about 30 minutes. It’s a quick, easy, and crowd-pleasing weeknight dinner that requires simple ingredients and minimal cleanup.
- Prep Time: 10 minutes
- Cook Time: 20 minutes
- Total Time: 30 minutes
- Yield: 4 servings 1x
- Category: Main Course
- Cuisine: American
Ingredients
- 1.5 pounds boneless, skin-on chicken thighs (4 to 6 thighs)
- 1/3 cup finely grated Parmesan cheese (freshly grated from a block)
- 1 teaspoon garlic powder
- 1/2 teaspoon onion powder
- 1 teaspoon paprika (sweet or smoked)
- 1 teaspoon dried Italian seasoning (or 1/2 teaspoon dried oregano + 1/2 teaspoon dried basil)
- 1/2 teaspoon fine sea salt (or to taste)
- 1/4 teaspoon freshly ground black pepper
- 1 tablespoon olive oil (or avocado oil)
- Fresh parsley for garnish (optional)
Instructions
- Preheat your air fryer to 400°F (200°C) for 3 to 5 minutes.
- Pat the chicken thighs completely dry with paper towels. Press firmly to remove all moisture.
- In a medium mixing bowl, combine the grated Parmesan, garlic powder, onion powder, paprika, Italian seasoning, salt, and black pepper. Stir until evenly distributed.
- Drizzle the olive oil over the dried chicken thighs and toss gently to coat every surface with a thin layer of oil.
- Add the seasoning mixture to the bowl and toss again, pressing the mixture gently onto the skin side of each thigh. Ensure the underside gets some seasoning too.
- Place the thighs in the air fryer basket skin-side down in a single layer, leaving space between each piece for air circulation. Cook in batches if necessary.
- Cook at 400°F for 12 minutes. Do not open the basket during this time.
- Carefully flip each thigh using tongs. The skin side should be golden brown and starting to look crispy.
- Cook for another 8 to 10 minutes, or until the internal temperature reaches 170°F (77°C) when inserted into the thickest part of the thigh.
- Remove the thighs from the air fryer and let them rest on a wire rack or plate for 5 minutes.
- Garnish with fresh chopped parsley if desired, and serve hot.
Notes
Dry the skin thoroughly for maximum crispiness. Do not overcrowd the air fryer basket; cook in batches if needed. Let the chicken rest for 5 minutes after cooking to keep the skin crispy. For oven adaptation, bake at 425°F on a wire rack over a baking sheet for 25-30 minutes, flipping halfway.
Nutrition
- Serving Size: 1 serving (about 1-2
- Calories: 380
- Sugar: 0.5
- Sodium: 520
- Fat: 26
- Saturated Fat: 8
- Carbohydrates: 3
- Fiber: 0.5
- Protein: 32
Keywords: air fryer chicken thighs, crispy chicken thighs, garlic parmesan chicken, easy chicken recipe, weeknight dinner, keto chicken, gluten-free chicken



