Love this? Save it for later!
Share the inspiration with your friends
Third time in as many weeks and I finally stopped burning the brown butter. That first batch, honestly, I stood there watching it foam and thought, “this is fine,” until the kitchen smelled less like toasted nuts and more like regret. The acorn squash itself? That part I had down from the start—scoop out the seeds, roast it face-down until the flesh is so soft it practically melts when you look at it. But the brown butter was my white whale. Too dark one time, not dark enough the next, and once I just gave up and poured regular melted butter over everything—which was fine, but fine isn’t what this soup deserves.
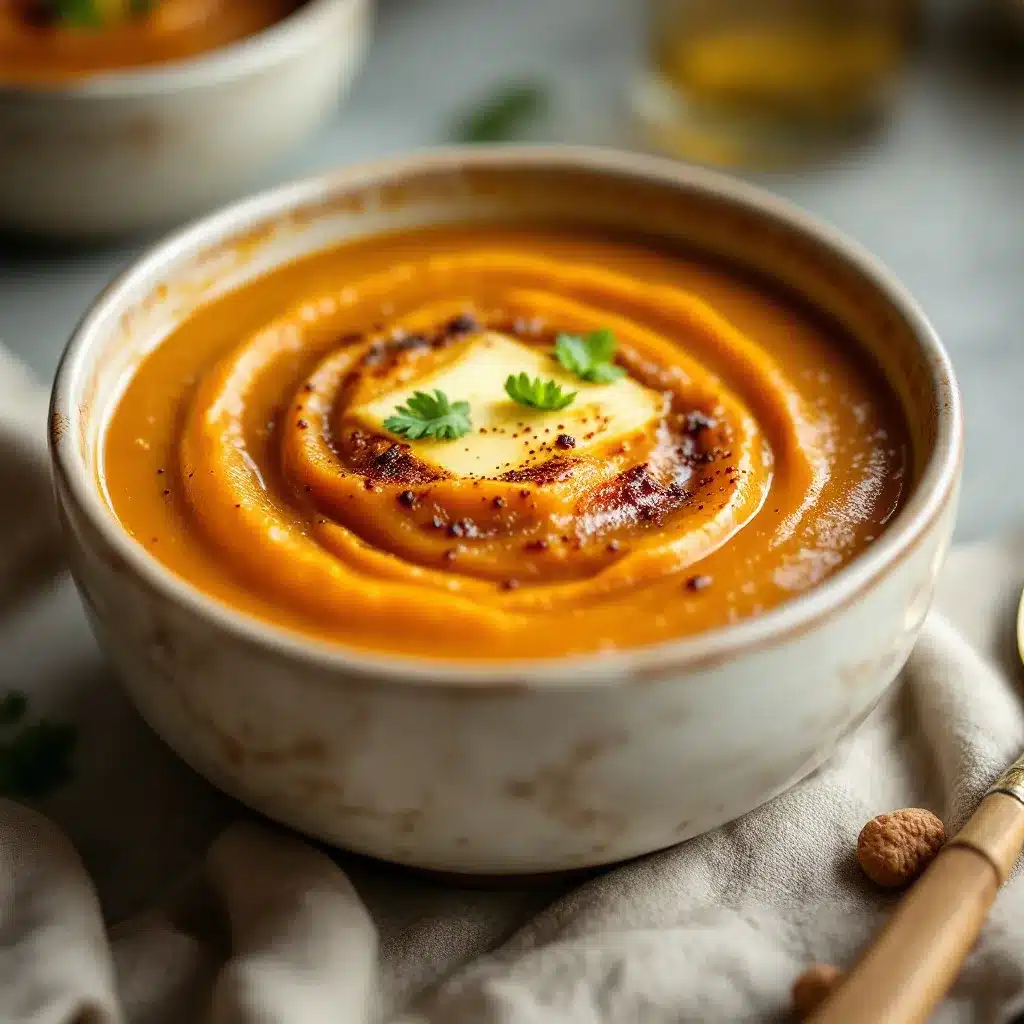
What kept me coming back wasn’t stubbornness, though there was plenty of that. It was that moment, around the fourth batch, when the butter turned exactly the shade of amber I’d been chasing and the smell hit me—nutty, almost caramel-like, with this warmth that made the whole kitchen feel like a hug. I poured it into the blender with the roasted squash, some broth, and a splash of cream, and when I hit that button and watched everything swirl together into this velvety, golden-orange soup, I actually said “finally” out loud. To no one. Just me and the blender.
There’s something about getting a recipe right that feels less like a win and more like a secret you’ve been let in on. This creamy roasted acorn squash soup with brown butter is that secret. It’s the kind of soup that makes you slow down, that turns a regular Tuesday into something worth remembering. And honestly, after three tries, I think I’ve finally earned it.
Why You’ll Love This Recipe
I’ve tested this soup more times than I care to admit, and each batch taught me something new. Here’s why this version is the one you’ll want to make again and again:
- Simple Ingredients, Big Flavor — You don’t need a specialty grocery store for this. Acorn squash, butter, broth, cream, and a few pantry spices. That’s it. No weird ingredients you’ll use once and forget about.
- Naturally Creamy Without Heavy Cream — The roasted squash blends into the silkiest texture all on its own. A little cream at the end is nice, but honestly, you could skip it and still have a luxurious soup. I’ve done it. It works.
- Perfect for Fall Gatherings — This soup is made for cozy dinners, Thanksgiving starters, or those nights when you just want something warm and comforting. It pairs beautifully with a crusty loaf of bread or a simple side salad.
- Make-Ahead Friendly — The flavors actually get better after a day in the fridge. Make it on Sunday, and you’ve got lunch or dinner sorted for the week. It also freezes beautifully.
- Crowd-Pleaser Across the Board — I’ve served this to kids who “don’t like soup” and adults who’ve had fancy restaurant versions. Both groups went back for seconds. The brown butter is the secret weapon here—it adds a nutty depth that makes everyone ask, “What’s in this?”
This isn’t just another squash soup recipe. It’s the one where the technique matters—roasting the squash until it’s caramelized, browning the butter until it’s just right, and blending everything until it’s silky smooth. It’s the kind of soup that feels special without being fussy, and that’s exactly what I was aiming for.
What Ingredients You Will Need
This recipe relies on simple, wholesome ingredients that work together to create something greater than the sum of their parts. Most of these are pantry staples, and the ones that aren’t are easy to find at any grocery store.
- Acorn squash (2 medium, about 2 pounds each) — Look for squash that feels heavy for its size with firm, unblemished skin. The ridges are normal, but avoid any with soft spots. You’ll cut these in half, scoop out the seeds, and roast them until tender. (For a slightly sweeter flavor, you can swap in butternut squash, but acorn squash has a more delicate, nutty taste that I prefer here.)
- Unsalted butter (4 tablespoons, plus more for serving) — This is the star of the show, so use good quality butter. I recommend Kerrygold or Plugrà for their higher butterfat content, which browns more evenly and gives a richer flavor. You’ll brown this until it’s amber and smells like toasted hazelnuts.
- Yellow onion (1 medium, diced) — Adds a savory base that balances the sweetness of the roasted squash. Dice it small so it cooks down evenly.
- Garlic cloves (3, minced) — Fresh garlic is non-negotiable here. Pre-minced stuff from a jar won’t give you the same aromatic depth.
- Vegetable or chicken broth (4 cups) — Use a good quality broth since it’s a major component of the soup. I prefer low-sodium so I can control the salt level. Homemade broth is amazing here if you have it, but store-bought works great.
- Heavy cream or coconut cream (½ cup) — Adds richness, but it’s optional. The soup is already creamy from the roasted squash. For a dairy-free version, full-fat coconut cream works beautifully and adds a subtle sweetness.
- Maple syrup (1 tablespoon) — Just a touch to enhance the natural sweetness of the roasted squash. Use real maple syrup, not pancake syrup. Trust me on this.
- Ground cinnamon (½ teaspoon) — Warm spice that complements the squash without overpowering it.
- Ground nutmeg (¼ teaspoon, freshly grated if possible) — A little goes a long way. Freshly grated nutmeg is worth the extra effort—it has a floral, aromatic quality that pre-ground stuff just can’t match.
- Salt and black pepper (to taste) — I use fine sea salt for cooking and finish with flaky sea salt for serving. Freshly cracked black pepper adds a subtle warmth.
- Optional toppings — Toasted pumpkin seeds, a drizzle of brown butter, fresh thyme or sage leaves, and a swirl of cream. These aren’t just for looks—they add texture and flavor that make each spoonful interesting.
Equipment Needed
Nothing fancy here, which is one of the things I love about this recipe. Here’s what you’ll need:
- Baking sheet — A rimmed baking sheet works best to catch any caramelized juices from the squash. Line it with parchment paper for easier cleanup.
- Large, sharp chef’s knife — Acorn squash is tough to cut through. A sharp knife makes the job safer and easier. I use my Wüsthof 8-inch chef’s knife for this.
- Large soup pot or Dutch oven — I use my 5.5-quart Le Creuset Dutch oven, but any heavy-bottomed pot will work. The heavy bottom helps prevent the onions from burning.
- Immersion blender or regular blender — An immersion blender lets you blend the soup right in the pot, which means less cleanup. If using a regular blender, work in batches and be careful with the hot liquid—only fill the blender halfway and remove the center cap to let steam escape.
- Small saucepan — For browning the butter. A light-colored pan helps you see the color change more easily.
- Measuring cups and spoons — For accuracy, especially with the spices and maple syrup.
If you don’t have an immersion blender, no worries. A regular blender works just as well—just be patient and blend in batches. I’ve also made this soup using a food processor in a pinch, though the texture isn’t quite as smooth.
Preparation Method
Let me walk you through this step by step. I’ve included all the little details I wish someone had told me the first time I made this.
Step 1: Roast the Acorn Squash
Preheat your oven to 400°F (200°C). Carefully cut each acorn squash in half from stem to root end. Scoop out the seeds and stringy bits with a spoon—save the seeds if you want to toast them later, they make a great garnish. Brush the cut sides with a little olive oil and season with salt and pepper. Place the squash halves cut-side down on a parchment-lined baking sheet. Roast for 35-45 minutes, until the flesh is fork-tender and the edges are starting to caramelize. Let them cool until you can handle them, then scoop out the flesh. You should have about 3 to 4 cups of roasted squash.
Step 2: Brown the Butter
While the squash roasts, make the brown butter. Cut 4 tablespoons of unsalted butter into pieces and add them to a small, light-colored saucepan. Melt the butter over medium heat, swirling the pan occasionally. The butter will foam up, then subside. Watch carefully—once the foam clears, you’ll see golden-brown specks forming at the bottom. The butter will smell nutty and toasty. This takes about 5-7 minutes. Remove it from the heat immediately and pour it into a heat-safe bowl to stop the cooking. Don’t walk away from this—brown butter goes from perfect to burnt very quickly. I learned this the hard way. Twice.
Step 3: Sauté the Aromatics
In your large soup pot, heat 1 tablespoon of olive oil over medium heat. Add the diced onion and cook, stirring occasionally, until softened and translucent, about 5-7 minutes. Add the minced garlic and cook for another minute until fragrant. Don’t let the garlic brown—it will turn bitter.
Step 4: Combine and Simmer
Add the roasted squash flesh to the pot along with 4 cups of broth. Stir in the maple syrup, cinnamon, nutmeg, and a generous pinch of salt and pepper. Bring everything to a gentle simmer, then reduce the heat to low and let it cook for 10 minutes. This allows the flavors to meld together.
Step 5: Blend Until Silky
Remove the pot from the heat. Using an immersion blender, blend the soup until it’s completely smooth. If you’re using a regular blender, work in batches—fill the blender no more than halfway, remove the center cap from the lid, and cover it with a kitchen towel to let steam escape. Blend until smooth, then transfer to a clean pot. Repeat with the remaining soup.
Step 6: Finish and Serve
Stir in the heavy cream or coconut cream and 3 tablespoons of the brown butter (reserve the rest for drizzling). Taste and adjust the seasoning—you might want more salt, a pinch more cinnamon, or an extra drizzle of maple syrup. Ladle the soup into bowls, drizzle with the remaining brown butter, and add your toppings. I love a sprinkle of toasted pumpkin seeds and a few fresh thyme leaves.
Cooking Tips & Techniques
After making this soup more times than I can count, here are the things I wish I’d known from the start:
Don’t rush the roasting. The caramelization on the squash is where the deep, sweet flavor comes from. If you pull it out of the oven too early, the soup will taste flat. You want the flesh to be so soft that a fork slides through it with zero resistance. The edges should look a little brown and almost jammy.
Master the brown butter. Use a light-colored pan so you can actually see the color change. Swirl the pan constantly once the butter starts foaming. The moment you see golden-brown specks and smell that nutty aroma, pull it off the heat. Pour it into a separate bowl immediately—the residual heat from the pan can still burn it if you leave it sitting.
Season in layers. Add salt at every stage—when you roast the squash, when you sauté the onions, and at the end before serving. This builds depth of flavor that you can’t get from just seasoning at the end.
Blend safely. Hot soup expands when blended, and the steam can blow the lid off a regular blender. Always remove the center cap and cover with a towel. And never fill the blender more than halfway.
Adjust the consistency. If your soup is too thick after blending, add more broth or a splash of milk until it reaches your desired consistency. If it’s too thin, let it simmer uncovered for a few minutes to reduce and concentrate the flavors.
Variations & Adaptations
This recipe is wonderfully flexible. Here are some ways to make it your own:
Dairy-Free Version — Use coconut cream instead of heavy cream and a good quality vegan butter for browning. The coconut adds a subtle sweetness that works beautifully with the squash. I’ve made this for friends with dairy sensitivities and they couldn’t tell the difference.
Spicy Kick — Add a pinch of cayenne pepper or red pepper flakes along with the cinnamon and nutmeg. The heat cuts through the richness of the brown butter and adds a lovely warmth. Start with ⅛ teaspoon and adjust from there.
Herb-Infused — Add a few sprigs of fresh thyme or sage to the pot while the soup simmers, then remove them before blending. The herbal notes complement the nutty brown butter perfectly. I tried this on a whim one rainy Sunday and it’s been my go-to ever since.
Roasted Garlic Addition — Roast a whole head of garlic alongside the squash. Squeeze the soft, caramelized cloves into the pot before blending. It adds a mellow, sweet garlic flavor that takes the soup to another level.
Protein Boost — Stir in some cooked white beans or a scoop of unflavored protein powder before blending. The beans make the soup even creamier without changing the flavor. I’ve done this for post-workout lunches and it’s surprisingly good.
Different Squash — No acorn squash? Use butternut, kabocha, or even sugar pumpkin. The cooking time might vary slightly, but the technique is the same. Each squash brings its own unique sweetness and texture.
Serving & Storage Suggestions
How to Serve
This soup is best served hot, with a generous drizzle of brown butter on top and your choice of garnishes. I love a sprinkle of toasted pumpkin seeds for crunch, a few fresh thyme or sage leaves for color, and an extra swirl of cream. Serve it with crusty bread, a simple green salad, or even a grilled cheese sandwich for a complete meal. It also makes an elegant starter for Thanksgiving or any fall dinner party.
Storage Instructions
Store leftover soup in an airtight container in the refrigerator for up to 5 days. The flavors actually deepen and improve after a day or two. Reheat gently on the stovetop over medium-low heat, stirring occasionally. You can also reheat individual portions in the microwave—just cover the bowl and heat in 30-second intervals, stirring between each.
Freezing Instructions
This soup freezes beautifully. Let it cool completely, then transfer to freezer-safe containers or zip-top bags. Leave about an inch of headspace for expansion. Freeze for up to 3 months. Thaw overnight in the refrigerator before reheating. The texture remains silky and smooth after freezing—I’ve tested this multiple times.
Make-Ahead Tips
You can roast the squash and brown the butter up to 2 days in advance. Store the squash in the refrigerator and the brown butter at room temperature. When you’re ready to make the soup, simply sauté the aromatics, add the squash and broth, and proceed with the recipe.
Nutritional Information & Benefits
This soup is as nourishing as it is delicious. Here’s a rough breakdown per serving (based on 6 servings):
- Calories: Approximately 280
- Fat: 18g (mostly from the butter and cream)
- Carbohydrates: 28g
- Fiber: 5g
- Protein: 4g
- Vitamin A: 180% of the Daily Value (from the squash)
- Vitamin C: 30% of the Daily Value
Acorn squash is packed with vitamins A and C, both of which support immune health—perfect for the colder months. It’s also a good source of fiber, which aids digestion and helps you feel full longer. The brown butter adds healthy fats that help your body absorb the fat-soluble vitamins in the squash. If you use coconut cream instead of heavy cream, you’ll also get a dose of medium-chain triglycerides (MCTs), which are known for their energy-boosting properties.
This soup is naturally gluten-free and can easily be made dairy-free and vegan. It’s also relatively low in sugar, with most of the sweetness coming from the roasted squash and just a touch of maple syrup.
Conclusion
This creamy roasted acorn squash soup with brown butter is the kind of recipe that feels like a warm hug in a bowl. It’s simple enough for a weeknight dinner but impressive enough to serve at a holiday gathering. The nutty, amber-colored brown butter takes the humble acorn squash and turns it into something truly special—something that makes you close your eyes after the first spoonful.
I hope you make this soup and fall in love with it the way I did. Don’t be afraid to experiment with the toppings or adjust the spices to your taste. That’s the beauty of cooking—every batch is a chance to make it your own. If you try it, I’d love to hear how it turned out. Drop a comment below or tag me in your photos. And if you’re looking for more cozy fall recipes, be sure to check out my creamy pumpkin cheesecake swirl muffins or this cozy brown butter pumpkin sourdough bread for more seasonal inspiration.
Until next time, happy cooking—and don’t burn the butter.
Frequently Asked Questions
Can I use butternut squash instead of acorn squash?
Absolutely. Butternut squash is slightly sweeter and has a denser texture, but it works beautifully in this recipe. The roasting time might be a bit longer, so check for doneness with a fork. The flavor will be slightly different but just as delicious.
How do I know when the brown butter is done?
Watch for the butter to turn a golden-amber color and develop a nutty, toasty aroma. You’ll see small brown specks forming at the bottom of the pan. The whole process takes about 5-7 minutes over medium heat. Remove it from the heat immediately once you see those specks—it can go from perfect to burnt in seconds.
Can I make this soup vegan?
Yes! Use coconut cream instead of heavy cream and a vegan butter for browning. The coconut cream adds a subtle sweetness that pairs beautifully with the roasted squash. I’ve made this version for vegan friends and it was a hit.
How do I thicken the soup if it’s too thin?
Let it simmer uncovered for 10-15 minutes to reduce and concentrate the flavors. You can also blend in a cooked potato or some cooked white beans to add body without changing the flavor. If it’s still too thin, a cornstarch slurry (1 tablespoon cornstarch mixed with 2 tablespoons cold water) stirred in and simmered for a few minutes will do the trick.
Can I freeze this soup?
Yes, and it freezes beautifully. Let the soup cool completely, then transfer it to freezer-safe containers or zip-top bags. Leave about an inch of headspace for expansion. Freeze for up to 3 months. Thaw overnight in the refrigerator and reheat gently on the stovetop. The texture remains silky and smooth.
Pin This Recipe!

Creamy Roasted Acorn Squash Soup with Brown Butter

A velvety, golden-orange soup made with roasted acorn squash and nutty brown butter. Simple ingredients come together for a cozy, elegant dish perfect for fall gatherings or a comforting weeknight meal.
- Prep Time: 15 minutes
- Cook Time: 45 minutes
- Total Time: 1 hour
- Yield: 6 servings 1x
- Category: Soup
- Cuisine: American
Ingredients
- 2 medium acorn squash (about 2 pounds each)
- 4 tablespoons unsalted butter, plus more for serving
- 1 medium yellow onion, diced
- 3 garlic cloves, minced
- 4 cups vegetable or chicken broth (low-sodium preferred)
- ½ cup heavy cream or coconut cream
- 1 tablespoon maple syrup
- ½ teaspoon ground cinnamon
- ¼ teaspoon ground nutmeg (freshly grated if possible)
- Salt and black pepper to taste
- Optional toppings: toasted pumpkin seeds, fresh thyme or sage leaves, extra brown butter drizzle, cream swirl
Instructions
- Preheat oven to 400°F (200°C). Cut each acorn squash in half from stem to root end. Scoop out seeds and stringy bits. Brush cut sides with olive oil and season with salt and pepper. Place cut-side down on a parchment-lined baking sheet. Roast for 35-45 minutes until fork-tender and edges caramelize. Let cool, then scoop out flesh (about 3-4 cups).
- While squash roasts, make brown butter: Cut 4 tablespoons unsalted butter into pieces and add to a small light-colored saucepan. Melt over medium heat, swirling occasionally. Butter will foam, then subside. Watch for golden-brown specks and nutty aroma (about 5-7 minutes). Remove from heat immediately and pour into a heat-safe bowl.
- In a large soup pot, heat 1 tablespoon olive oil over medium heat. Add diced onion and cook until softened and translucent, about 5-7 minutes. Add minced garlic and cook 1 minute until fragrant (do not brown).
- Add roasted squash flesh, 4 cups broth, maple syrup, cinnamon, nutmeg, and a generous pinch of salt and pepper. Bring to a gentle simmer, then reduce heat to low and cook for 10 minutes.
- Remove pot from heat. Using an immersion blender, blend soup until completely smooth. If using a regular blender, work in batches: fill blender no more than halfway, remove center cap, cover with a towel, and blend until smooth. Transfer to a clean pot.
- Stir in heavy cream or coconut cream and 3 tablespoons of the brown butter (reserve rest for drizzling). Taste and adjust seasoning. Ladle into bowls, drizzle with remaining brown butter, and add desired toppings.
Notes
Don’t rush the roasting—caramelization is key for deep flavor. Use a light-colored pan for browning butter to see color change. Season in layers for best flavor. For dairy-free, use coconut cream and vegan butter. Soup can be made ahead and freezes well. Adjust consistency with extra broth if too thick, or simmer to reduce if too thin.
Nutrition
- Serving Size: 1 bowl (about 1.5 cu
- Calories: 280
- Sugar: 8
- Sodium: 480
- Fat: 18
- Saturated Fat: 10
- Carbohydrates: 28
- Fiber: 5
- Protein: 4
Keywords: acorn squash soup, brown butter, fall soup, creamy soup, roasted squash, vegetarian soup, gluten-free soup



