Love this? Save it for later!
Share the inspiration with your friends
Introduction
“I wasn’t planning on making pudding that afternoon,” I admit, laughing as I recall the scene. It was one of those slow Sunday afternoons back in early spring, the kind where the rain taps softly on the kitchen window, and you’re just craving something warm and comforting. I was rummaging through my pantry when I stumbled on a dusty, half-forgotten vanilla bean pod tucked between the flour and sugar. Honestly, I hadn’t used one in ages, and I wondered if I could whip up something simple yet satisfying.
The idea of a creamy vanilla pudding bubbled up, but I didn’t want the usual boxed stuff—no sir. I wanted homemade, easy, and indulgently smooth. You know that feeling when you realize you’re missing half the ingredients? Yep, that happened. No cornstarch, no fancy stabilizers—just the basics. So, I improvised. The first batch was a bit lumpy (don’t ask about the mess on my stove!), but by the third attempt, I nailed the texture—silky, rich, and perfectly vanilla-kissed. It’s my go-to now when I want a no-fuss dessert that feels a little like a hug in a bowl.
Maybe you’ve been there—searching for that simple, homemade pudding recipe that’s both quick and tastes like it took hours. Well, this Creamy Easy Homemade Vanilla Pudding Recipe is exactly that. It’s the kind of dessert that sneaks up on you with nostalgia and comfort, yet it’s light and fresh enough to keep you coming back for more. Let me tell you, once you try making pudding this way, you might never go back to store-bought again!
Why You’ll Love This Recipe
After countless trials in my tiny kitchen, this vanilla pudding recipe has earned a permanent spot in my recipe box. Here’s why:
- Quick & Easy: Ready in just about 20 minutes, perfect for busy weeknights or last-minute dessert cravings.
- Simple Ingredients: No exotic or hard-to-find items—you likely already have all the staples in your pantry and fridge.
- Perfect for Any Occasion: Whether it’s a cozy night in or a casual dinner party, this pudding fits right in.
- Crowd-Pleaser: Kids love it, adults love it, and even picky eaters won’t say no.
- Unbelievably Delicious: The smooth, creamy texture combined with the warm vanilla aroma is pure comfort food magic.
This isn’t just another vanilla pudding recipe. What makes it stand out is the way the vanilla bean infuses every bite with a natural, aromatic warmth, and the gentle cooking method that gives it a luscious texture without any artificial thickening agents. I also blend the pudding just enough to keep it silky but still with a tiny bit of body—no weird plastic-y feel here.
Honestly, this pudding has become my little kitchen secret. It’s that dessert where you close your eyes after the first spoonful and smile, knowing you’ve made something truly delightful. Plus, it’s a fantastic base if you want to mix in fresh berries or a sprinkle of toasted coconut. You’ll see—it’s so versatile and forgiving that it quickly becomes a favorite.
What Ingredients You Will Need
This recipe relies on straightforward, wholesome ingredients that come together to create a smooth, flavorful pudding without fuss. Most of these are pantry staples or common fridge items, and you can easily swap some based on what you have.
- Whole milk (2 cups / 480 ml) – Provides richness; for a lighter option, use 2% milk.
- Heavy cream (1 cup / 240 ml) – Adds creaminess; you can substitute with half-and-half if needed.
- Granulated sugar (⅓ cup / 67 g) – Balances the vanilla’s natural flavor.
- Vanilla bean pod (1, split and scraped) – The star ingredient for authentic vanilla flavor. If unavailable, use 2 teaspoons pure vanilla extract.
- Egg yolks (4 large, room temperature) – For thickening and that luscious texture.
- All-purpose flour (3 tablespoons / 24 g) – Helps thicken the pudding smoothly; cornstarch can be a substitute (2 tablespoons).
- Salt (a pinch) – Enhances the sweetness and depth.
Ingredient tips: I prefer using organic whole milk and fresh eggs for the best flavor and texture. When selecting vanilla beans, look for plump, fragrant pods from Madagascar or Tahiti for the richest aroma. If you want to make it dairy-free, swap milk and cream with full-fat coconut milk, and use a gluten-free flour blend for thickening.
Equipment Needed
- Medium saucepan: For gently heating milk and cream without scorching.
- Mixing bowls: One for whisking egg yolks and sugar, preferably heatproof if you want to temper the eggs carefully.
- Whisk: Essential for smooth blending and preventing lumps.
- Fine mesh sieve: Optional but recommended to strain the pudding for an ultra-smooth finish.
- Measuring cups and spoons: For precise ingredient portions.
- Rubber spatula: For scraping and folding.
In my experience, a heavy-bottomed saucepan really helps avoid hotspots and burning. If you don’t have a whisk, a fork can do in a pinch, but whisking will give you a better texture. For straining, I sometimes skip it if I’m in a hurry, but it’s a game-changer for silky pudding. No fancy gadgets needed here—just simple tools that you probably already own.
Preparation Method
- Prepare the vanilla: Split the vanilla bean pod lengthwise with a sharp knife and scrape out the seeds. Set both seeds and pod aside. (5 minutes)
- Heat milk and cream: In a medium saucepan, combine whole milk, heavy cream, vanilla bean seeds, and pod. Warm over medium heat until just below boiling—small bubbles will appear at the edges. Remove from heat and let steep for 10 minutes to infuse the vanilla deeply. (15 minutes, including steeping)
- Mix egg yolks and sugar: While the milk is steeping, whisk together the egg yolks, granulated sugar, flour, and salt in a heatproof bowl until smooth and pale. This mixture is your pudding base. (5 minutes)
- Temper the eggs: Slowly pour about half a cup (120 ml) of the warm milk mixture into the egg yolks while whisking constantly. This warms the eggs gently to prevent scrambling. (3 minutes)
- Combine and cook: Pour the tempered egg mixture back into the saucepan with the rest of the milk. Return to medium heat and cook, whisking constantly, until the pudding thickens and coats the back of a spoon (about 170°F or 77°C). This usually takes 5-7 minutes. Be patient and keep stirring to avoid lumps or burning. (7 minutes)
- Strain the pudding: Remove the vanilla pod, then strain the pudding through a fine mesh sieve into a clean bowl for extra smoothness. (2 minutes)
- Cool and set: Cover the surface of the pudding with plastic wrap (to prevent a skin from forming) and refrigerate for at least 2 hours before serving. (2+ hours)
Pro tip: If you notice lumps forming during cooking, whisk vigorously or remove from heat briefly and stir to smooth them out. Also, stirring constantly is key—let me tell you, I learned that the hard way after one batch had a weird texture!
Cooking Tips & Techniques
Making pudding may seem straightforward, but a few tricks can make all the difference:
- Always temper your eggs: Pouring hot milk directly into eggs will cook them instantly, causing curdling. Slow, steady whisking while adding warm milk keeps the texture silky.
- Use a heavy-bottomed pan: This prevents hotspots that scorch the milk and can ruin the flavor.
- Don’t rush the thickening: Cooking pudding over medium heat while whisking ensures even thickening without lumps.
- Strain for smoothness: Skipping this step can leave tiny clumps or vanilla pod bits, so a fine sieve is your friend.
- Cover while cooling: Wrapping the pudding surface with plastic wrap avoids a skin forming, which nobody loves scraping off.
- Patience is key: Let the pudding chill fully—it thickens more as it cools, and the flavors meld beautifully.
Years ago, I tried rushing the cooling process once and ended up with a runny mess. Since then, I always set a timer and plan ahead. Also, whisking with a balloon whisk makes stirring easier and helps keep the pudding lump-free.
Variations & Adaptations
One of the best things about this vanilla pudding base is how easily it adapts to different tastes and occasions.
- Chocolate twist: Stir in ⅓ cup (30 g) of unsweetened cocoa powder with the flour to make a rich chocolate pudding.
- Dairy-free version: Replace milk and cream with full-fat coconut milk and use a gluten-free flour blend or cornstarch to thicken.
- Fruit-infused: Mix in mashed ripe bananas or pureed fresh berries after cooking for a fruity pudding variation.
- Spiced vanilla: Add a pinch of cinnamon or nutmeg while heating the milk for a cozy, autumnal flavor.
- Vegan adaptation: Use silken tofu blended with vanilla and maple syrup instead of eggs and dairy for a plant-based pudding.
Personally, I once added a splash of bourbon and a sprinkle of toasted pecans on top for a grown-up dessert that stole the show. It’s fun to experiment—you can make this pudding your own!
Serving & Storage Suggestions
This pudding is best served chilled, straight from the fridge, but you can let it sit at room temperature for 10 minutes if you prefer a creamier mouthfeel. For presentation, a simple dusting of cinnamon or a few fresh berries on top adds a lovely touch.
If you want to turn this into a more substantial dessert, try layering it with crushed cookies or granola for texture contrast. It pairs wonderfully with a cup of strong coffee or a light dessert wine.
Store pudding in an airtight container in the refrigerator for up to 3 days. If you need more time, it freezes well—just thaw it slowly in the fridge and whisk gently to restore creaminess before serving.
Flavors tend to deepen after a day, so sometimes I make it a day ahead for gatherings. Trust me, it’s worth the wait!
Nutritional Information & Benefits
Each serving (about ½ cup / 120 ml) provides approximately:
| Calories | 220 |
|---|---|
| Fat | 12 g |
| Carbohydrates | 25 g |
| Protein | 5 g |
| Sugar | 22 g |
This pudding offers a comforting dose of calcium and protein thanks to the milk and eggs. Using real vanilla bean provides antioxidants, and the recipe avoids preservatives and artificial thickeners common in store-bought versions.
If you’re watching carbs, consider swapping sugar for a natural sweetener like maple syrup or honey (adjust quantities), and use almond milk with a thickener for a lower-carb option. Just keep in mind that texture and flavor might vary.
Conclusion
This Creamy Easy Homemade Vanilla Pudding Recipe is more than just a dessert; it’s a little celebration of simple ingredients and patient cooking. I love how it feels like a warm, familiar embrace after a long day, yet it’s elegant enough to serve guests without fuss.
Feel free to tweak it—maybe you’ll add a personal touch that’ll become your signature. Honestly, I make this pudding at least once a month now, and every time it brings back that cozy Sunday afternoon feeling.
Give it a try and let me know how it goes! Don’t hesitate to share your variations or questions—I’m always excited to hear your pudding stories.
FAQs About Creamy Easy Homemade Vanilla Pudding
Can I make this pudding without eggs?
Yes! You can substitute eggs with cornstarch or arrowroot powder for thickening. Expect a slightly different texture, more like a custard, but still delicious.
How do I prevent a skin from forming on the pudding?
Press a piece of plastic wrap directly onto the surface of the pudding as soon as it cools. This keeps air from drying out the top and forming a skin.
Can I use vanilla extract instead of a vanilla bean?
Absolutely. Use 2 teaspoons of pure vanilla extract if you don’t have a vanilla bean. Add it after cooking to preserve its flavor.
Is it okay to use low-fat milk?
Sure, but the pudding will be less creamy. To compensate, you might add a bit more cream or reduce the milk slightly for a richer texture.
How long does homemade pudding keep in the fridge?
Stored in an airtight container, it should stay fresh for up to 3 days. Always check for any off smells or changes in texture before eating.
And if you ever want to try a dessert with a bit more crunch, this pudding pairs nicely with my crispy garlic chicken for a full meal experience or can be layered with fresh berry trifle for a fruity twist. It’s all about mixing comfort with creativity!
Pin This Recipe!
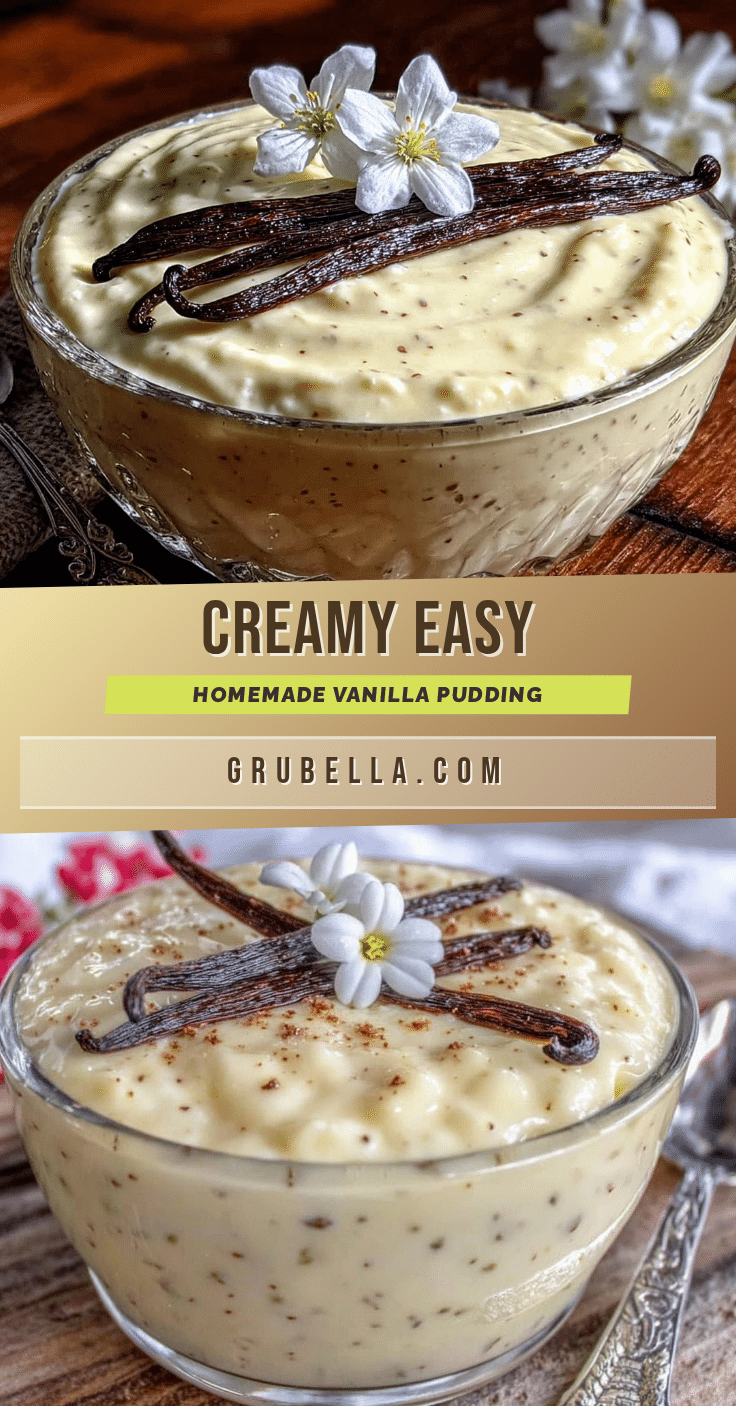
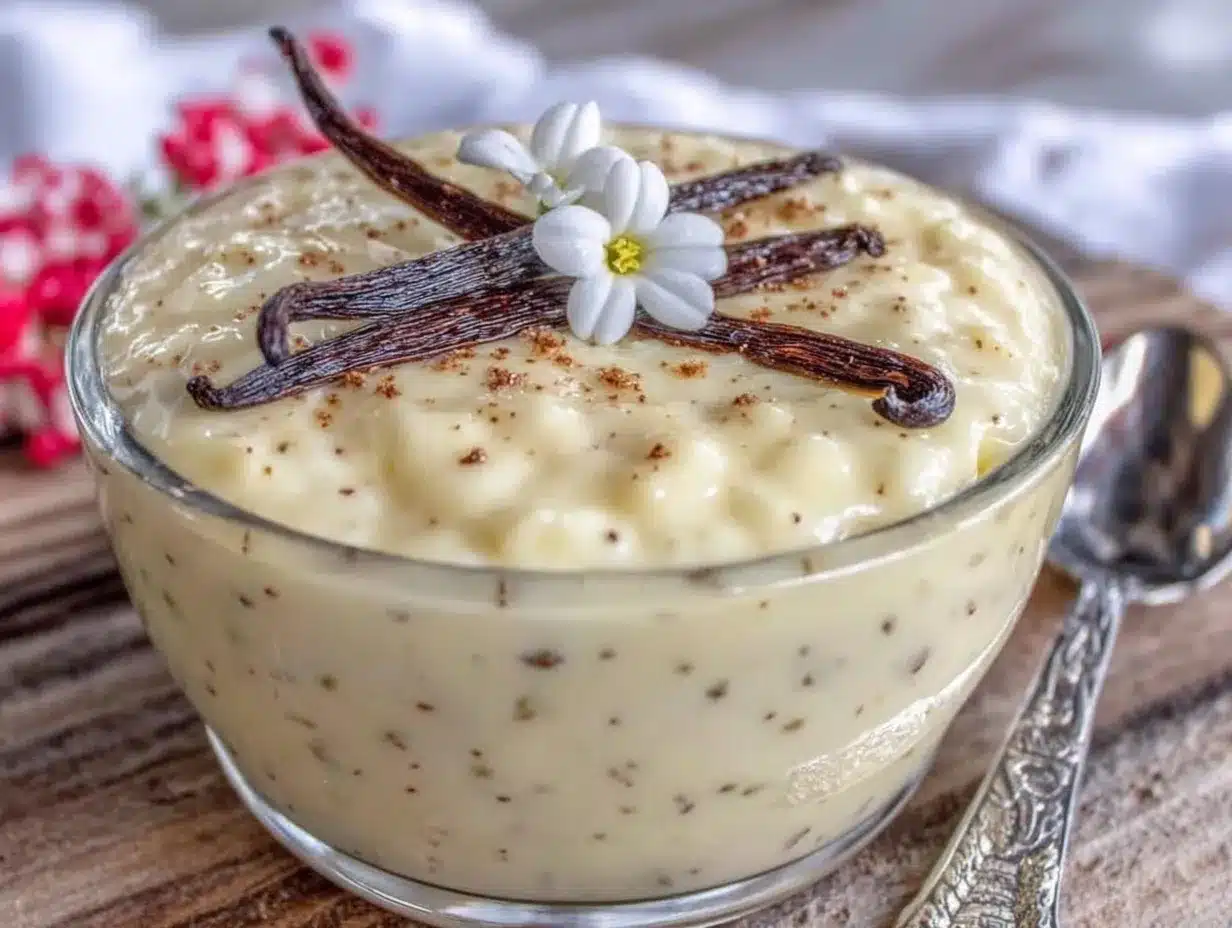
Creamy Easy Homemade Vanilla Pudding Recipe for Perfect Dessert Delight
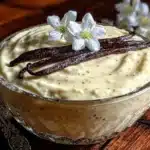
A quick and easy homemade vanilla pudding recipe that is silky, rich, and full of authentic vanilla flavor. Perfect for a comforting dessert that feels like a warm hug in a bowl.
- Prep Time: 15 minutes
- Cook Time: 15 minutes
- Total Time: 2 hours 30 minutes
- Yield: 4 servings 1x
- Category: Dessert
- Cuisine: American
Ingredients
- 2 cups whole milk (480 ml)
- 1 cup heavy cream (240 ml)
- ⅓ cup granulated sugar (67 g)
- 1 vanilla bean pod, split and scraped (or 2 teaspoons pure vanilla extract)
- 4 large egg yolks, room temperature
- 3 tablespoons all-purpose flour (24 g) (or 2 tablespoons cornstarch as substitute)
- A pinch of salt
Instructions
- Split the vanilla bean pod lengthwise with a sharp knife and scrape out the seeds. Set both seeds and pod aside. (5 minutes)
- In a medium saucepan, combine whole milk, heavy cream, vanilla bean seeds, and pod. Warm over medium heat until just below boiling—small bubbles will appear at the edges. Remove from heat and let steep for 10 minutes to infuse the vanilla deeply. (15 minutes, including steeping)
- While the milk is steeping, whisk together the egg yolks, granulated sugar, flour, and salt in a heatproof bowl until smooth and pale. This mixture is your pudding base. (5 minutes)
- Slowly pour about half a cup (120 ml) of the warm milk mixture into the egg yolks while whisking constantly to temper the eggs and prevent scrambling. (3 minutes)
- Pour the tempered egg mixture back into the saucepan with the rest of the milk. Return to medium heat and cook, whisking constantly, until the pudding thickens and coats the back of a spoon (about 170°F or 77°C). This usually takes 5-7 minutes. (7 minutes)
- Remove the vanilla pod, then strain the pudding through a fine mesh sieve into a clean bowl for extra smoothness. (2 minutes)
- Cover the surface of the pudding with plastic wrap to prevent a skin from forming and refrigerate for at least 2 hours before serving. (2+ hours)
Notes
Always temper your eggs slowly to prevent curdling. Use a heavy-bottomed pan to avoid hotspots and burning. Strain pudding for an ultra-smooth texture. Cover pudding surface with plastic wrap while cooling to prevent skin formation. Patience is key for thickening and flavor melding.
Nutrition
- Serving Size: About ½ cup (120 ml)
- Calories: 220
- Sugar: 22
- Fat: 12
- Carbohydrates: 25
- Protein: 5
Keywords: vanilla pudding, homemade pudding, easy dessert, creamy pudding, vanilla bean dessert, quick pudding recipe