Love this? Save it for later!
Share the inspiration with your friends
“Mom, can we make the rainbow cake again?” My daughter said this, and honestly, I froze for a second. She meant the boxed mix cake I’d thrown together for her third birthday, the one we’d smothered in store-bought frosting and enough sprinkles to make a baker cry. That cake was fine. But it wasn’t the one I wanted her to remember.
So I started testing. I wanted a classic vanilla birthday cake that actually tasted like vanilla — not just sugar and shortening. I wanted a crumb that was tender but sturdy enough to hold up to stacking. And I wanted buttercream that didn’t taste like a chemistry experiment. Something that felt special but didn’t require a pastry degree.
This recipe took about six tries to get right. The first batch was too dry. The second was too dense. The third had me questioning if I even knew how to bake. But somewhere around batch four, I stopped overthinking and started paying attention to what the batter was telling me. That’s when everything clicked.
This classic vanilla birthday cake with sprinkle buttercream is the one we make now for every birthday in our house. It’s the cake that gets requested by text from friends. It’s the one that makes people close their eyes after the first bite and just… pause. That’s the moment you’re aiming for.
Why You’ll Love This Recipe
Let’s be real for a second. There are about a million vanilla cake recipes out there. So why should you trust this one?
- Actually Moist (Not Dense or Dry) : This cake uses a combination of buttermilk and oil to create a tender crumb that stays soft for days. No dry, crumbly slices here.
- Simple Pantry Ingredients : You probably already have everything you need. No weird stabilizers or hard-to-find extracts.
- Perfect for Beginners and Pros : The method is straightforward enough for a first-time baker but produces results that look bakery-worthy.
- Customizable Sprinkles : The buttercream is a blank canvas. Use rainbow jimmies for a party vibe, seasonal colors for holidays, or skip them entirely for a sleek finish.
- Real Vanilla Flavor : We’re using both vanilla extract and vanilla bean paste (or a split vanilla bean) for that deep, floral, unmistakable vanilla taste.
- Sturdy Enough to Decorate : This cake holds up to stacking, carving, and heavy frosting. No sliding layers or crumb disasters.
I’ve tested this recipe on picky kids, professional bakers, and my neighbor who swears she doesn’t like cake. All of them asked for seconds. That’s not a brag — that’s just proof that sometimes the simplest things are the ones worth perfecting.
And honestly? The sprinkle buttercream is the real star here. It’s not just buttercream with sprinkles stirred in. The sprinkles add a subtle pop of texture and color that makes every slice feel like a celebration. It’s the kind of detail that makes people think you spent hours when really, you just knew the right tricks.
What Ingredients You Will Need
This recipe uses simple, everyday ingredients that work together to create something truly special. Each one plays a specific role in the texture and flavor, so here’s what to grab and why it matters.
For the Vanilla Cake
- All-Purpose Flour (2 ½ cups / 312g): Spoon and level your flour — don’t scoop directly from the bag. Packed flour will make the cake dense and dry.
- Granulated Sugar (1 ¾ cups / 350g): Standard white sugar gives the cake sweetness and helps create a tender crumb. Don’t reduce the sugar; it’s needed for structure too.
- Unsalted Butter (½ cup / 113g), softened: Use unsalted so you control the salt level. Let it sit at room temperature for about an hour before starting.
- Vegetable Oil (¼ cup / 60ml): This is my secret for a moist cake that stays soft for days. Butter gives flavor, oil gives moisture. You need both.
- Eggs (3 large), room temperature: Cold eggs can seize the butter and create a lumpy batter. Set them out with the butter or place them in warm water for 5 minutes.
- Egg Whites (2 large), room temperature: Extra whites add structure without extra fat, giving the cake a lighter crumb. Don’t skip these.
- Buttermilk (1 cup / 240ml), room temperature: The acidity tenderizes the gluten and reacts with the baking soda for lift. No buttermilk? Add 1 tablespoon lemon juice to regular milk and let it sit 5 minutes.
- Vanilla Extract (2 teaspoons): Pure vanilla extract, not imitation. The flavor difference is real.
- Vanilla Bean Paste (1 teaspoon, optional but amazing): Those little vanilla specks throughout the cake make it look and taste homemade in the best way.
- Baking Powder (2 ½ teaspoons): The main leavening agent. Make sure it’s fresh — test it by dropping a bit in hot water; it should bubble immediately.
- Baking Soda (½ teaspoon): Works with the buttermilk for extra lift.
- Salt (1 teaspoon): Balances the sweetness and enhances the vanilla flavor.
For the Sprinkle Buttercream
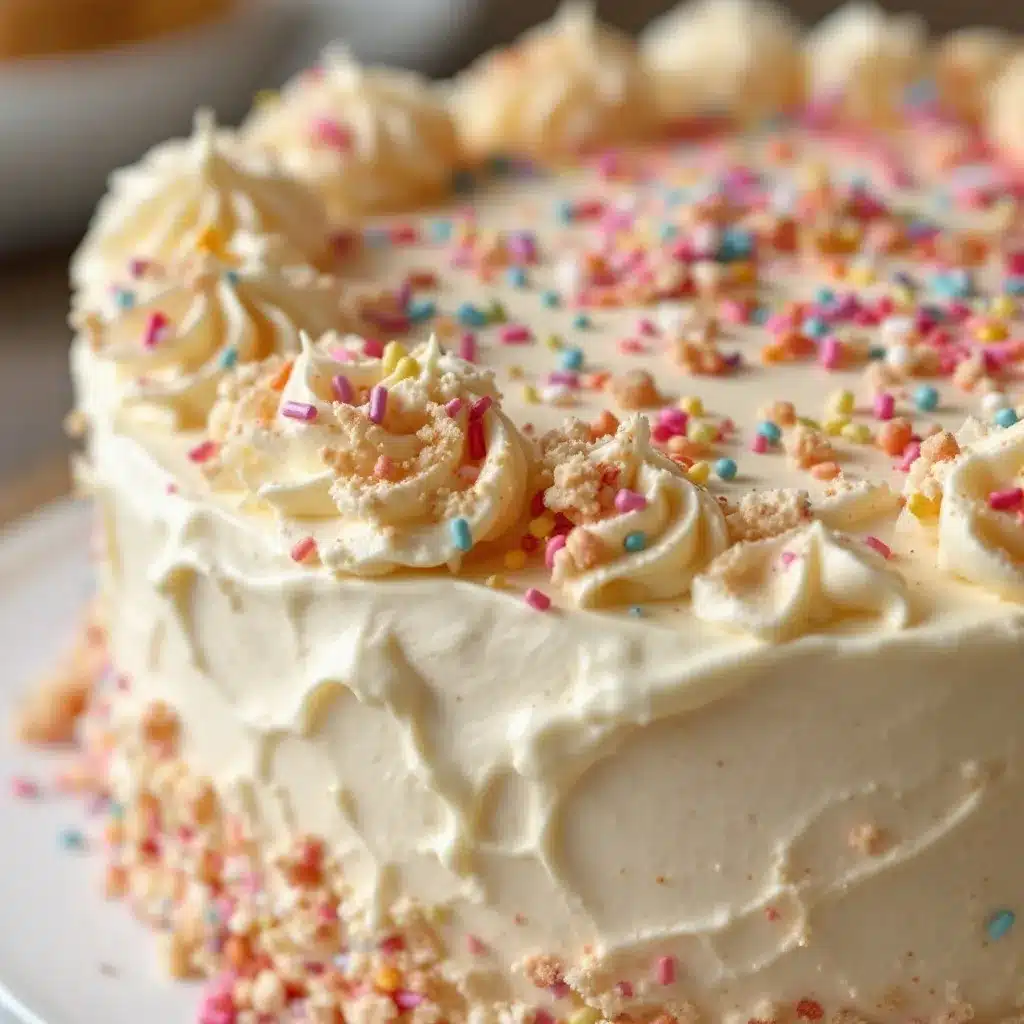
- Unsalted Butter (1 ½ cups / 339g), softened: The base of the frosting. Use good quality butter — it’s the main flavor here.
- Powdered Sugar (4 cups / 480g), sifted: Sifting removes lumps and gives you silky smooth frosting. Don’t skip this step.
- Heavy Cream (3-4 tablespoons / 45-60ml): Adds richness and helps achieve the right spreading consistency. Use as needed.
- Vanilla Extract (2 teaspoons): Again, use the good stuff.
- Salt (¼ teaspoon): A pinch of salt in the frosting keeps it from tasting cloying.
- Rainbow Jimmies or Sprinkles (½ cup / 80g): Use jimmies (the long, skinny sprinkles) instead of nonpareils (the tiny round ones). Nonpareils bleed color into the frosting and turn it gray. Learned that one the hard way.
Equipment Needed
You don’t need a professional bakery setup for this cake, but having the right tools makes everything easier. Here’s what I use:
- Two 9-Inch Round Cake Pans: Light-colored metal pans work best. Dark pans absorb more heat and can over-brown the edges. If you only have dark pans, reduce the oven temperature by 25°F.
- Stand Mixer or Hand Mixer: A stand mixer with the paddle attachment is ideal for creaming the butter and sugar. A hand mixer works fine too — just be prepared to hold it for a few minutes.
- Parchment Paper Rounds: Cut circles to line the bottom of your pans. This guarantees the cakes release cleanly every time. No more stuck bottoms.
- Cooling Racks: You need two racks so the cakes can cool completely before frosting. Stacking warm cakes is a recipe for a meltdown.
- Offset Spatula: A small one (about 6 inches) is perfect for spreading buttercream evenly. It’s worth the $8 investment.
- Kitchen Scale: I know I said this is a simple recipe, but weighing your flour is the number one way to guarantee consistent results. A scale costs about $15 and changes your baking forever.
- Cake Stand or Turntable: A turntable makes frosting way easier, but a simple cake stand works too. I used a lazy Susan from my pantry for years before buying an actual turntable.
If you don’t have parchment rounds, trace your cake pan on parchment paper and cut them out. It takes two minutes and saves you from scraping cake off the pan.
Preparation Method
Take your time with this one. Rushing leads to dense cake and lumpy frosting. Here’s the step-by-step method I’ve refined over those six test batches.
Step 1: Prep Your Pans and Oven
Preheat your oven to 350°F (175°C). Grease two 9-inch round cake pans with butter or non-stick spray. Line the bottoms with parchment paper rounds, then grease the parchment too. Dust the pans with a light coating of flour and tap out the excess. This double-prevention method means your cakes will release perfectly every time.
Step 2: Whisk Dry Ingredients
In a medium bowl, whisk together the all-purpose flour, baking powder, baking soda, and salt. Whisk for about 20 seconds — this aerates the flour and distributes the leavening agents evenly. Set this aside.
Step 3: Cream Butter and Sugar
In the bowl of your stand mixer fitted with the paddle attachment, beat the softened unsalted butter and granulated sugar on medium speed for 3 to 4 minutes. Scrape the bowl down once during mixing. The mixture should look light, fluffy, and pale in color. Don’t rush this step — proper creaming creates air pockets that help the cake rise.
Step 4: Add Oil and Vanilla
With the mixer running on low, drizzle in the vegetable oil and vanilla extract (and vanilla bean paste if using). Mix until just combined. The mixture might look slightly separated at this point — that’s normal.
Step 5: Add Eggs One at a Time
Add the whole eggs one at a time, mixing on medium speed after each addition until fully incorporated. Then add the egg whites one at a time, mixing after each. Scrape the bowl down after all the eggs are added. The batter should look smooth and glossy.
Step 6: Alternate Dry and Wet Ingredients
With the mixer on low speed, add the dry ingredients in three additions, alternating with the buttermilk in two additions. Start and end with the dry ingredients. Here’s the order: ⅓ dry, ½ buttermilk, ⅓ dry, remaining buttermilk, final ⅓ dry. Mix each addition just until combined — overmixing develops gluten and makes the cake tough. After the last addition, stop the mixer and finish folding with a rubber spatula. Give the bottom of the bowl a few good folds to make sure everything is incorporated.
Step 7: Divide and Bake
Divide the batter evenly between the two prepared pans. I use a kitchen scale for accuracy — each pan should get about 680 grams of batter. Smooth the tops with a spatula. Bake for 28 to 32 minutes, rotating the pans halfway through. The cakes are done when a toothpick inserted in the center comes out clean or with a few moist crumbs. The edges should be lightly golden and pulling away from the pan slightly.
Step 8: Cool Completely
Let the cakes cool in the pans for 10 minutes. Run a thin knife around the edges to loosen them, then turn the cakes out onto cooling racks. Peel off the parchment paper and let them cool completely — this takes about 1 to 2 hours. Do not frost warm cakes. The buttercream will melt and slide right off.
Step 9: Make the Sprinkle Buttercream
While the cakes cool, make the frosting. In the bowl of your stand mixer fitted with the paddle attachment, beat the softened unsalted butter on medium speed for 2 to 3 minutes until smooth and pale. Add the sifted powdered sugar one cup at a time, mixing on low speed after each addition. Add the heavy cream one tablespoon at a time until the frosting reaches a spreadable consistency. Add the vanilla extract and salt, then beat on medium-high speed for 2 to 3 minutes until light and fluffy. Fold in the rainbow jimmies by hand with a spatula. Don’t overmix or the sprinkles will bleed.
Step 10: Assemble and Frost
Place one cake layer on your cake stand or serving plate. Spread about 1 cup of buttercream evenly over the top. Place the second cake layer on top, making sure it’s centered. Apply a thin layer of frosting all over the cake — this is the crumb coat. It doesn’t need to be perfect. Chill the cake for 20 minutes to set the crumb coat. Then apply the final layer of frosting, using your offset spatula to create smooth sides or decorative swirls. Add extra sprinkles on top for a festive finish.
Cooking Tips & Techniques
Here’s what I learned the hard way so you don’t have to.
Room Temperature Ingredients Are Non-Negotiable. I know it’s annoying to wait, but cold butter doesn’t cream properly and cold eggs can curdle your batter. Set everything out 1 to 2 hours before you start. If you forget, place eggs in warm water for 5 minutes and microwave your buttermilk for 15 seconds.
Don’t Overmix the Batter. Once you add the dry ingredients, mix just until the flour disappears. Overmixing develops gluten, which makes the cake dense and rubbery. If you see streaks of flour, finish mixing by hand with a spatula.
Use a Kitchen Scale for Flour. This is the single best tip I can give you. A cup of flour can weigh anywhere from 120 to 150 grams depending on how you scoop it. That 30-gram difference will ruin your cake. Weigh your flour at 125 grams per cup and you’ll get consistent results every time.
Chill the Cake Before Frosting. A cold cake is easier to frost. The crumb coat sets faster, the buttercream doesn’t slide, and you get cleaner edges. I pop my cooled cake layers in the freezer for 20 minutes before I start assembling.
Test Your Baking Powder. If your baking powder is old, your cake won’t rise. Drop half a teaspoon into hot water. If it bubbles immediately, it’s good. If it fizzles weakly or does nothing, buy a new can.
Rotate Your Pans. Every oven has hot spots. Rotating the pans halfway through baking ensures even browning and consistent rise. Set a timer for 14 minutes and rotate them then.
Let the Buttercream Warm Up. If your frosting seems too stiff, let it sit at room temperature for 10 minutes and then beat it again for 30 seconds. Cold buttercream is hard to spread. Warm buttercream is a dream.
Variations & Adaptations
This recipe is a great base for all kinds of creative twists. Here are some of my favorites.
Chocolate Birthday Cake: Replace ⅓ cup (40g) of the all-purpose flour with ⅓ cup (30g) of unsweetened cocoa powder. Add an extra 2 tablespoons of buttermilk to compensate for the cocoa’s absorbency. Use chocolate sprinkles in the buttercream for a double-chocolate situation.
Lemon Vanilla Cake: Add the zest of 2 lemons to the sugar and rub it in with your fingers before creaming with the butter. Replace 2 tablespoons of buttermilk with 2 tablespoons of fresh lemon juice. Use lemon extract instead of vanilla in the buttercream for a bright, citrusy finish.
Gluten-Free Version: Use a good quality 1:1 gluten-free flour blend that contains xanthan gum. I’ve had great results with Bob’s Red Mill and King Arthur brands. Add an extra tablespoon of buttermilk since gluten-free flours tend to be more absorbent. The texture will be slightly more tender, but it still tastes amazing.
Cupcakes: This batter makes about 24 standard cupcakes. Fill cupcake liners ⅔ full and bake at 350°F (175°C) for 18 to 22 minutes. The sprinkle buttercream pipes beautifully through a star tip for a bakery-style finish.
Dairy-Free Option: Use vegan butter sticks (not tub margarine) and a dairy-free milk alternative like oat or almond milk mixed with 1 tablespoon of apple cider vinegar to mimic buttermilk. The texture will be slightly less tender but still delicious. I’ve made this for a friend’s dairy-free birthday and nobody noticed the difference.
Funfetti Inside Out: Fold ⅓ cup of rainbow sprinkles into the cake batter right before pouring it into the pans. Use a gentle hand — overmixing will cause the sprinkles to bleed and dissolve. This gives you confetti cake with confetti frosting. It’s a lot of sprinkles, but sometimes that’s exactly what a birthday calls for.
Serving & Storage Suggestions
Serving Temperature: This cake is best served at room temperature. If you’ve refrigerated it, let it sit out for 30 to 45 minutes before slicing. Cold buttercream loses its silky texture and the cake can taste a bit dense.
How to Slice: Use a long, sharp knife. Wipe the blade clean between cuts for neat slices. For clean, even pieces, dip the knife in hot water and dry it before each cut. This works especially well with the buttercream — the warm knife glides through without dragging the frosting.
What to Serve With It: A tall glass of cold milk is the classic pairing. For an adult birthday, a cup of black coffee or a vanilla latte balances the sweetness beautifully. If you’re feeling extra, a scoop of vanilla bean ice cream on the side turns this into a full dessert experience.
Storage: Store the frosted cake in an airtight cake carrier at room temperature for up to 3 days. If your kitchen is warm (above 75°F), refrigerate it to prevent the buttercream from softening too much. Bring it back to room temperature before serving.
Freezing: You can freeze the unfrosted cake layers for up to 3 months. Wrap each cooled layer tightly in plastic wrap, then a layer of aluminum foil. Thaw at room temperature while still wrapped to prevent condensation. The buttercream can also be frozen in an airtight container for up to 3 months. Thaw in the refrigerator overnight, then re-whip for a minute before using.
Make Ahead Tip: Bake the cake layers a day ahead and store them wrapped at room temperature. Make the buttercream up to 3 days ahead and refrigerate it. When you’re ready to assemble, let the buttercream come to room temperature and re-whip it for 30 seconds. This makes birthday morning way less stressful.
Flavor Development: Like many butter cakes, this one actually tastes better the day after baking. The flavors meld and the texture settles into something even more tender. If you can, bake it a day ahead and frost it the morning of the celebration.
Nutritional Information & Benefits
Let’s be honest — this is a celebration cake. It’s not health food, and that’s okay. Birthdays are meant to be enjoyed. But here’s a rough breakdown so you know what you’re working with.
Per Slice (based on 12 servings):
- Calories: 520-550
- Fat: 28g (17g saturated)
- Carbohydrates: 68g
- Sugar: 52g
- Protein: 5g
- Sodium: 320mg
Ingredient Highlights: Butter contains fat-soluble vitamins A, D, E, and K. Eggs provide high-quality protein and choline, which supports brain health. Buttermilk adds calcium and probiotics (if using cultured buttermilk).
Dietary Considerations: This recipe contains dairy, eggs, and gluten. It can be adapted for gluten-free diets (see variations section). For dairy-free options, use vegan butter and dairy-free milk alternatives. This recipe is not suitable for vegan diets unless further adapted.
My Perspective: I don’t believe in making birthday cake guilt-free. I believe in making it delicious and enjoying every single bite. One slice of homemade cake made with real ingredients is always better than a box mix with preservatives. If you want to feel good about serving this, remember that you made it from scratch with love and quality ingredients. That counts for a lot.
Frequently Asked Questions
Can I use salted butter instead of unsalted?
You can, but reduce the added salt in the recipe by half. Salted butter has varying amounts of salt depending on the brand, so it’s harder to control the final flavor. I recommend unsalted for consistent results.
Why did my cake sink in the middle?
This usually happens for one of three reasons: the oven door was opened too early (wait until at least 20 minutes of baking), the baking powder is old, or the batter was overmixed. Check your baking powder before starting and resist the urge to peek.
Can I make this into a sheet cake?
Absolutely. Pour the batter into a greased and floured 9×13-inch pan and bake at 350°F (175°C) for 30 to 35 minutes. The baking time will vary depending on your pan, so start checking at 28 minutes. The sprinkle buttercream recipe will cover a sheet cake with a thin layer, or you can double it for a thicker frosting.
How do I get smooth buttercream?
Sift your powdered sugar. This is the number one tip for silky smooth frosting. Also, beat the butter alone for 2 to 3 minutes before adding the sugar. And add the cream slowly — you might not need all of it. For the smoothest finish, use the paddle attachment, not the whisk.
Can I use this recipe for a tiered cake?
Yes, this cake is sturdy enough for a two-tier cake. For a three-tier or larger cake, I’d recommend adding a support structure with dowels. The cake is moist but has enough structure to hold its shape. Just make sure each layer is completely cooled and chilled before stacking.
Conclusion
This classic vanilla birthday cake with sprinkle buttercream is more than just a recipe — it’s the kind of thing that becomes a tradition. It’s the cake you make for the people you love, the one that shows up at every birthday party and family gathering until your kids are grown and asking for the recipe themselves.
I’ve tested this one so many times that I could make it in my sleep. And honestly? That’s exactly what you want from a birthday cake recipe. You want something reliable, something that works every single time, something that lets you focus on the celebration instead of stressing over whether the cake will turn out right.
So go ahead and make this for your next birthday. Customize the sprinkles to match the party theme. Add extra vanilla because you know that’s the best part. Frost it messy or smooth — it doesn’t matter. What matters is that you made it. And that makes it special.
If you try this recipe, I’d love to hear how it turned out. Drop a comment below with your favorite sprinkle combo or tag me in your cake photos. Happy baking, friends.
Pin This Recipe!
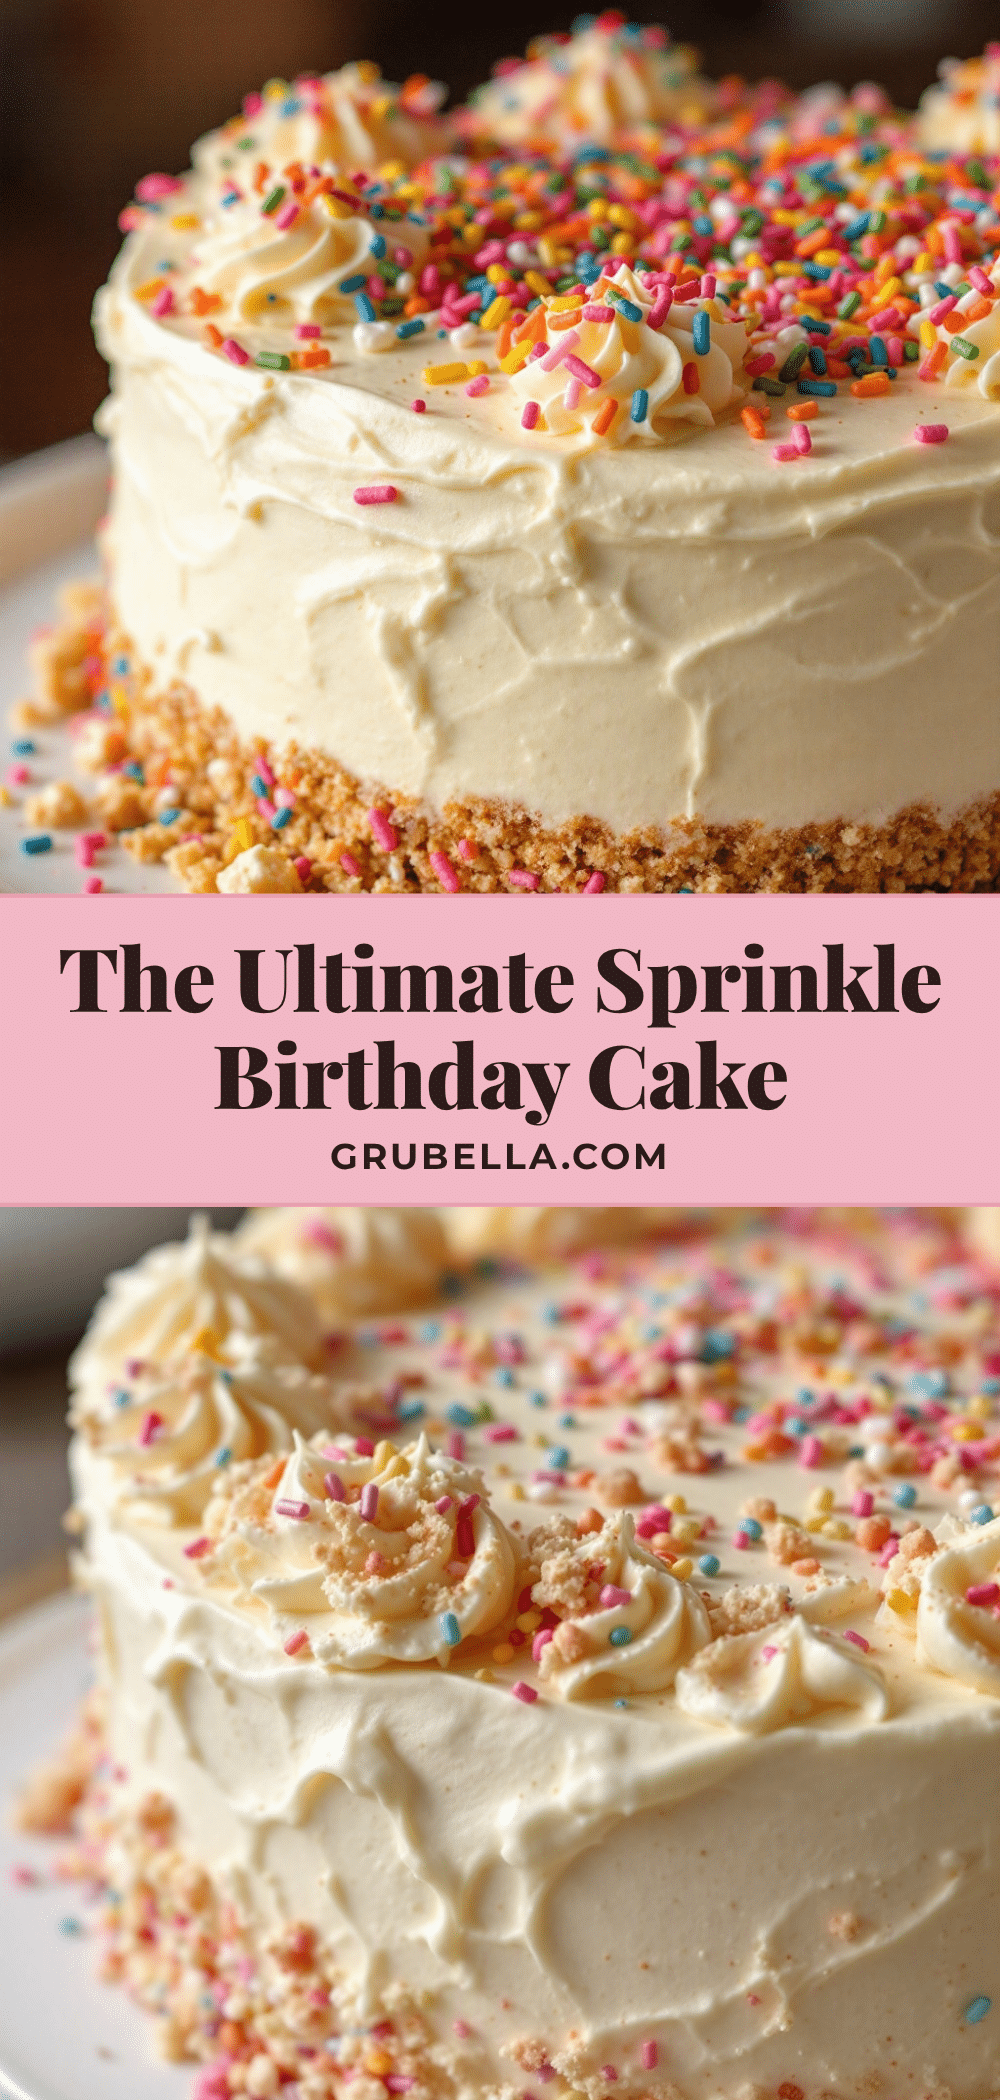
Classic Vanilla Birthday Cake with Easy Sprinkle Buttercream
A tender, moist vanilla cake with real vanilla flavor, paired with a silky sprinkle buttercream. Perfect for birthdays and celebrations, this recipe is simple enough for beginners but produces bakery-worthy results.
- Prep Time: 20 minutes
- Cook Time: 30 minutes
- Total Time: 1 hour 50 minutes (includes cooling)
- Yield: 12 servings 1x
- Category: Dessert
- Cuisine: American
Ingredients
- 2 ½ cups (312g) all-purpose flour
- 1 ¾ cups (350g) granulated sugar
- ½ cup (113g) unsalted butter, softened
- ¼ cup (60ml) vegetable oil
- 3 large eggs, room temperature
- 2 large egg whites, room temperature
- 1 cup (240ml) buttermilk, room temperature
- 2 teaspoons vanilla extract
- 1 teaspoon vanilla bean paste (optional)
- 2 ½ teaspoons baking powder
- ½ teaspoon baking soda
- 1 teaspoon salt
- 1 ½ cups (339g) unsalted butter, softened (for buttercream)
- 4 cups (480g) powdered sugar, sifted
- 3–4 tablespoons (45-60ml) heavy cream
- 2 teaspoons vanilla extract (for buttercream)
- ¼ teaspoon salt (for buttercream)
- ½ cup (80g) rainbow jimmies or sprinkles
Instructions
- Preheat oven to 350°F (175°C). Grease two 9-inch round cake pans, line bottoms with parchment paper, grease parchment, and dust with flour.
- In a medium bowl, whisk together flour, baking powder, baking soda, and salt for about 20 seconds. Set aside.
- In a stand mixer with paddle attachment, beat softened butter and sugar on medium speed for 3-4 minutes until light and fluffy.
- With mixer on low, drizzle in oil and vanilla extract (and vanilla bean paste if using). Mix until just combined.
- Add whole eggs one at a time, mixing on medium after each. Then add egg whites one at a time, mixing after each. Scrape bowl down.
- With mixer on low, add dry ingredients in three additions alternating with buttermilk in two additions (start and end with dry). Mix just until combined; finish folding with a spatula.
- Divide batter evenly between prepared pans (about 680g each). Smooth tops. Bake for 28-32 minutes, rotating pans halfway, until toothpick comes out clean.
- Cool cakes in pans for 10 minutes. Run knife around edges, turn out onto cooling racks, peel off parchment, and cool completely (1-2 hours).
- For buttercream: Beat softened butter on medium speed for 2-3 minutes until smooth. Add sifted powdered sugar one cup at a time on low. Add heavy cream one tablespoon at a time until spreadable. Add vanilla and salt, beat on medium-high for 2-3 minutes until fluffy. Fold in sprinkles by hand.
- Place one cake layer on stand. Spread about 1 cup buttercream on top. Place second layer on top. Apply thin crumb coat all over. Chill 20 minutes. Apply final frosting layer and decorate with extra sprinkles.
Notes
Room temperature ingredients are essential. Use a kitchen scale for flour for consistent results. Chill cake before frosting for easier handling. Cake tastes even better the day after baking.
Nutrition
- Serving Size: 1 slice
- Calories: 535
- Sugar: 52
- Sodium: 320
- Fat: 28
- Saturated Fat: 17
- Carbohydrates: 68
- Protein: 5
Keywords: vanilla birthday cake, sprinkle buttercream, classic cake, homemade birthday cake, vanilla cake recipe



