Love this? Save it for later!
Share the inspiration with your friends
The thought hits me in the cereal aisle, of all places. I want to make something that feels like a hug and a love letter at the same time. Something that says “I love you” without needing a fancy dinner reservation. And honestly, what says that better than a stack of fluffy, heart-shaped red velvet pancakes on Valentine’s Day morning? I had the cocoa powder, the buttermilk, and the food coloring already at home. The only thing missing was the right pan. I stood there, holding a heart-shaped cookie cutter, and it just clicked. This was it. This was the breakfast that would turn a regular Tuesday into something special.
There’s a certain magic to red velvet. It’s not quite chocolate, not quite vanilla—it’s its own beautiful thing. And when you shape it into little hearts and pile them high with cream cheese glaze? That’s not just breakfast. That’s an experience. These pancakes are tender, with that subtle tang from the buttermilk and a rich, velvety crumb that melts in your mouth. They’re not overly sweet, which is perfect because the cream cheese icing adds just the right amount of indulgence.
I’ve made a lot of pancakes in my time—from simple buttermilk stacks to fancy peanut butter banana overnight oats—but these heart-shaped ones are different. They feel intentional. They feel like you planned ahead, even if you just grabbed a cookie cutter at the last minute. And honestly, the best part is watching someone’s face light up when they see a plate of pinkish-red hearts staring back at them. That’s the real payoff.
Why You’ll Love This Recipe
This isn’t just another pancake recipe. I’ve tested this one multiple times to get the texture just right—fluffy on the inside, slightly crisp on the edges, and sturdy enough to hold that heart shape without falling apart. Here’s why it works:
- Quick & Easy: From start to finish, you’re looking at about 20 minutes. Perfect for a lazy Valentine’s morning or a surprise breakfast in bed.
- Simple Ingredients: You probably have most of these in your pantry already. No weird specialty flours or hard-to-find extracts.
- Perfect for Valentine’s Day: Obviously. But also great for anniversaries, Galentine’s brunch, or just a random Tuesday when you want to feel fancy.
- Crowd-Pleaser: Kids love the shape, adults love the flavor. Everyone wins.
- Unbelievably Delicious: The combination of cocoa, buttermilk, and cream cheese icing is next-level comfort food. You’ll close your eyes after the first bite.
What makes this recipe different from all the other red velvet pancake recipes out there? It’s the technique. I blend the wet ingredients separately and let them sit for a minute before adding the dry. This helps the buttermilk and cocoa powder meld together, creating that signature red velvet flavor without any bitterness. Plus, I use a specific ratio of baking soda to buttermilk that gives you pancakes that are light, airy, and perfectly risen—not dense or rubbery.
This is the kind of recipe that makes you feel like a rockstar in the kitchen. It’s simple enough for a beginner, but impressive enough to serve at a fancy brunch. And honestly? It’s just fun to eat heart-shaped pancakes.
What Ingredients You Will Need
This recipe uses simple, wholesome ingredients to deliver that classic red velvet flavor and fluffy texture without any fuss. Most of these are pantry staples, so you might not even need a grocery run.
- All-purpose flour – 1 ½ cups (180g). The base of our pancakes. Spoon and level it for accuracy—don’t scoop directly from the bag or you’ll get too much.
- Granulated sugar – 3 tablespoons (36g). Just enough sweetness without overpowering the tangy buttermilk.
- Unsweetened cocoa powder – 2 tablespoons (10g). Use a good quality one like Hershey’s Special Dark or Ghirardelli for richer flavor.
- Baking powder – 1 teaspoon (4g). For lift and fluffiness.
- Baking soda – ½ teaspoon (2g). Reacts with the buttermilk for extra tenderness.
- Salt – ¼ teaspoon (1g). Balances the sweetness and enhances the chocolate flavor.
- Buttermilk – 1 cup (240ml). This is non-negotiable for the best texture. If you don’t have buttermilk, make a quick substitute by adding 1 tablespoon of lemon juice or white vinegar to 1 cup of milk and letting it sit for 5 minutes.
- Large egg – 1, room temperature. Helps bind everything together.
- Unsalted butter – 2 tablespoons (28g), melted and slightly cooled. Adds richness and moisture.
- Vanilla extract – 1 teaspoon (5ml). Pure vanilla, not imitation, for the best flavor.
- Red food coloring – 1 to 2 tablespoons (15-30ml). Gel food coloring works best because it’s more concentrated. Start with 1 tablespoon and add more if you want a deeper red.
For the Cream Cheese Glaze:
- Cream cheese – 4 ounces (113g), softened to room temperature. Full-fat gives the best creamy texture.
- Powdered sugar – ½ cup (60g), sifted to avoid lumps.
- Milk – 2 to 3 tablespoons (30-45ml), to thin the glaze to your desired consistency.
- Vanilla extract – ½ teaspoon (2.5ml).
For Topping (optional but recommended):
- Fresh strawberries, sliced
- Powdered sugar for dusting
- Whipped cream
Equipment Needed
You don’t need a ton of fancy tools for this recipe, which is part of why I love it. Here’s what you’ll need:
- Heart-shaped cookie cutter (about 3-4 inches wide). This is the star of the show. I got mine at a dollar store, but any kitchen supply store has them. If you don’t have one, you can also freehand the shape with a spoon while the batter is in the pan—it’s a little messier but works in a pinch.
- Non-stick skillet or griddle. A good non-stick surface is key for clean heart shapes. I use a 10-inch skillet and cook two pancakes at a time.
- Mixing bowls – One large, one medium.
- Whisk – For combining the wet and dry ingredients. A fork works too if you’re in a rush.
- Measuring cups and spoons – For accuracy. I cannot stress this enough—baking is a science, even for pancakes.
- Spatula – A thin, flexible one works best for flipping without breaking the shape.
- Small saucepan or microwave-safe bowl – For melting the butter.
- Piping bag or zip-top bag – For drizzling the cream cheese glaze neatly. You can also just spoon it on, but piping looks prettier.
Preparation Method
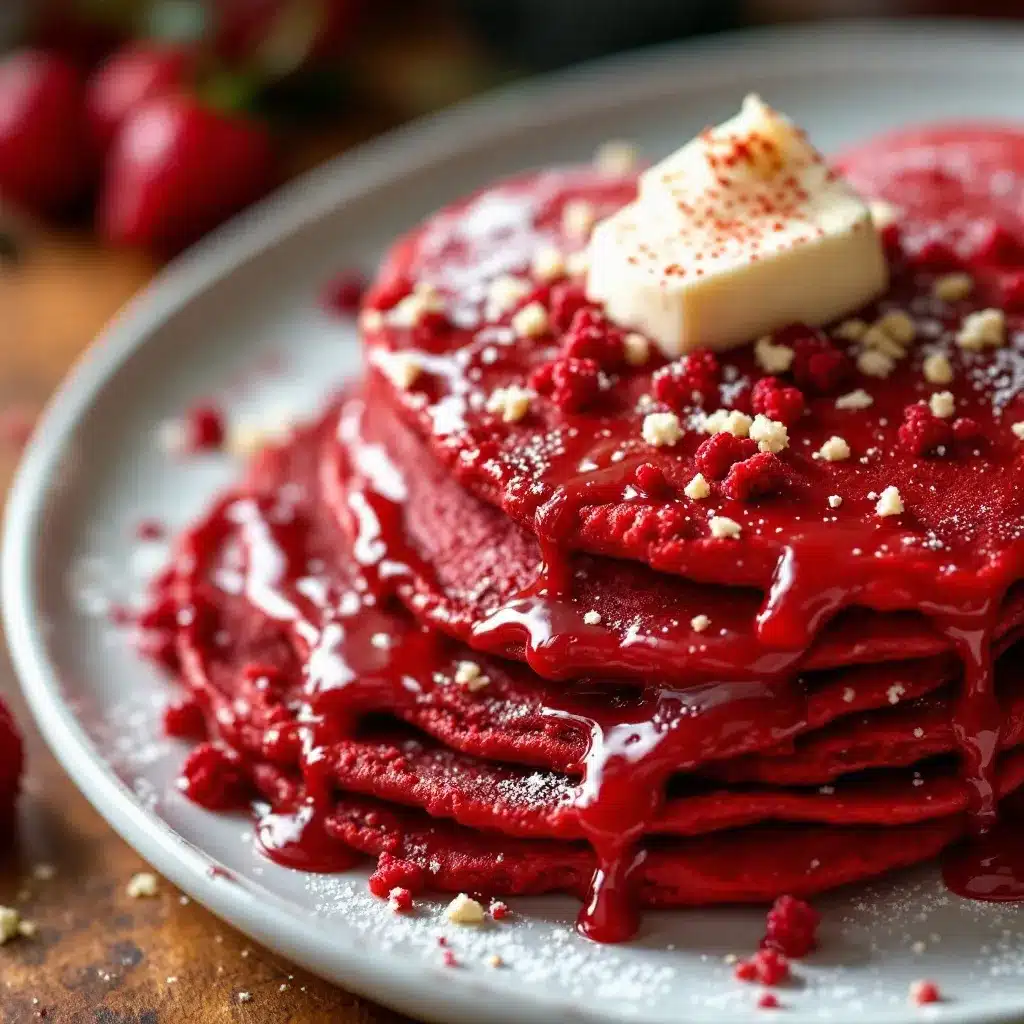
- Make the cream cheese glaze first. In a medium bowl, beat the softened cream cheese with a whisk or hand mixer until smooth and fluffy. Add the sifted powdered sugar and vanilla extract, then beat again until combined. Slowly add milk, 1 tablespoon at a time, whisking after each addition until you reach a pourable consistency. Set aside. (You can also refrigerate it while you make the pancakes—it thickens up a bit and spreads beautifully.)
- Mix the dry ingredients. In a large bowl, whisk together the all-purpose flour, granulated sugar, cocoa powder, baking powder, baking soda, and salt. Make sure there are no lumps—cocoa powder loves to clump, so break them up with your fingers if needed.
- Mix the wet ingredients. In a separate medium bowl, whisk together the buttermilk, egg, melted butter, vanilla extract, and red food coloring. Whisk until the egg is fully incorporated and the color is uniform. (Pro tip: If you want a deeper red, add the food coloring a little at a time until you’re happy with the shade.)
- Combine wet and dry. Pour the wet ingredients into the dry ingredients. Stir gently with a wooden spoon or spatula until just combined. Do not overmix—a few lumps are totally fine. Overmixing will make your pancakes tough. Let the batter rest for 5 minutes. This allows the gluten to relax and the baking soda to start reacting, giving you fluffier pancakes.
- Preheat your skillet. Place your non-stick skillet or griddle over medium-low heat. Lightly grease it with butter or a spritz of non-stick cooking spray. (I use butter for flavor, but oil works too.) The pan is ready when a drop of water sizzles and dances on the surface.
- Place the cookie cutter in the pan. Spray the inside of your heart-shaped cookie cutter with non-stick spray so the batter doesn’t stick to it. Place it in the center of the preheated skillet.
- Pour the batter. Using a ¼-cup measure, pour the batter into the cookie cutter, filling it about ¾ full. Don’t overfill—the pancake will rise and spread a little inside the cutter. (I learned this the hard way when my first batch overflowed and turned into a blob.)
- Cook the pancake. Let it cook for 2 to 3 minutes, or until you see bubbles forming on the surface and the edges look set. The bottom should be golden brown. Carefully lift the cookie cutter straight up using a spatula or tongs. (Be careful—it’s hot!)
- Flip the pancake. Slide a thin spatula under the pancake and flip it gently. Cook for another 1 to 2 minutes on the other side, until cooked through and lightly golden. Remove to a plate and repeat with the remaining batter.
- Keep warm. If you’re making a big batch, keep the finished pancakes warm on a baking sheet in a 200°F (95°C) oven while you cook the rest.
- Assemble and serve. Stack the heart-shaped pancakes on a plate. Drizzle generously with the cream cheese glaze. Top with sliced strawberries, a dusting of powdered sugar, and a dollop of whipped cream if you’re feeling extra fancy.
Cooking Tips & Techniques
I’ve made this recipe about a dozen times now, and I’ve definitely had my share of pancake disasters. Here’s what I’ve learned so you don’t have to repeat my mistakes:
- Don’t skip the rest time. Letting the batter sit for 5 minutes after mixing is non-negotiable for fluffy pancakes. It gives the baking soda time to activate and the flour to hydrate properly. Trust me, the difference is noticeable.
- Low and slow is the way to go. If your pan is too hot, the outside will burn before the inside cooks through. Medium-low heat is your friend. I keep my burner at a 3 out of 9 and adjust as needed.
- Grease the cookie cutter well. I cannot emphasize this enough. If you don’t spray the inside of the cutter with non-stick spray, the batter will stick and you’ll end up with a mangled heart. I use a quick spritz of avocado oil spray.
- Use a thin spatula. A thick spatula will crush the pancake when you try to flip it. I use a fish spatula—it’s thin, flexible, and slides right under without disturbing the shape.
- Make extra glaze. The cream cheese glaze is the best part, in my opinion. I always double the glaze recipe because people end up wanting more. It keeps well in the fridge for up to a week.
- If the batter seems too thick, add a tablespoon of milk. Different brands of flour absorb liquid differently. The batter should be thick but pourable—like a thick milkshake. If it’s too thick, your pancakes will be dense.
Variations & Adaptations
One of the best things about this recipe is how easy it is to customize. Here are some variations I’ve tried and loved:
- Gluten-Free Version: Swap the all-purpose flour with a 1:1 gluten-free baking blend (like King Arthur Measure for Measure or Bob’s Red Mill). The texture will be slightly different—a bit more delicate—but still delicious. Add an extra tablespoon of milk if the batter seems too thick.
- Dairy-Free Version: Use a dairy-free milk (like oat or almond) mixed with 1 tablespoon of lemon juice to mimic buttermilk. Use a vegan butter substitute and dairy-free cream cheese for the glaze. I’ve tried this with Miyoko’s cream cheese and it worked beautifully.
- Natural Coloring Option: If you’re not a fan of artificial food coloring, you can use beet powder or a few tablespoons of beet juice. The color won’t be as vibrant—more of a dusty rose—but it’s completely natural and still pretty.
- Chocolate Chips: Fold in ¼ cup of mini chocolate chips to the batter for extra chocolatey goodness. White chocolate chips are especially good here—they add a nice contrast to the red velvet.
- Spiced Version: Add ½ teaspoon of cinnamon and a pinch of nutmeg to the dry ingredients. It gives the pancakes a warm, cozy flavor that’s perfect for a chilly Valentine’s morning.
Serving & Storage Suggestions
These pancakes are best served warm, right off the griddle. The cream cheese glaze should be at room temperature so it drizzles smoothly. I like to stack 3 to 4 pancakes per serving, then top them with fresh strawberries, a dusting of powdered sugar, and a generous drizzle of glaze.
For a full Valentine’s breakfast spread, I love pairing these with a refreshing copycat Starbucks Pink Drink—the color theme is perfect, and the light, fruity flavor balances the richness of the pancakes. If you’re feeling extra romantic, set up a charcuterie board for two on the side with fresh fruit, cheese, and pastries for a complete brunch experience.
Storage: Leftover pancakes can be stored in an airtight container in the refrigerator for up to 3 days. The glaze should be stored separately in a jar or small bowl. To reheat, pop the pancakes in a toaster or warm them in a 300°F (150°C) oven for about 5 minutes. I don’t recommend microwaving—they get rubbery.
Freezing: These pancakes freeze beautifully. Place them in a single layer on a baking sheet and freeze until solid (about 1 hour), then transfer to a freezer-safe bag. They’ll keep for up to 2 months. Reheat directly from frozen in a toaster or oven.
Nutritional Information & Benefits
Here’s the estimated nutritional breakdown for one serving (3 pancakes with 2 tablespoons of glaze):
- Calories: 380
- Total Fat: 14g
- Saturated Fat: 8g
- Carbohydrates: 55g
- Fiber: 2g
- Sugar: 28g
- Protein: 9g
While these are definitely a treat, there are some redeeming qualities. The buttermilk adds probiotics and calcium, and the cocoa powder is rich in antioxidants. If you want to lighten things up a bit, you can use a sugar substitute like monk fruit in the pancakes (though the glaze needs real powdered sugar for texture).
For those with dietary restrictions, this recipe can easily be adapted to be gluten-free or dairy-free (see variations above). It contains dairy (buttermilk, butter, cream cheese) and gluten (flour), so keep that in mind if you’re serving someone with allergies.
Conclusion
These heart-shaped red velvet pancakes are more than just breakfast—they’re a little love note on a plate. They’re the kind of thing that makes someone feel special without requiring hours of effort. I love how the rich, tangy red velvet flavor pairs with the sweet cream cheese glaze, and how the heart shape turns an ordinary morning into something memorable.
I hope you give these a try, whether it’s for Valentine’s Day, an anniversary, or just because you want to make someone smile. Don’t be afraid to customize them to your liking—add more cocoa, swap the toppings, or double the glaze (I won’t judge). And if you do make them, I’d love to hear how they turned out! Drop a comment below, tag me in your photos, or share your own twist on the recipe. Happy cooking, and happy Valentine’s Day!
Frequently Asked Questions
Can I make the batter the night before?
I don’t recommend it. The baking soda starts reacting as soon as it hits the buttermilk, so the batter will lose its lift overnight. If you want to prep ahead, mix the dry ingredients and wet ingredients separately, then combine them right before cooking.
My pancakes turned out greenish instead of red. What happened?
This is a common issue with natural cocoa powder and red food coloring. The cocoa’s acidity can react with the coloring and create a slightly green tint. Using gel food coloring instead of liquid helps, as does adding a tiny pinch of baking soda (like ⅛ teaspoon) to neutralize some of the acidity.
Can I use a different shaped cookie cutter?
Absolutely! This technique works with any shape—stars, circles, or even initials. Just make sure the cutter is at least 2 inches wide so the pancake cooks evenly.
How do I keep the pancakes warm while I cook the rest?
Place them on a baking sheet in a 200°F (95°C) oven. Don’t stack them on top of each other or they’ll steam and lose their crisp edges. A single layer on the sheet is best.
Can I make these without a cookie cutter?
Yes! You can freehand the heart shape by pouring the batter into a circle, then using a spoon to nudge the top into a V-shape and the bottom into two curves. It takes a little practice, but it works. Alternatively, just make round pancakes and tell everyone they’re hearts in spirit.
Pin This Recipe!
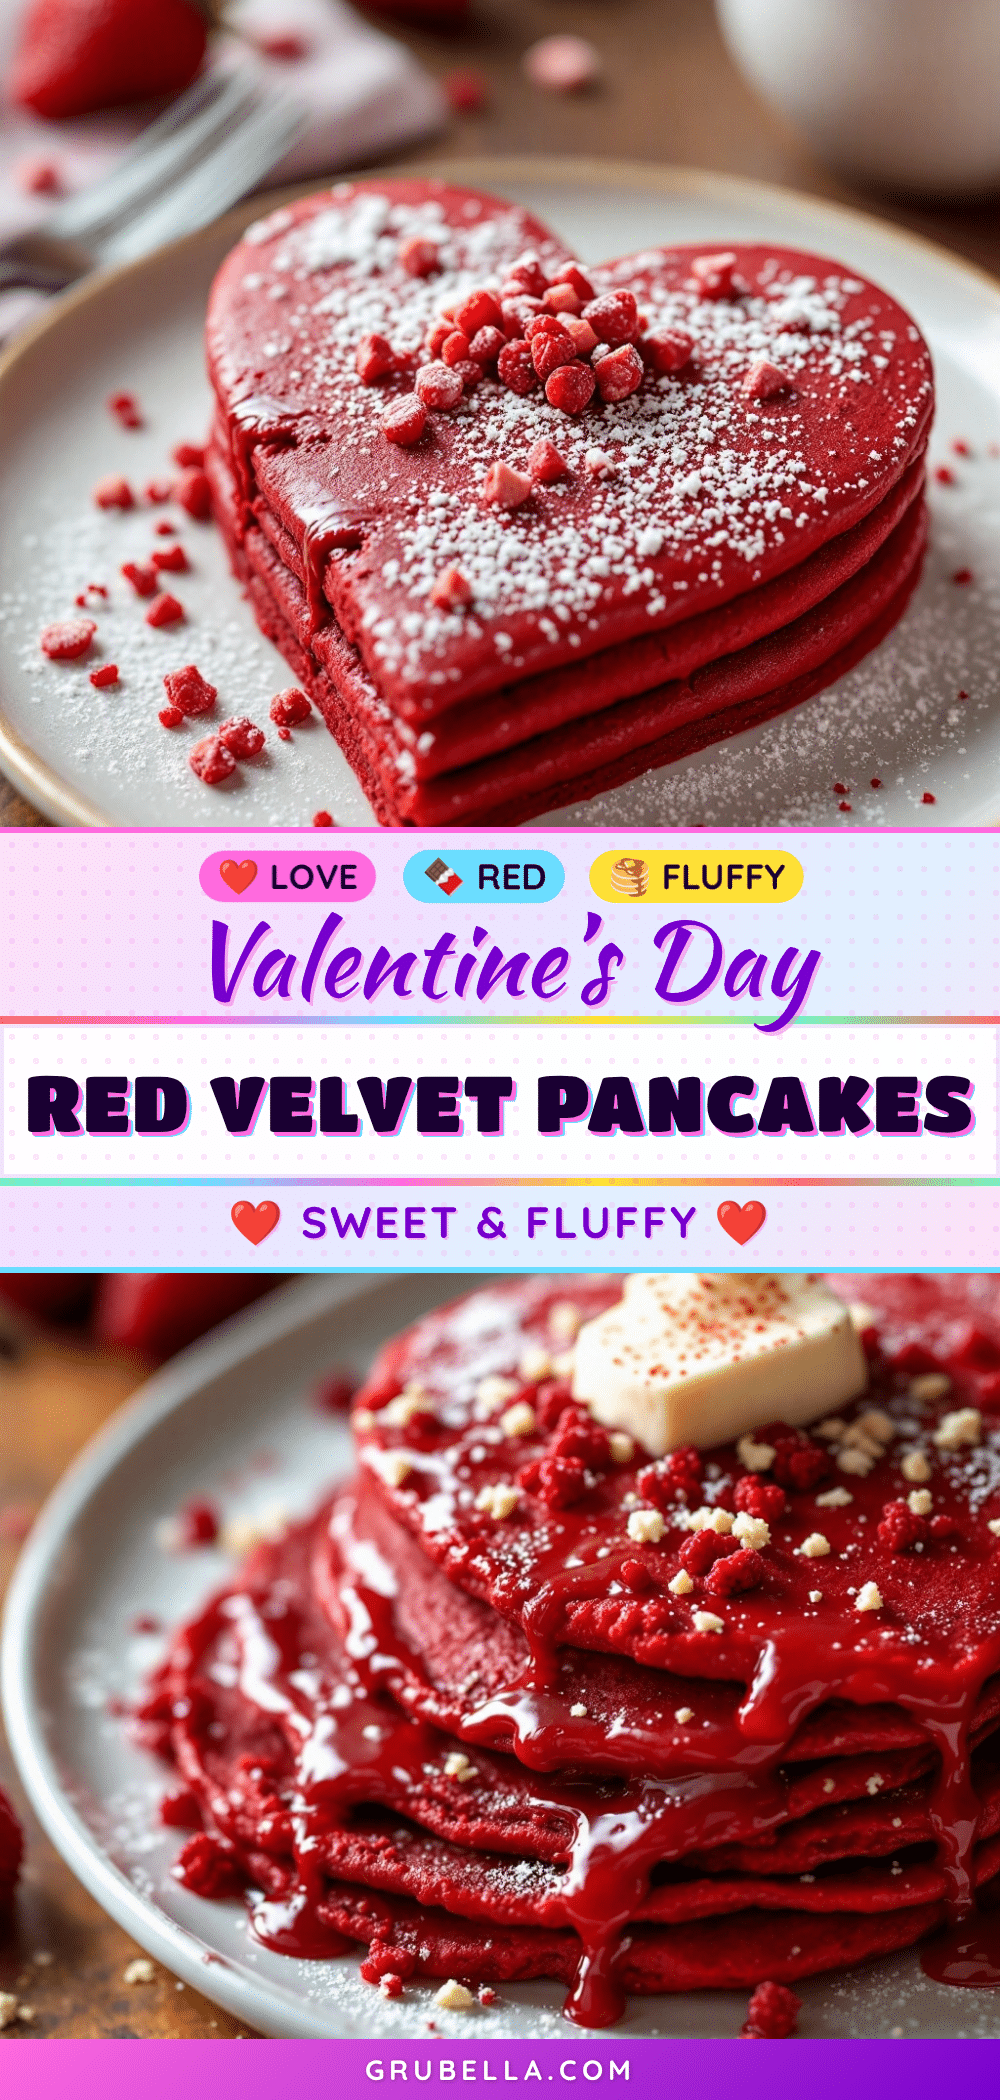
Best Heart-Shaped Red Velvet Pancakes for Valentine’s Day
Fluffy, heart-shaped red velvet pancakes with a tangy cream cheese glaze—perfect for a romantic Valentine’s Day breakfast or any special morning. These tender pancakes are quick to make and guaranteed to impress.
- Prep Time: 10 minutes
- Cook Time: 10 minutes
- Total Time: 20 minutes
- Yield: 4 servings 1x
- Category: Breakfast
- Cuisine: American
Ingredients
- 1 ½ cups (180g) all-purpose flour
- 3 tablespoons (36g) granulated sugar
- 2 tablespoons (10g) unsweetened cocoa powder
- 1 teaspoon (4g) baking powder
- ½ teaspoon (2g) baking soda
- ¼ teaspoon (1g) salt
- 1 cup (240ml) buttermilk
- 1 large egg, room temperature
- 2 tablespoons (28g) unsalted butter, melted and slightly cooled
- 1 teaspoon (5ml) vanilla extract
- 1 to 2 tablespoons (15-30ml) red food coloring (gel preferred)
- 4 ounces (113g) cream cheese, softened
- ½ cup (60g) powdered sugar, sifted
- 2 to 3 tablespoons (30-45ml) milk
- ½ teaspoon (2.5ml) vanilla extract (for glaze)
- Fresh strawberries, sliced (optional)
- Powdered sugar for dusting (optional)
- Whipped cream (optional)
Instructions
- Make the cream cheese glaze: In a medium bowl, beat softened cream cheese until smooth. Add sifted powdered sugar and ½ teaspoon vanilla extract, beat until combined. Slowly add milk, 1 tablespoon at a time, whisking until pourable. Set aside.
- Mix dry ingredients: In a large bowl, whisk together flour, sugar, cocoa powder, baking powder, baking soda, and salt. Break up any cocoa lumps.
- Mix wet ingredients: In a separate medium bowl, whisk together buttermilk, egg, melted butter, 1 teaspoon vanilla extract, and red food coloring until uniform.
- Combine wet and dry: Pour wet ingredients into dry. Stir gently until just combined (a few lumps are fine). Do not overmix. Let batter rest for 5 minutes.
- Preheat a non-stick skillet or griddle over medium-low heat. Lightly grease with butter or non-stick spray.
- Spray the inside of a heart-shaped cookie cutter (3-4 inches) with non-stick spray. Place it in the center of the preheated skillet.
- Pour ¼ cup of batter into the cookie cutter, filling it about ¾ full.
- Cook for 2-3 minutes until bubbles form on the surface and edges look set. Carefully lift the cookie cutter straight up using a spatula or tongs.
- Flip the pancake gently with a thin spatula. Cook for another 1-2 minutes until cooked through and lightly golden. Remove to a plate. Repeat with remaining batter.
- Keep finished pancakes warm on a baking sheet in a 200°F (95°C) oven while cooking the rest.
- Assemble: Stack pancakes on a plate. Drizzle with cream cheese glaze. Top with sliced strawberries, powdered sugar, and whipped cream if desired.
Notes
Let the batter rest for 5 minutes for fluffier pancakes. Use medium-low heat to prevent burning. Grease the cookie cutter well to avoid sticking. Double the glaze if desired—it keeps in the fridge for up to a week. For natural color, use beet powder or beet juice (color will be less vibrant).
Nutrition
- Serving Size: 3 pancakes with 2 ta
- Calories: 380
- Sugar: 28
- Fat: 14
- Saturated Fat: 8
- Carbohydrates: 55
- Fiber: 2
- Protein: 9
Keywords: red velvet pancakes, heart-shaped pancakes, Valentine's Day breakfast, cream cheese glaze, fluffy pancakes



