Love this? Save it for later!
Share the inspiration with your friends
The cashier at the corner grocery store watched me loading my cart with chocolate cookies, cream cheese, and candy eyes. She didn’t say anything at first. Then she just shook her head and laughed. “You’re making that spider web cake, aren’t you?” she asked. I blinked at her, confused. I mean, I’d never met this woman before in my life. “Every year around this time,” she explained, “someone comes through with that exact combination. It’s always the spider web cake.”
Honestly, I hadn’t even planned on making anything spooky that day. I was just craving chocolate, and the candy eyes were on sale. But something about her knowing smile made me lean in. She told me her grandmother used to make a version of this cake every Halloween—except her grandmother called it “the messy web” because the icing always looked more like a tangled ball of yarn than a spider web. Maybe you’ve been there too, where a recipe finds you instead of the other way around.
I went home that afternoon and started experimenting. The first attempt was a disaster—the cookie layer crumbled into a thousand pieces, and the “web” looked like a sad puddle of white chocolate. But I kept at it. By the third try, something clicked. The chocolate cookie base held together perfectly, the cream cheese layer set just right, and the spider web design actually looked like something you’d see in a haunted house. I brought it to a Halloween party that weekend, and people literally stopped mid-conversation to stare at it. That’s when I knew this recipe was special.
This spider web chocolate cookie cake has become my signature Halloween dish. It’s the kind of dessert that makes people do a double-take—equal parts delicious and dramatic. And honestly, it’s way easier to make than it looks. That’s what I love most about it.
Why You’ll Love This Spooky Spider Web Chocolate Cookie Cake
Let me tell you why this recipe has earned a permanent spot in my Halloween rotation. I’ve tested it at least a dozen times, tweaking the ratios, adjusting the bake times, and even trying different chocolate brands. This version? It’s the one that works every single time.
- No Baking Skills Required : If you can press cookie dough into a pan and drizzle melted chocolate, you can make this cake. Seriously. The spider web design looks fancy, but it’s just a simple swirl technique anyone can master.
- Simple Ingredients : You probably have most of these in your pantry right now. No specialty baking supplies or hard-to-find items. Just good, basic ingredients that come together beautifully.
- Perfect for Halloween Parties : This cake is a showstopper. When you walk into a room carrying a dessert with an actual spider web design and candy spiders on top, people lose their minds. It’s guaranteed to be the center of attention.
- Crowd-Pleaser : Kids love the spooky factor. Adults love the rich chocolate and creamy layers. I’ve yet to meet someone who doesn’t go back for seconds.
- Make-Ahead Friendly : You can prep this cake a day in advance. The flavors actually get better after sitting overnight in the fridge. Less stress on party day—that’s a win in my book.
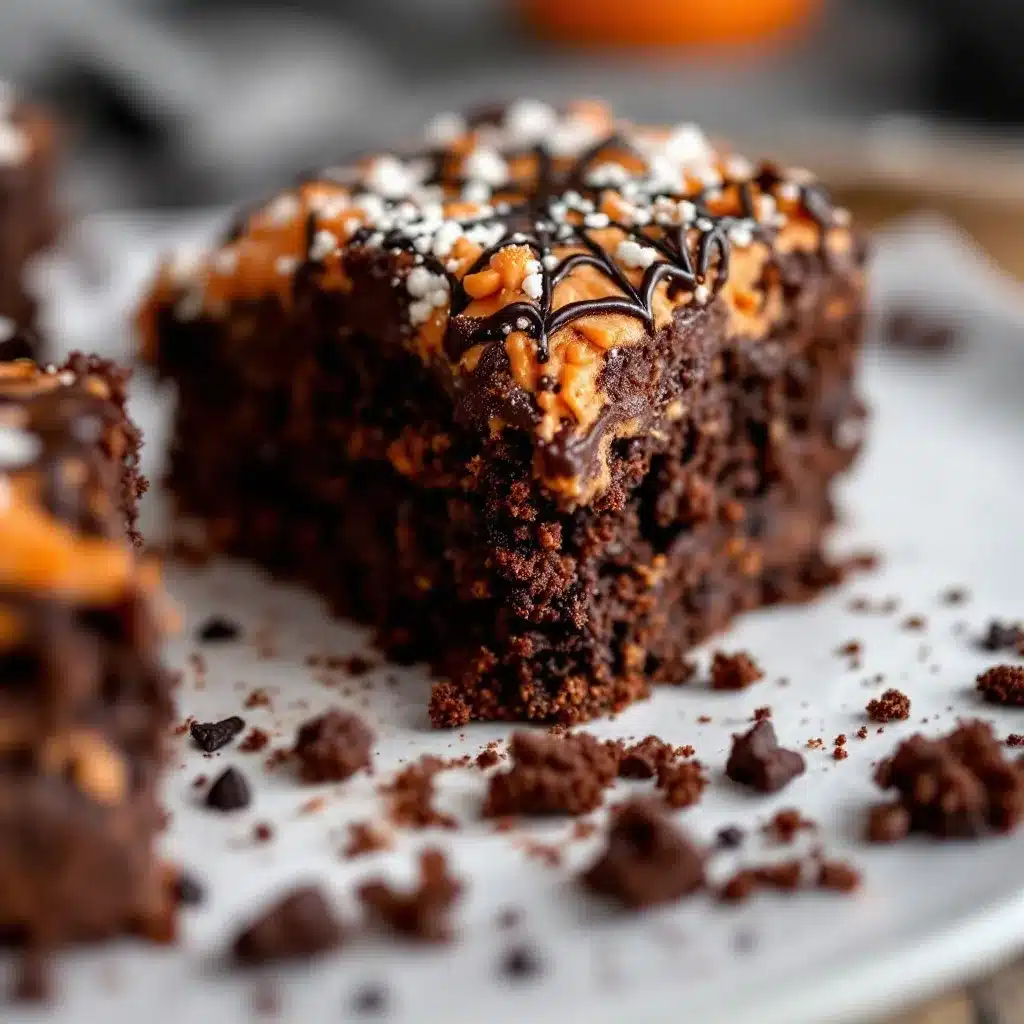
What makes this recipe different from all the other Halloween desserts out there? It’s the texture combination. You’ve got a dense, fudgy chocolate cookie base, a smooth and tangy cream cheese layer, and then that delicate chocolate web on top. Every bite hits different notes. It’s not just another chocolate cake—it’s an experience.
This is the kind of dessert that makes you close your eyes after the first bite. It’s comfort food with a spooky twist—indulgent, satisfying, and perfect for celebrating the season without spending hours in the kitchen.
What Ingredients You Will Need
This spooky spider web chocolate cookie cake uses simple, wholesome ingredients to deliver bold flavor and satisfying texture without the fuss. Most of these are pantry staples, which makes this recipe perfect for last-minute Halloween cravings.
For the Chocolate Cookie Base
- 1 ½ cups all-purpose flour (spooned and leveled for accuracy)
- ½ cup unsweetened cocoa powder (I prefer Ghirardelli for its deep, rich flavor)
- ½ teaspoon baking soda
- ¼ teaspoon salt
- ½ cup unsalted butter, softened (room temperature is key for proper creaming)
- ¾ cup granulated sugar
- ¼ cup packed light brown sugar (adds moisture and a hint of caramel)
- 1 large egg, room temperature
- 1 teaspoon vanilla extract
For the Cream Cheese Layer
- 8 ounces cream cheese, softened (full-fat works best for stability)
- ¼ cup granulated sugar
- 1 large egg, room temperature
- ½ teaspoon vanilla extract
For the Spider Web Design
- ½ cup semi-sweet chocolate chips (use quality chips for smooth melting)
- 2 tablespoons heavy cream (or milk in a pinch, but cream gives a silkier texture)
- 2 tablespoons white chocolate chips (for the web contrast)
- ¼ teaspoon coconut oil (optional, helps thin the chocolate for drizzling)
For Decoration
- 12-15 candy spider rings (available at most grocery stores around Halloween)
- Optional: edible glitter or luster dust (for a magical, spooky shimmer)
If you’re dairy-free, you can substitute the cream cheese with a plant-based alternative, though the texture will be slightly softer. For a gluten-free version, swap the all-purpose flour with a 1:1 gluten-free baking blend—I’ve tested this with King Arthur’s measure-for-measure blend, and it works beautifully. Just don’t overmix the dough, as gluten-free flours can get gummy.
Equipment Needed
You don’t need a professional bakery setup for this recipe. Here’s what you’ll actually use:
- 9-inch springform pan (regular cake pan works too, but springform makes removal so much easier—trust me on this)
- Electric hand mixer or stand mixer (for creaming the butter and sugar; a whisk and some elbow grease also work if you’re feeling ambitious)
- Mixing bowls (at least two—one for the cookie dough, one for the cream cheese layer)
- Parchment paper (line the bottom of your pan for easy release)
- Small microwave-safe bowls (for melting chocolate)
- Piping bag or zip-top bag (for the spider web design; a small spoon works in a pinch)
- Spatula (for spreading the cream cheese layer evenly)
- Cooling rack (essential for letting the cake cool completely before decorating)
If you don’t have a springform pan, line a regular 9-inch cake pan with parchment paper slings (two long strips crossing each other) so you can lift the cake out easily. I’ve done this many times, and it works like a charm.
Preparation Method
Let’s walk through this step by step. I’ll tell you exactly what to look for at each stage so you know you’re on the right track.
-
Preheat your oven to 350°F (175°C). Line the bottom of your 9-inch springform pan with parchment paper. Lightly grease the sides with butter or cooking spray.
-
Make the chocolate cookie base. In a medium bowl, whisk together the flour, cocoa powder, baking soda, and salt. In a large bowl, beat the softened butter, granulated sugar, and brown sugar together until light and fluffy—about 3 minutes with an electric mixer. You want it to look pale and airy. Add the egg and vanilla extract, beating until combined. Gradually add the dry ingredients to the wet mixture, mixing on low speed just until a soft dough forms. Don’t overmix, or the cookies will be tough.
-
Press the dough into the pan. Transfer the cookie dough to your prepared pan. Use your fingers or the back of a spoon to press it evenly into the bottom. Make sure it reaches all the way to the edges and sits at an even thickness. This is your foundation—if it’s uneven, the cake might tilt later.
-
Prepare the cream cheese layer. In a clean bowl, beat the softened cream cheese and sugar together until smooth and creamy. Add the egg and vanilla, beating just until incorporated. The mixture should be silky with no lumps. Pour this over the cookie dough base, spreading it gently with a spatula to create an even layer.
-
Bake the cake. Place the pan in the preheated oven and bake for 30-35 minutes. The edges should look set and slightly golden, but the center will still jiggle slightly when you gently shake the pan. That’s okay—it will continue to set as it cools. A toothpick inserted near the center should come out with moist crumbs, not wet batter.
-
Cool completely. Let the cake cool in the pan on a wire rack for 20 minutes. Then run a knife around the edges to loosen it, remove the springform ring, and let it cool completely—about 1 hour. Do not rush this step. If the cake is even slightly warm when you add the chocolate web, everything will slide off into a melted mess. I learned this the hard way.
-
Make the chocolate web. Once the cake is completely cool, melt the semi-sweet chocolate chips and heavy cream together in a microwave-safe bowl. Heat in 20-second intervals, stirring between each, until smooth. Let it cool slightly—about 5 minutes. In a separate small bowl, melt the white chocolate chips with the coconut oil (if using) using the same method.
-
Create the spider web design. This is the fun part. Pour the melted semi-sweet chocolate over the top of the cake and spread it into an even layer using a spatula. While it’s still wet, transfer the melted white chocolate to a small piping bag or a zip-top bag with a tiny corner snipped off. Pipe concentric circles starting from the center of the cake, working outward. Then, using a toothpick or a knife, drag lines from the center outward through the white chocolate circles to create the web effect. Wipe the toothpick clean between each drag for the cleanest lines.
-
Add the spiders. While the chocolate is still slightly tacky, place the candy spider rings around the edge of the web. Press them gently so they stick. You can arrange them crawling in different directions for a more dramatic effect.
-
Chill and serve. Refrigerate the cake for at least 30 minutes to set the chocolate web completely. When you’re ready to serve, let it sit at room temperature for 10 minutes before slicing. This ensures clean, beautiful slices.
Cooking Tips & Techniques
I’ve made this cake enough times to know exactly where things can go wrong. Let me save you some trouble.
Room temperature ingredients matter. I know it’s tempting to use cold cream cheese straight from the fridge, but trust me—it will leave you with lumpy batter and an uneven texture. Let everything sit out for at least 30 minutes before you start. Set a timer if you have to, because I’ve definitely forgotten and ended up with lumpy cream cheese more times than I’d like to admit.
Don’t overbake the base. The cookie layer continues cooking from residual heat even after you pull it out of the oven. If you wait until it looks fully set, it will be dry and crumbly. Pull it when the edges are set but the center still has a slight wobble. That’s your sweet spot.
The web technique takes practice. My first spider web looked like a toddler’s art project—blobby and uneven. The trick is to work quickly while the chocolate is still wet, and to use a light hand when dragging the toothpick through the white chocolate circles. If you mess up, don’t panic. Just spread the chocolate again and start over. No one will know.
Timing is everything. I like to bake the cake the night before and let it cool completely in the refrigerator overnight. Then I add the web design the next day when I have more time and patience. This also means the cream cheese layer sets firmly, making it easier to spread the chocolate on top without it sinking in.
For perfect slices, use a hot knife. Run your knife under hot water, wipe it dry, then slice. Repeat between each cut. This gives you clean, Instagram-worthy slices without smearing the chocolate web.
Variations & Adaptations
This recipe is surprisingly flexible. Here are some ways to make it your own.
Peanut Butter Spider Web Cake: Swap the cream cheese layer for a peanut butter filling. Beat 8 ounces of softened cream cheese with ½ cup creamy peanut butter and ¼ cup sugar, then proceed as directed. The chocolate and peanut butter combination is absolutely killer.
White Chocolate Base: For a lighter, sweeter version, use white chocolate chips for the base layer instead of semi-sweet. The contrast between the white chocolate and the dark cocoa powder in the cookie base is stunning visually.
Vegan Adaptation: Use vegan butter, dairy-free cream cheese, and a flax egg (1 tablespoon ground flaxseed mixed with 3 tablespoons water) for the cookie base. The texture will be slightly denser, but it’s still delicious. I’ve tested this for a friend’s Halloween party, and no one even noticed the difference.
Spider Web Cupcakes: Press the cookie dough into a muffin tin lined with paper liners instead of a cake pan. Bake for 15-18 minutes, then top with the cream cheese mixture and bake another 10 minutes. Top each mini cake with its own spider web design. These are perfect for parties where you want individual servings.
Extra Spooky Touch: Add a drop of black food coloring to the cream cheese layer for a darker, more dramatic look. It gives the cake a genuinely eerie appearance that’s perfect for Halloween.
Serving & Storage Suggestions
This cake is best served chilled or at room temperature. I prefer it straight from the fridge because the cream cheese layer firms up nicely and the chocolate web stays crisp. If you’re serving it at a party, let it sit out for about 10-15 minutes before slicing—it makes cutting easier.
What to serve with it: A dollop of whipped cream on the side balances the richness beautifully. For a truly indulgent experience, serve it with a scoop of vanilla ice cream. The warm-cold contrast is heavenly. If you’re feeling extra festive, drizzle some caramel sauce over the plate for a spooky blood-drip effect.
Storage: Keep the cake covered in the refrigerator for up to 5 days. The flavors actually meld together and improve after day two. Just make sure the chocolate web is fully set before you cover it, or you’ll end up with smudges.
Freezing: You can freeze the undecorated cake for up to 2 months. Wrap it tightly in plastic wrap, then foil. When you’re ready to serve, thaw it in the refrigerator overnight, then add the chocolate web design fresh. I’ve done this multiple times for last-minute Halloween gatherings, and it works perfectly.
Reheating: If you prefer a warm cookie base, microwave individual slices for 10-15 seconds. The chocolate web will soften slightly, but it’s still delicious. Just don’t nuke the whole cake—the cream cheese layer doesn’t take well to reheating.
Nutritional Information & Benefits
Let’s be real—this is a treat, not a health food. But here’s what you’re working with per slice (based on 12 servings):
- Calories: Approximately 380
- Total Fat: 22g
- Saturated Fat: 13g
- Carbohydrates: 42g
- Sugar: 28g
- Protein: 6g
- Fiber: 2g
The cocoa powder in the base is actually rich in antioxidants and flavonoids, which have been linked to heart health. Cream cheese provides a decent amount of calcium and protein. Of course, this isn’t a daily indulgence—it’s a celebration cake for a reason. But knowing that you’re getting a little bit of nutritional value along with the sugar rush makes me feel slightly less guilty about going back for seconds.
For those watching their sugar intake, you can reduce the sugar in the cream cheese layer by half without affecting the texture too much. The chocolate web provides plenty of sweetness on its own.
Conclusion
This spooky spider web chocolate cookie cake is everything I want in a Halloween dessert. It’s dramatic enough to impress a crowd, simple enough for a weeknight baking session, and delicious enough to make you forget it’s supposed to be scary. The combination of fudgy cookie base, creamy filling, and delicate chocolate web is honestly addictive.
I love that this recipe lets me be creative without stressing over precision. The web design is forgiving—each one turns out a little different, which makes every cake unique. It’s become my go-to for Halloween parties, movie nights, and even just for fun when I want to surprise my family with something special.
I’d love to hear how yours turns out. Did you add extra spiders? Try a different color scheme? Make it gluten-free? Drop a comment below and share your version. And if you snap a photo, tag me—I’m always looking for new spooky inspiration. Happy baking, and don’t let the spiders scare you away from that first slice!
Frequently Asked Questions
Can I make this spider web cake ahead of time?
Absolutely. You can bake the cake up to two days in advance and store it covered in the refrigerator. Add the chocolate web design the day you plan to serve it for the best visual effect. The web stays crisp for about 24 hours before it starts to soften slightly.
My chocolate web turned out messy. What did I do wrong?
Most likely, the chocolate was too thick or too thin. If it’s too thick, add a tiny bit more cream. If it’s too thin, let it cool for a few more minutes. Also, make sure you’re working quickly—the chocolate sets fast. Practice on a piece of parchment paper first if you’re nervous.
Can I use a different pan size?
Yes, but you’ll need to adjust the baking time. An 8-inch pan will give you a thicker cake that needs about 5 extra minutes in the oven. A 10-inch pan will give you a thinner cake that bakes about 5 minutes faster. Keep an eye on it and use the toothpick test to check doneness.
How do I get clean slices without ruining the web design?
Use a sharp knife and run it under hot water before each cut. Wipe the blade clean between slices. Chilling the cake thoroughly before slicing also helps the web stay intact. If you’re really worried, slice the cake before adding the web design, then pipe the web onto each individual slice.
Can I use milk chocolate instead of semi-sweet?
You can, but the web will be much sweeter and softer. Milk chocolate has more sugar and less cocoa butter, so it doesn’t set as firmly. If you prefer milk chocolate, add an extra tablespoon of heavy cream to help it firm up, and chill the cake longer before serving.
Pin This Recipe!
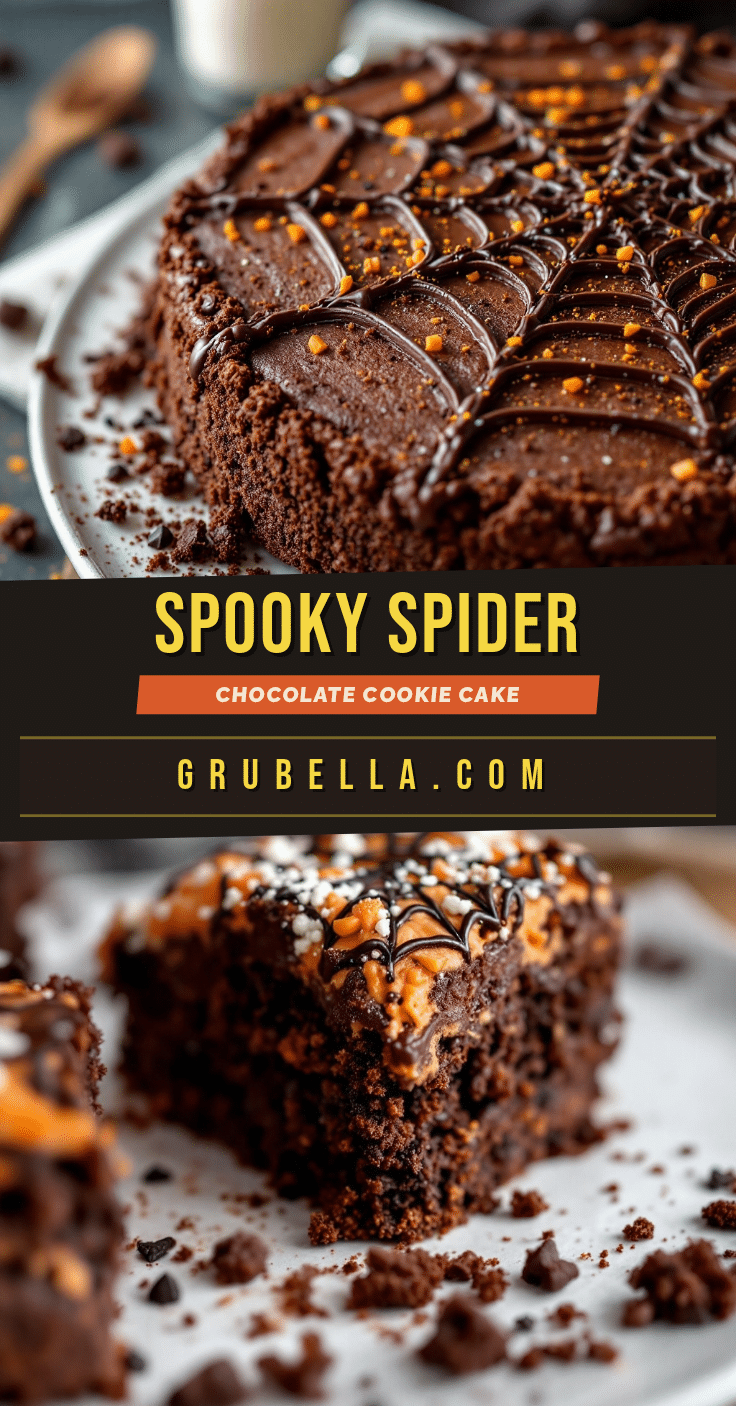
Best Easy Spooky Spider Web Chocolate Cookie Cake

A dramatic and delicious Halloween dessert featuring a fudgy chocolate cookie base, a creamy cream cheese layer, and a delicate chocolate spider web design. This showstopper is surprisingly easy to make and perfect for parties.
- Prep Time: 30 minutes
- Cook Time: 35 minutes
- Total Time: 1 hour 5 minutes
- Yield: 12 servings 1x
- Category: Dessert
- Cuisine: American
Ingredients
- 1 ½ cups all-purpose flour
- ½ cup unsweetened cocoa powder
- ½ teaspoon baking soda
- ¼ teaspoon salt
- ½ cup unsalted butter, softened
- ¾ cup granulated sugar
- ¼ cup packed light brown sugar
- 1 large egg, room temperature
- 1 teaspoon vanilla extract
- 8 ounces cream cheese, softened
- ¼ cup granulated sugar
- 1 large egg, room temperature
- ½ teaspoon vanilla extract
- ½ cup semi-sweet chocolate chips
- 2 tablespoons heavy cream
- 2 tablespoons white chocolate chips
- ¼ teaspoon coconut oil (optional)
- 12–15 candy spider rings
- Optional: edible glitter or luster dust
Instructions
- Preheat your oven to 350°F (175°C). Line the bottom of your 9-inch springform pan with parchment paper. Lightly grease the sides with butter or cooking spray.
- Make the chocolate cookie base. In a medium bowl, whisk together the flour, cocoa powder, baking soda, and salt. In a large bowl, beat the softened butter, granulated sugar, and brown sugar together until light and fluffy—about 3 minutes with an electric mixer. Add the egg and vanilla extract, beating until combined. Gradually add the dry ingredients to the wet mixture, mixing on low speed just until a soft dough forms.
- Press the dough into the pan. Transfer the cookie dough to your prepared pan. Use your fingers or the back of a spoon to press it evenly into the bottom, reaching all the way to the edges.
- Prepare the cream cheese layer. In a clean bowl, beat the softened cream cheese and sugar together until smooth and creamy. Add the egg and vanilla, beating just until incorporated. Pour this over the cookie dough base, spreading it gently with a spatula.
- Bake the cake for 30-35 minutes. The edges should look set and slightly golden, but the center will still jiggle slightly. Let cool in the pan on a wire rack for 20 minutes, then remove the springform ring and cool completely (about 1 hour).
- Make the chocolate web. Once the cake is completely cool, melt the semi-sweet chocolate chips and heavy cream together in a microwave-safe bowl in 20-second intervals, stirring between each, until smooth. Let cool slightly. In a separate small bowl, melt the white chocolate chips with the coconut oil (if using) using the same method.
- Create the spider web design. Pour the melted semi-sweet chocolate over the top of the cake and spread into an even layer. While still wet, pipe concentric circles of white chocolate starting from the center outward. Use a toothpick to drag lines from the center outward through the white chocolate circles to create the web effect. Wipe the toothpick clean between each drag.
- Add the spiders. While the chocolate is still slightly tacky, place the candy spider rings around the edge of the web, pressing gently so they stick.
- Chill and serve. Refrigerate the cake for at least 30 minutes to set the chocolate web. Let sit at room temperature for 10 minutes before slicing.
Notes
Room temperature ingredients are crucial for a smooth texture. Do not overbake the base; the center should still jiggle slightly. For clean slices, use a hot knife. The cake can be made ahead and stored covered in the refrigerator for up to 5 days. Freeze the undecorated cake for up to 2 months.
Nutrition
- Serving Size: 1 slice
- Calories: 380
- Sugar: 28
- Fat: 22
- Saturated Fat: 13
- Carbohydrates: 42
- Fiber: 2
- Protein: 6
Keywords: spider web cake, chocolate cookie cake, Halloween dessert, spooky cake, cream cheese cake, easy Halloween recipe



