Love this? Save it for later!
Share the inspiration with your friends
My husband took a bite of this crispy brown butter acorn squash with sage, paused mid-chew, and just stared at the plate for a second. Not in a dramatic way—more like he was trying to figure out why something so simple tasted so ridiculously good. He asked me to make it again three days later. That never happens.
I wasn’t even trying to impress anyone. It was a Tuesday night, I had an acorn squash sitting on the counter that I bought on a whim at the farmers market, and I was tired of roasting it the same old way. You know how it goes—you get stuck in a rut with certain vegetables, treating them like a side dish obligation instead of something you actually look forward to eating.
Brown butter changes everything. It’s one of those kitchen tricks that feels almost unfair, like you’re getting away with something. You just cook butter until it turns nutty and golden, and suddenly whatever you put it on tastes ten times more complex. Pair that with crispy sage leaves (which are basically nature’s potato chips in herb form), and you’ve got a side dish that steals the whole show.
This recipe came together because I wanted something that felt special enough for Thanksgiving but easy enough for a random weeknight. And honestly? It delivers on both fronts. The squash gets caramelized on the edges, tender in the middle, and the brown butter-sage situation coats every single piece in pure fall flavor. No fancy techniques, no hard-to-find ingredients—just good food that makes you wonder why you don’t cook like this every single day.
Why You’ll Love This Recipe
I’ve tested this crispy brown butter acorn squash with sage about seven times now, tweaking the temperature, the thickness of the slices, and the amount of butter. Here’s why I keep coming back to it.
- Ready in Under 40 Minutes : From cutting board to table in about 35 minutes, with only 10 minutes of active prep. Perfect for busy weeknights when you want something impressive without the effort.
- Simple Ingredients : You need an acorn squash, butter, fresh sage, salt, and pepper. That’s it. No trips to specialty stores or weird pantry items you’ll never use again.
- Perfect for Fall Gatherings : This dish fits right in at Thanksgiving, Friendsgiving, or any cozy dinner party. But it’s also simple enough for a Tuesday night when you need some comfort food energy.
- Crowd-Pleaser : I’ve served this to picky eaters, vegetable skeptics, and full-on squash lovers. Everyone goes back for seconds. The crispy sage leaves alone are worth the price of admission.
- Unbelievably Delicious : The combination of nutty brown butter, caramelized squash, and crispy sage creates this flavor that’s savory, slightly sweet, and completely addictive. You’ll find yourself eating it straight from the pan.
What makes this recipe different from the rest is the technique. Most recipes just drizzle butter over squash and call it a day. I brown the butter first, which develops those deep, toasty notes that transform the whole dish. Then I fry the sage leaves in that same butter until they’re perfectly crispy. The squash roasts at high heat to get those gorgeous caramelized edges while staying tender inside. It’s not complicated—it’s just smart cooking that delivers maximum flavor with minimum effort.
This is the kind of recipe that makes you feel like a really good cook, even though it’s almost embarrassingly simple. And honestly, that’s my favorite kind of recipe to share.
What Ingredients You Will Need
This recipe uses simple, wholesome ingredients that come together to create something genuinely special. Here’s what you need and why each one matters.
For the Squash
- 1 medium acorn squash (about 1.5 to 2 pounds) — Look for one that feels heavy for its size with firm, unblemished skin. The ridges can be annoying to peel, but I’ll show you a trick that makes it easier. You can also leave the skin on if you prefer—it’s edible once roasted.
- 2 tablespoons olive oil — Helps the squash roast evenly and get those beautiful golden-brown edges. Use a good-quality extra virgin olive oil for better flavor.
- ½ teaspoon salt — I use kosher salt here. It seasons the squash without making it salty.
- ¼ teaspoon black pepper — Freshly ground is always better, but pre-ground works in a pinch.
For the Brown Butter and Sage
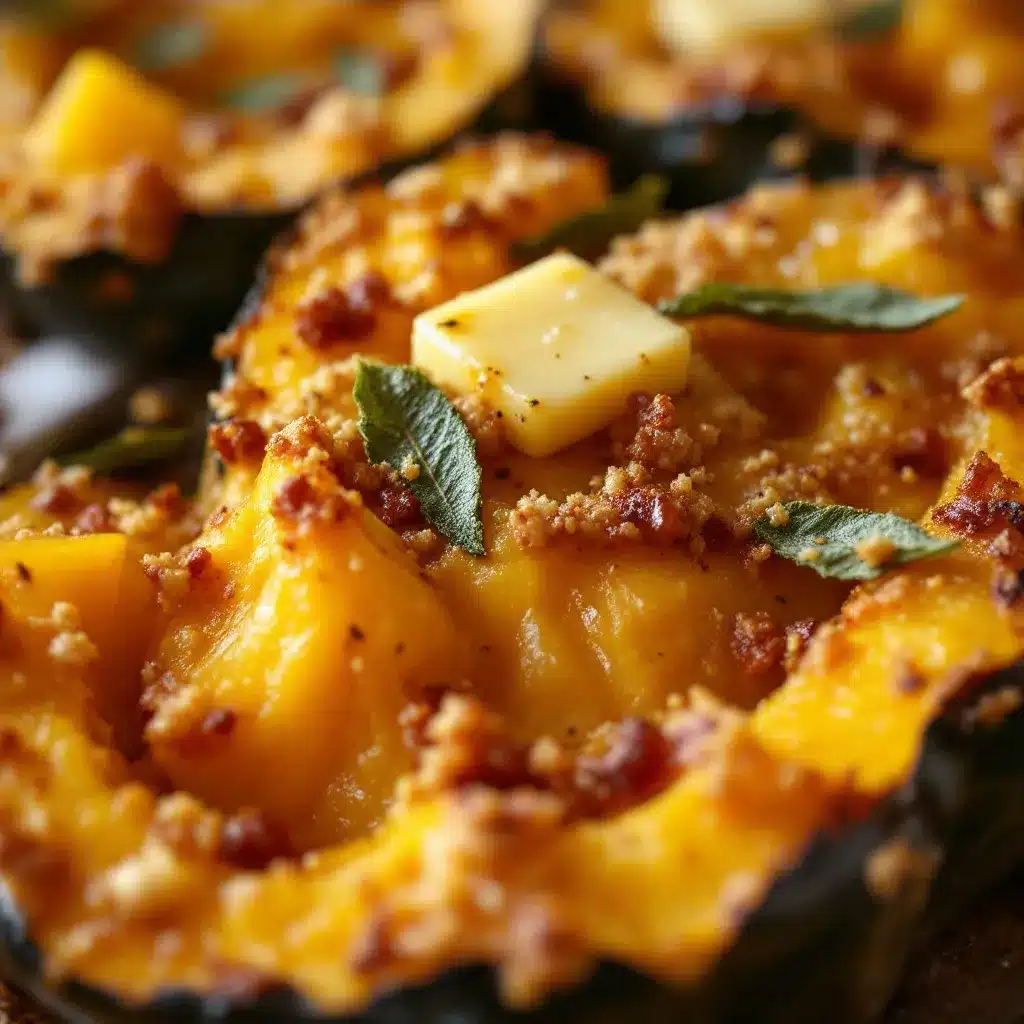
- 4 tablespoons unsalted butter — I recommend Kerrygold or another European-style butter for the best browning and flavor. The higher fat content gives you a richer, nuttier brown butter. Salted butter works too—just reduce the added salt slightly.
- 10-12 fresh sage leaves — Fresh sage is non-negotiable here. Dried sage won’t crisp up the same way. Look for leaves that are bright green and fragrant, without any brown spots.
- Flaky sea salt for finishing (optional but highly recommended) — Maldon or any other flaky salt adds that little crunch and burst of saltiness that makes the dish sing.
Ingredient Tips and Substitutions
If you can’t find acorn squash, butternut squash works beautifully here. Just cut it into similar-sized half-moon shapes. For a dairy-free version, use a high-quality vegan butter or ghee (which is technically dairy but has the lactose removed). The browning might not be quite as dramatic, but it’ll still be delicious. I’ve also made this with coconut oil in a pinch—different flavor, but still good.
Fresh sage is worth seeking out. Most grocery stores carry it in the produce section near the fresh herbs. If you grow your own, even better. One plant will give you more sage than you know what to do with, and this recipe is a perfect way to use it up.
Equipment Needed
Nothing fancy here—just basic kitchen tools you probably already own.
- Large baking sheet — A rimmed baking sheet works best to catch any butter that might drip. I use a half-sheet pan (18×13 inches) for even roasting.
- Parchment paper or silicone baking mat — Makes cleanup a breeze and prevents sticking. Not strictly necessary but highly recommended.
- Chef’s knife — A sharp one makes cutting through acorn squash much safer and easier. Dull knives are dangerous with hard squash.
- Vegetable peeler — For peeling the squash. A Y-peeler works better than a straight one for getting into those ridges.
- Small skillet — For browning the butter and frying the sage. A light-colored skillet helps you see when the butter turns golden.
- Cutting board — Preferably a large, sturdy one that won’t slip around.
- Spatula — For flipping the squash halfway through roasting.
If you don’t have a vegetable peeler you’re comfortable with, you can leave the skin on the squash. It softens during roasting and becomes perfectly edible. Some people actually prefer it that way. I’ve done it both ways and honestly, the skin-on version is a little more rustic and totally delicious.
Preparation Method
Step 1: Prep the Squash
Preheat your oven to 425°F (220°C). Line your baking sheet with parchment paper or a silicone mat. Now, tackle that acorn squash. First, cut off the top and bottom ends so the squash sits flat on your cutting board. This is my favorite safety trick—it stops the squash from rolling around while you’re trying to cut it. Carefully slice the squash in half from top to bottom. Use a sturdy spoon to scoop out all the seeds and stringy bits. You can save the seeds to roast later if you’re feeling ambitious—they make a great snack.
Step 2: Slice and Season
Using your vegetable peeler, remove the skin from each half. This takes a little patience, especially in the ridges, but it’s worth it for that smooth, buttery texture. Once peeled, slice each half into ½-inch thick half-moons. Try to keep them uniform in size so they roast evenly. In a large bowl, toss the squash slices with olive oil, salt, and pepper until every piece is well coated. Spread them in a single layer on your prepared baking sheet. Don’t overcrowd—give them room to breathe. If they’re too crowded, they’ll steam instead of caramelizing.
Step 3: Roast the Squash
Roast the squash for 20 minutes. At the 20-minute mark, flip each piece using your spatula. The undersides should be golden brown and caramelized. Return the pan to the oven and roast for another 10-15 minutes, until the squash is tender when pierced with a fork and the edges are deep golden brown. The exact time depends on how thick you sliced them and how hot your oven runs, so start checking at the 10-minute mark.
Step 4: Make the Brown Butter
While the squash finishes roasting, make your brown butter. Cut the butter into pieces and add it to your small skillet over medium heat. Swirl the pan occasionally as the butter melts. It’ll start to foam and bubble—that’s normal. Keep cooking, swirling frequently, until the foam subsides and you see golden-brown specks forming at the bottom of the pan. The butter will smell nutty and amazing. This takes about 4-6 minutes total. Watch it carefully—brown butter can go from perfect to burnt in seconds.
Step 5: Fry the Sage
Once your butter is browned, add the sage leaves to the pan. They’ll sizzle immediately. Cook for about 30 seconds per side, until they’re crisp and darker green. Use tongs or a fork to transfer them to a paper towel-lined plate. They’ll crisp up more as they cool. Don’t skip this step—crispy sage leaves are honestly the best part.
Step 6: Assemble and Serve
Transfer the roasted squash to a serving platter. Pour the brown butter over the top, making sure to scrape out all those little browned bits—that’s where all the flavor lives. Scatter the crispy sage leaves over everything. Sprinkle with flaky sea salt if you’re using it. Serve immediately, while the squash is still hot and the sage is perfectly crispy.
Cooking Tips & Techniques
I’ve made this recipe enough times to learn a few things the hard way. Let me save you some trouble.
Don’t rush the browning process. The first time I made brown butter, I cranked up the heat to speed things up. Big mistake. High heat makes the butter go from melted to burnt before you even see it change color. Keep it on medium heat and be patient. You’ll see it go through stages—first it melts, then it foams, then the foam subsides and the solids start to brown. That’s your window. Swirl the pan constantly and trust your nose. When it smells nutty and toasty, you’re there.
Cut your squash pieces evenly. I know it’s tempting to just hack away at it, but uneven pieces mean some will be perfectly caramelized while others are still crunchy or already mushy. Take the extra minute to make them uniform. Your future self will thank you.
Flip the squash halfway through. This isn’t optional. The side that’s touching the pan gets all the caramelization. If you don’t flip, you’ll have one beautiful side and one pale, sad side. Use a thin metal spatula to get underneath without breaking the pieces.
Make extra sage leaves. I always fry more than I think I need because they shrink when they cook, and everyone wants more. They’re like little flavor bombs—crispy, savory, and completely irresistible. Plus, they look gorgeous on the plate.
Serve immediately. This dish is best straight out of the oven. The squash stays warm for about 10-15 minutes, but the sage leaves lose their crunch after a while. If you’re making this for a dinner party, time it so the squash comes out of the oven right when you’re ready to eat.
Variations & Adaptations
This crispy brown butter acorn squash with sage is pretty perfect as written, but here are some ways to mix it up depending on your mood or what you have on hand.
Maple-Balsamic Version
Drizzle 1 tablespoon of maple syrup and 1 tablespoon of balsamic vinegar over the roasted squash before adding the brown butter. The sweetness plays beautifully with the nutty brown butter and the tangy vinegar cuts through the richness. I made this for a Friendsgiving potluck and people literally asked for the recipe before they finished eating.
Spicy Brown Butter
Add a pinch of red pepper flakes or a small dried chili to the butter while it browns. The heat sneaks up on you in the best way. It’s subtle enough that you won’t overwhelm the delicate squash flavor, but adds a nice warmth that pairs well with the sage.
Garlic Lover’s Version
Add 2-3 smashed garlic cloves to the butter while it browns. Remove them before pouring the butter over the squash. The garlic infuses the butter with a mellow, sweet flavor that’s absolutely divine. I’ve also tried roasting whole garlic cloves alongside the squash—also delicious.
Nutty Crunch Topping
Toast some walnuts or pecans in the brown butter before adding the sage. The nuts get toasty and flavorful, adding another layer of texture. Just be careful not to burn them—they cook fast.
Dairy-Free Adaptation
Use a good-quality vegan butter or ghee for the brown butter. The flavor won’t be quite as rich, but it’s still really good. I’ve also had success with coconut oil, though it adds a subtle coconut flavor that not everyone loves with sage.
Serving & Storage Suggestions
This dish is best served hot, right after the brown butter goes on and the sage leaves are still crispy. I like to arrange the squash on a warm platter in a single layer, then drizzle the butter and scatter the sage on top. A sprinkle of flaky sea salt right before serving makes everything pop.
It pairs beautifully with roasted chicken, pork chops, or a hearty fall salad. For a vegetarian main, serve it alongside cozy brown butter pumpkin sourdough bread and a simple green salad. It also works great as part of a Thanksgiving spread alongside maple bourbon sweet potato casserole and other classic sides.
Storage: Leftover squash keeps in an airtight container in the refrigerator for up to 4 days. The sage leaves will lose their crispness, unfortunately. Reheat the squash in a 350°F oven for about 10 minutes to revive some of the caramelization. The microwave works in a pinch, but the texture won’t be as good.
Make-Ahead Tip: You can peel and slice the squash up to a day in advance. Store the pieces in a bowl of cold water in the refrigerator. Pat them dry before roasting. You can also make the brown butter ahead of time and store it in the fridge—just reheat it gently before using.
Nutritional Information & Benefits
Here’s the approximate nutritional breakdown for one serving (about one quarter of the recipe):
- Calories: 220
- Fat: 16g
- Carbohydrates: 20g
- Fiber: 3g
- Protein: 2g
- Vitamin A: 45% of daily value
- Vitamin C: 30% of daily value
- Potassium: 15% of daily value
Acorn squash is packed with vitamins A and C, both of which support immune health—perfect for fall and winter when cold season hits. It’s also a good source of fiber, which keeps you full and supports digestion. The brown butter adds richness, but you’re still getting a vegetable-forward dish that feels indulgent without being heavy. If you’re watching your calorie intake, you can reduce the butter to 2 tablespoons—it won’t be quite as luxurious, but it’ll still be delicious.
This recipe is naturally gluten-free and can be made dairy-free with the substitutions mentioned above. It’s also vegetarian and can be part of a balanced diet for most people.
Conclusion
This crispy brown butter acorn squash with sage has become my go-to fall side dish for a reason. It’s simple enough for a Tuesday night but impressive enough for company. The combination of caramelized squash, nutty brown butter, and crispy sage leaves is genuinely addictive—I’ve watched people who claimed they didn’t like squash go back for thirds.
What I love most about this recipe is how it proves that you don’t need complicated techniques or fancy ingredients to make something truly special. A little patience with the brown butter, a hot oven, and some fresh sage—that’s all it takes. It’s the kind of cooking that reminds me why I love being in the kitchen.
I’d love to hear how this turns out for you. Did you try any of the variations? Have a favorite way to serve it? Drop a comment below and let me know. And if you’re looking for more fall inspiration, check out these pumpkin cream cheese muffins or this cozy slow cooker chicken and wild rice soup for more seasonal comfort food.
Frequently Asked Questions
Can I make this recipe ahead of time?
You can prep the squash up to a day in advance by peeling and slicing it, then storing the pieces in cold water in the fridge. The brown butter can also be made ahead and stored in the refrigerator. However, for the best texture and flavor, I recommend roasting the squash and assembling the dish right before serving. The crispy sage leaves especially don’t hold up well over time.
Do I have to peel the acorn squash?
Nope! The skin of acorn squash is perfectly edible once cooked. It softens during roasting and adds a bit of texture. If you’re short on time or just don’t feel like dealing with peeling, leave the skin on. Just make sure to wash the squash well before cutting. Some people actually prefer the skin-on version for the extra chewiness.
Can I use dried sage instead of fresh?
I really don’t recommend it for this recipe. Dried sage won’t crisp up the same way, and the flavor is much more concentrated and slightly bitter. Fresh sage leaves are key for that crispy texture and mild, earthy flavor. If you only have dried sage, you can sprinkle a little over the finished dish, but you’ll miss out on the best part of the recipe.
What other squash can I use?
Butternut squash is the best substitute—cut it into similar half-moon shapes and roast the same way. Delicata squash works great too, and you don’t even need to peel it. Kabocha squash is another excellent option, though it’s a bit denser and may need an extra few minutes in the oven. Stay away from spaghetti squash for this one—it doesn’t hold its shape the same way.
How do I know when the brown butter is done?
Watch for three signs: the butter will smell nutty and toasty, it’ll turn a golden-amber color, and you’ll see small brown specks forming at the bottom of the pan. The whole process takes about 4-6 minutes over medium heat. Don’t walk away from it—brown butter can go from perfect to burnt in about 30 seconds. If it smells burnt or looks dark brown, start over. Burnt brown butter tastes bitter and will ruin the dish.
Pin This Recipe!
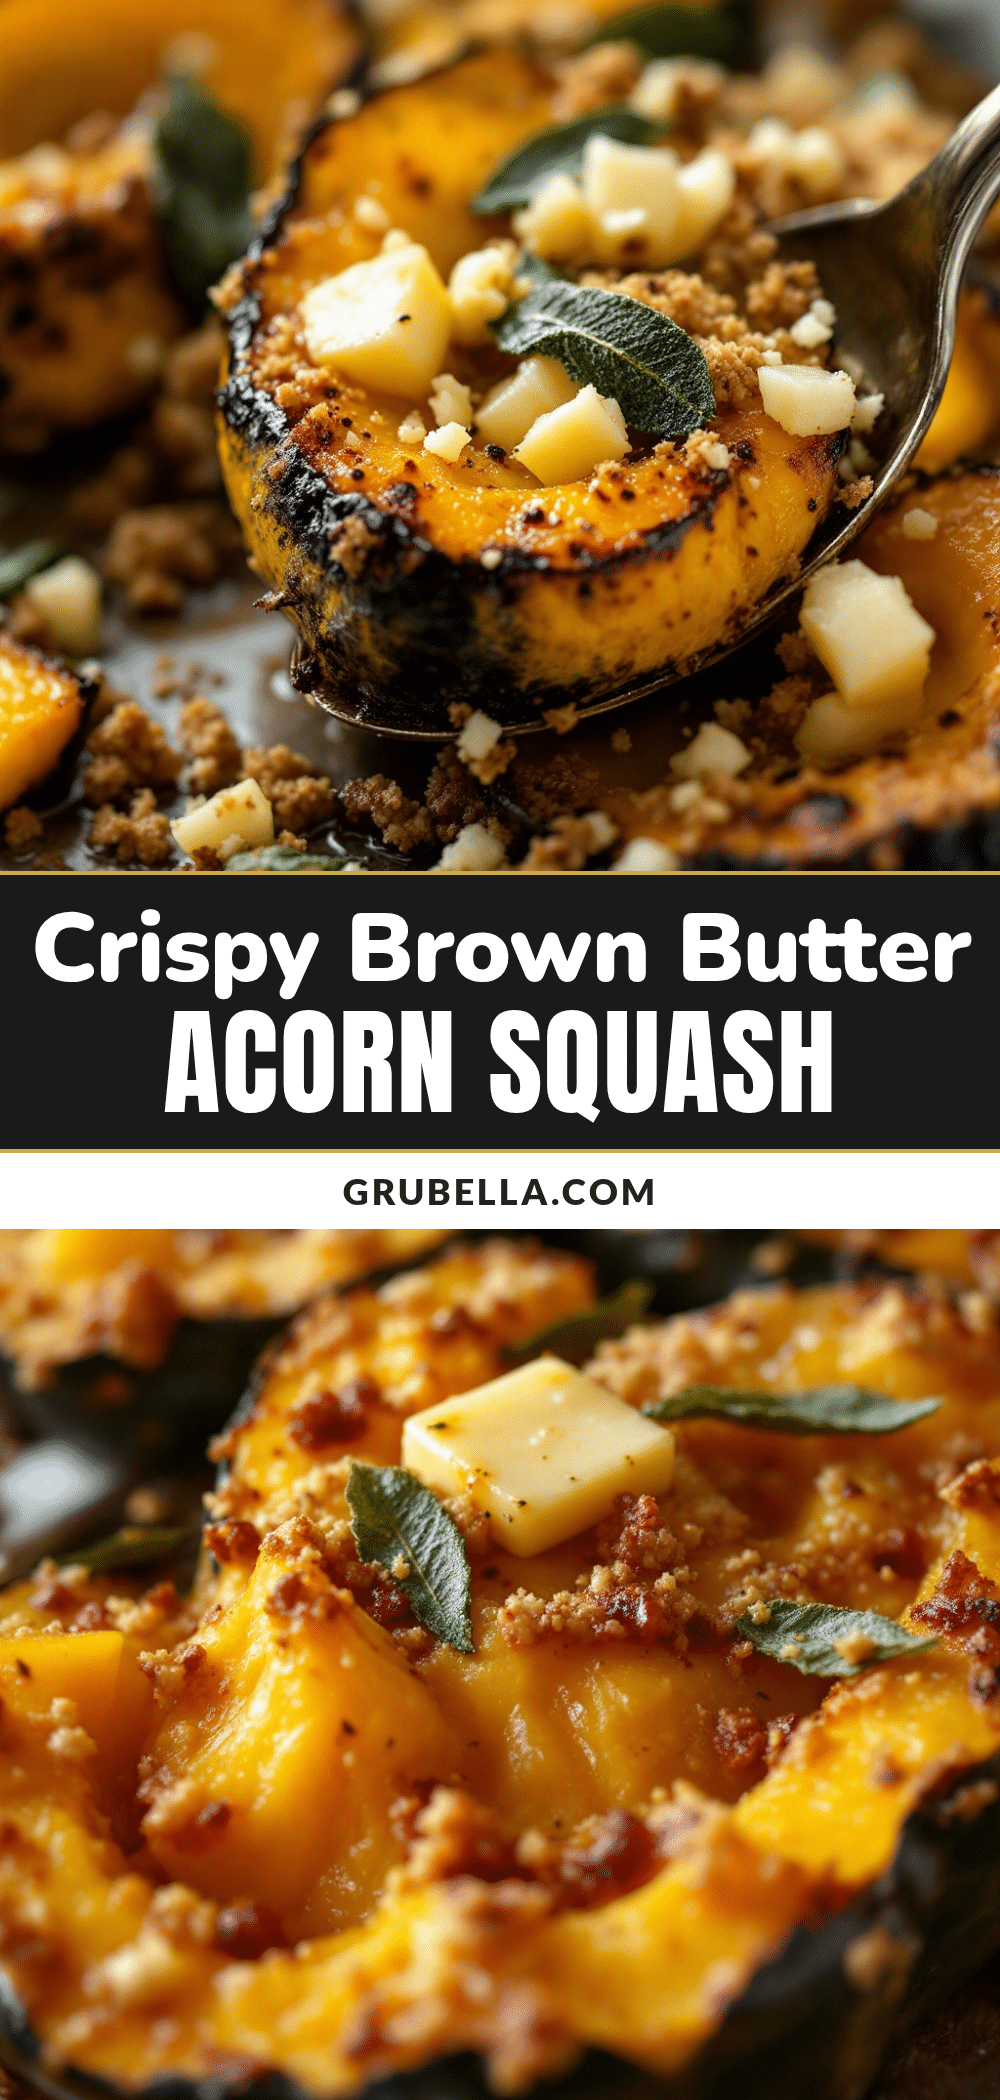
Best Easy Crispy Brown Butter Acorn Squash with Sage

This crispy brown butter acorn squash with sage is a simple yet impressive side dish that’s ready in under 40 minutes. Caramelized squash, nutty brown butter, and crispy sage leaves create an addictive fall flavor perfect for weeknights or holiday gatherings.
- Prep Time: 10 minutes
- Cook Time: 30-35 minutes
- Total Time: 40-45 minutes
- Yield: 4 servings 1x
- Category: Side Dish
- Cuisine: American
Ingredients
- 1 medium acorn squash (about 1.5 to 2 pounds)
- 2 tablespoons olive oil
- ½ teaspoon kosher salt
- ¼ teaspoon black pepper, freshly ground
- 4 tablespoons unsalted butter (preferably European-style like Kerrygold)
- 10–12 fresh sage leaves
- Flaky sea salt for finishing (optional, e.g., Maldon)
Instructions
- Preheat your oven to 425°F (220°C). Line a large baking sheet with parchment paper or a silicone mat.
- Prep the squash: Cut off the top and bottom ends so the squash sits flat. Carefully slice the squash in half from top to bottom. Use a sturdy spoon to scoop out all the seeds and stringy bits.
- Using a vegetable peeler, remove the skin from each half. Slice each half into ½-inch thick half-moons, keeping them uniform in size.
- In a large bowl, toss the squash slices with olive oil, salt, and pepper until well coated. Spread them in a single layer on the prepared baking sheet, not overcrowding.
- Roast the squash for 20 minutes. Flip each piece using a spatula, then return to the oven and roast for another 10-15 minutes, until tender when pierced with a fork and edges are deep golden brown.
- While the squash finishes roasting, make the brown butter: Cut the butter into pieces and add to a small skillet over medium heat. Swirl the pan occasionally as the butter melts and foams. Continue cooking, swirling frequently, until the foam subsides and golden-brown specks form at the bottom, about 4-6 minutes. The butter should smell nutty.
- Add the sage leaves to the brown butter. They will sizzle immediately. Cook for about 30 seconds per side, until crisp and darker green. Transfer to a paper towel-lined plate using tongs or a fork.
- Transfer the roasted squash to a serving platter. Pour the brown butter over the top, scraping out all the browned bits. Scatter the crispy sage leaves over everything. Sprinkle with flaky sea salt if using. Serve immediately.
Notes
Don’t rush the browning process; keep heat on medium and watch carefully as brown butter can burn quickly. Cut squash pieces evenly for uniform cooking. Flip squash halfway through roasting for even caramelization. Make extra sage leaves as they shrink when cooked. Serve immediately for best texture; sage leaves lose crunch over time. For make-ahead: peel and slice squash up to a day in advance, store in cold water in fridge. Brown butter can be made ahead and reheated gently.
Nutrition
- Serving Size: 1/4 of recipe
- Calories: 220
- Sugar: 4
- Sodium: 300
- Fat: 16
- Saturated Fat: 8
- Carbohydrates: 20
- Fiber: 3
- Protein: 2
Keywords: brown butter acorn squash, crispy sage, fall side dish, roasted acorn squash, easy squash recipe, Thanksgiving side, vegetarian side dish, gluten-free side dish



