Love this? Save it for later!
Share the inspiration with your friends
Third time this week, and I finally stopped adding more chipotle. That was my problem all along — I kept trying to out-smoke myself, dumping in extra adobo sauce like I was competing with the grill itself. But the fourth batch? That one sat on the stove for two hours, doing absolutely nothing dramatic, and it tasted like I’d been making it for years. The secret isn’t more heat or more smoke. It’s letting the beef and the beans figure each other out without you hovering.
I started making this smoky beef and black bean chili back in late October when the air got that cold-bite feel and I wanted something that would fill the whole kitchen with that low-and-slow smell without actually requiring me to tend a fire all afternoon. I browned the beef in batches — which I used to skip because I was impatient — and I let the onions go until they were jammy and almost embarrassing about it. The first time, I used a can of chipotles that had been sitting in my fridge door for eight months. That chili was fine. But the second time, I bought fresh ones, and I remembered why people bother with ingredients that aren’t from the back of the fridge.
This isn’t one of those chilis that takes all day and makes you plan your life around it. It’s rich and deep and the kind of thing you eat in silence for a few minutes before you start talking again. I wanted a chili that felt like a real meal — not just something you eat before the cornbread arrives. And honestly? This one delivers. It’s thick enough to stand up to a spoon, smoky without being aggressive, and the black beans hold their shape in a way that makes every bite feel intentional. I’ve made it for myself on a Tuesday and for a crowd on a Saturday, and it worked both times. That’s the kind of recipe you hold onto.
Why You’ll Love This Recipe
I’ve tested this chili more times than I care to admit — and I’ve learned a few things along the way. This version is the one I keep coming back to, and here’s why it works.
- Rich, Deep Flavor in Under an Hour — Most “quick” chilis taste thin and watery. This one builds layers of smoky depth using a smart browning technique and the right spice balance. You get slow-cooked flavor without the slow cook.
- Simple, Everyday Ingredients — No obscure spice blends or specialty stores. You probably have cumin, smoked paprika, and canned black beans in your pantry right now. If you don’t, they’re a five-minute trip away.
- Perfect for Meal Prep and Crowds — This chili gets better after a day in the fridge. Make it Sunday, eat it Tuesday, and thank yourself on Wednesday when lunch is already handled. It also scales beautifully — double it for game day or a potluck without any fuss.
- Seriously Satisfying Without Being Heavy — The beef and beans give it real staying power, but it’s not the kind of chili that sits in your stomach like a brick. It’s hearty but balanced, with a subtle heat that warms you up without making you reach for milk.
- Customizable to Your Taste — Want it spicier? Add more chipotle. Prefer it milder? Dial it back and double the smoked paprika. This recipe is a framework, not a straightjacket. I’ve made it with ground turkey and extra beans when I wanted something lighter, and it still worked beautifully.
This isn’t just another chili recipe. It’s the one I turn to when I need something reliable — the kind of meal that feels like a hug in a bowl but doesn’t require a whole afternoon of babysitting the stove. I’ve served it alongside a skillet of Hatch chili cheddar cornbread and watched people go back for thirds. That’s the kind of reaction you want from a bowl of chili.
What Ingredients You Will Need
This recipe leans on a handful of pantry staples and a few fresh ingredients that do the heavy lifting. Here’s exactly what you need and why each one matters.
- 2 tablespoons olive oil — For browning the beef and sautéing the aromatics. Use a neutral oil with a decent smoke point; avocado oil works great too.
- 2 pounds ground beef (85/15 or 80/20) — I prefer an 85/15 blend here. It’s lean enough that you won’t have to drain a pool of grease, but rich enough to give the chili body. If you use 93/7, the chili will be a little less silky — still good, but add an extra tablespoon of oil.
- 1 large yellow onion, diced — About 2 cups. Onion is the backbone of this chili. Let it cook until it’s soft and translucent, almost jammy. Don’t rush this step.
- 4 cloves garlic, minced — Fresh garlic only. The pre-minced stuff in a jar has its place, but not here. You want that sharp, aromatic hit that only fresh garlic provides.
- 1 large poblano pepper, seeded and diced — Adds a mild, earthy heat that builds without overwhelming. If you can’t find poblanos, use a green bell pepper and add a pinch of cayenne.
- 2 chipotle peppers in adobo sauce, minced, plus 1 tablespoon adobo sauce — This is where the smoky depth comes from. Chipotles are dried, smoked jalapeños rehydrated in a tangy-sweet adobo sauce. They bring warmth, complexity, and that signature campfire note. I recommend the San Marcos brand — they’re consistently smoky without being overly vinegary.
- 2 tablespoons tomato paste — Concentrated tomato flavor that thickens the chili and adds a subtle sweetness. Cook it with the aromatics for a minute or two to deepen its flavor.
- 1 can (14.5 ounces) fire-roasted diced tomatoes — Fire-roasted tomatoes amplify the smoky theme. Don’t drain them; the liquid is full of flavor. Muir Glen makes a solid fire-roasted option.
- 2 cans (15 ounces each) black beans, drained and rinsed — Rinsing removes the excess sodium and starchy liquid that can make chili murky. Black beans hold their shape better than kidney beans in this application, giving you a meaty texture in every bite.
- 2 cups beef broth — Use a good-quality broth. I like Better Than Bouillon’s roasted beef base — it’s concentrated and gives you control over the salt level. Low-sodium is ideal here.
- 1 tablespoon smoked paprika — Not the sweet or hot kind. Smoked paprika is made from peppers dried over oak fires, and it reinforces the chipotle’s smokiness. I use the Spanish smoked paprika from Penzeys.
- 1 tablespoon ground cumin — Cumin adds that warm, almost citrusy earthiness that defines chili. Toast it in the pan for 30 seconds before adding liquid to wake up its oils.
- 1 teaspoon dried oregano — Mexican oregano if you have it; it’s more floral and less minty than Mediterranean oregano. It adds a subtle herbal note that rounds out the smokiness.
- 1 teaspoon kosher salt, plus more to taste — Season as you go, not just at the end. I add a pinch with the onions, another with the beef, and adjust right before serving.
- ½ teaspoon black pepper — Freshly ground, please. Pre-ground pepper is fine in a pinch, but fresh makes a noticeable difference.
- Optional toppings: shredded cheddar, sour cream, diced avocado, fresh cilantro, lime wedges, pickled jalapeños — These aren’t optional in my house. A dollop of sour cream and a squeeze of lime brighten up the deep, smoky flavors beautifully.
Equipment Needed
You don’t need a fancy kitchen to make this chili work. Here’s what I used, plus a few alternatives if you’re working with what you’ve got.
- Large Dutch oven or heavy-bottomed pot (5-6 quart) — A Dutch oven retains heat evenly and gives you a good surface for browning. Le Creuset is lovely, but a Lodge enameled cast iron pot costs a fraction and works just as well. In a pinch, any heavy-bottomed stockpot will do — just watch the heat to prevent scorching.
- Wooden spoon or spatula — For breaking up the beef and scraping up the browned bits. A flat-edged wooden spoon works best. Metal utensils can scratch enameled cookware.
- Sharp chef’s knife and cutting board — You’ll be dicing onion, mincing garlic, and seeding poblanos. A dull knife makes all of this harder than it needs to be.
- Measuring spoons and liquid measuring cup — Precision matters with spices. Eyeballing smoked paprika is a recipe for disappointment.
- Can opener — Obvious, but worth mentioning. A good one makes the process smoother.
- Colander — For rinsing the black beans. A fine-mesh strainer works too.
I’ve made this chili in a stainless steel pot and it turned out fine — I just had to stir more often to keep the bottom from catching. If you’re using a nonstick pot, be careful with high heat; nonstick surfaces don’t love the high temperatures needed for proper browning.
Preparation Method
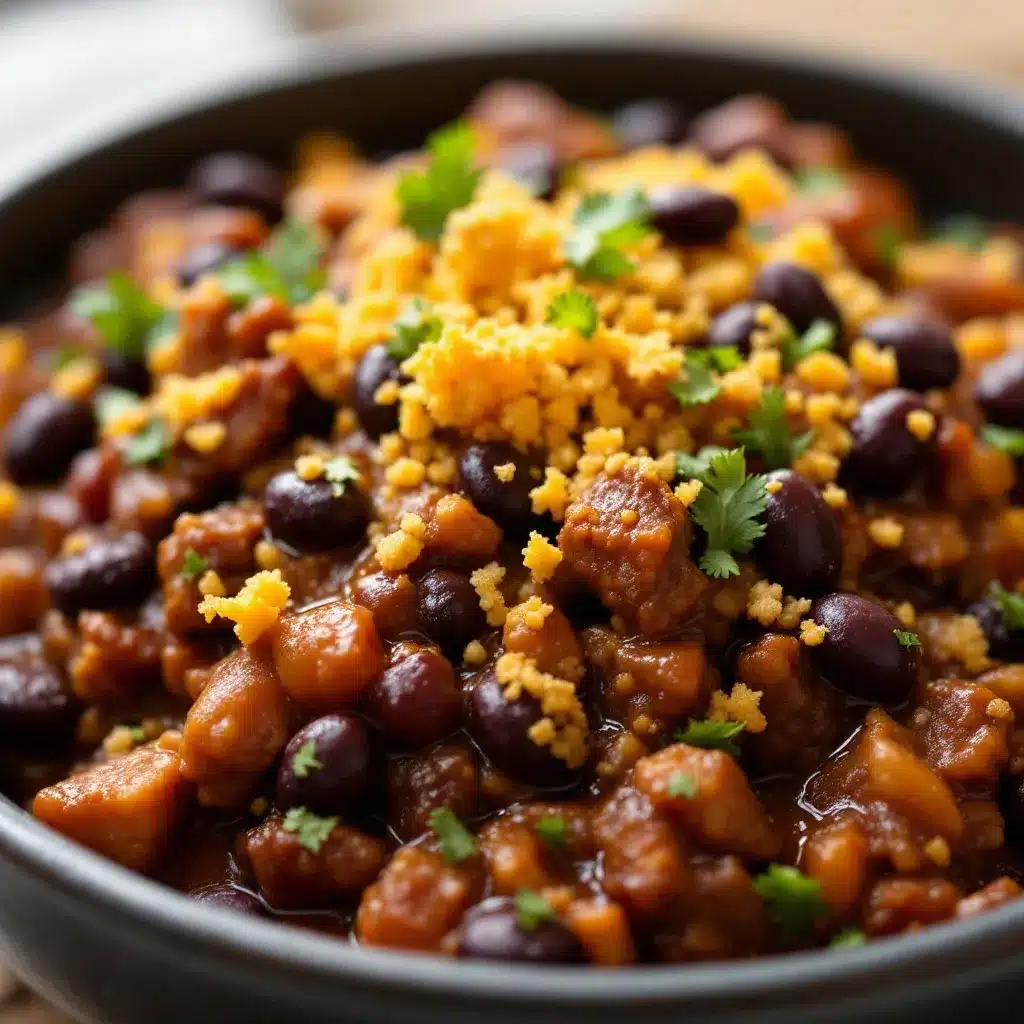
Let’s get into the actual cooking. This method is designed to build flavor at every step, so don’t skip the browning or the toasting of the spices. Trust me — it’s worth it.
- Brown the beef in batches. Heat 1 tablespoon of olive oil in your Dutch oven over medium-high heat. Add half the ground beef and let it cook undisturbed for 3-4 minutes — you want a deep brown crust, not gray meat. Break it up with your spoon and continue cooking until browned all over, about 5-6 minutes total. Transfer to a bowl with a slotted spoon, leaving the fat in the pot. Repeat with the remaining beef. (If your pot is crowded, the beef will steam instead of brown. Two batches is non-negotiable here.)
- Sauté the aromatics. Reduce the heat to medium. Add the remaining 1 tablespoon of olive oil to the pot. Toss in the diced onion and poblano pepper, and cook for 6-8 minutes, stirring occasionally, until the onion is soft and translucent. Scrape up any browned bits from the bottom of the pot — that’s pure flavor. Add the minced garlic, tomato paste, and the minced chipotles with their adobo sauce. Cook for 1-2 minutes until the tomato paste darkens to a rust color and the garlic is fragrant.
- Toast the spices. Sprinkle the smoked paprika, cumin, dried oregano, salt, and black pepper over the aromatics. Stir constantly for 30-45 seconds — this wakes up the essential oils in the spices and makes them more aromatic. The kitchen will smell incredible at this point.
- Combine the liquids and beans. Pour in the fire-roasted diced tomatoes (with their juices) and the beef broth. Stir to combine, scraping the bottom of the pot to release any remaining browned bits. Add the drained and rinsed black beans. Return the browned beef to the pot, along with any accumulated juices in the bowl. Give everything a good stir.
- Simmer low and slow. Bring the chili to a gentle boil, then reduce the heat to low. Cover the pot with the lid slightly ajar — you want some steam to escape so the chili thickens. Simmer for 30-40 minutes, stirring every 10 minutes or so. The chili is ready when it has thickened noticeably and the flavors have melded together. If it looks too thick, add a splash of broth or water. If it’s too thin, simmer uncovered for an extra 10 minutes.
- Taste and adjust. Remove the pot from the heat. Taste the chili and adjust the seasoning. I usually add another pinch of salt and a squeeze of lime juice at this point — the acidity brightens everything up. If you want more heat, stir in an extra teaspoon of adobo sauce or a pinch of cayenne.
- Rest before serving. Let the chili sit off the heat for 10-15 minutes before serving. This allows the flavors to settle and the texture to thicken slightly. It’s not essential, but it makes a difference.
One thing I learned the hard way: don’t add the beans too early if you’re using canned beans. They’ve already been cooked, and simmering them for an hour can turn them mushy. Thirty minutes is the sweet spot — long enough for them to absorb the smoky flavor, short enough to keep their shape.
Cooking Tips & Techniques
I’ve made enough mediocre chili to know where things go wrong. Here are the tricks that turned this recipe from “fine” to “can’t stop eating it.”
- Don’t crowd the pan when browning. This is the number one mistake people make. If you dump all the beef in at once, it releases steam and boils instead of browning. Brown meat equals flavor. Gray meat equals sadness. Work in batches and give each piece of beef room to develop that deep crust.
- Toast your spices. I used to dump cumin and paprika straight into the liquid, and I wondered why my chili tasted flat. Toasting them in the hot oil for 30 seconds transforms their flavor completely. You’ll smell the difference immediately — it goes from dusty to aromatic and warm. Just don’t burn them; burnt spices taste bitter and acrid.
- Use the right fat ratio. Ground beef that’s too lean (93/7 or higher) produces dry, crumbly chili. You need some fat for richness and mouthfeel. If you only have lean beef, add a tablespoon of butter or oil when you brown it to compensate.
- Layer your salt. Season at every stage — a pinch with the onions, a pinch with the beef, and a final adjustment at the end. This builds flavor from the ground up instead of trying to fix a bland chili with a last-minute salt dump.
- Let it rest. Chili is one of those rare dishes that actually improves after sitting. The flavors meld, the texture evens out, and the heat distributes more evenly. I made the mistake of serving it immediately the first time, and it was good. The next day’s leftovers were incredible.
One failure I’ll admit to: I once tried to speed things up by using a high simmer instead of a low one. The chili reduced too quickly, the bottom scorched, and I ended up with a smoky flavor I didn’t ask for. Low and gentle is the way. Trust the process.
Variations & Adaptations
This chili is flexible. Here are a few ways I’ve adapted it depending on what I had in the fridge or who I was feeding.
- Vegetarian version. Skip the beef entirely and double the black beans. Add a second can of fire-roasted tomatoes and an extra cup of broth. For more depth, add 8 ounces of chopped cremini mushrooms and cook them with the onions until they release their liquid and start browning. The mushrooms add a meaty, umami quality that helps fill the gap left by the beef.
- Spicier version. If you like heat, add a finely diced jalapeño (seeds and all) with the onions. You can also stir in ½ teaspoon of cayenne pepper with the other spices, or add an extra chipotle pepper with its sauce. I’ve done all three at once and it was intense but delicious — just have a glass of milk nearby.
- Smokier version. For those who can’t get enough of that campfire flavor, add 1 teaspoon of liquid smoke along with the broth. Be careful — liquid smoke is potent. Start with ½ teaspoon, taste, and add more if you want. I also like to stir in a diced smoked sausage or andouille at the end for extra meaty smokiness.
- Slow cooker adaptation. Brown the beef and sauté the aromatics on the stovetop first, then transfer everything to a slow cooker. Cook on low for 6-8 hours or high for 3-4 hours. Add the black beans during the last 30 minutes to prevent them from breaking down.
- Gluten-free and dairy-free adaptation. This recipe is naturally gluten-free as written. For dairy-free, skip the cheese and sour cream toppings. Use avocado or a dairy-free yogurt alternative instead.
I’ve tried a version with sweet potatoes once — added a diced medium sweet potato with the broth — and it was surprisingly good. The sweetness played well with the smokiness, and the potatoes broke down just enough to thicken the chili naturally. Worth a try if you have one sitting around.
Serving & Storage Suggestions
This chili is a meal in itself, but the right accompaniments can take it over the top.
Serving suggestions: Ladle the chili into deep bowls and top with your favorites. I go with shredded sharp cheddar, a dollop of sour cream, diced avocado, fresh cilantro, and a squeeze of lime. Pickled jalapeños add a bright, vinegary kick that cuts through the richness. Serve with warm tortillas, crusty bread, or a side of Hatch chili cheddar cornbread for dipping. If you’re feeding a crowd, set up a chili bar with all the toppings and let everyone build their own bowl.
Storage instructions: Let the chili cool completely before storing. Transfer to an airtight container and refrigerate for up to 5 days. The flavors actually deepen after a day or two in the fridge — it’s one of those rare dishes that gets better with time. For longer storage, portion the chili into freezer-safe bags or containers, leaving an inch of headspace for expansion. Freeze for up to 3 months.
Reheating methods: Thaw frozen chili in the refrigerator overnight. Reheat on the stovetop over medium-low heat, stirring occasionally, until warmed through. Add a splash of broth or water if it’s too thick. You can also microwave individual portions in 60-second bursts, stirring between each. The chili might thicken a bit after storage, so don’t be afraid to loosen it up with a little extra liquid.
One thing I’ve noticed: the smoked paprika flavor mellows slightly after a day in the fridge. If you’re making this ahead for a party, consider adding an extra pinch of smoked paprika when you reheat it to revive that smoky punch.
Nutritional Information & Benefits
This chili is hearty and satisfying without being a calorie bomb. Here’s an approximate nutritional breakdown per serving (based on 6 servings, without toppings).
- Calories: 420
- Protein: 32g
- Fat: 18g
- Carbohydrates: 32g
- Fiber: 10g
- Sugar: 6g
- Sodium: 780mg
Health benefits: Black beans are packed with fiber and plant-based protein, which help keep you full and support digestive health. The beef provides iron, zinc, and B vitamins — all essential for energy and immune function. Smoked paprika and chipotle peppers contain capsaicin, which has anti-inflammatory properties and can give your metabolism a slight boost. The fire-roasted tomatoes are rich in lycopene, a powerful antioxidant that’s better absorbed when cooked in oil.
Dietary considerations: This recipe is naturally gluten-free and can be made dairy-free by omitting the cheese and sour cream. It’s also low in added sugar — the only sweetness comes from the tomatoes and onions. If you’re watching your sodium, use low-sodium broth and no-salt-added canned tomatoes, and rinse the black beans thoroughly.
I’m not a nutritionist, but I feel good about eating a bowl of this chili. It’s real food — whole ingredients, balanced macros, and zero weird additives. That’s the kind of meal I can feel good about serving my family.
Conclusion
This smoky beef and black bean chili is the kind of recipe that earns a permanent spot in your rotation. It’s rich and deeply flavored without being complicated, and it comes together in about an hour with ingredients you can find at any grocery store. The smokiness from the chipotles and smoked paprika gives it a distinctive character that sets it apart from standard chili, while the black beans add texture and heartiness that makes it a complete meal.
I’ve made this chili for weeknight dinners, game day gatherings, and lazy Sunday lunches. It’s never let me down. The best part? It’s endlessly adaptable — make it spicier, smokier, or lighter depending on your mood. That’s the beauty of a good chili recipe; it’s a framework, not a rigid formula.
I’d love to hear how yours turns out. Did you add extra chipotle? Try it with ground turkey? Serve it with cheesy chicken and rice casserole on the side? Drop a comment below and let me know your favorite variation. And if you’re looking for another cozy, one-pot meal, check out this slow cooker tomato basil soup — it’s perfect for those days when you want comfort without the effort.
Now go make some chili. Your kitchen is about to smell amazing.
Frequently Asked Questions
Can I make this chili in a slow cooker?
Yes, absolutely. Brown the beef and sauté the aromatics on the stovetop first, then transfer everything except the black beans to a slow cooker. Cook on low for 6-8 hours or high for 3-4 hours. Add the drained and rinsed black beans during the last 30 minutes of cooking. This method gives you the same deep flavor with minimal hands-on time.
Can I use dried black beans instead of canned?
You can, but you’ll need to plan ahead. Soak 1 cup of dried black beans overnight, then drain and rinse them. Cook them separately in fresh water until tender — about 1 to 1½ hours — before adding them to the chili. Do not add raw dried beans directly to the chili; the acidity from the tomatoes will prevent them from softening properly.
How do I make this chili less spicy?
Reduce or omit the chipotle peppers in adobo sauce. Start with just 1 teaspoon of adobo sauce instead of a full tablespoon, and skip the minced chipotles entirely. You can also use a mild smoked paprika instead of hot smoked paprika. The chili will still have plenty of smoky flavor without the heat.
Can I freeze this chili?
Yes, this chili freezes beautifully. Let it cool completely, then portion it into freezer-safe bags or containers. Leave about an inch of headspace for expansion. Freeze for up to 3 months. Thaw overnight in the refrigerator and reheat on the stovetop or in the microwave. You may need to add a splash of broth when reheating, as the chili thickens during freezing.
What’s the best way to reheat leftover chili?
For the best texture, reheat chili on the stovetop over medium-low heat, stirring occasionally. Add a tablespoon or two of beef broth or water if it’s too thick. If you’re in a hurry, microwave individual portions in 30-second bursts, stirring between each, until heated through. The chili will taste even better the next day as the flavors continue to meld.
Pin This Recipe!
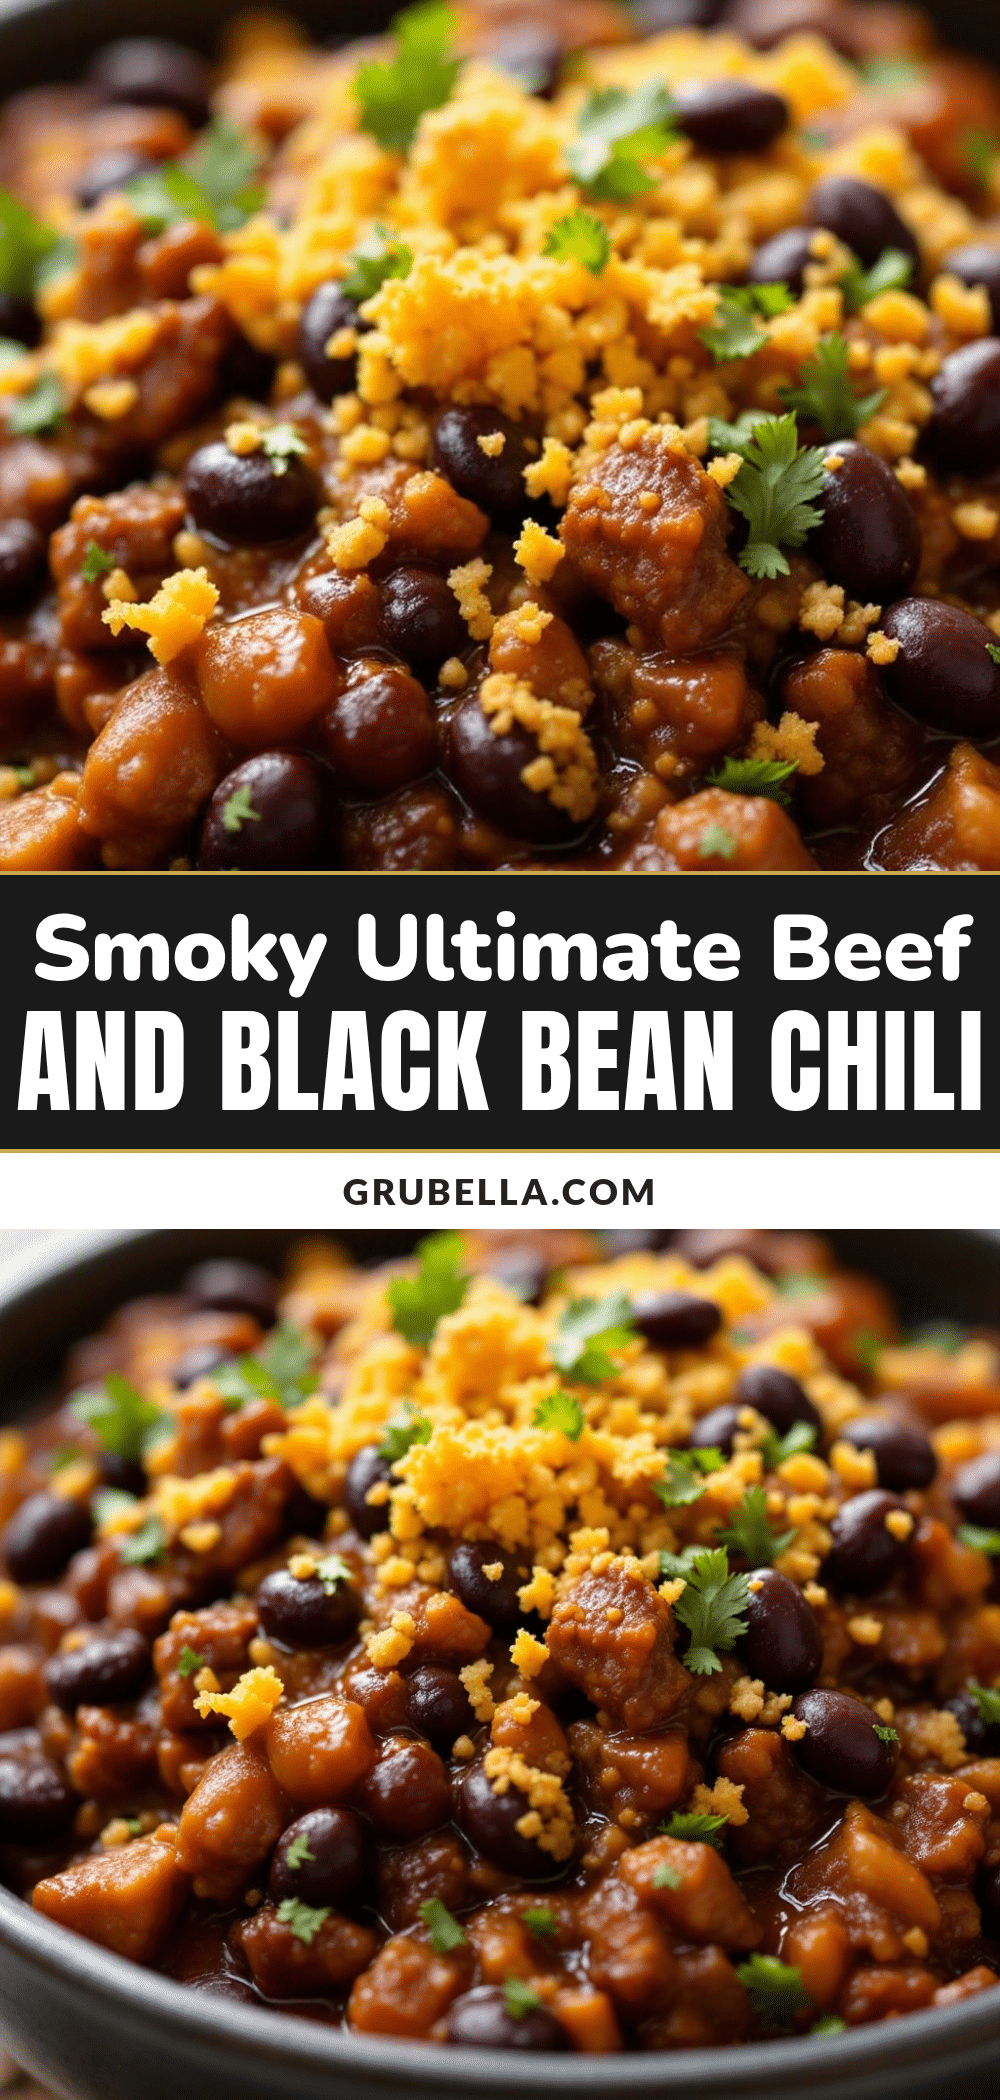
Best Smoky Beef and Black Bean Chili Recipe

This smoky beef and black bean chili is rich and deeply flavored without being complicated, coming together in about an hour with simple ingredients. It’s thick enough to stand up to a spoon, smoky without being aggressive, and the black beans hold their shape for an intentional bite in every spoonful.
- Prep Time: 15 minutes
- Cook Time: 40 minutes
- Total Time: 55 minutes
- Yield: 6 servings 1x
- Category: Main Course
- Cuisine: American
Ingredients
- 2 tablespoons olive oil
- 2 pounds ground beef (85/15 or 80/20)
- 1 large yellow onion, diced (about 2 cups)
- 4 cloves garlic, minced
- 1 large poblano pepper, seeded and diced
- 2 chipotle peppers in adobo sauce, minced, plus 1 tablespoon adobo sauce
- 2 tablespoons tomato paste
- 1 can (14.5 ounces) fire-roasted diced tomatoes
- 2 cans (15 ounces each) black beans, drained and rinsed
- 2 cups beef broth
- 1 tablespoon smoked paprika
- 1 tablespoon ground cumin
- 1 teaspoon dried oregano (preferably Mexican oregano)
- 1 teaspoon kosher salt, plus more to taste
- ½ teaspoon black pepper, freshly ground
- Optional toppings: shredded cheddar, sour cream, diced avocado, fresh cilantro, lime wedges, pickled jalapeños
Instructions
- Brown the beef in batches. Heat 1 tablespoon of olive oil in your Dutch oven over medium-high heat. Add half the ground beef and let it cook undisturbed for 3-4 minutes until a deep brown crust forms. Break it up and continue cooking until browned all over, about 5-6 minutes total. Transfer to a bowl with a slotted spoon, leaving the fat in the pot. Repeat with the remaining beef.
- Sauté the aromatics. Reduce the heat to medium. Add the remaining 1 tablespoon of olive oil to the pot. Add the diced onion and poblano pepper, and cook for 6-8 minutes, stirring occasionally, until the onion is soft and translucent. Scrape up any browned bits from the bottom. Add the minced garlic, tomato paste, and the minced chipotles with their adobo sauce. Cook for 1-2 minutes until the tomato paste darkens and the garlic is fragrant.
- Toast the spices. Sprinkle the smoked paprika, cumin, dried oregano, salt, and black pepper over the aromatics. Stir constantly for 30-45 seconds until fragrant.
- Combine the liquids and beans. Pour in the fire-roasted diced tomatoes (with their juices) and the beef broth. Stir to combine, scraping the bottom of the pot. Add the drained and rinsed black beans. Return the browned beef to the pot along with any accumulated juices. Stir well.
- Simmer low and slow. Bring the chili to a gentle boil, then reduce the heat to low. Cover the pot with the lid slightly ajar. Simmer for 30-40 minutes, stirring every 10 minutes, until the chili has thickened and flavors have melded. If too thick, add a splash of broth or water; if too thin, simmer uncovered for an extra 10 minutes.
- Taste and adjust. Remove from heat. Taste and adjust seasoning, adding more salt or a squeeze of lime juice as desired. For more heat, stir in an extra teaspoon of adobo sauce or a pinch of cayenne.
- Rest before serving. Let the chili sit off the heat for 10-15 minutes before serving to allow flavors to settle and texture to thicken slightly.
Notes
Don’t add the beans too early if using canned beans; they’ve already been cooked and simmering for an hour can turn them mushy. Thirty minutes is the sweet spot. The chili gets better after a day in the fridge. If making ahead, add an extra pinch of smoked paprika when reheating to revive the smoky flavor.
Nutrition
- Serving Size: 1 serving (about 1.5
- Calories: 420
- Sugar: 6
- Sodium: 780
- Fat: 18
- Saturated Fat: 6
- Carbohydrates: 32
- Fiber: 10
- Protein: 32
Keywords: smoky beef chili, black bean chili, chipotle chili, easy chili recipe, one-pot chili, gluten-free chili, meal prep chili



