Love this? Save it for later!
Share the inspiration with your friends
Fingers still sticky with orange pulp, standing over a colander in the sink while my three-year-old demanded “more pumpkin guts” for the third time. That’s where this recipe was born. Not from some romantic fall afternoon with a pumpkin spice latte in hand, but from the very real mess of carving pumpkins on a Tuesday night when dinner was already late and I was honestly just trying to salvage something from all that work.
The seeds were sitting there, rinsed and glistening, and I almost threw them in the trash. You know that moment when you’re tired and the extra step feels impossible? But then I remembered the bag of cinnamon sugar sitting in the pantry, and something clicked. What if instead of the usual salty roasted seeds, I made them sweet? Like a crunchy, caramelized snack that would actually disappear before the jack-o-lantern started wilting on the porch.
That first batch came out okay. A little too burnt on the edges, not sweet enough in the middle. But my kids ate them like they’d discovered gold, and my husband asked if I could make more the next weekend. So I tinkered. Adjusted the temperature, played with the sugar ratio, figured out the trick to getting that shatteringly crisp texture without the bitter burned taste. And now? These crispy cinnamon sugar pumpkin seeds are the reason I actually look forward to pumpkin carving day.
There’s something honest about a recipe that starts with a mess and ends with a bowl of something that makes everyone quiet for five minutes. No fancy techniques, no special trips to the store. Just seeds you were about to throw away, transformed into the snack you didn’t know you needed.
Why You’ll Love This Recipe
Let me tell you why these crispy cinnamon sugar pumpkin seeds have become a non-negotiable part of my fall baking rotation. I’ve tested this recipe more times than I care to admit, and every single batch has taught me something new about getting that perfect crunch.
- Quick & Easy: From pumpkin to snack in about 30 minutes total. Most of that time is hands-off baking, so you can clean up that pumpkin carving mess while they crisp up in the oven.
- Simple Ingredients: You literally just need pumpkin seeds, butter, sugar, cinnamon, and a pinch of salt. That’s it. No weird extracts or specialty items.
- Perfect for Fall Gatherings: These are amazing for Halloween parties, Thanksgiving snacking, or just munching while you watch a scary movie. They also make a fantastic topping for our creamy pumpkin cheesecake swirl muffins for extra crunch.
- Crowd-Pleaser: I’ve brought these to potlucks and watched grown adults fight over the last handful. Kids love them, adults love them, and they somehow disappear faster than any other snack on the table.
- Unbelievably Delicious: The contrast between the crunchy seed and the sweet, buttery coating is honestly addictive. They’re like a grown-up version of cinnamon toast crunch, but better because you made them yourself.
What makes these different from every other pumpkin seed recipe out there is the technique. Most recipes tell you to boil the seeds first or dry them overnight. I tried that. It’s a hassle, and honestly, it doesn’t give you better results. My method uses a simple butter coating and a specific oven temperature that toasts the seeds evenly without burning the sugar. It’s the kind of trick you only learn after burning three batches in a row, and I’m sharing it so you don’t have to make the same mistakes.
These seeds are the kind of snack that makes you close your eyes after the first bite. That sweet-crunchy-satisfying thing that hits every craving at once. Perfect for impressing guests without any stress, or turning a simple Tuesday night into something a little more special.
What Ingredients You Will Need
This recipe uses the simplest ingredients to create something truly special. Here’s everything you need and why each one matters.
- Fresh pumpkin seeds (1 cup, about 4 ounces): Straight from your carving pumpkin, rinsed and patted dry. You can also use store-bought raw pumpkin seeds (pepitas), but fresh seeds from a sugar pumpkin or carving pumpkin have a better texture and flavor. Look for seeds that are plump and firm, not shriveled or discolored.
- Unsalted butter (2 tablespoons, melted): The butter is what helps the cinnamon sugar stick and gives the seeds that rich, toasty flavor. I use unsalted so I can control the salt level. If you only have salted butter, just skip the added salt in the recipe. I prefer Kerrygold for its creamy taste, but any good-quality butter works.
- Granulated sugar (2 tablespoons): Regular white sugar creates that perfect crystallized coating that shatters when you bite into it. Don’t substitute brown sugar here — it has too much moisture and will make the seeds sticky instead of crispy.
- Ground cinnamon (1 teaspoon): Fresh cinnamon makes a huge difference. If your cinnamon has been sitting in the pantry for two years, it’s time to replace it. I like Saigon cinnamon for its bold, sweet flavor, but regular cinnamon works great too.
- Salt (¼ teaspoon): Just a tiny pinch to balance the sweetness and bring out the nutty flavor of the seeds. Flaky sea salt like Maldon is lovely here, but regular table salt works fine.
That’s honestly it. Six ingredients, and you probably already have five of them in your kitchen right now. The only thing you need to source is the pumpkin seeds themselves, and those come free with your Halloween pumpkin purchase.
One thing I learned the hard way — don’t skip rinsing the seeds thoroughly. That stringy orange pulp will burn in the oven and give your seeds a bitter, unpleasant taste. Take the extra minute to really clean them well. I run mine under cold water in a colander and pick out any remaining pulp pieces by hand. It’s not glamorous, but it makes a difference.
Equipment Needed
You don’t need any fancy equipment for this recipe, which is part of why I love it so much. Here’s what you’ll need:
- Baking sheet: A standard half-sheet pan works perfectly. Line it with parchment paper for easy cleanup. If you don’t have parchment, you can use a silicone baking mat or just grease the pan lightly with butter.
- Mixing bowl: Any medium-sized bowl will do. I use a glass mixing bowl because it’s easy to see when the seeds are evenly coated.
- Colander: For rinsing those pumpkin seeds. A fine-mesh strainer works even better because the seeds won’t fall through.
- Paper towels or clean kitchen towel: For drying the seeds after rinsing. This step is crucial — wet seeds won’t get crispy.
- Spatula: For stirring the seeds halfway through baking. A silicone spatula is nice because it won’t scratch your baking sheet.
- Measuring spoons: For the butter, sugar, cinnamon, and salt. I use my stainless steel set because they’re accurate and easy to clean.
If you don’t have parchment paper, don’t stress. I’ve made these directly on a greased baking sheet many times and they turn out just fine. The cleanup is slightly more annoying, but the results are the same. And if you’re using a dark-colored baking sheet, keep an eye on the seeds a few minutes early — dark pans absorb more heat and can burn the sugar faster.
Preparation Method
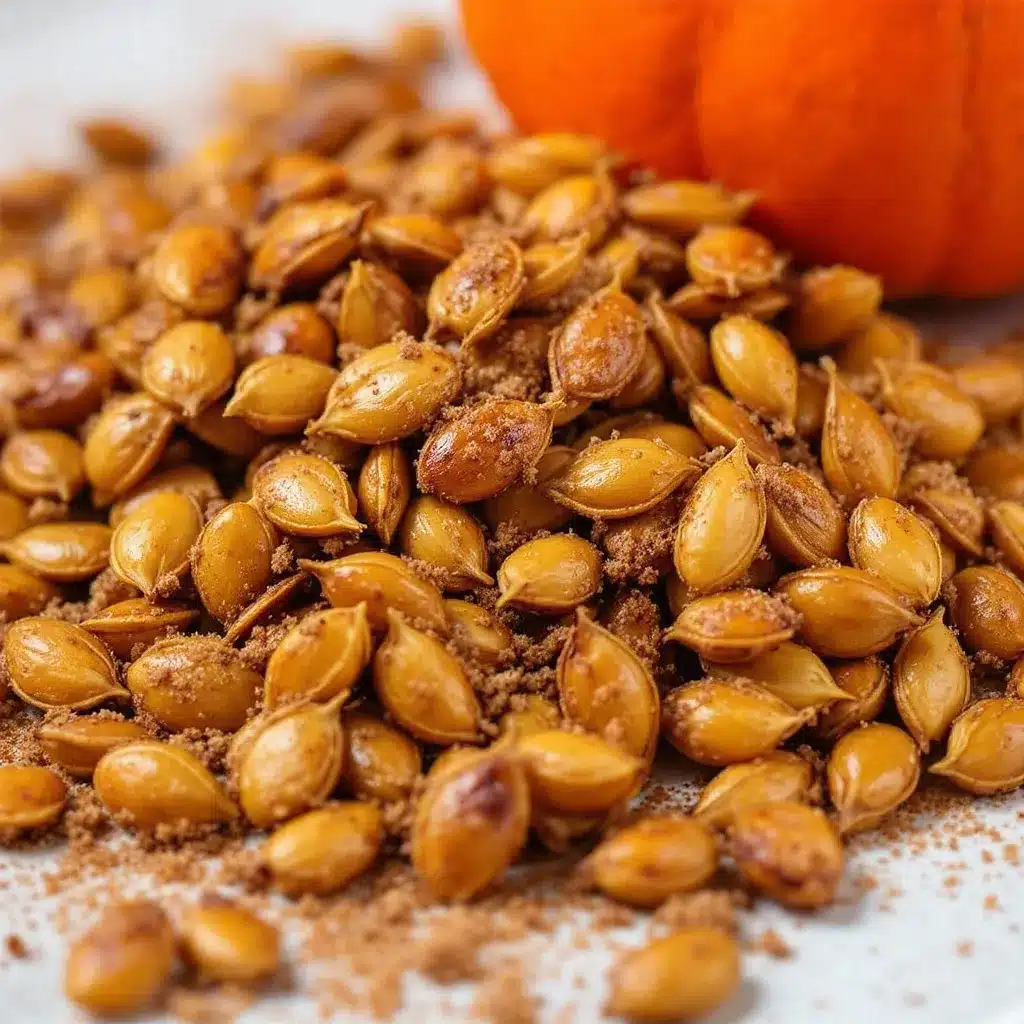
Alright, let’s get these seeds crispy and delicious. Follow these steps and you’ll have the perfect snack in no time.
- Preheat your oven to 325°F (163°C). This is the sweet spot — hot enough to crisp the seeds without burning the sugar. While the oven heats up, line your baking sheet with parchment paper.
- Clean the pumpkin seeds thoroughly. Separate the seeds from the pumpkin guts and place them in a colander. Rinse under cold running water, using your fingers to rub off any remaining pulp. Pick out any big stringy pieces. This takes about 2-3 minutes, and it’s important. Trust me, you don’t want to bite into a piece of burned pumpkin string.
- Dry the seeds completely. Spread the rinsed seeds on a clean kitchen towel or paper towels. Pat them dry, then let them sit for 5 minutes to air dry a bit more. They should feel damp but not soaking wet. If they’re too wet, the butter won’t stick properly and the seeds won’t get crispy.
- Melt the butter. Place 2 tablespoons of unsalted butter in a small microwave-safe bowl and microwave for 20-30 seconds until melted. Alternatively, melt it in a small saucepan over low heat. Let it cool for a minute — you don’t want it hot enough to cook the seeds when you mix them.
- Mix the cinnamon sugar. In a small bowl, combine 2 tablespoons of granulated sugar, 1 teaspoon of ground cinnamon, and ¼ teaspoon of salt. Stir with a fork until evenly mixed. Take a moment to smell that cinnamon — this is where the magic starts.
- Combine everything. Place the dried pumpkin seeds in your mixing bowl. Pour the melted butter over them and toss until every seed is coated. Then sprinkle the cinnamon sugar mixture over the seeds and toss again. Make sure every seed has a little coating — it’s okay if some seeds have more than others, but try to get them all covered.
- Spread on the baking sheet. Pour the coated seeds onto your prepared baking sheet and spread them into a single layer. Don’t overcrowd them — if they’re piled on top of each other, they’ll steam instead of roast. If you have a lot of seeds, use two baking sheets.
- Bake for 15 minutes. Place the baking sheet on the middle rack of your oven. Set a timer for 15 minutes. Your kitchen will start smelling amazing about 5 minutes in.
- Stir and rotate. After 15 minutes, remove the baking sheet from the oven. Use your spatula to stir the seeds around, making sure the ones on the edges get mixed with the ones in the middle. Rotate the baking sheet front to back for even baking.
- Bake for another 5-10 minutes. Return the sheet to the oven and bake for another 5 minutes. Start checking at the 5-minute mark — the seeds should be golden brown and smell toasty. You’ll hear them start to pop slightly, which is normal. Be careful not to overbake; the sugar can go from golden to burnt very quickly.
- Cool completely. Remove the baking sheet from the oven and let the seeds cool right on the sheet. They’ll continue to crisp up as they cool. Don’t touch them for at least 10 minutes — I know it’s hard, but patience pays off here. The seeds will be soft when they come out of the oven but will become shatteringly crisp as they cool.
- Break apart and enjoy. Once completely cool, break apart any clusters that have formed. Some clumping is normal and actually desirable — those little clusters of cinnamon-sugar-coated seeds are the best part.
One thing I want to mention — every oven runs a little differently. My old oven would burn these at 325°F, so I had to drop the temperature to 300°F and bake them longer. Pay attention to how your oven behaves and adjust accordingly. The seeds should be golden brown, not dark brown. If they look too dark at any point, take them out immediately.
Cooking Tips & Techniques
After making these crispy cinnamon sugar pumpkin seeds more times than I can count, I’ve picked up some tricks that make a real difference. Let me share what I’ve learned.
The drying step is non-negotiable. I learned this the hard way when I made a batch with seeds that were still pretty wet. They came out chewy and sad instead of crispy and glorious. Take the extra few minutes to really dry those seeds. Pat them with paper towels, then let them sit while you preheat the oven. Every bit of moisture you remove is a step toward crunchier seeds.
Watch the last few minutes like a hawk. The difference between perfect cinnamon sugar pumpkin seeds and burnt ones is about 60 seconds. The sugar in the coating can go from beautifully caramelized to acrid and bitter in the blink of an eye. I set my timer for the minimum time and start checking early. When they smell toasty and look golden, they’re done.
Don’t skip the parchment paper. I know it’s tempting to save a step, but parchment makes cleanup so much easier and prevents the sugar from sticking to your pan. If you use a silicone baking mat, make sure it’s light-colored — dark mats can cause the bottom of the seeds to burn before the tops are done.
Let them cool completely before storing. I’ve made the mistake of putting warm seeds in a container, and they turned soft and chewy within hours. The steam trapped in the container ruins all that crispy texture you worked for. Spread them out, walk away, and let them cool fully. It takes about 20 minutes, but it’s worth the wait.
Double the batch if you’re smart. These disappear fast. I’ve never made a batch that lasted more than two days in my house. If you’re making them for a party or just want to have some around for snacking, double the recipe. They store well if you follow the storage tips below, so there’s no reason not to make extra.
One failure I’ll admit to — I once tried to speed things up by using a higher oven temperature. Big mistake. The sugar burned on the outside while the inside of the seeds stayed soft. Low and slow is the way to go here. 325°F is the perfect temperature for even cooking and caramelization without burning.
Variations & Adaptations
One of the best things about this recipe is how easy it is to change up. Here are some variations I’ve tried and loved.
Spiced Pumpkin Seeds: Add ¼ teaspoon of pumpkin pie spice, ¼ teaspoon of nutmeg, and a pinch of cloves to the cinnamon sugar mixture. This gives the seeds a warm, holiday-inspired flavor that’s perfect for Thanksgiving snacking. I made these for our Friendsgiving last year and they were gone before the turkey even came out of the oven.
Maple Brown Sugar Seeds: Replace the granulated sugar with 2 tablespoons of packed brown sugar and add 1 tablespoon of real maple syrup. Reduce the butter to 1 tablespoon since the maple syrup adds moisture. These come out with a deeper, more complex sweetness that pairs beautifully with a cup of coffee. They’re also amazing sprinkled over our cozy brown butter pumpkin sourdough bread for extra crunch.
Spicy Sweet Seeds: Add ¼ teaspoon of cayenne pepper and ¼ teaspoon of chili powder to the cinnamon sugar mixture. The heat sneaks up on you after the initial sweetness, creating that addictive sweet-and-spicy combo that’s impossible to stop eating. My brother-in-law, who claims he doesn’t like sweets, devoured an entire batch of these in one sitting.
Vegan Version: Replace the butter with coconut oil or a plant-based butter alternative. Use refined coconut oil if you don’t want a coconut flavor, or unrefined if you enjoy that tropical note. The texture comes out slightly different — a bit less rich — but still incredibly crispy and delicious.
Chocolate Drizzle: Once the seeds have cooled completely, melt ¼ cup of dark chocolate chips and drizzle over the seeds. Let the chocolate set before breaking apart. This turns your simple snack into something that feels almost like a dessert. I did this for a Halloween party and people lost their minds.
Feel free to experiment with your own combinations. The basic technique stays the same — coat in butter, toss in sugar and spices, bake low and slow. Everything else is up to your imagination.
Serving & Storage Suggestions
These crispy cinnamon sugar pumpkin seeds are incredibly versatile when it comes to serving. Here’s how I like to enjoy them.
Serving Temperature: These are best at room temperature, straight from the baking sheet after they’ve cooled. The texture is perfectly crisp and the cinnamon sugar coating is at its most flavorful. That said, they’re also delicious slightly warm, when the butter is still a bit melty and the sugar is soft. Just don’t store them while they’re still warm — that’s a recipe for soggy seeds.
Presentation Ideas: Serve them in a simple bowl for snacking, or get creative. I love filling small mason jars with these seeds and tying a ribbon around the neck for hostess gifts. They also make a fantastic topping for salads, yogurt bowls, or oatmeal. Sprinkle them over our creamy high-protein cottage cheese breakfast bowl for a crunchy-sweet breakfast that feels indulgent but isn’t.
What to Serve With Them: These seeds pair beautifully with a hot cup of apple cider or a pumpkin spice latte. They’re also great alongside a cheese board — the sweetness contrasts perfectly with sharp cheddar or creamy brie. For a fun fall snack board, arrange these seeds with apple slices, caramel dip, and our perfect chewy brown sugar pumpkin spice blondies for a dessert spread that’ll impress any crowd.
Storage Instructions: Store completely cooled seeds in an airtight container at room temperature. They’ll stay crispy for up to 2 weeks, though I doubt they’ll last that long. Do not refrigerate them — the moisture in the fridge will make them soft. If you live in a humid climate, add a food-safe silica gel packet to the container to absorb excess moisture.
Freezer Instructions: You can freeze these seeds for up to 3 months. Place them in a freezer-safe bag or container, squeeze out as much air as possible, and freeze. To refresh them, spread the frozen seeds on a baking sheet and warm them in a 300°F oven for 5 minutes. Let them cool completely before serving again. The texture won’t be quite as perfect as fresh, but they’ll still be delicious.
How Flavors Develop: These seeds are actually at their best the day after you make them. The flavors meld together overnight, and the texture becomes even more crisp. If you can resist eating them all on day one, you’ll be rewarded with an even better snack on day two.
Nutritional Information & Benefits
Let’s talk about what’s actually in these little crunchy gems. While they’re definitely a treat, pumpkin seeds have some surprising health benefits that make this snack feel a little less guilty.
Estimated Nutritional Values (per ¼ cup serving):
- Calories: 180
- Total Fat: 14g
- Saturated Fat: 4g
- Carbohydrates: 10g
- Fiber: 2g
- Sugar: 6g
- Protein: 7g
- Sodium: 150mg
Health Benefits: Pumpkin seeds are packed with magnesium, zinc, and healthy fats. Magnesium supports muscle function and sleep quality, while zinc is great for immune health — perfect for the cold and flu season that coincides with pumpkin season. The protein and fiber in these seeds also help keep you full and satisfied, making them a better snack choice than processed options.
Dietary Considerations: These seeds are naturally gluten-free, making them a safe snack for anyone with celiac disease or gluten sensitivity. They’re also vegetarian and can easily be made vegan with the coconut oil substitution mentioned above. If you’re watching your sugar intake, you can reduce the sugar to 1 tablespoon — the seeds won’t be as sweet, but they’ll still have that lovely cinnamon flavor.
Potential Allergens: This recipe contains dairy from the butter. If you have a dairy allergy, use the vegan substitution with coconut oil or a plant-based butter. The seeds themselves are nut-free, but always check your ingredient labels if allergies are a concern.
I’m not a nutritionist, and I don’t pretend to be one. But I do believe in enjoying food that makes you feel good, and these seeds hit that sweet spot between indulgent and wholesome. A handful of these is a much better choice than a handful of candy, and they satisfy that same craving for something sweet and crunchy.
Conclusion
These crispy cinnamon sugar pumpkin seeds have become a fall tradition in my house, and I have a feeling they’ll become one in yours too. They take something you were probably going to throw away and turn it into something genuinely special — a snack that’s crunchy, sweet, and completely addictive.
What I love most about this recipe is how forgiving it is. Even if you burn the first batch a little (I’ve done it, more than once), the second batch will be perfect. The ingredients are cheap, the technique is simple, and the payoff is enormous. Plus, there’s something deeply satisfying about making something delicious from what most people consider kitchen waste.
I’d love to hear how these turn out for you. Did you try any of the variations? Did you come up with your own twist? Drop a comment below and let me know — I read every single one, and I love hearing about your kitchen adventures. And if you snap a photo of your seeds, tag me so I can see your beautiful creations.
Until next time, happy snacking, and remember — the best recipes often start with a mess.
Frequently Asked Questions
Do I have to use fresh pumpkin seeds, or can I use store-bought pepitas?
You can absolutely use store-bought raw pepitas! The texture will be slightly different — fresh seeds have a thicker, more substantial crunch — but the flavor will still be delicious. Just make sure you’re using raw, unsalted pepitas, not roasted ones. If you use roasted seeds, reduce the baking time by about 5 minutes since they’re already partially cooked.
Why did my seeds turn out chewy instead of crispy?
Chewy seeds usually mean one of two things: they weren’t dried thoroughly before baking, or they were stored before they cooled completely. Make sure you pat those seeds really dry after rinsing, and let them cool fully on the baking sheet before transferring to a container. If they’re still chewy after cooling, spread them back on a baking sheet and bake at 300°F for another 5-7 minutes.
Can I make these in an air fryer?
Yes! Air fryer cinnamon sugar pumpkin seeds work great. Preheat your air fryer to 300°F, spread the coated seeds in a single layer in the basket, and cook for 8-10 minutes, shaking the basket halfway through. Check them at the 8-minute mark — air fryers run hot and can burn the sugar quickly. Let them cool completely in the basket before removing.
How do I prevent the sugar from burning?
The key is temperature control and attention. Keep your oven at 325°F max, and start checking the seeds at the 15-minute mark. If you notice the sugar starting to darken too quickly, reduce the temperature to 300°F and add a few minutes to the baking time. Also, make sure your seeds are in a single layer — overlapping seeds trap moisture and can cause uneven cooking that leads to burning.
Can I use these seeds in other recipes?
Absolutely! These cinnamon sugar pumpkin seeds are amazing as a topping for yogurt bowls, oatmeal, salads, and even ice cream. Crush them up and use them as a crust for cheesecake or as a topping for muffins before baking. They also make a fantastic addition to trail mix or granola. I’ve even sprinkled them over roasted sweet potatoes for a sweet-savory side dish that’s absolutely divine.
Pin This Recipe!
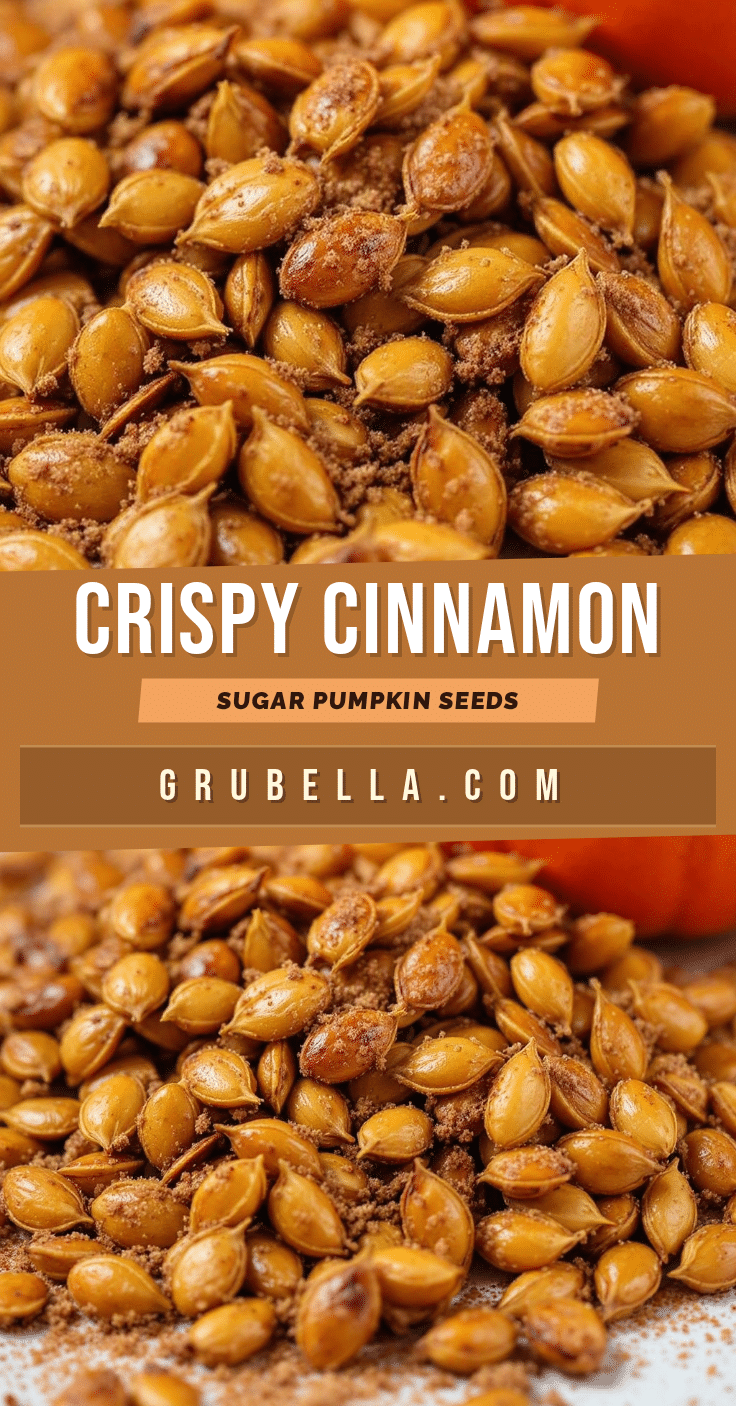
Best Easy Crispy Cinnamon Sugar Pumpkin Seeds Recipe
Transform fresh pumpkin seeds into a crunchy, sweet, and addictive snack with this easy recipe. Perfect for fall gatherings, these cinnamon sugar pumpkin seeds are a crowd-pleaser that turns kitchen waste into a delicious treat.
- Prep Time: 10 minutes
- Cook Time: 20 minutes
- Total Time: 30 minutes
- Yield: 4 servings 1x
- Category: Snack
- Cuisine: American
Ingredients
- 1 cup fresh pumpkin seeds (about 4 ounces)
- 2 tablespoons unsalted butter, melted
- 2 tablespoons granulated sugar
- 1 teaspoon ground cinnamon
- ¼ teaspoon salt
Instructions
- Preheat your oven to 325°F (163°C). Line a baking sheet with parchment paper.
- Clean the pumpkin seeds thoroughly by separating them from the pumpkin guts and rinsing under cold water in a colander. Remove any remaining pulp.
- Dry the seeds completely by spreading them on a clean kitchen towel or paper towels. Pat dry and let sit for 5 minutes to air dry.
- Melt 2 tablespoons of unsalted butter in a small microwave-safe bowl (20-30 seconds) or in a small saucepan over low heat. Let cool for a minute.
- In a small bowl, combine 2 tablespoons granulated sugar, 1 teaspoon ground cinnamon, and ¼ teaspoon salt. Stir until evenly mixed.
- Place the dried pumpkin seeds in a mixing bowl. Pour the melted butter over them and toss until every seed is coated. Sprinkle the cinnamon sugar mixture over the seeds and toss again to coat evenly.
- Spread the coated seeds in a single layer on the prepared baking sheet. Avoid overcrowding.
- Bake for 15 minutes on the middle rack.
- Remove the baking sheet from the oven, stir the seeds with a spatula, and rotate the sheet front to back for even baking.
- Return to the oven and bake for another 5-10 minutes, checking at the 5-minute mark. Seeds should be golden brown and smell toasty.
- Remove from the oven and let the seeds cool completely on the baking sheet for at least 10 minutes. They will crisp up as they cool.
- Once completely cool, break apart any clusters and enjoy.
Notes
Dry seeds thoroughly for best crispiness. Watch the last few minutes of baking closely to prevent burning. Let seeds cool completely before storing to maintain crunch. For a vegan version, replace butter with coconut oil.
Nutrition
- Serving Size: ¼ cup
- Calories: 180
- Sugar: 6
- Sodium: 150
- Fat: 14
- Saturated Fat: 4
- Carbohydrates: 10
- Fiber: 2
- Protein: 7
Keywords: cinnamon sugar pumpkin seeds, crispy pumpkin seeds, roasted pumpkin seeds, fall snack, Halloween snack, easy pumpkin seed recipe



