Love this? Save it for later!
Share the inspiration with your friends
The Sunday night chopping ritual had become a quiet meditation. The knife hitting the board in a steady rhythm, the smell of onion and garlic blooming in the warm kitchen air, and the satisfying sizzle of ground beef hitting a hot pan. It was my way of preparing for the chaos of the week ahead, a small act of control in a life that often felt anything but. And honestly, the only thing I wanted from that effort was a freezer full of these easy freezer-friendly ground beef taco meal prep bowls.
I didn’t set out to create a perfect recipe. I was just tired. Tired of the 6 PM scramble, tired of staring into the fridge only to order takeout again, and tired of wasting food. I wanted something I could grab on a busy Tuesday that felt like a real meal, not a sad desk lunch. So, I started experimenting with what worked: the right fat content in the beef so it wouldn’t get icy, the perfect blend of spices that held up after being frozen, and the vegetables that stayed crisp-tender instead of turning to mush. It took a few failed batches—some were too watery, some were too bland—but I finally cracked the code.
These bowls are the result of that trial and error. They are the kind of meal that makes you feel like you have your life together, even when you don’t. It’s a small victory, packed into a container, waiting for you in the freezer. And that, my friend, is a beautiful thing.
Why You’ll Love These Easy Freezer-Friendly Ground Beef Taco Meal Prep Bowls
Let me tell you why this recipe has become my absolute go-to for busy weeks. I’ve tested this more times than I care to admit, and it’s finally the version I trust every single time.
- Ready in 30 Minutes: From start to finish, you can have a week’s worth of lunches or dinners prepped and in the freezer in under half an hour. It’s faster than ordering delivery.
- Simple, Pantry-Friendly Ingredients: You don’t need a specialty grocery store for this. Ground beef, canned goods, and basic spices are all you need. It’s budget-friendly and accessible.
- Perfect for Meal Prep and Busy Nights: Whether you’re feeding a hungry family after soccer practice or just need a reliable lunch for work, these bowls are a lifesaver. They are the ultimate grab-and-go solution.
- A Total Crowd-Pleaser: Everyone loves taco night. Turning it into a healthy, pre-portioned bowl means no one has to miss out. Kids and adults alike gobble these up.
- Unbelievably Delicious (Even After Freezing): The secret is in the technique. The beef stays perfectly seasoned and moist, and the rice and beans don’t turn into a sad, watery mess. It tastes like you just made it.
What makes this recipe different from all the other taco bowls out there? It’s the careful balance of moisture. I’ve learned that by cooking the beef with a little tomato paste and letting the excess liquid evaporate, you avoid the dreaded “freezer burn” and ice crystals that ruin the texture. Plus, using a specific ratio of rice to liquid ensures it reheats perfectly fluffy. This isn’t just another version—it’s the one I actually look forward to eating.
Honestly, this is the kind of meal that makes you feel taken care of. It’s comfort food that’s actually good for you, and it’s ready when you need it most.
What Ingredients You Will Need
This recipe relies on simple, wholesome ingredients that come together to deliver big, bold taco flavor. You probably have most of these in your pantry right now.
- For the Ground Beef Taco Meat:
- 2 lbs lean ground beef (90/10 works best to avoid excess grease)
- 1 medium yellow onion, finely diced
- 4 cloves garlic, minced
- 2 tablespoons tomato paste (adds depth and richness)
- 1 packet (1 oz) low-sodium taco seasoning (I like the Spice Islands brand for its clean flavor)
- 1 teaspoon ground cumin (for that earthy, warm note)
- 1/2 teaspoon smoked paprika (optional, but adds a lovely subtle smokiness)
- 1/2 cup low-sodium beef broth or water
- Salt and black pepper to taste
- For the Rice Base:
- 2 cups dry long-grain white rice or brown rice (see note below)
- 3 cups water or low-sodium chicken broth
- 1 tablespoon olive oil
- 1 teaspoon salt
- For the Bean & Corn Mix:
- 1 can (15 oz) black beans, drained and rinsed
- 1 can (15 oz) corn kernels, drained (or 1 1/2 cups frozen corn, thawed)
- 1/2 cup chopped cilantro (optional, but brightens everything up)
- Juice of 1 lime
- For the Bowls (Optional Toppings at Serving):
- Shredded cheddar or Monterey Jack cheese
- Sour cream or Greek yogurt
- Fresh salsa or pico de gallo
- Diced avocado
- Hot sauce (like Cholula or Valentina)
Ingredient Tips & Substitutions: For the rice, I prefer long-grain white rice because it freezes and reheats the fluffiest. Brown rice works, but it can get a bit drier, so you might need to add a splash of water when reheating. If you are watching your sodium, definitely use low-sodium broth and taco seasoning. For a gluten-free option, double-check your taco seasoning label. You can also swap the ground beef for ground turkey or chicken—just add a tablespoon of olive oil to the pan to keep it moist.
Equipment Needed
You don’t need a fancy kitchen to make these bowls. Here is what you will need:
- Large Skillet or Dutch Oven: A 12-inch skillet is perfect for browning the beef. A Dutch oven works great too.
- Medium Saucepan with Lid: For cooking your rice perfectly.
- Cutting Board and Sharp Knife: For dicing the onion and mincing the garlic.
- Measuring Cups and Spoons: For accuracy, especially with the spices and liquid.
- Wooden Spoon or Spatula: For breaking up the beef as it cooks.
- Colander: For draining and rinsing the beans and corn.
- Freezer-Safe Meal Prep Containers (6-8): I love using glass containers with tight-fitting lids. They don’t stain and they stack beautifully. Look for ones that are about 2-cup capacity. If you’re on a budget, BPA-free plastic containers work just fine, just let the food cool completely before sealing.
- Optional but Helpful: A rice cooker makes the rice step hands-off. A kitchen scale can help you portion the bowls evenly.
Preparation Method
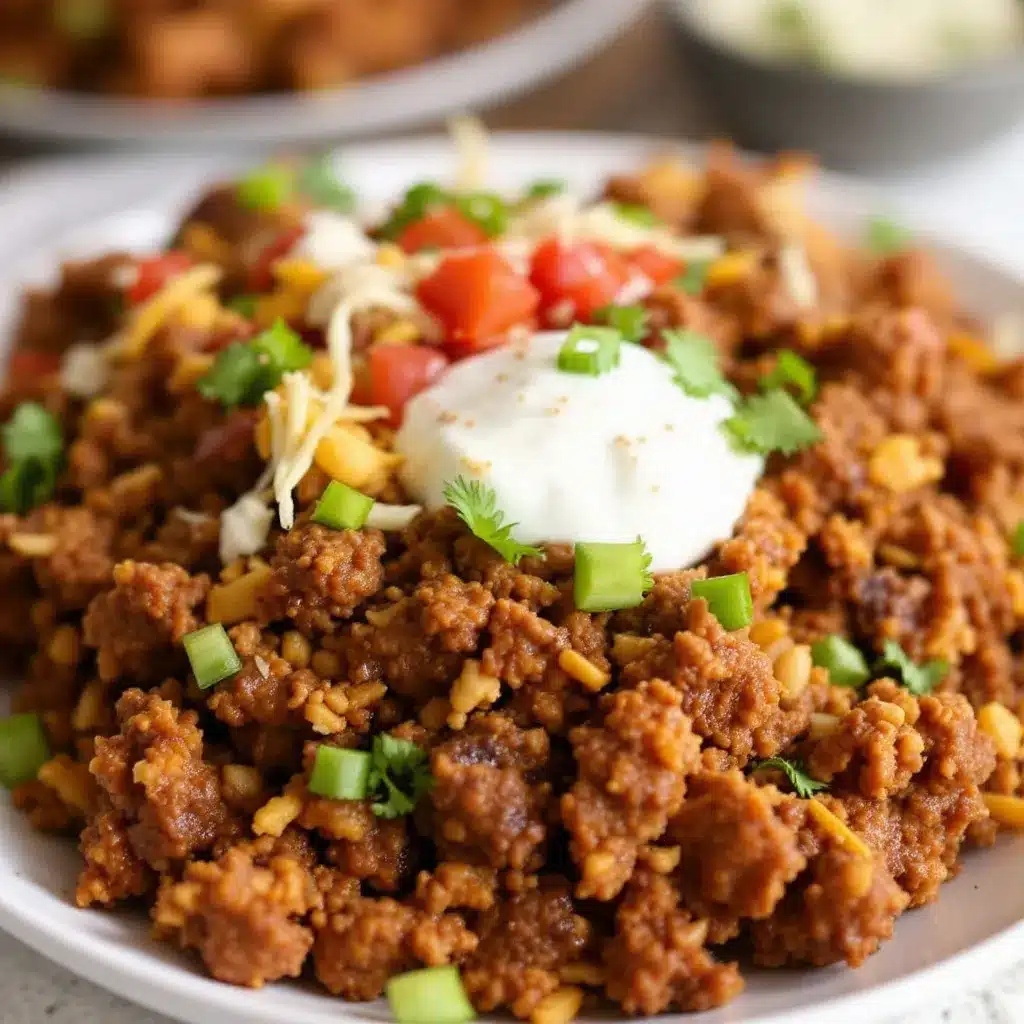
Let’s get cooking! This comes together quickly, so I like to have all my ingredients prepped and ready to go before I start.
- Cook the Rice: In a medium saucepan, combine the 2 cups of rice, 3 cups of water (or broth), 1 tablespoon of olive oil, and 1 teaspoon of salt. Bring to a boil over high heat. Once boiling, reduce the heat to low, cover the pot, and simmer for 15-18 minutes for white rice (or 40-45 minutes for brown rice), until the liquid is absorbed and the rice is tender. Remove from heat and let it sit, covered, for 5 minutes. Then, fluff with a fork and set aside to cool slightly. Pro tip: Don’t skip the resting time—it makes the rice fluffier.
- Brown the Beef: While the rice is cooking, heat your large skillet over medium-high heat. Add the ground beef. Cook, breaking it up with your wooden spoon, for about 5-7 minutes, until it is nicely browned all over. Do not drain the fat yet. You want that fond (the brown bits) on the bottom of the pan—it’s flavor!
- Sauté the Aromatics: Add the diced onion to the beef. Cook for 3-4 minutes, stirring occasionally, until the onion becomes translucent and soft. Add the minced garlic and cook for another minute until fragrant. The smell at this point is incredible.
- Build the Taco Flavor: Push the beef mixture to one side of the pan. Add the tomato paste to the empty space and let it cook for about 30 seconds, stirring it around until it darkens slightly. This “blooming” step deepens its flavor. Then, stir the tomato paste into the beef. Sprinkle the taco seasoning, cumin, and smoked paprika over everything. Stir well to coat.
- Simmer the Meat: Pour in the 1/2 cup of beef broth. Stir everything together, scraping up any browned bits from the bottom of the pan. Bring to a simmer, then reduce the heat to low and let it cook for 5-7 minutes, stirring occasionally, until the liquid has mostly evaporated and the meat is thick and saucy. This is the critical step for freezer success—you want it moist but not watery. Taste and adjust salt and pepper as needed.
- Prepare the Bean & Corn Mix: In a medium bowl, combine the drained black beans, drained corn, chopped cilantro (if using), and the juice of one lime. Stir gently to combine. This simple mix adds texture and freshness to the bowls.
- Assemble the Bowls: Let the beef and rice cool for about 10-15 minutes. It is much easier to portion when it’s not piping hot. Grab your meal prep containers. Start with a base of rice (about 1/2 to 3/4 cup per bowl). Top with a generous scoop of the taco beef (about 1/2 cup). Add a spoonful of the bean and corn mix. Do not add any fresh toppings like cheese or sour cream yet—those are best added after reheating.
- Cool and Freeze: Place the lids on the containers but leave them slightly ajar. Let them cool completely on the counter for about 30 minutes. This prevents condensation from forming inside the container, which causes freezer burn. Once completely cool, seal the lids tightly and place them in the freezer. They will keep for up to 3 months.
Cooking Tips & Techniques
I have made a lot of mistakes in the kitchen so you don’t have to. Here are my hard-earned lessons for perfect taco bowls every time.
- Don’t Overcrowd the Pan: If you are browning a lot of beef, do it in batches. If you crowd the pan, the beef will steam instead of sear, and you will miss out on that deep, savory flavor. Trust me, the extra 5 minutes is worth it.
- The “Dry” Beef Secret: The number one reason freezer meals fail is because they are too watery. After simmering the beef, let it cook until almost all the liquid is gone. You want it to look like a thick, chunky chili, not a soup. This prevents ice crystals from forming when frozen.
- Cool Before Sealing: I know it’s tempting to slap the lids on and shove them in the freezer, but please don’t. Hot food creates steam, which turns into ice. Letting everything cool completely is the single best thing you can do for texture.
- Portioning is Key: Use a kitchen scale or a measuring cup to make sure each bowl has the same amount of rice and beef. This ensures consistent reheating times and that no one gets short-changed on taco meat!
- Label Everything: I use a permanent marker to write the date and contents on the lid. You think you’ll remember what’s in there, but after a month, everything looks the same. Trust me on this one.
Variations & Adaptations
This recipe is a fantastic base for so many different flavor profiles. Don’t be afraid to make it your own.
- Make it a Burrito Bowl: Swap the rice for cilantro-lime cauliflower rice for a low-carb option. Just pulse a head of cauliflower in a food processor and sauté it with a little oil. It freezes surprisingly well!
- Spicy Southwest Style: Add a diced jalapeño (seeds removed for less heat) to the pan with the onions. Stir in 1/2 cup of roasted green chiles or a can of diced green chiles with the broth. It adds a fantastic, smoky heat.
- Vegetarian “Beef” Bowls: Use 2 lbs of your favorite plant-based ground meat substitute. Sauté it the same way you would the beef, but you may need a little extra oil. The taco seasoning does a wonderful job of masking any “veggie” taste.
- Cheesy Enchilada Style: Before freezing, stir 1/2 cup of shredded Monterey Jack cheese into the bean and corn mix. When you reheat the bowl, top it with a little extra cheese and a drizzle of red enchilada sauce. It’s pure comfort.
- Breakfast Taco Bowls: For a fun twist, use this same taco beef and rice base, but serve it with a fried egg on top for breakfast or brunch. It’s a hearty, protein-packed way to start the day.
Serving & Storage Suggestions
Getting these bowls from freezer to table is just as easy as making them.
- How to Reheat: The best way is to thaw a bowl overnight in the refrigerator. Then, microwave it on high for 2-3 minutes, stirring halfway through, until piping hot. If you are in a rush, you can microwave it directly from frozen—just add a splash of water to the rice and microwave for 4-5 minutes, stirring a couple of times.
- Serving Ideas: Once reheated, this is where you can get creative. Top with shredded cheese, a dollop of sour cream, fresh salsa, diced avocado, and a squeeze of lime. A sprinkle of fresh cilantro or green onions adds a final pop of color and flavor.
- Storage: These bowls will stay perfect in the freezer for up to 3 months. After that, the quality starts to decline. I do not recommend storing leftovers in the fridge for more than 3-4 days after thawing.
- Flavor Development: The best part? The flavors actually meld and deepen overnight in the fridge or after being frozen. The spices settle into the beef and rice, making the second and third bowls taste even better than the first.
Nutritional Information & Benefits
This is a well-balanced meal that will keep you full and energized.
- Estimated Nutrition (per bowl, without toppings): Approximately 450-550 calories, 25g protein, 45g carbohydrates, 15g fat, 7g fiber.
- Health Benefits: This meal is packed with lean protein from the beef, which supports muscle health and keeps you satisfied. The black beans and corn add a great dose of fiber and antioxidants. The lime and cilantro provide a boost of Vitamin C.
- Dietary Considerations: This recipe is naturally gluten-free (check your taco seasoning) and dairy-free as written. It’s easy to make it low-carb by swapping the rice for cauliflower rice. It is also a great option for those following a high-protein diet.
- Potential Allergens: None of the main ingredients are common allergens, but always check labels on taco seasoning and broth for hidden gluten or dairy.
Conclusion
So there you have it—my secret weapon for surviving the busiest of weeks. These easy freezer-friendly ground beef taco meal prep bowls are more than just a recipe; they’re a strategy. A way to take care of your future self when you know you’ll be too tired to cook. They are forgiving, flexible, and genuinely delicious.
I encourage you to make a double batch this weekend. Play around with the variations, load them up with your favorite toppings, and enjoy the peace of mind that comes from having a healthy, homemade meal ready to go. Honestly, it’s one of the best gifts you can give yourself.
I would love to hear how your bowls turn out! Drop a comment below and let me know what variations you tried or if you have any questions. Happy prepping!
Frequently Asked Questions
Can I use ground turkey or chicken instead of beef?
Absolutely! Ground turkey or chicken works perfectly. Just add a tablespoon of olive oil to the pan when browning, as they are leaner than beef and can dry out. Follow the rest of the recipe exactly as written.
How long do these bowls last in the freezer?
They will maintain their best quality for up to 3 months. After that, they are still safe to eat, but the texture of the rice and beef may start to decline. Be sure to label your containers with the date!
Can I use brown rice instead of white rice?
Yes, you can. Brown rice is a great whole-grain option. Just be aware that it can get a bit drier after freezing. To combat this, add an extra tablespoon of water or broth when you reheat the bowl. It will still be delicious.
Do I have to thaw the bowls before reheating?
Not at all! You can microwave them directly from frozen. Just add a splash of water to the rice, cover the bowl loosely, and microwave for 4-5 minutes, stirring halfway through. Thawing overnight in the fridge gives you a more consistent and quicker reheat, though.
What are the best containers for freezing these bowls?
I highly recommend glass meal prep containers with airtight lids. They are durable, don’t stain, and are safe for the freezer, microwave, and dishwasher. If you are on a budget, BPA-free plastic containers work well too, just make sure they are labeled as freezer-safe.
Pin This Recipe!
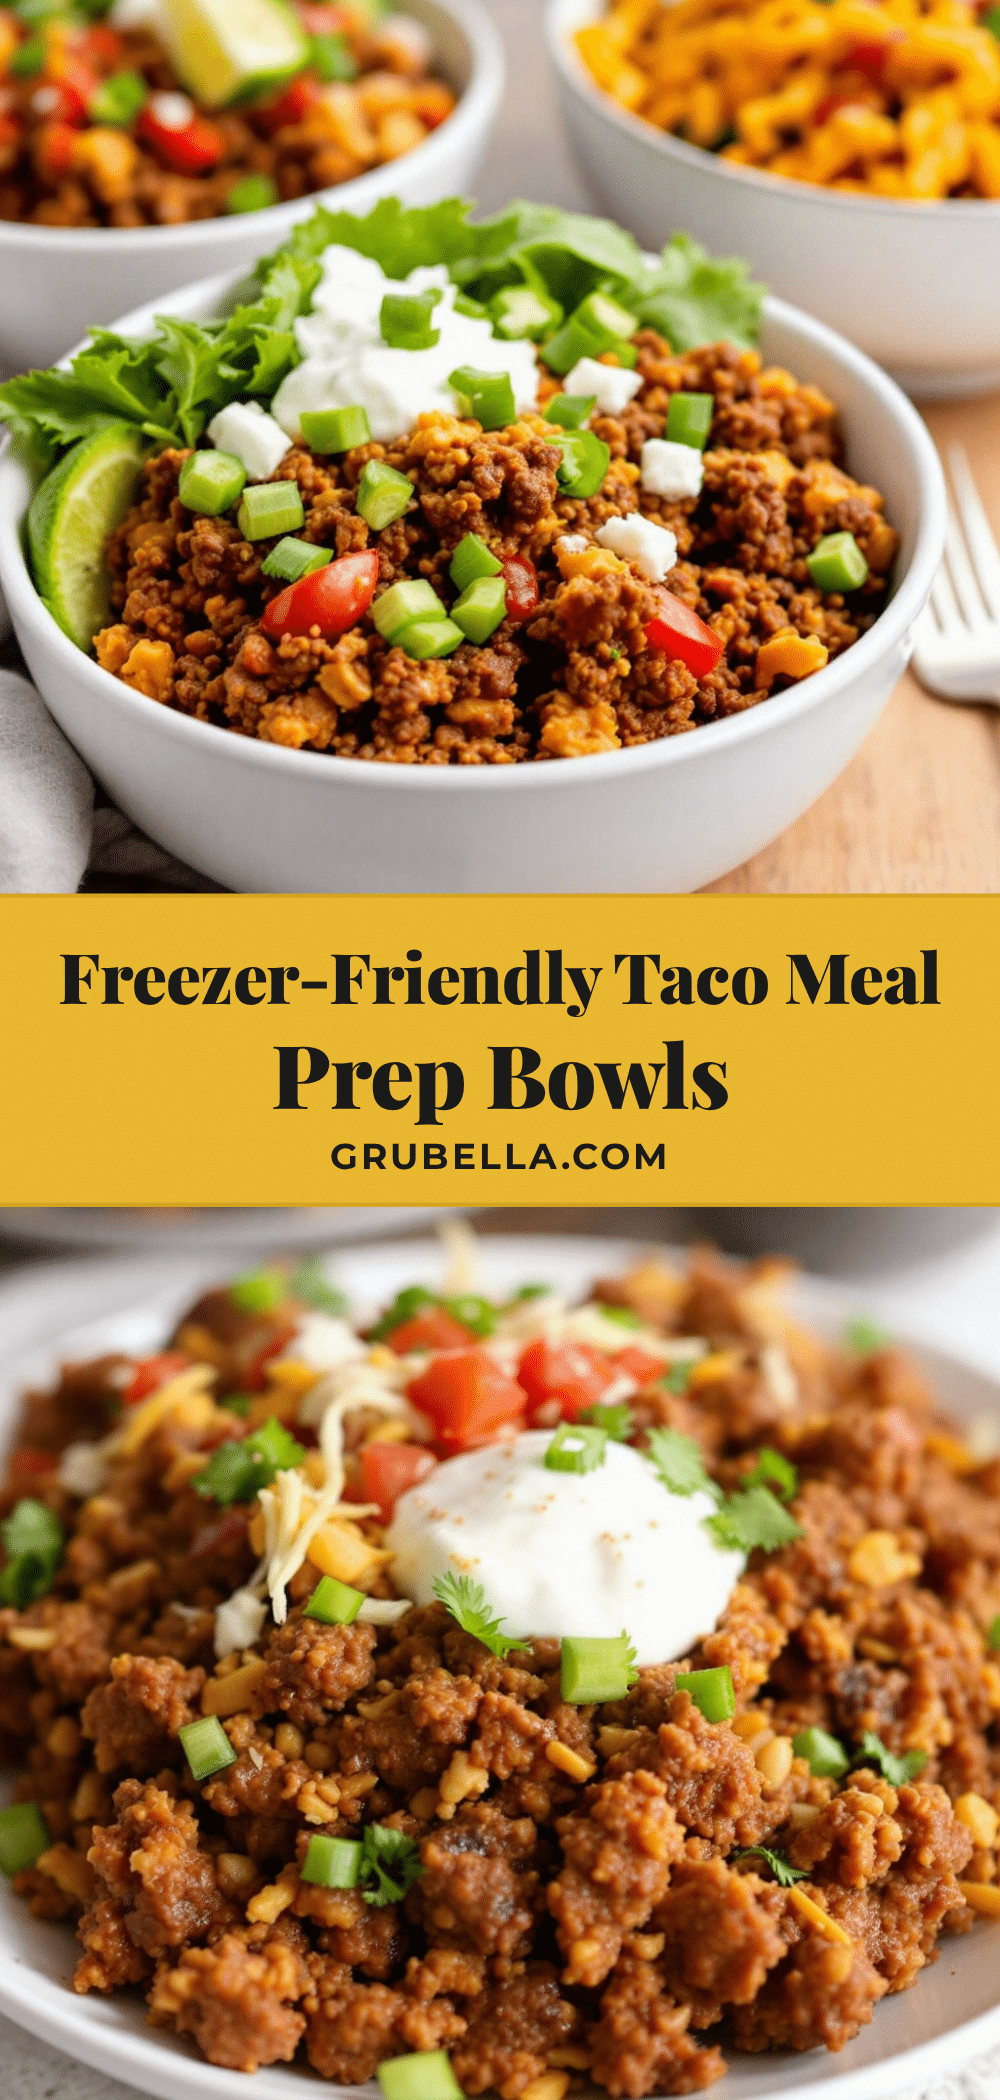
Easy Freezer-Friendly Ground Beef Taco Meal Prep Bowls
These easy freezer-friendly ground beef taco meal prep bowls are the perfect solution for busy weeks. Ready in 30 minutes, they are packed with flavor and reheat beautifully, making them a lifesaver for lunch or dinner.
- Prep Time: 15 minutes
- Cook Time: 30 minutes
- Total Time: 45 minutes
- Yield: 6-8 servings 1x
- Category: Main Course
- Cuisine: Mexican
Ingredients
- 2 lbs lean ground beef (90/10 works best to avoid excess grease)
- 1 medium yellow onion, finely diced
- 4 cloves garlic, minced
- 2 tablespoons tomato paste
- 1 packet (1 oz) low-sodium taco seasoning
- 1 teaspoon ground cumin
- 1/2 teaspoon smoked paprika (optional)
- 1/2 cup low-sodium beef broth or water
- Salt and black pepper to taste
- 2 cups dry long-grain white rice or brown rice
- 3 cups water or low-sodium chicken broth
- 1 tablespoon olive oil
- 1 teaspoon salt
- 1 can (15 oz) black beans, drained and rinsed
- 1 can (15 oz) corn kernels, drained (or 1 1/2 cups frozen corn, thawed)
- 1/2 cup chopped cilantro (optional)
- Juice of 1 lime
- Shredded cheddar or Monterey Jack cheese (optional, for serving)
- Sour cream or Greek yogurt (optional, for serving)
- Fresh salsa or pico de gallo (optional, for serving)
- Diced avocado (optional, for serving)
- Hot sauce (optional, for serving)
Instructions
- Cook the Rice: In a medium saucepan, combine the 2 cups of rice, 3 cups of water (or broth), 1 tablespoon of olive oil, and 1 teaspoon of salt. Bring to a boil over high heat. Once boiling, reduce the heat to low, cover the pot, and simmer for 15-18 minutes for white rice (or 40-45 minutes for brown rice), until the liquid is absorbed and the rice is tender. Remove from heat and let it sit, covered, for 5 minutes. Then, fluff with a fork and set aside to cool slightly.
- Brown the Beef: While the rice is cooking, heat your large skillet over medium-high heat. Add the ground beef. Cook, breaking it up with your wooden spoon, for about 5-7 minutes, until it is nicely browned all over. Do not drain the fat yet.
- Sauté the Aromatics: Add the diced onion to the beef. Cook for 3-4 minutes, stirring occasionally, until the onion becomes translucent and soft. Add the minced garlic and cook for another minute until fragrant.
- Build the Taco Flavor: Push the beef mixture to one side of the pan. Add the tomato paste to the empty space and let it cook for about 30 seconds, stirring it around until it darkens slightly. Then, stir the tomato paste into the beef. Sprinkle the taco seasoning, cumin, and smoked paprika over everything. Stir well to coat.
- Simmer the Meat: Pour in the 1/2 cup of beef broth. Stir everything together, scraping up any browned bits from the bottom of the pan. Bring to a simmer, then reduce the heat to low and let it cook for 5-7 minutes, stirring occasionally, until the liquid has mostly evaporated and the meat is thick and saucy. Taste and adjust salt and pepper as needed.
- Prepare the Bean & Corn Mix: In a medium bowl, combine the drained black beans, drained corn, chopped cilantro (if using), and the juice of one lime. Stir gently to combine.
- Assemble the Bowls: Let the beef and rice cool for about 10-15 minutes. Grab your meal prep containers. Start with a base of rice (about 1/2 to 3/4 cup per bowl). Top with a generous scoop of the taco beef (about 1/2 cup). Add a spoonful of the bean and corn mix. Do not add any fresh toppings like cheese or sour cream yet—those are best added after reheating.
- Cool and Freeze: Place the lids on the containers but leave them slightly ajar. Let them cool completely on the counter for about 30 minutes. This prevents condensation from forming inside the container, which causes freezer burn. Once completely cool, seal the lids tightly and place them in the freezer. They will keep for up to 3 months.
Notes
For the rice, long-grain white rice freezes and reheats the fluffiest. Brown rice works but can get drier; add a splash of water when reheating. The key to freezer success is cooking the beef until almost all liquid is evaporated to prevent ice crystals. Let bowls cool completely before sealing to avoid condensation. These bowls can be reheated from frozen or thawed overnight in the fridge.
Nutrition
- Serving Size: 1 bowl (without topp
- Calories: 500
- Sugar: 4
- Sodium: 600
- Fat: 15
- Saturated Fat: 5
- Carbohydrates: 45
- Fiber: 7
- Protein: 25
Keywords: taco bowls, meal prep, freezer-friendly, ground beef, easy dinner, healthy lunch, make ahead



