Love this? Save it for later!
Share the inspiration with your friends
That first cold bite of peanut butter and cream cheese hitting my tongue—the way the chocolate shell cracks just a little before giving way to this silky, almost mousse-like filling—still takes me straight to my aunt’s tiny kitchen in Nashville. I was maybe twelve, sitting on a wobbly stool while she pulled this pie out of the freezer, not even bothering to slice it neatly. She just handed me a fork and said, “Dig in.”
I didn’t know then that she’d made it in ten minutes flat. I thought she’d been slaving away for hours, because how else do you get something that tastes like a Reese’s cup married a cheesecake? Turns out, she hadn’t even turned on the oven. That was the moment I learned that the best desserts don’t always come from effort. Sometimes, they come from knowing exactly which shortcuts to take.
This creamy no-bake peanut butter icebox pie is that same recipe, tweaked just a little over the years. I’ve made it for birthday parties where I forgot to buy a cake, for summer barbecues when the kitchen was too hot to function, and for random Tuesday nights when I needed something sweet but couldn’t face dirty dishes. It’s the kind of dessert that feels fancy but is secretly lazy. And honestly? That’s the best kind.
You don’t need a mixer. You don’t need patience. You just need a bowl, a spoon, and a serious craving for peanut butter.
Why You’ll Love This Recipe
I have tested this creamy no-bake peanut butter icebox pie more times than I care to admit. The first version was too dense. The second was too sweet. The third—well, the third was the one where I finally stopped tweaking and started eating. Here is why this one works.
- No Oven Required : This is a true no-bake situation. No blind baking crusts, no worrying about cracks, no standing over a hot stove. Just mix, pour, and let the fridge do the work.
- Simple Ingredients : Cream cheese, peanut butter, powdered sugar, whipped topping, and a store-bought graham cracker crust. That is it. You probably have most of this in your kitchen right now.
- Perfect for Entertaining : This pie looks like a showstopper but takes ten minutes of active work. Make it the night before a party, and nobody will know you barely broke a sweat. It pairs beautifully with a spread like my best charcuterie board for two for a complete dessert and appetizer combo.
- Crowd-Pleaser : Kids devour it. Adults sneak seconds. Peanut butter lovers will stare at you like you are a hero.
- Unbelievably Creamy : The secret is letting the cream cheese soften completely before mixing. No lumps, no graininess—just smooth, rich, cloud-like filling.
What makes this recipe different from the hundreds of other peanut butter pies out there? It is the balance. The filling is rich but not heavy, sweet but balanced by the tang of cream cheese and the saltiness of the peanut butter. It is the kind of dessert that makes you close your eyes on the first bite. Not because it is complicated. Because it is exactly right.
What Ingredients You Will Need
This creamy no-bake peanut butter icebox pie relies on a handful of simple ingredients, each playing a specific role. No obscure items, no specialty stores. Just the good stuff.
For the Filling
- 8 ounces cream cheese, softened (Full-fat is best here. Low-fat can work, but the texture won’t be as lush. Let it sit out for at least 30 minutes before starting.)
- 1 cup creamy peanut butter (I use Skippy or Jif for the smoothest texture. Natural peanut butter that separates can make the filling grainy, so stick with the processed stuff for this one.)
- 1 cup powdered sugar (Sift it if you have the patience. If not, whisk it well to break up clumps.)
- 1 teaspoon vanilla extract (Pure vanilla, not imitation. It makes a difference in the depth of flavor.)
- 8 ounces frozen whipped topping, thawed (Cool Whip or a store brand. Let it thaw in the fridge overnight for the best texture.)
For the Crust
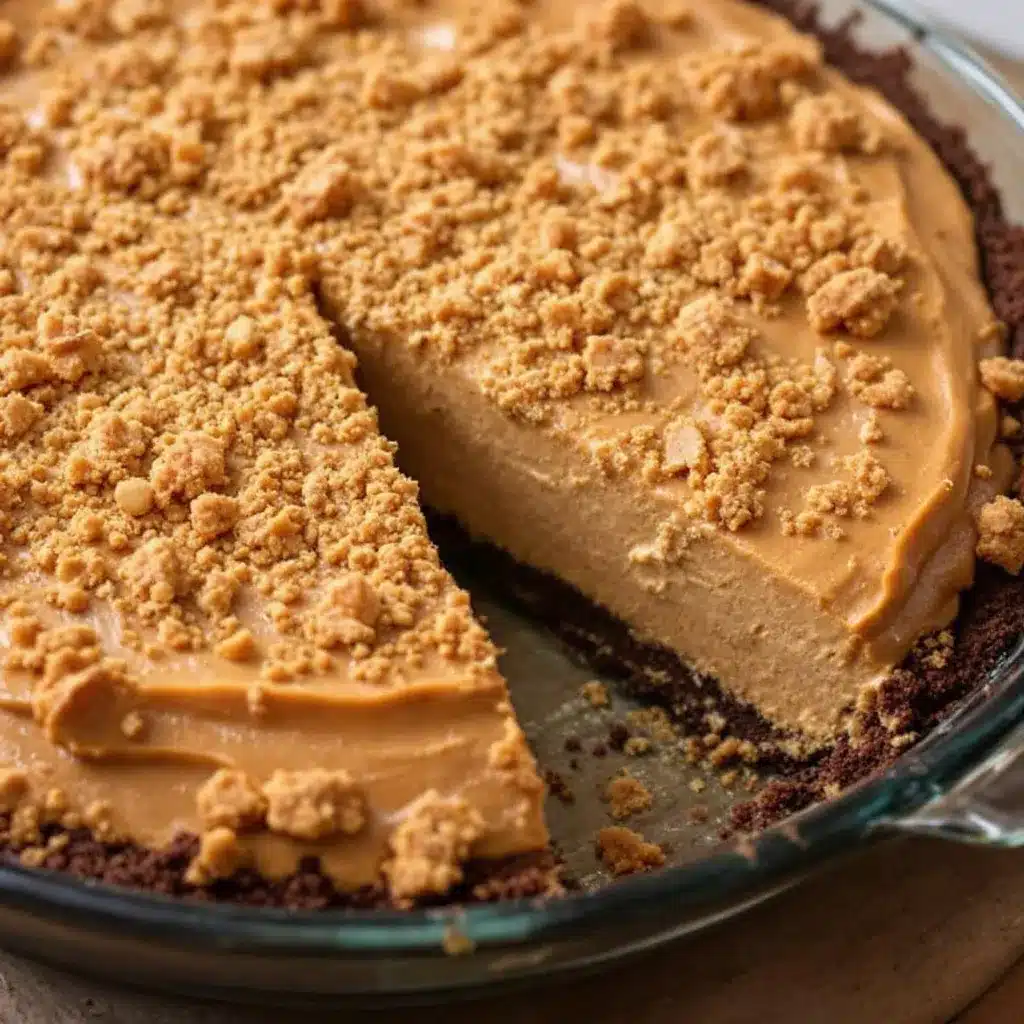
- 1 store-bought 9-inch graham cracker crust (You can make your own, but honestly, the store-bought ones work perfectly here. I like the Keebler brand for its buttery flavor.)
For the Topping (Optional but Recommended)
- 1/4 cup heavy cream (For whipping into soft peaks. If you are short on time, extra whipped topping works fine.)
- 1 tablespoon powdered sugar (To sweeten the whipped cream lightly.)
- 2 tablespoons chocolate syrup or melted chocolate (For drizzling. A little goes a long way.)
- 1/4 cup chopped peanuts (For crunch. Salted peanuts balance the sweetness beautifully.)
If you love no-bake peanut butter treats, you will also enjoy my easy no-bake peanut butter protein balls for a quick snack that uses similar ingredients.
Equipment Needed
One of the best things about this creamy no-bake peanut butter icebox pie is the minimal cleanup. Here is what you need:
- Large mixing bowl (Any bowl works, but a wider bowl makes mixing easier.)
- Hand mixer or stand mixer (You can mix by hand with a strong arm and a wooden spoon, but a mixer makes it silky smooth in under two minutes.)
- Rubber spatula (For scraping every last bit of filling into the crust. Waste not, want not.)
- Measuring cups and spoons (Standard set. Nothing fancy.)
- 9-inch pie plate (If you are using a homemade crust or a disposable one.)
- Plastic wrap or foil (For covering the pie while it chills.)
If you do not have a hand mixer, you can absolutely do this with a whisk and some elbow grease. Just make sure your cream cheese is very soft, and be prepared for a small arm workout. I have done it both ways, and honestly, the whisk method builds character.
Preparation Method
This is where the magic happens. Follow these steps, and you will have a creamy no-bake peanut butter icebox pie that looks like you spent hours on it.
- Soften the cream cheese. Take the cream cheese out of the fridge at least 30 minutes before you start. If you forgot, unwrap it, cut it into cubes, and microwave it for 10-15 seconds. Do not overdo it—you want it soft, not melted.
- Beat the cream cheese. In a large mixing bowl, beat the softened cream cheese with a hand mixer on medium speed until it is completely smooth. No lumps allowed. This takes about 1-2 minutes. Scrape down the sides of the bowl with your spatula.
- Add the peanut butter. Add 1 cup of creamy peanut butter to the bowl. Beat on medium speed until fully combined. The mixture will be thick and sticky. That is normal. Scrape the bowl again.
- Incorporate the powdered sugar and vanilla. Add 1 cup of powdered sugar and 1 teaspoon of vanilla extract. Start mixing on low speed so the sugar does not fly everywhere, then increase to medium. Beat until the mixture is smooth and fluffy. It should look like a thick peanut butter frosting at this point.
- Fold in the whipped topping. Add the thawed whipped topping to the bowl. Use your spatula to fold it in gently. Do not stir vigorously—you want to keep the airiness. Fold until no white streaks remain. The filling should be light, creamy, and mousse-like.
- Fill the crust. Spoon the filling into the graham cracker crust. Spread it evenly with your spatula. The pie will be quite full—that is fine.
- Chill the pie. Cover the pie loosely with plastic wrap or foil. Refrigerate for at least 6 hours, but overnight is best. The filling needs time to set and firm up. Do not rush this step. A cold pie slices cleanly; a warm one is a mess.
- Make the topping (optional). If you want whipped cream, pour 1/4 cup heavy cream and 1 tablespoon powdered sugar into a chilled bowl. Whip with a hand mixer on medium-high until soft peaks form. This takes 2-3 minutes. Do not overwhip, or you will get butter.
- Finish and serve. Spread or pipe the whipped cream over the chilled pie. Drizzle with chocolate syrup and sprinkle with chopped peanuts. Slice with a sharp knife, wiping the blade clean between cuts for neat slices.
A quick note: If you are serving this at a gathering, make it the night before. The flavors meld together overnight, and the texture becomes even creamier. It is one of those rare desserts that genuinely improves with time.
Cooking Tips & Techniques
After making this creamy no-bake peanut butter icebox pie at least two dozen times, I have learned a few things the hard way. Here is what I wish someone had told me.
Room temperature ingredients matter. I know it is tempting to use cold cream cheese straight from the fridge, but do not. Cold cream cheese creates lumps that no amount of mixing can fully fix. Set it out early. If you forget, the microwave method works, but watch it carefully—ten seconds too long, and you will have scrambled eggs.
Do not overmix after adding the whipped topping. The first time I made this, I got excited and kept mixing. The filling turned out dense and almost gluey. The whipped topping is there to add lightness, so fold it gently. A few streaks are fine. They will disappear as the pie chills.
Chill time is non-negotiable. I once tried to rush this pie after four hours. It was still soft in the center and fell apart when I tried to slice it. Six hours is the minimum. Overnight is ideal. The filling needs time to firm up so it holds its shape.
Use a sharp knife for clean slices. Run the knife under hot water, wipe it dry, then slice. Wipe the blade between each cut. This gives you those beautiful, Instagram-worthy slices.
If your pie is too soft after chilling, pop it in the freezer for 30 minutes before slicing. That extra chill helps the filling hold its shape without freezing solid.
Variations & Adaptations
This creamy no-bake peanut butter icebox pie is incredibly forgiving. Here are some ways to make it your own.
- Chocolate Peanut Butter : Add 1/4 cup of melted chocolate to the filling mixture before folding in the whipped topping. It creates a chocolate-peanut butter swirl effect that is absolutely divine.
- Gluten-Free Version : Use a gluten-free graham cracker crust or an Oreo-style gluten-free crust. The filling itself has no gluten, so the swap is simple.
- Vegan Adaptation : Use vegan cream cheese, vegan peanut butter, and coconut whipped topping. The texture will be slightly different, but the flavor is still fantastic.
- Low-Sugar Option : Swap the powdered sugar for a powdered sugar substitute like Swerve. Use a sugar-free peanut butter. The pie will be less sweet but still creamy and satisfying.
- Add Crunch : Fold in 1/2 cup of crushed peanut butter cookies or chopped Reese’s cups into the filling before chilling. It adds texture and little pockets of sweetness.
- Spiced Version : Add 1/2 teaspoon of cinnamon and a pinch of nutmeg to the filling. It gives the pie a warm, almost snickerdoodle-like undertone that pairs beautifully with peanut butter.
I have personally tried the chocolate peanut butter version for a birthday party, and it disappeared in minutes. The chocolate adds depth without overpowering the peanut butter. Highly recommend.
Serving & Storage Suggestions
This creamy no-bake peanut butter icebox pie is best served cold, straight from the fridge. The texture is firm but creamy, like a frozen mousse. Let it sit at room temperature for 5 minutes before slicing if it is too firm straight from the fridge.
Presentation ideas: Pipe whipped cream rosettes around the edge of the pie for a bakery-style look. Drizzle chocolate syrup in a zigzag pattern. Sprinkle chopped peanuts or mini chocolate chips over the top. A dusting of cocoa powder also works beautifully.
What to serve with it: A cup of strong black coffee or cold milk is the perfect companion. The bitterness of the coffee cuts through the richness of the pie. For a dessert spread, serve it alongside cozy slow cooker chicken and wild rice soup for a comforting dinner and dessert combo.
Storage: Cover the pie tightly with plastic wrap or foil and store it in the refrigerator for up to 5 days. The crust may soften slightly over time, but the flavor stays great.
Freezing: This pie freezes beautifully. Wrap the entire pie (or individual slices) tightly in plastic wrap, then foil. Freeze for up to 3 months. Thaw in the refrigerator overnight before serving. Do not thaw at room temperature, or the filling may become too soft.
Reheating: There is no reheating needed. This is a cold dessert through and through. If you want a slightly softer texture, let it sit at room temperature for 10 minutes before serving.
One thing I have noticed: the flavors actually deepen after a day or two in the fridge. The peanut butter becomes more pronounced, and the sweetness mellows out. So do not be afraid to make this ahead of time.
Nutritional Information & Benefits
Let us be honest—this creamy no-bake peanut butter icebox pie is a treat, not a health food. But here is the breakdown so you can enjoy it mindfully.
Estimated per slice (1/8 of pie):
- Calories: 420
- Fat: 28g
- Carbohydrates: 38g
- Protein: 9g
- Sugar: 26g
- Fiber: 2g
Health highlights: Peanut butter provides protein, healthy fats, and vitamin E. Cream cheese adds calcium. The graham cracker crust offers a small amount of whole grains if you choose a whole wheat version.
Dietary considerations: This recipe contains dairy, peanuts, and gluten. For a dairy-free version, use vegan cream cheese and coconut whipped topping. For a gluten-free version, use a gluten-free crust. The peanut butter is obviously non-negotiable for flavor, but you could try sunflower seed butter for a nut-free alternative.
I am not here to pretend this is a health food. But I do believe that dessert has a place in a balanced life. A slice of this pie, enjoyed slowly with good company, is worth every calorie.
Conclusion
This creamy no-bake peanut butter icebox pie is the dessert I turn to when I need something impressive without the stress. It is rich, creamy, and ridiculously easy. The kind of recipe that makes you look like a hero even though you barely tried.
I love that it works for every occasion—birthday parties, potlucks, lazy Sundays, or random Tuesday cravings. I love that it uses ingredients I almost always have on hand. And I love that it never fails to get compliments.
Try it as written, or play with the variations. Add chocolate. Swap the crust. Fold in some crushed cookies. Make it your own. That is the beauty of a simple recipe—it leaves room for your creativity.
If you make this pie, I would love to hear about it. Drop a comment below and tell me how it turned out. Did you add anything? Change anything? Serve it at a party? I read every comment, and your stories make my day.
Now go grab a fork. This pie is waiting.
Frequently Asked Questions
Can I use natural peanut butter for this pie?
You can, but the texture may be slightly grainier and the filling might not set as firmly. Natural peanut butter has more oil that can separate, which affects the consistency. For the best results, use processed creamy peanut butter like Skippy or Jif.
How long does this pie need to chill?
At least 6 hours, but overnight is ideal. The filling needs time to firm up so it slices cleanly. If you are short on time, you can chill it for 4 hours, but the slices will be softer and less defined.
Can I make this pie ahead of time?
Absolutely. This pie actually tastes better after a day or two in the fridge. Make it up to 3 days ahead, cover it tightly, and keep it refrigerated. Add the whipped cream and toppings just before serving for the best presentation.
Can I freeze this pie?
Yes. Wrap the entire pie or individual slices tightly in plastic wrap, then foil. Freeze for up to 3 months. Thaw in the refrigerator overnight before serving. Do not thaw at room temperature.
How do I get clean slices?
Use a sharp knife and run it under hot water before each cut. Wipe the blade dry, slice, then wipe the blade clean between cuts. This prevents the filling from sticking and gives you neat, beautiful slices.
Pin This Recipe!
Creamy No-Bake Peanut Butter Icebox Pie

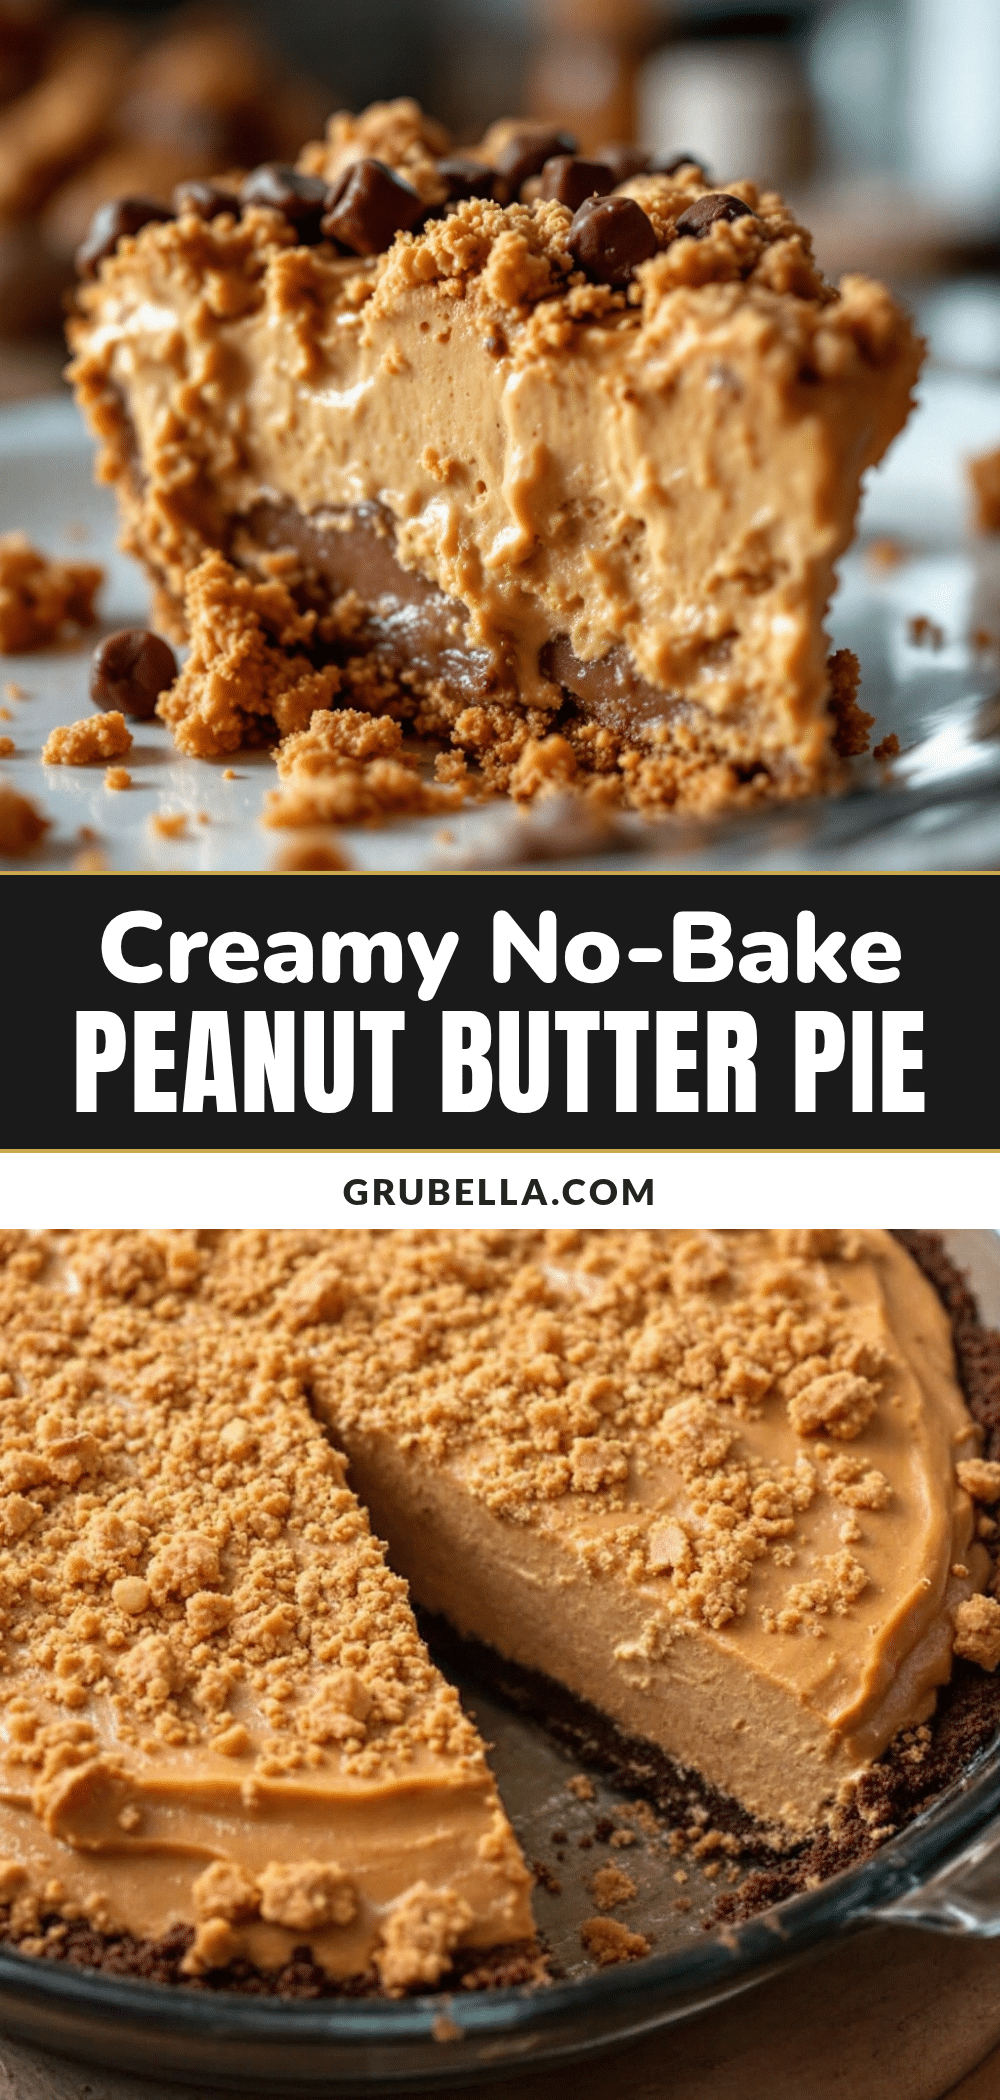
This creamy no-bake peanut butter icebox pie is a rich, mousse-like dessert that tastes like a Reese’s cup married a cheesecake. Made in just 10 minutes with simple ingredients, it’s the perfect make-ahead treat for any occasion.
- Prep Time: 10 minutes
- Cook Time: 0 minutes
- Total Time: 6 hours 10 minutes (includes chilling)
- Yield: 8 servings 1x
- Category: Dessert
- Cuisine: American
Ingredients
- 8 ounces cream cheese, softened
- 1 cup creamy peanut butter (e.g., Skippy or Jif)
- 1 cup powdered sugar
- 1 teaspoon vanilla extract
- 8 ounces frozen whipped topping, thawed
- 1 store-bought 9-inch graham cracker crust
- 1/4 cup heavy cream (for topping, optional)
- 1 tablespoon powdered sugar (for topping, optional)
- 2 tablespoons chocolate syrup or melted chocolate (for topping, optional)
- 1/4 cup chopped peanuts (for topping, optional)
Instructions
- Soften the cream cheese: Take the cream cheese out of the fridge at least 30 minutes before starting. If forgotten, unwrap, cut into cubes, and microwave for 10-15 seconds until soft but not melted.
- Beat the cream cheese: In a large mixing bowl, beat the softened cream cheese with a hand mixer on medium speed until completely smooth, about 1-2 minutes. Scrape down the sides of the bowl.
- Add the peanut butter: Add 1 cup of creamy peanut butter to the bowl. Beat on medium speed until fully combined. The mixture will be thick and sticky. Scrape the bowl again.
- Incorporate the powdered sugar and vanilla: Add 1 cup of powdered sugar and 1 teaspoon of vanilla extract. Start mixing on low speed, then increase to medium. Beat until smooth and fluffy, resembling thick peanut butter frosting.
- Fold in the whipped topping: Add the thawed whipped topping to the bowl. Gently fold with a spatula until no white streaks remain. The filling should be light, creamy, and mousse-like.
- Fill the crust: Spoon the filling into the graham cracker crust and spread evenly with a spatula.
- Chill the pie: Cover loosely with plastic wrap or foil. Refrigerate for at least 6 hours, but overnight is best for clean slices.
- Make the topping (optional): In a chilled bowl, whip 1/4 cup heavy cream and 1 tablespoon powdered sugar with a hand mixer on medium-high until soft peaks form, about 2-3 minutes.
- Finish and serve: Spread or pipe whipped cream over the chilled pie. Drizzle with chocolate syrup and sprinkle with chopped peanuts. Slice with a sharp knife, wiping the blade clean between cuts.
Notes
Room temperature cream cheese is crucial for a smooth texture. Do not overmix after adding whipped topping to keep the filling light. Chill time is non-negotiable—at least 6 hours, overnight is best. For clean slices, run a sharp knife under hot water and wipe between cuts. The pie can be frozen for up to 3 months.
Nutrition
- Serving Size: 1 slice (1/8 of pie)
- Calories: 420
- Sugar: 26
- Fat: 28
- Carbohydrates: 38
- Fiber: 2
- Protein: 9
Keywords: no-bake pie, peanut butter pie, icebox pie, creamy peanut butter dessert, easy dessert, no-bake dessert



