Love this? Save it for later!
Share the inspiration with your friends
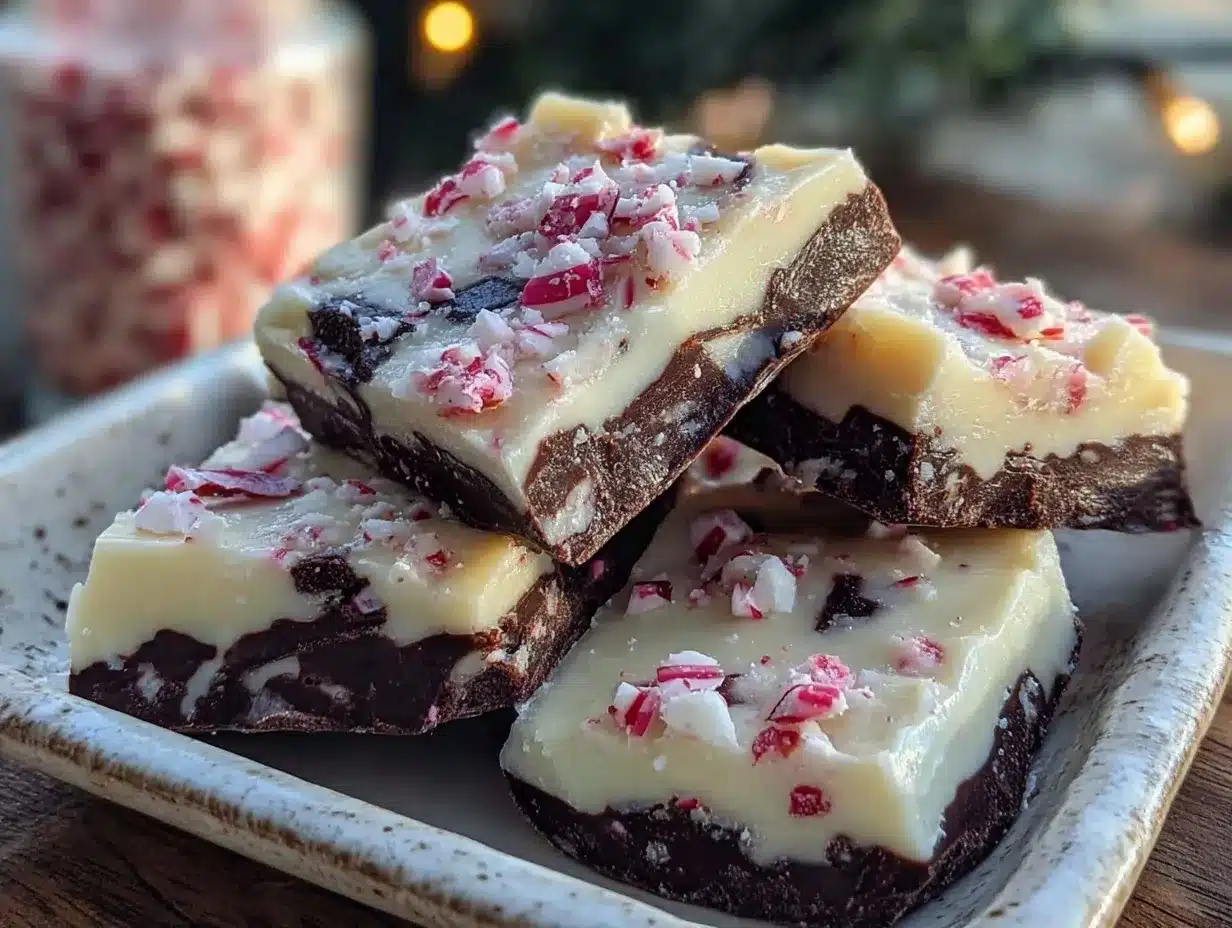
“You know that moment when you open a tin of holiday treats and suddenly your whole kitchen smells like peppermint heaven?” That’s exactly how my Easy Homemade Peppermint Bark with White and Dark Chocolate came into my life. It wasn’t in some fancy cooking class or from a gourmet bakery, but rather on an unusually rainy December afternoon when I was stuck inside, craving something festive and simple. I’d forgotten to buy my usual holiday sweets, and the local store was already out of the peppermint bark I love. So, I thought, why not try making it myself?
Honestly, I wasn’t expecting much. I mean, how hard could smashing candy canes and melting chocolate really be? But let me tell you, the first batch was a messy, chocolatey disaster — I dropped a whole bowl of crushed candy on the floor, and my mixing spoon had more chocolate on it than the bark itself. Still, the combination of creamy white chocolate layered over silky dark chocolate, with that crisp peppermint crunch, was too good to give up on.
Maybe you’ve been there—stuck at home, wanting a little holiday magic in your kitchen without a fuss. This recipe stuck with me because it’s easy, festive, and perfect for sharing. Plus, it’s one of those treats that looks impressive but is honestly quite forgiving. Whether you’re making it for a last-minute gift or to enjoy with a cup of cocoa, this peppermint bark has a way of turning any day into a mini celebration.
Why You’ll Love This Recipe
- Quick & Easy: Comes together in under 30 minutes, perfect for busy holiday prep or spontaneous sweet cravings.
- Simple Ingredients: No need for fancy imports — just quality chocolate and peppermint candies you can find at any grocery store.
- Perfect for Gifting: Makes a beautiful, thoughtful homemade gift that friends and family will rave about.
- Crowd-Pleaser: The mix of dark and white chocolate with peppermint crunch appeals to all ages and tastes.
- Unbelievably Delicious: The silky texture paired with refreshing peppermint keeps you coming back for more.
This isn’t just another peppermint bark recipe. I’ve played around with different chocolate brands and candy cane sizes to land on this perfect balance — the dark chocolate offers a deep richness, while the white chocolate adds a creamy contrast that’s just dreamy. And the peppermint? Crushed just right to give a satisfying snap without overwhelming the sweetness.
Let me tell you, this recipe feels like holiday comfort food reimagined — it’s quick, fuss-free, and yet somehow still feels special enough to make you pause and savor that first bite. Whether you’re new to making candy or a seasoned pro, you’ll find this recipe forgiving and fun, and it might just become your go-to peppermint bark for years to come.
What Ingredients You Will Need
This Easy Homemade Peppermint Bark recipe uses straightforward ingredients that come together to create bold festive flavors without any complicated prep. Most of these are pantry staples or seasonal treats that are easy to find. Here’s what you’ll need:
- Dark chocolate chips or bar (10 oz / 280 g): I prefer a 60-70% cocoa chocolate for the right bittersweet balance. Brands like Ghirardelli or Lindt work great.
- White chocolate chips or bar (10 oz / 280 g): Use good quality white chocolate (not the candy coating) for smooth melting and rich flavor.
- Peppermint candy canes (about 6-8): Crushed coarsely — not too fine, so you get a nice crunch. You can swap with peppermint candies if you prefer.
- Unsalted butter (1 tbsp / 14 g): Optional, but helps the chocolate melt silky and adds a touch of richness.
- Sea salt (a pinch): Optional, but just a hint helps balance the sweetness and intensifies flavors.
For substitutions, if you want a dairy-free version, look for vegan dark and white chocolate alternatives, and replace butter with coconut oil. In summer, crushed dried peppermint or mint leaves can add a fresh twist if candy canes are hard to find. I usually crush my candy canes inside a clean kitchen towel with a rolling pin — less mess and safer than using a food processor!
Equipment Needed
- Baking sheet or tray: I use a rimmed cookie sheet lined with parchment or a silicone baking mat to prevent sticking.
- Microwave-safe bowls or double boiler: For melting the chocolate. I prefer a double boiler because it gives me more control and keeps the chocolate smooth.
- Spatula: A flexible silicone spatula is best for spreading chocolate evenly.
- Knife or rolling pin: For crushing the peppermint candies. A rolling pin inside a towel keeps the candy shards contained and your counters clean.
- Measuring spoons and cups: For precise ingredient amounts.
If you don’t have a double boiler, a microwave works fine—just melt chocolate in short bursts and stir often to avoid burning. I’ve found that investing in a good silicone spatula makes spreading the layers way easier, especially when the chocolate starts to set quickly. And parchment paper is a must—trust me, you’ll thank me when it’s time to peel off the bark!
Preparation Method
- Prepare your workspace (5 minutes): Line a baking sheet with parchment paper or a silicone mat. Crush the peppermint candy canes by placing them in a clean kitchen towel and gently pounding with a rolling pin until you have a mix of small and larger pieces. Set aside.
- Melt the dark chocolate (5-7 minutes): Using a double boiler or microwave, melt the dark chocolate and butter together until smooth. Stir frequently to avoid overheating. The mixture should be glossy and pourable but not too thin.
- Spread the dark chocolate (5 minutes): Pour the melted dark chocolate onto the prepared baking sheet. Use a spatula to spread it evenly into a roughly 8×10 inch (20×25 cm) rectangle, about 1/4 inch (6 mm) thick. Tap the tray gently on the counter to smooth out any bubbles.
- Chill the dark chocolate layer (15-20 minutes): Place the tray in the fridge until the chocolate is firm but not completely hard — it should still feel slightly tacky to the touch.
- Melt the white chocolate (5-7 minutes): While the dark chocolate chills, melt the white chocolate in the same way you did the dark chocolate. Stir until silky smooth.
- Layer the white chocolate (5 minutes): Pour the melted white chocolate over the chilled dark chocolate layer. Spread evenly with your spatula, covering the surface completely.
- Add the crushed peppermint (immediate): Sprinkle the crushed candy canes evenly over the white chocolate while it’s still warm so they stick well. Press down lightly if needed.
- Final chill (30 minutes): Return the tray to the fridge and let the peppermint bark set completely until firm and crisp.
- Break into pieces and serve (5 minutes): Once set, remove from fridge and break the bark into rustic pieces with your hands or knife. Store in an airtight container.
Quick tip: If the white chocolate starts to harden before you finish spreading, just warm it gently for a few seconds. Also, keep an eye on the peppermint — too fine and it’ll get lost, too big and it can be tricky to eat. I like mine in a medium-sized crunch.
Cooking Tips & Techniques
One thing I learned the hard way is that chocolate hates moisture. Even a tiny drop of water can cause it to seize up into a grainy mess. So, always make sure your bowls and utensils are completely dry before melting chocolate.
When melting chocolate, patience is key. Low and slow wins the race here — overheating can burn the chocolate and ruin the flavor. Using a double boiler gives you more control, but if you’re in a hurry, the microwave works fine as long as you stir every 20 seconds.
Another tip is to chill the dark chocolate layer just enough so the white chocolate sticks but layers don’t mix. If you rush this step, the layers can blend into a messy swirl instead of neat stripes.
And crushing peppermint? Don’t pulverize it into powder! I’ve made that mistake and ended up with a bark that tasted like toothpaste. Keep some bigger shards for texture and visual appeal.
Pro tip: To speed up chilling, pop the tray in the freezer for 10 minutes instead of the fridge, but watch closely so the chocolate doesn’t get too hard to spread on top.
Variations & Adaptations
- Dark chocolate only: Skip the white chocolate layer for a richer, less sweet version that’s perfect for true chocolate lovers.
- Nutty twist: Add chopped toasted almonds or pistachios on top with the peppermint for extra crunch and flavor complexity.
- Vegan peppermint bark: Use dairy-free dark and white chocolate alternatives and swap butter for coconut oil. The texture changes slightly but it’s just as tasty.
- Spiced up: Sprinkle a pinch of cinnamon or chili powder into the melted chocolate for a cozy winter kick.
- Mint extract boost: Add a few drops of peppermint extract to the white chocolate layer for a more intense mint flavor.
Personally, I once tried adding crushed candy cane pieces inside the dark chocolate layer before chilling, and it gave a delightful surprise crunch that guests loved. Feel free to mix and match these ideas to suit your taste or occasion.
Serving & Storage Suggestions
Serve your peppermint bark chilled or at room temperature for the best snap and flavor. It’s lovely on its own or paired with a hot cup of peppermint tea or rich coffee. For a festive touch, arrange pieces on a pretty plate or layer in a clear jar with a ribbon for gifting.
Store peppermint bark in an airtight container at room temperature for up to two weeks or refrigerate for longer freshness. If you want to freeze it, wrap tightly in plastic wrap and foil — it keeps well for a couple of months but may lose some of its crunch upon thawing.
Reheat gently by leaving at room temperature for 10-15 minutes if too firm from refrigeration. Over time, the flavors meld and the peppermint scent intensifies, making it even more inviting after a day or two.
Nutritional Information & Benefits
Each serving of this peppermint bark (about 1 oz / 28 g) contains roughly 150-180 calories, primarily from fats and sugars. The dark chocolate provides antioxidants and minerals like iron and magnesium, while peppermint adds a refreshing breath-freshening quality.
This treat is naturally gluten-free and can be adapted for dairy-free diets, making it accessible for many dietary needs. Of course, it’s a sweet indulgence best enjoyed in moderation, but the homemade quality means no preservatives or artificial flavors.
I love that this recipe combines a bit of indulgence with simple ingredients, so I don’t feel guilty sharing it around the holidays — it’s a small treat that brings big joy.
Conclusion
If you’re looking for a festive, fuss-free holiday treat that tastes like a slice of peppermint bliss, this Easy Homemade Peppermint Bark with White and Dark Chocolate is your best bet. It’s straightforward enough for a last-minute project but impressive enough to wow guests or delight your family.
Don’t be afraid to tweak the peppermint intensity or chocolate ratio to suit your taste — the recipe is forgiving and fun to personalize. Honestly, I keep coming back to this because it feels like a cozy holiday hug in every bite.
Give it a try, and let me know how your peppermint bark turns out! Share your tweaks or favorite variations in the comments — I love hearing what makes this classic recipe your own. Happy baking and even happier snacking!
FAQs
Can I use chocolate chips instead of bars for this peppermint bark?
Absolutely! Chocolate chips work well and melt smoothly, but bars tend to have a creamier texture. Just choose good quality chips for the best flavor.
How do I prevent the chocolate from seizing while melting?
Make sure all your tools are completely dry, melt chocolate slowly over low heat or in short microwave bursts, and stir frequently. Even a tiny drop of water can cause seizing.
Can I store peppermint bark at room temperature?
Yes, in an airtight container away from heat or sunlight, it will keep fresh for up to two weeks. For longer storage, refrigeration or freezing works too.
What’s the best way to crush candy canes without making a mess?
Place candy canes inside a clean kitchen towel and gently crush with a rolling pin or heavy pan. This keeps shards contained and your counters clean.
Is it possible to make this recipe dairy-free?
Definitely! Use dairy-free dark and white chocolates and swap butter for coconut oil. The texture might be slightly different but still delicious.
Speaking of chocolate treats, if you enjoy this peppermint bark, you might appreciate the rich flavors of decadent double chocolate cookies or the cozy appeal of classic hot chocolate recipe to complete your winter dessert lineup.
Pin This Recipe!
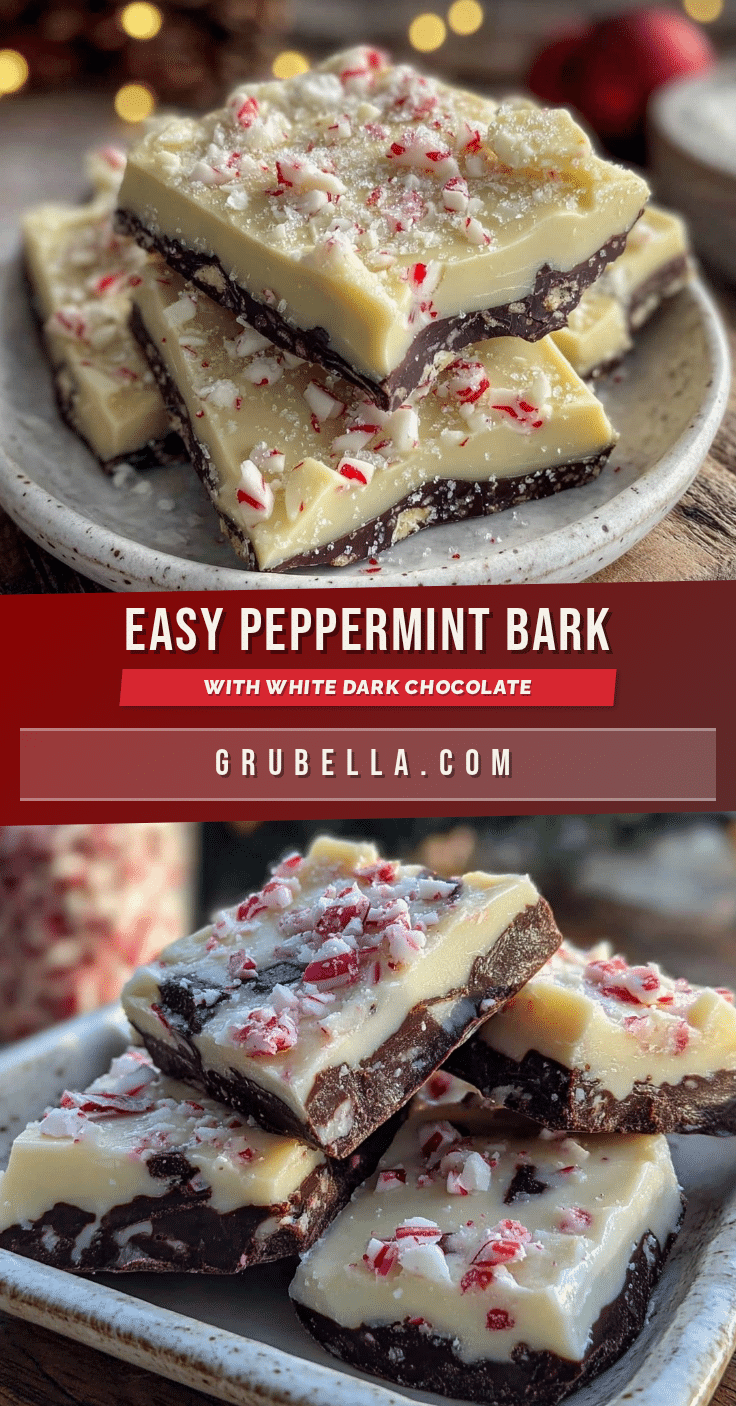
Easy Homemade Peppermint Bark Recipe for Perfect Holiday Treats

A quick and easy peppermint bark recipe combining creamy white chocolate, rich dark chocolate, and crunchy crushed peppermint candy canes. Perfect for festive gifting or enjoying with a cup of cocoa.
- Prep Time: 10 minutes
- Cook Time: 20 minutes
- Total Time: 1 hour
- Yield: About 12 servings 1x
- Category: Dessert
- Cuisine: American
Ingredients
- 10 oz (280 g) dark chocolate chips or bar (60-70% cocoa)
- 10 oz (280 g) white chocolate chips or bar
- 6–8 peppermint candy canes, crushed coarsely
- 1 tbsp (14 g) unsalted butter (optional)
- Pinch of sea salt (optional)
Instructions
- Line a baking sheet with parchment paper or a silicone mat. Crush the peppermint candy canes by placing them in a clean kitchen towel and gently pounding with a rolling pin until you have a mix of small and larger pieces. Set aside.
- Melt the dark chocolate and butter together using a double boiler or microwave until smooth, stirring frequently to avoid overheating.
- Pour the melted dark chocolate onto the prepared baking sheet and spread evenly into an 8×10 inch rectangle about 1/4 inch thick. Tap the tray gently to smooth out bubbles.
- Chill the dark chocolate layer in the fridge for 15-20 minutes until firm but slightly tacky.
- Melt the white chocolate in the same way until silky smooth.
- Pour the melted white chocolate over the chilled dark chocolate layer and spread evenly.
- Sprinkle the crushed peppermint candy canes evenly over the white chocolate while still warm and press lightly if needed.
- Return the tray to the fridge and chill for 30 minutes until the bark is firm and crisp.
- Break the bark into rustic pieces and store in an airtight container.
Notes
Use a double boiler for better control when melting chocolate to avoid burning. Keep bowls and utensils dry to prevent chocolate from seizing. Crush peppermint candy canes coarsely for texture and visual appeal. To speed chilling, use the freezer for 10 minutes but watch closely. If white chocolate hardens too fast while spreading, warm gently for a few seconds.
Nutrition
- Serving Size: 1 oz (28 g) piece
- Calories: 165
- Sugar: 15
- Sodium: 15
- Fat: 11
- Saturated Fat: 7
- Carbohydrates: 17
- Fiber: 1
- Protein: 2
Keywords: peppermint bark, holiday treats, peppermint candy, white chocolate, dark chocolate, easy dessert, festive recipe, homemade candy