Love this? Save it for later!
Share the inspiration with your friends
My friend Sarah showed up at my door on a rainy Tuesday afternoon, holding a half-empty can of pumpkin puree and looking slightly desperate. She had a work thing that night—some last-minute potluck situation—and her fridge was basically just that can of pumpkin, some butter, and a carton of eggs. I looked in my own pantry and found a bag of maple sugar I’d bought on a whim last fall and never opened, plus the usual baking suspects. And honestly? That’s how these Best Maple Pumpkin Pie Spice Snickerdoodle Bars were born. We stood in my tiny kitchen, laughing about how ridiculous it was, and threw together something that made both of us stop mid-conversation after the first bite. I mean, really stop—like, chewing slowly, looking at each other with wide eyes. The bars came out of the pan all warm and crinkly on top, with that perfect cinnamon-maple smell filling every corner of the apartment. Sarah took the whole tray to her thing and texted me later that night saying people were asking for the recipe. I scribbled it on a napkin for her, and I’ve been making them ever since. There’s something about a happy accident in the kitchen that just sticks with you, you know?
Why You’ll Love This Recipe
These aren’t your average snickerdoodle bars. I’ve tested this recipe about five times now (okay, maybe six—I lost count after the third batch), and each tweak made them better. Here’s why they’re worth every minute:
- Quick & Easy : Comes together in about 30 minutes of hands-on time. No rolling, no chilling, no fuss. Perfect for those “I need dessert now” moments.
- Simple Ingredients : You probably have most of this stuff in your pantry already. The maple syrup and pumpkin puree are the only things you might need to grab, and they’re easy to find this time of year.
- Perfect for Fall Gatherings : Great for Thanksgiving dessert tables, Halloween parties, or just a cozy night in with a mug of tea. I brought a batch to a Friendsgiving last year and they disappeared before the pie even got sliced.
- Crowd-Pleaser : Kids love the soft, chewy texture, and adults can’t get enough of that warm spice blend. Even my friend who “doesn’t like pumpkin” ate three of them.
- Unbelievably Delicious : The combination of maple, pumpkin pie spice, and that classic cinnamon-sugar coating is next-level comfort food. The texture is soft and tender with slightly crispy edges—basically everything you want in a bar cookie.
What makes these different from other snickerdoodle bars is the pumpkin puree and maple syrup working together. The pumpkin keeps them incredibly moist without making them taste like pumpkin bread, and the maple adds this deep, almost caramel-like sweetness that regular snickerdoodles just don’t have. I’ve tried versions with just cinnamon, but the pumpkin pie spice blend really makes these sing. Trust me on this one.
What Ingredients You Will Need
This recipe uses simple, wholesome ingredients to deliver bold flavor and satisfying texture without the fuss. Most of these are pantry staples, especially if you do any fall baking.
For the Bars:
- 1 cup (2 sticks) unsalted butter, softened (I use Kerrygold for the richness, but any good butter works)
- 1 cup granulated sugar
- 1/2 cup packed light brown sugar
- 1/2 cup pumpkin puree (not pumpkin pie filling—make sure it’s 100% pure pumpkin)
- 1/4 cup pure maple syrup (the real stuff, not pancake syrup. Grade A dark amber is my go-to)
- 2 large eggs, room temperature
- 2 teaspoons vanilla extract
- 2 1/2 cups all-purpose flour
- 2 teaspoons pumpkin pie spice (store-bought or homemade—I’ll share my blend below)
- 1 teaspoon ground cinnamon
- 1 teaspoon baking soda
- 1/2 teaspoon salt
For the Cinnamon-Sugar Coating:
- 1/4 cup granulated sugar
- 1 tablespoon ground cinnamon
- 1/2 teaspoon pumpkin pie spice (optional, but why not?)
If you want to make your own pumpkin pie spice blend, mix 2 teaspoons ground cinnamon, 1 teaspoon ground ginger, 1/2 teaspoon ground nutmeg, 1/2 teaspoon ground cloves, and 1/4 teaspoon allspice. Store it in a little jar and use it all season. I keep a batch on my counter from September through December.
For the pumpkin puree, I recommend Libby’s—it’s consistently thick and not watery. If you’re using a different brand, just make sure to blot any excess moisture with a paper towel before adding it to the batter. Nobody wants soggy bars.
Equipment Needed
You don’t need a fancy kitchen to make these. Here’s what you’ll need:
- 9×13-inch baking pan (metal or glass—I prefer metal for even browning)
- Parchment paper (for easy lifting—trust me, this saves so much cleanup)
- Electric mixer (hand or stand mixer works fine. I’ve made these with a whisk and some elbow grease too, but it’s a workout)
- Large mixing bowls
- Whisk
- Rubber spatula
- Cooling rack
- Small bowl for the cinnamon-sugar coating
If you don’t have parchment paper, you can grease the pan really well with butter or non-stick spray. Just be careful when cutting the bars—they might stick a little. I learned that the hard way with my first batch and ended up with crumbly edges. Still delicious, just not as pretty.
Preparation Method
- Preheat your oven to 350°F (175°C). Line your 9×13-inch baking pan with parchment paper, leaving some overhang on the long sides. This creates little “handles” so you can lift the whole slab out later. Spray the parchment lightly with non-stick spray just to be safe.
- In a large mixing bowl, cream together the softened butter, granulated sugar, and brown sugar. Beat on medium speed for about 3-4 minutes until the mixture is light and fluffy. You want it to look pale and airy—this is where the texture starts to come together. Scrape down the sides of the bowl halfway through.
- Add the pumpkin puree, maple syrup, eggs, and vanilla extract. Beat on low speed until just combined. Don’t overmix here—the batter might look a little separated at first, but that’s totally fine. It will come together when you add the dry ingredients. If it looks curdled, you’re okay. Keep going.
- In a separate medium bowl, whisk together the flour, pumpkin pie spice, cinnamon, baking soda, and salt. Make sure there are no lumps. I like to give it a good 10-15 seconds of whisking to distribute the spices evenly. Nobody wants a bite with a clump of baking soda.
- Gradually add the dry ingredients to the wet ingredients. Mix on low speed, adding about a third of the flour mixture at a time. Mix until just incorporated—stop as soon as you don’t see any more streaks of flour. Overmixing will make the bars tough, and we want them soft and tender.
- In a small bowl, stir together the coating ingredients: sugar, cinnamon, and pumpkin pie spice. Set this aside for now.
- Spread the batter evenly into the prepared pan. The batter will be thick and a little sticky—that’s normal. Use a spatula or lightly greased hands to press it into an even layer. Take your time here; an even layer ensures even baking.
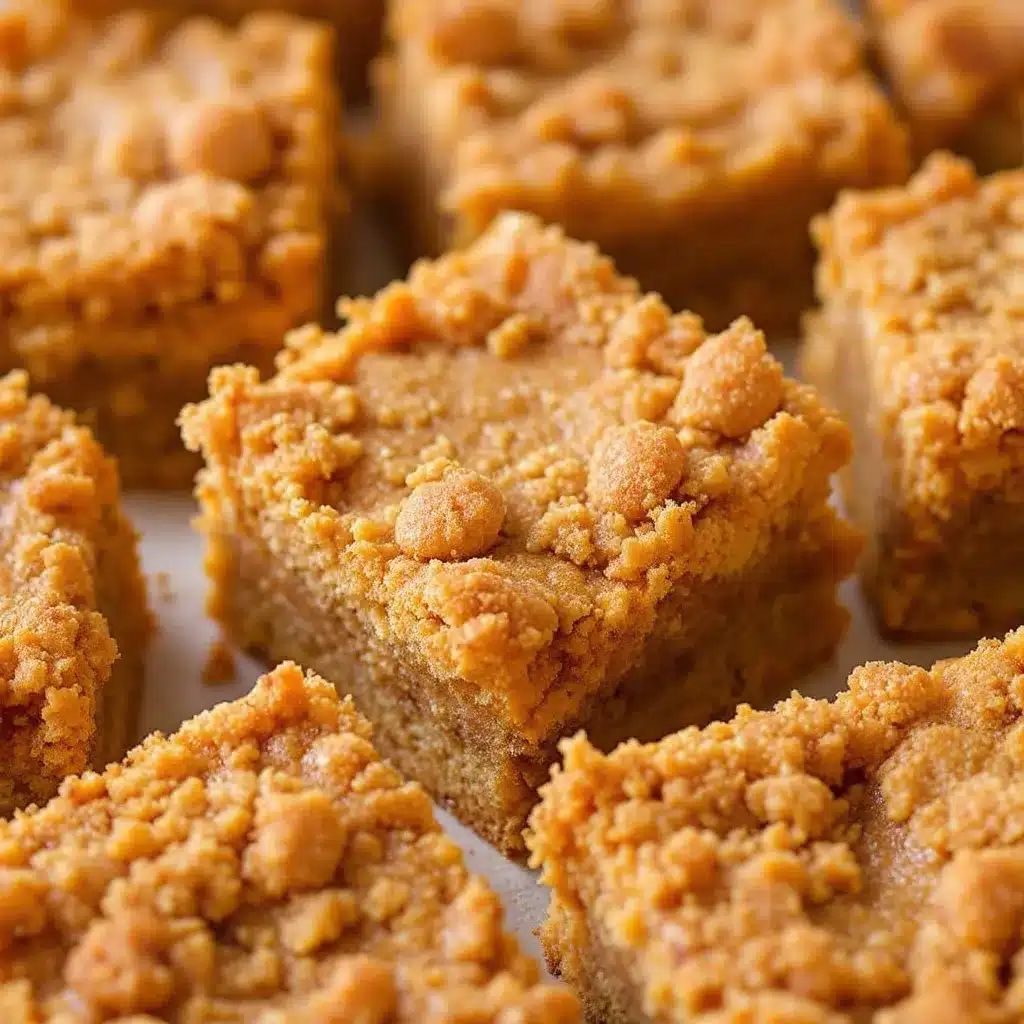
- Sprinkle the cinnamon-sugar coating generously over the top. Don’t be shy—use all of it. It might seem like a lot, but it creates that signature crinkly, crackly top that snickerdoodles are famous for. The coating will sink into the batter slightly as it bakes, which is exactly what you want.
- Bake for 22-28 minutes, or until the edges are golden brown and the center is set. A toothpick inserted into the center should come out clean or with just a few moist crumbs. The top should look crackly and slightly domed. My oven runs hot, so I usually check at 22 minutes and go from there.
- Let the bars cool in the pan on a wire rack for at least 20 minutes. Then use the parchment handles to lift the entire slab out onto the rack to cool completely. If you cut them while they’re still warm, they’ll fall apart. I know it’s tempting—I’ve burned my fingers more than once trying to sneak a warm piece. Just wait. Trust the process.
- Once completely cool, cut into squares. I usually get about 24 bars from one pan, but you can make them bigger or smaller depending on your crowd. Use a sharp knife and wipe it clean between cuts for the neatest edges.
Cooking Tips & Techniques
I’ve made these bars enough times to learn a few things the hard way. Here’s what I wish someone had told me:
Room temperature ingredients matter. I know, I know—every recipe says this. But with pumpkin puree and maple syrup in the mix, cold eggs can make the batter seize up. Leave your eggs on the counter for 30 minutes before starting. If you forget (which I do, constantly), place them in a bowl of warm water for 5 minutes.
Don’t overmix the batter. This is the number one mistake I made in my early batches. Once you add the flour, mix just until you don’t see any more white streaks. Overmixing develops the gluten and makes the bars dense and cakey instead of soft and chewy. We’re going for that perfect snickerdoodle texture—tender with a little bit of chew.
The coating is everything. I used to skimp on the cinnamon-sugar mixture, thinking it was just for looks. Nope. That coating creates a delicious crust on top that contrasts with the soft interior. Sprinkle it evenly and don’t leave any bare spots. One time I got distracted and only covered about half the top—the uncovered parts were still good, but they didn’t have that signature snickerdoodle magic.
Watch your oven like a hawk. Every oven is different. My friend’s oven bakes these in exactly 24 minutes, while mine takes 26. Start checking at 20 minutes if you have a convection setting or a particularly aggressive oven. The edges should be golden brown and the center should look set but still soft.
Let them cool completely. I cannot stress this enough. The bars need time to set up properly. If you cut them while they’re warm, they’ll crumble and fall apart. I once served warm bars to my family and they were more like snickerdoodle crumble—still tasty, but not as pretty. Patience pays off here.
Variations & Adaptations
One of the best things about this recipe is how flexible it is. Here are some ways I’ve made it work for different situations:
Gluten-Free Version: Swap the all-purpose flour with a 1:1 gluten-free baking flour blend. I’ve used Bob’s Red Mill and King Arthur with great results. Just make sure the blend contains xanthan gum for structure. The texture will be slightly more tender, but still delicious.
Dairy-Free Option: Use vegan butter sticks (I like Miyoko’s) instead of regular butter. Make sure it’s softened to room temperature. The bars will still be soft and flavorful, though they might spread a tiny bit more in the oven.
Extra Pumpkin Flavor: Add 1/2 teaspoon more pumpkin pie spice and an extra tablespoon of maple syrup. I did this for a Thanksgiving dessert table and it was a huge hit. The pumpkin flavor is more pronounced without being overwhelming.
Mix-In Additions: Fold in 1/2 cup white chocolate chips or chopped pecans before spreading the batter. I made a batch with toasted pecans last week and my husband said they were the best yet. You could also add dried cranberries for a festive twist.
Spice It Up: Add a pinch of cayenne pepper or chipotle powder to the cinnamon-sugar coating for a spicy-sweet kick. It sounds weird, but the heat plays beautifully with the maple and pumpkin. I tried this on a whim and now I’m obsessed.
Glazed Top: Drizzle a simple maple glaze over the cooled bars. Mix 1/2 cup powdered sugar with 2 tablespoons maple syrup and a splash of milk. It adds a pretty finish and extra maple flavor.
Serving & Storage Suggestions
These bars are best served at room temperature, but they’re also amazing slightly warm with a scoop of vanilla ice cream. I’m not kidding—try it. The warm bar with cold, melty ice cream is pure fall comfort.
For presentation, I like to arrange them on a rustic wooden board or a white platter. A light dusting of cinnamon on the plate adds a nice touch. They’re perfect for Thanksgiving dessert tables, Halloween parties, or just a random Tuesday when you need something sweet.
Storage: Keep the bars in an airtight container at room temperature for up to 5 days. Place a piece of bread in the container to help maintain moisture—the bars will absorb it and stay soft. I learned this trick from my grandma and it works like magic.
Freezing: These freeze beautifully. Wrap individual bars in plastic wrap, then place them in a freezer-safe bag or container. They’ll keep for up to 3 months. To thaw, just leave them on the counter for about 30 minutes. I always keep a stash in my freezer for unexpected guests.
Reheating: Pop a bar in the microwave for 10-15 seconds to bring back that fresh-from-the-oven warmth. Or place them on a baking sheet in a 300°F oven for 5 minutes. The flavors actually deepen after a day or two, so don’t be surprised if they taste even better the next day.
Nutritional Information & Benefits
Let’s be real—these are a treat, not a health food. But they’re made with real ingredients, and that counts for something. Here’s the estimated nutritional breakdown per bar (based on 24 servings):
- Calories: 185
- Fat: 9g
- Carbohydrates: 25g
- Protein: 2g
- Fiber: 1g
- Sugar: 15g
The pumpkin puree adds vitamin A and fiber, while the maple syrup provides antioxidants and minerals like zinc and manganese. The cinnamon and pumpkin pie spices have anti-inflammatory properties. So while these aren’t health food, they’re not empty calories either. They’re made with love and real ingredients, and that’s something I feel good about.
If you’re watching your sugar intake, you can reduce the granulated sugar by 1/4 cup and use a sugar substitute like monk fruit sweetener. The texture will be slightly different, but still tasty. I’ve tried it with a 1:1 sugar substitute and it worked fine.
Conclusion
These Best Maple Pumpkin Pie Spice Snickerdoodle Bars are everything I love about fall baking—warm spices, cozy flavors, and that feeling of sharing something homemade with people you care about. They came from a happy accident in my kitchen, and now they’re a staple in my fall recipe rotation. The combination of maple, pumpkin, and cinnamon-sugar coating is just perfect. Honestly, they might be my favorite thing I’ve ever baked.
I’d love to hear how yours turn out! Did you add any mix-ins? Try a different spice blend? Share your creations in the comments below—I read every single one and I’m always looking for new ideas. And if you loved these bars, don’t forget to share this recipe with a friend who needs a little fall comfort in their life. Happy baking, friends!
Frequently Asked Questions
Can I use pumpkin pie filling instead of pumpkin puree?
No, please don’t. Pumpkin pie filling has added sugar and spices, which will throw off the sweetness and texture of the bars. Stick with 100% pure pumpkin puree for the best results. If you accidentally bought pie filling, you can still use it—just reduce the sugar in the recipe by about 1/4 cup and skip the pumpkin pie spice. But honestly, it’s safer to just grab the right can.
Can I make these bars ahead of time?
Absolutely. These bars actually taste better the next day—the flavors have time to meld and deepen. Bake them up to 2 days in advance and store them in an airtight container at room temperature. You can also freeze them for up to 3 months. Just thaw and serve.
Why did my bars turn out dry?
Overbaking is usually the culprit. Every oven is different, so start checking at 22 minutes. The bars should look set in the center but still soft. Also, make sure you’re measuring your flour correctly—scoop it into the measuring cup with a spoon and level it off. Packing the flour can lead to dry, dense bars.
Can I use maple extract instead of maple syrup?
You can, but I wouldn’t recommend it. Maple syrup adds moisture and depth that extract just can’t replicate. If you’re in a pinch, use 1/4 cup honey or agave nectar instead. The flavor will be different, but still delicious. Just reduce the sugar by a tablespoon or two since honey is sweeter than maple syrup.
How do I get clean, neat cuts?
Patience is key. Let the bars cool completely before cutting. Use a sharp chef’s knife and wipe it clean with a damp paper towel between each cut. If the bars are sticking to the knife, try dipping the blade in hot water and drying it off before slicing. This gives you those beautiful, bakery-style edges.
Pin This Recipe!
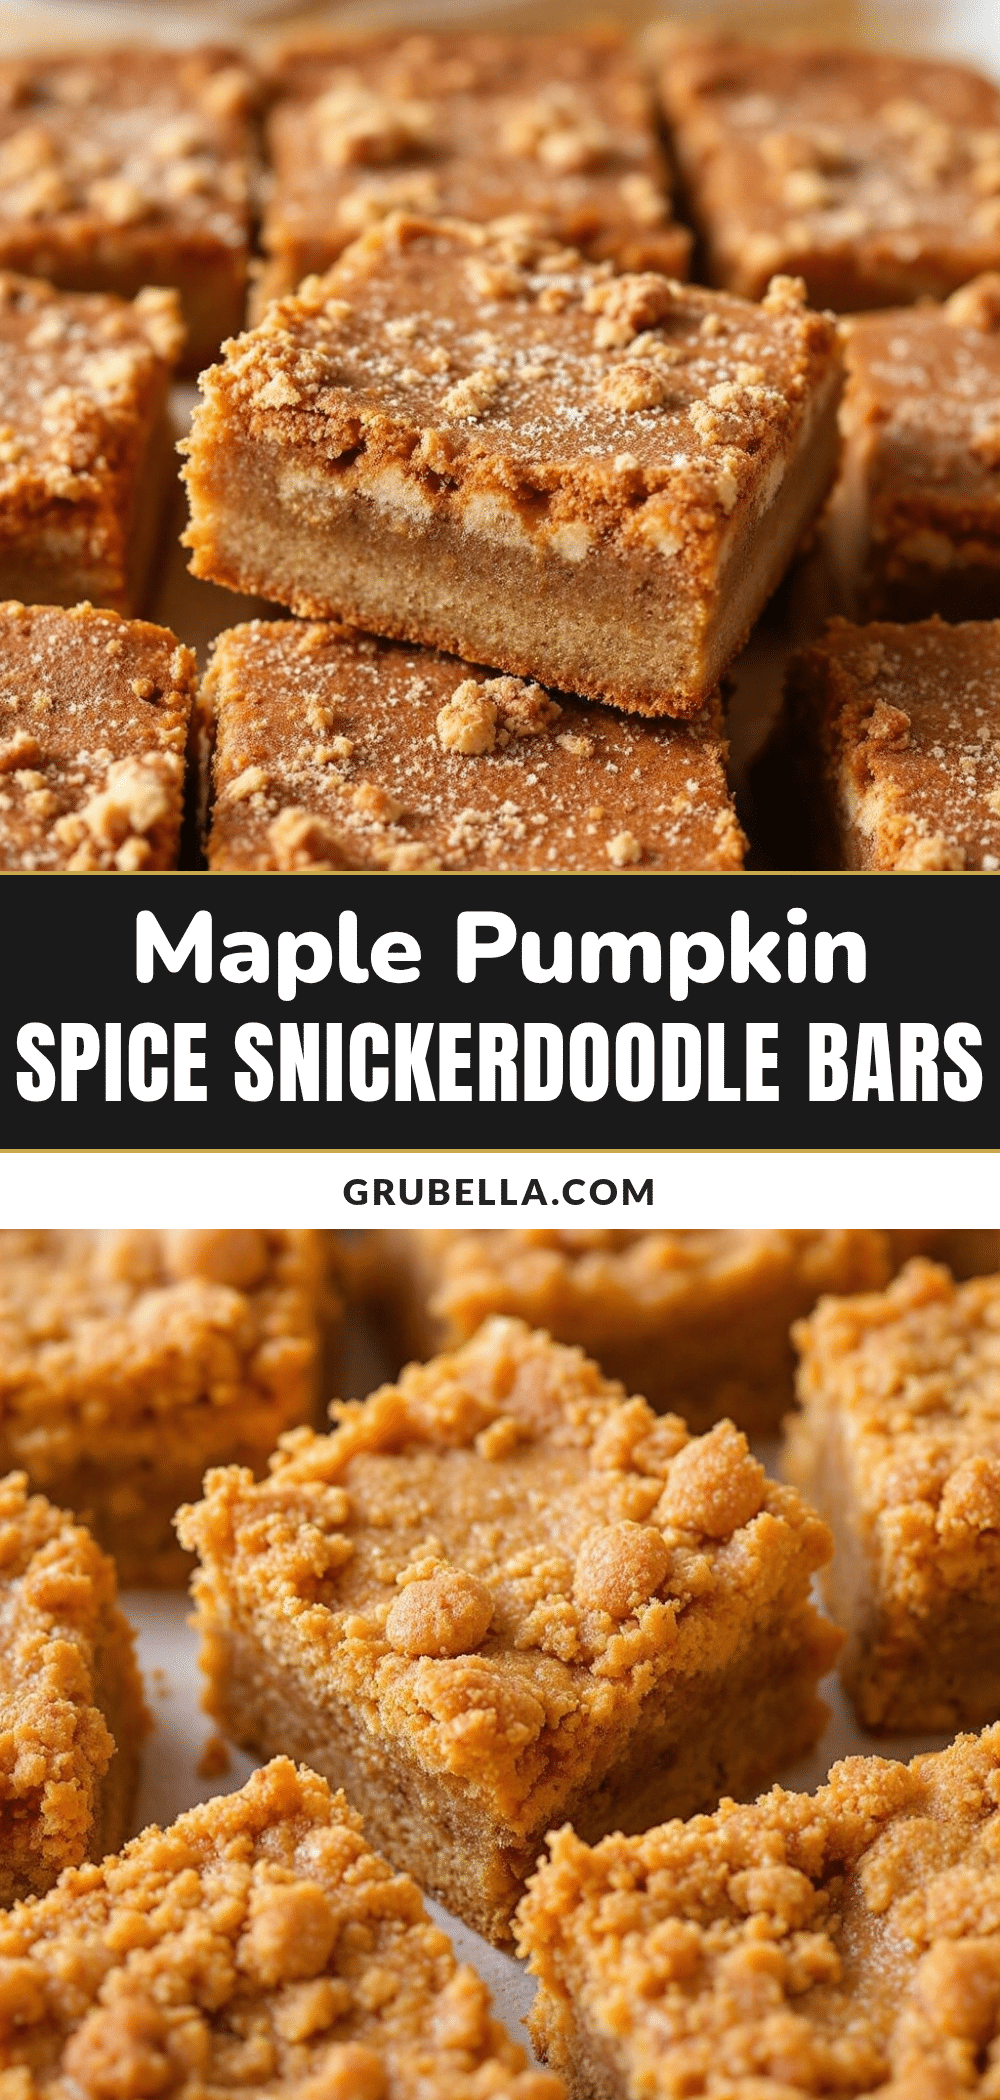
Best Maple Pumpkin Pie Spice Snickerdoodle Bars (Easy Fall Dessert)
These soft and chewy snickerdoodle bars combine pumpkin puree and maple syrup with warm pumpkin pie spice, topped with a crackly cinnamon-sugar coating. They’re an easy, crowd-pleasing fall dessert that comes together in about 30 minutes of hands-on time.
- Prep Time: 15 minutes
- Cook Time: 25 minutes
- Total Time: 40 minutes
- Yield: 24 servings 1x
- Category: Dessert
- Cuisine: American
Ingredients
- 1 cup (2 sticks) unsalted butter, softened
- 1 cup granulated sugar
- 1/2 cup packed light brown sugar
- 1/2 cup pumpkin puree (100% pure pumpkin)
- 1/4 cup pure maple syrup (Grade A dark amber preferred)
- 2 large eggs, room temperature
- 2 teaspoons vanilla extract
- 2 1/2 cups all-purpose flour
- 2 teaspoons pumpkin pie spice
- 1 teaspoon ground cinnamon
- 1 teaspoon baking soda
- 1/2 teaspoon salt
- 1/4 cup granulated sugar (for coating)
- 1 tablespoon ground cinnamon (for coating)
- 1/2 teaspoon pumpkin pie spice (for coating, optional)
Instructions
- Preheat your oven to 350°F (175°C). Line a 9×13-inch baking pan with parchment paper, leaving overhang on the long sides. Spray lightly with non-stick spray.
- In a large mixing bowl, cream together the softened butter, 1 cup granulated sugar, and brown sugar on medium speed for 3-4 minutes until light and fluffy. Scrape down the sides halfway through.
- Add the pumpkin puree, maple syrup, eggs, and vanilla extract. Beat on low speed until just combined. The batter may look slightly separated; that’s fine.
- In a separate medium bowl, whisk together the flour, 2 teaspoons pumpkin pie spice, 1 teaspoon cinnamon, baking soda, and salt until no lumps remain.
- Gradually add the dry ingredients to the wet ingredients, mixing on low speed and adding about a third at a time. Mix until just incorporated—stop as soon as no streaks of flour remain.
- In a small bowl, stir together the coating ingredients: 1/4 cup granulated sugar, 1 tablespoon cinnamon, and 1/2 teaspoon pumpkin pie spice (if using). Set aside.
- Spread the batter evenly into the prepared pan. The batter will be thick and sticky; use a spatula or lightly greased hands to press it into an even layer.
- Sprinkle the cinnamon-sugar coating generously over the top, using all of it.
- Bake for 22-28 minutes, or until the edges are golden brown and the center is set. A toothpick inserted into the center should come out clean or with a few moist crumbs.
- Let the bars cool in the pan on a wire rack for at least 20 minutes. Then use the parchment handles to lift the slab out onto the rack to cool completely.
- Once completely cool, cut into squares (about 24 bars). Use a sharp knife, wiping it clean between cuts for neat edges.
Notes
For best results, use room temperature ingredients. Don’t overmix the batter to keep bars tender. Let bars cool completely before cutting to avoid crumbling. Store in an airtight container at room temperature for up to 5 days; place a piece of bread in the container to maintain moisture. Freeze individual bars wrapped in plastic wrap for up to 3 months.
Nutrition
- Serving Size: 1 bar
- Calories: 185
- Sugar: 15
- Sodium: 120
- Fat: 9
- Saturated Fat: 5
- Carbohydrates: 25
- Fiber: 1
- Protein: 2
Keywords: snickerdoodle bars, pumpkin bars, maple bars, fall dessert, easy dessert, pumpkin pie spice, cinnamon sugar bars



