Love this? Save it for later!
Share the inspiration with your friends
The plate came back to the kitchen with nothing but a few crumbs clinging to the edge. My neighbor Karen had taken one bite, stopped mid-sentence, and then just quietly finished the whole thing without saying a word. That’s how I knew these baked apple cider donuts were different.
I wasn’t trying to reinvent the wheel that Saturday morning. Honestly, I was just trying to use up the half-gallon of apple cider sitting in my fridge from our orchard trip the weekend before. You know how it is—you buy the big jug with grand plans of cozy cider sipping, and then life gets busy and suddenly it’s Wednesday and that cider is staring at you every time you open the refrigerator door.
So I did what any reasonable person would do. I reduced it down on the stove until my whole apartment smelled like autumn in a pot, and I poured that concentrated, appley goodness into a donut pan I’d bought on a whim two years ago and never used. The first batch came out okay. The second batch came out dangerously good. By the third try, I had something that made people close their eyes while eating—and that’s not something I say lightly.
These aren’t fried, which means no greasy fingers and no standing over a pot of hot oil. They’re baked, tender, and rolled in cinnamon sugar while they’re still warm so that coating sticks and crackles when you bite into it. The apple cider flavor is concentrated and real—not that artificial apple taste you get from so many fall treats. It’s the kind of donut that makes you want to pour another cup of coffee and sit down for a minute, even if you don’t usually have time for that sort of thing.
I’ve made these for book club, for Sunday brunch with my sister, and for no reason at all on a random Tuesday. Every single time, someone asks for the recipe. And honestly? I’m happy to share it, because good food like this deserves to be passed around.
Why You’ll Love These Baked Apple Cider Donuts
Let me tell you why these donuts have earned a permanent spot in my fall baking rotation. First off, they’re baked—not fried—which means you get all the cozy donut satisfaction without the mess and hassle of deep frying. Your kitchen stays clean, your hands don’t smell like oil, and honestly, the texture is so tender and cakey that you won’t miss the fryer one bit.
- Quick & Easy: These come together in about 30 minutes from start to finish. No yeast, no rising time, no complicated techniques. Just mix, bake, and roll in sugar.
- Real Apple Cider Flavor: We’re not using extract or artificial flavoring here. By reducing the cider on the stove, we concentrate that authentic apple taste into something truly special.
- Simple Ingredients: You probably have most of these in your pantry right now. No weird specialty items or trips to three different stores.
- Perfect for Fall Gatherings: Whether it’s a pumpkin carving party, Thanksgiving brunch, or just a cozy weekend morning, these donuts fit right in. They pair beautifully with a hot cup of coffee or a homemade pumpkin spice latte.
- Crowd-Pleaser: I’ve served these to kids, adults, picky eaters, and donut snobs. The plate always empties.
- Unbelievably Delicious: That first bite—where the cinnamon sugar crunches against your teeth and gives way to the soft, apple-scented interior—is genuinely one of the best things I’ve ever experienced in my kitchen.
What makes these different from every other apple cider donut recipe out there? It’s the technique of reducing the cider and the ratio of wet to dry ingredients. I tested this six times before I got it right. Too much cider and the donuts were gummy. Too little and they were dry. The version I’m sharing with you today hits that perfect sweet spot where the donut is moist but still light, with a tender crumb that practically melts in your mouth.
This is comfort food at its finest—the kind of treat that makes you feel like everything’s going to be okay, even if only for the five minutes it takes to eat one. And honestly, sometimes that’s exactly what we need.
What Ingredients You Will Need
This recipe uses simple, wholesome ingredients to deliver that unmistakable fall flavor. Most of these are pantry staples, which means you can whip up a batch whenever the craving strikes—and trust me, it will strike.
For the Donuts
- 1 cup apple cider — Not apple juice, not apple-flavored drink. Real apple cider. You’ll reduce this on the stove to concentrate the flavor, so don’t skip this step even if you’re tempted. It makes all the difference.
- 1 ¾ cups all-purpose flour — Spoon and level your flour for the most accurate measurement. Scooping directly from the bag can pack in too much flour and make your donuts dense.
- ¾ cup granulated sugar — Adds sweetness and helps create that tender crumb.
- 1 ½ teaspoons baking powder — Our leavening agent. Make sure it’s fresh—old baking powder won’t give you the rise you need.
- ½ teaspoon baking soda — Works with the buttermilk to create lift and tenderness.
- 1 teaspoon ground cinnamon — The warm, cozy spice that makes fall baking taste like fall baking. I prefer Saigon cinnamon for its stronger, sweeter flavor.
- ½ teaspoon ground nutmeg — Freshly grated if you have it, but pre-ground works just fine.
- ½ teaspoon salt — Don’t skip this. Salt balances the sweetness and enhances all the other flavors.
- 1 large egg — Room temperature, so it incorporates more evenly into the batter.
- ½ cup buttermilk — Adds tenderness and a slight tang that complements the apple cider beautifully. No buttermilk? Add ½ tablespoon of lemon juice or vinegar to regular milk and let it sit for 5 minutes.
- ¼ cup unsalted butter, melted and slightly cooled — Butter gives these donuts their rich flavor. I use salted butter in a pinch and just reduce the added salt to ¼ teaspoon.
- 1 teaspoon vanilla extract — Pure vanilla, not imitation. It rounds out all the flavors.
For the Cinnamon Sugar Coating
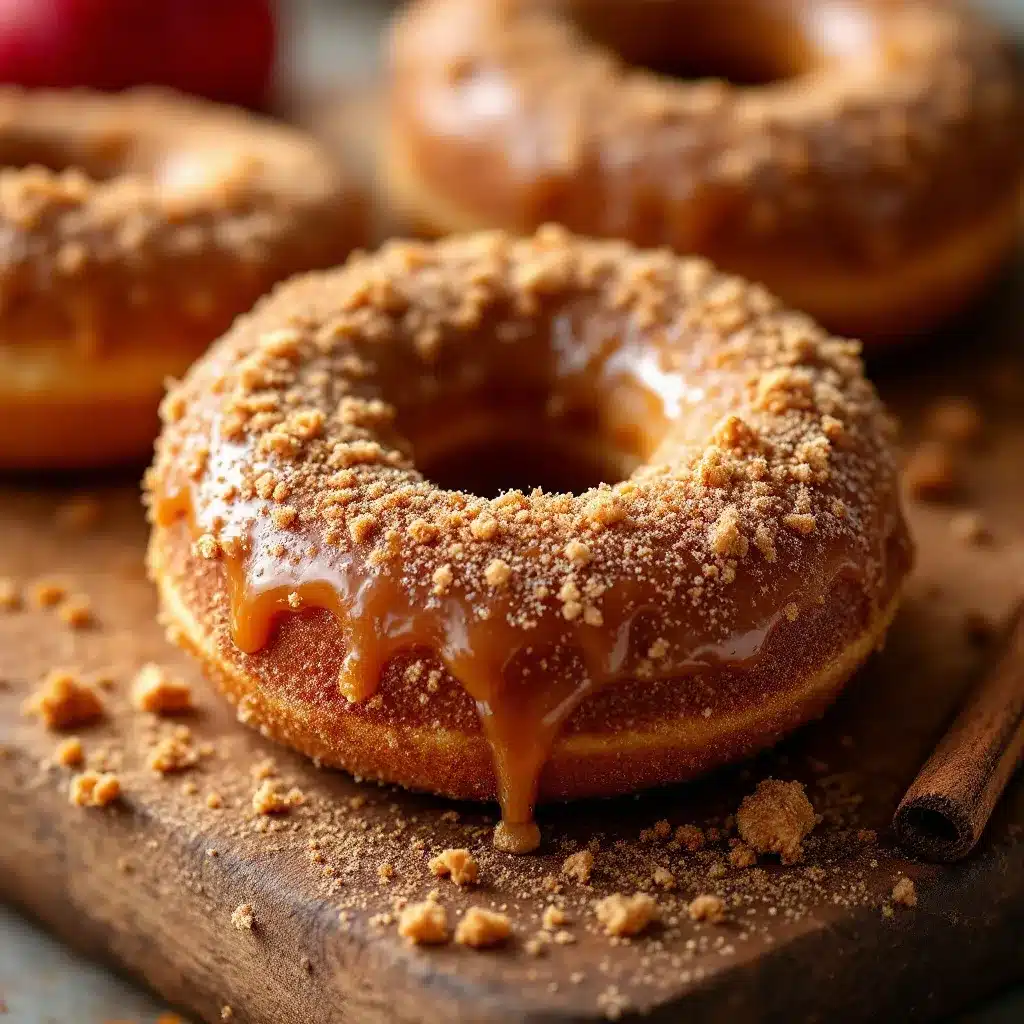
- ½ cup granulated sugar — Regular white sugar works best for coating. The crystals are the perfect size for sticking to the warm donuts.
- 1 tablespoon ground cinnamon — Feel free to adjust this to your taste. Some people like a heavier cinnamon coating, and I fully support that life choice.
- 2 tablespoons unsalted butter, melted — Brushing this on the warm donuts helps the cinnamon sugar adhere. Don’t skip this step or you’ll end up with sad, bare donuts.
Ingredient Tips from My Kitchen
I’ve tested this recipe with different brands and variations, so let me save you some trial and error. For the apple cider, I’ve had great results with both store-bought and fresh-pressed orchard cider. Just make sure it’s unpasteurized or minimally processed for the strongest apple flavor. The reducing process works best with cider that hasn’t been filtered—the cloudy kind with all that apple sediment still in it.
For the buttermilk, I’ve used both full-fat and low-fat versions with equal success. If you’re dairy-free, you can substitute with unsweetened almond milk mixed with a teaspoon of apple cider vinegar. The acidity is what matters here, not the fat content.
I recommend using a good-quality cinnamon for the coating. I’ve tried this with cheap supermarket cinnamon and with high-quality Vietnamese cinnamon, and honestly, the difference is noticeable. The better cinnamon has a natural sweetness and warmth that elevates the whole donut experience.
Equipment Needed
You don’t need a professional bakery setup to make these donuts, but a few specific tools will make your life much easier.
- Donut pan: This is non-negotiable. You need a standard 6-cavity donut pan. I use a Wilton non-stick pan that I’ve had for years, and it works perfectly. If you only have one pan, you’ll need to bake in batches—the batter makes about 12 donuts total.
- Small saucepan: For reducing the apple cider. A 1-quart saucepan is perfect. You want something with a wide bottom so the cider reduces evenly.
- Mixing bowls: One large, one medium. I use glass bowls because they don’t hold onto odors or flavors.
- Whisk: For combining dry ingredients and mixing the wet ingredients. A balloon whisk works best.
- Rubber spatula: For folding the wet and dry ingredients together without overmixing.
- Piping bag or zip-top bag: To pipe the batter into the donut cavities. A gallon-sized zip-top bag with the corner snipped off works beautifully and costs nothing.
- Pastry brush: For brushing melted butter onto the warm donuts. A silicone brush is easier to clean than a natural bristle one.
- Cooling rack: A wire rack allows air to circulate around the donuts so they cool evenly without getting soggy on the bottom.
- Shallow bowl or pie plate: For the cinnamon sugar mixture. You need something wide enough to roll the donuts in.
If you don’t have a donut pan, you can bake this batter as mini muffins or in a standard muffin tin. The baking time will be slightly different—start checking at 10 minutes for mini muffins and 15 minutes for standard muffins. They won’t have that classic donut shape, but they’ll taste just as amazing.
Preparation Method
Alright, let’s get baking. I’ve broken this down into clear steps with all the little details that make the difference between good donuts and unforgettable ones.
Step 1: Reduce the Apple Cider
Pour the apple cider into a small saucepan and bring it to a boil over medium-high heat. Once it’s boiling, reduce the heat to medium-low and let it simmer gently. You’re looking for it to reduce down to about ¼ cup—this takes roughly 12-15 minutes. The cider will thicken slightly and become syrupy. You’ll know it’s ready when it coats the back of a spoon and smells intensely of apples. Set it aside to cool while you prepare the rest of the ingredients. Don’t rush this step—if you use unreduced cider, your donuts will be too wet and won’t have that concentrated apple flavor.
Step 2: Preheat and Prep
Preheat your oven to 350°F (175°C). Grease your donut pan thoroughly with butter or non-stick spray. I use a pastry brush to get butter into all the nooks and crannies of the pan. Even if your pan claims to be non-stick, don’t skip this step. Trust me on this one—I learned the hard way.
Step 3: Mix the Dry Ingredients
In a large bowl, whisk together the flour, granulated sugar, baking powder, baking soda, cinnamon, nutmeg, and salt. Whisk for about 20 seconds to make sure everything is evenly distributed. This aerates the flour and ensures your donuts will be light, not dense.
Step 4: Mix the Wet Ingredients
In a separate medium bowl, whisk together the egg, buttermilk, melted butter, vanilla extract, and the cooled reduced apple cider. Whisk until everything is smooth and well combined. The mixture should look pale and slightly thickened.
Step 5: Combine Wet and Dry
Pour the wet ingredients into the dry ingredients. Use a rubber spatula to fold everything together gently. Here’s the important part: mix just until you don’t see any more streaks of flour. A few small lumps are totally fine. Overmixing will develop the gluten and make your donuts tough and rubbery. We want tender, cakey donuts, not hockey pucks.
Step 6: Fill the Donut Pan
Transfer the batter to a piping bag or a zip-top bag. If using a zip-top bag, snip about ½ inch off one corner. Pipe the batter into each donut cavity, filling them about ¾ full. The batter will be thick—that’s normal. Don’t be tempted to overfill, or your donuts will lose their hole in the middle. If you don’t have a piping bag, you can carefully spoon the batter in, but the bag method is much cleaner and more precise.
Step 7: Bake
Bake for 10-12 minutes, or until the donuts are golden brown and a toothpick inserted into the thickest part comes out clean. The edges should be slightly darker than the centers. My oven runs a little hot, so I start checking at 9 minutes. Every oven is different, so trust your eyes and your toothpick more than the timer.
Step 8: Cool Slightly
Let the donuts cool in the pan for 2-3 minutes. This is crucial—if you try to remove them immediately, they’ll fall apart. But don’t let them cool completely in the pan, either, or they’ll stick. After 3 minutes, turn them out onto a wire rack. They should slide out easily if you greased the pan well.
Step 9: Coat in Cinnamon Sugar
While the donuts are still warm (but not hot enough to burn your fingers), brush each one lightly with melted butter. Then immediately roll it in the cinnamon sugar mixture until fully coated. The warmth of the donut helps the sugar stick and creates that crackly, slightly crunchy exterior that makes these donuts so addictive. Work quickly here—once the donuts cool completely, the sugar won’t adhere as well.
Step 10: Repeat
If you only have one donut pan, let it cool completely, re-grease it, and repeat steps 6-9 with the remaining batter. You can speed this up by running the pan under cool water and drying it thoroughly before greasing again.
Cooking Tips & Techniques
After making these donuts more times than I care to count, I’ve picked up a few tricks that I wish I’d known from the beginning. Let me share them so you can skip the learning curve.
Don’t skip reducing the cider. I know it adds an extra step and dirties another pan, but this is where the magic happens. Unreduced cider will make your donuts taste watery and weak. The reduction process concentrates the natural sugars and apple flavor into something almost caramel-like. It’s non-negotiable in my book.
Room temperature ingredients matter. Cold eggs and cold buttermilk will seize the melted butter and create lumps in your batter. Take them out of the fridge 30 minutes before you start baking. If you forget (and I forget all the time), place the eggs in a bowl of warm water for 5 minutes and microwave the buttermilk for 10-15 seconds.
Use a light hand when mixing. This is the most common mistake I see in baked donut recipes. People overmix because they want a perfectly smooth batter. But that smooth batter comes at the cost of texture. Mix until just combined, and accept the lumps. They’ll bake out in the oven.
Check your oven temperature. I have an oven thermometer because my oven’s built-in temperature gauge is a liar. It says 350°F when it’s actually running at 375°F. An inexpensive oven thermometer will save you from burnt donuts and frustration.
Work in batches if needed. Don’t try to cram all the batter into one pan. These donuts need room to rise and form their signature shape. Overfilled cavities mean no hole in the middle, and honestly, that’s just a muffin at that point.
Keep the coating fresh. Cinnamon sugar coating is best the day you make it. If you’re making these ahead, I recommend storing the donuts uncoated and brushing with butter and rolling in sugar just before serving. The sugar will eventually dissolve into the donut and lose that crackly texture.
One failure I’ll never forget: The first time I made these, I got distracted by a phone call and left the cider reducing on the stove. It went from syrupy to burnt in about 30 seconds flat. The smoke alarm went off, the kitchen smelled like a campfire, and I had to start over. So set a timer for the reduction step. Your smoke detector will thank you.
Variations & Adaptations
One of the best things about this recipe is how adaptable it is. I’ve experimented with quite a few variations, and here are my favorites.
Gluten-Free Version
Substitute the all-purpose flour with a 1:1 gluten-free baking flour blend. I’ve had good results with both King Arthur Measure for Measure and Bob’s Red Mill 1:1 blends. Add ¼ teaspoon of xanthan gum if your blend doesn’t already include it. The texture will be slightly more delicate, so handle the donuts gently when removing them from the pan.
Dairy-Free Version
Replace the buttermilk with unsweetened almond milk or oat milk mixed with ½ tablespoon of apple cider vinegar. Use melted coconut oil or vegan butter in place of the regular butter. The flavor will be slightly different—coconut oil adds its own subtle taste—but the texture stays remarkably similar.
Spiced Apple Cider Donuts
Add ¼ teaspoon of ground cardamom, ¼ teaspoon of ground ginger, and a pinch of ground cloves to the dry ingredients. This creates a more complex spice profile that’s absolutely stunning in the fall. I made this version for Thanksgiving one year and it was the first thing to disappear from the dessert table.
Apple Cider Donut Holes
If you don’t have a donut pan, you can bake the batter as donut holes in a mini muffin tin. Grease the pan well, fill each cavity about ¾ full, and bake for 8-10 minutes. Roll them in cinnamon sugar while warm, just like the full-size version. They’re perfect for snacking and portion control—well, theoretically.
Maple Glaze Variation
Instead of the cinnamon sugar coating, try a maple glaze. Whisk together 1 cup of powdered sugar, 2 tablespoons of pure maple syrup, and 1-2 tablespoons of milk until smooth. Dip the cooled donuts in the glaze and let them set on a wire rack. The maple flavor pairs beautifully with the apple cider.
Personal Favorite
My absolute favorite variation combines the cinnamon sugar coating with a drizzle of the maple glaze. It’s extra work, I know, but the combination of crunchy cinnamon sugar and creamy maple glaze is absolutely next-level. I make this version when I’m trying to impress someone—and it always works.
Serving & Storage Suggestions
These donuts are best served warm, within an hour of baking. That’s when the exterior is still slightly crisp from the cinnamon sugar and the interior is soft and tender. I like to serve them on a rustic wooden board or a simple white plate with a few apple slices and a steaming mug of coffee or tea.
For a full fall spread, pair these donuts with a pumpkin cream cheese muffin or a slice of brown butter pumpkin sourdough bread for a brunch that’ll have everyone talking. They also work beautifully alongside a homemade pumpkin spice latte for the ultimate fall experience.
Storage instructions: Store leftover donuts in an airtight container at room temperature for up to 2 days. Place a paper towel at the bottom of the container to absorb excess moisture. Don’t stack them too high, or the ones on the bottom will get squished and lose their coating.
Freezer instructions: These donuts freeze surprisingly well. Freeze them uncoated on a baking sheet until solid, then transfer to a freezer-safe bag or container. They’ll keep for up to 3 months. When you’re ready to enjoy them, thaw at room temperature, then reheat in a 300°F oven for 5 minutes. Brush with melted butter and roll in cinnamon sugar right before serving.
Reheating tips: The microwave will make these donuts soft and soggy—not ideal. For best results, reheat in a 300°F oven for 5-7 minutes or in an air fryer at 300°F for 2-3 minutes. The air fryer method actually crisps up the exterior beautifully.
How flavors develop: These donuts are truly best on day one, when the cinnamon sugar coating is still crackly and the interior is at its peak tenderness. By day two, the sugar will have softened and melded into the donut. They’re still delicious—just different. Think of it as a softer, more cake-like experience.
Nutritional Information & Benefits
Let’s be real—these are donuts. They’re a treat, not a health food. But I believe in enjoying life’s little pleasures without guilt, and these donuts are absolutely worth every single bite.
Estimated nutrition per donut (based on 12 servings):
- Calories: 215
- Total Fat: 8g
- Saturated Fat: 5g
- Cholesterol: 35mg
- Sodium: 210mg
- Total Carbohydrates: 34g
- Dietary Fiber: 1g
- Sugars: 20g
- Protein: 3g
Health highlights: Apple cider contains antioxidants called polyphenols, which may help reduce inflammation and support heart health. Cinnamon has been studied for its potential blood sugar-regulating properties. And honestly? Sometimes the mental health benefits of enjoying a warm, freshly baked donut on a crisp fall morning are worth more than any nutritional metric.
Dietary considerations: This recipe contains gluten, dairy, and eggs. For gluten-free and dairy-free options, check the variations section above. These donuts are not suitable for vegan diets without significant modification.
Potential allergens: Wheat (gluten), milk (dairy), eggs.
My personal take: I’m a firm believer in balance. I eat vegetables and lean proteins most of the time, but I also believe that life is too short to skip the donuts. These baked apple cider donuts are part of my fall tradition, and I wouldn’t trade that for anything. One donut with a cup of coffee, enjoyed slowly and mindfully, is a beautiful thing.
Conclusion
These baked apple cider donuts with cinnamon sugar are everything I want in a fall recipe. They’re simple enough for a Tuesday morning but special enough for a holiday brunch. They fill your kitchen with the most incredible aroma—warm apples, cinnamon, and butter—and they make people smile in a way that feels genuine and unhurried.
I’ve shared this recipe with neighbors, coworkers, and family members, and every single person has come back to tell me they made them again. That’s the highest compliment a recipe can get, if you ask me. Because really, what’s the point of a good recipe if it doesn’t become part of someone’s regular rotation?
I hope you make these donuts and make them your own. Maybe you’ll add a pinch more cinnamon, or skip the coating and go straight for a glaze, or double the batch because you know one pan won’t be enough. Whatever you do, I’d love to hear about it. Drop a comment below and tell me how yours turned out—or better yet, share a photo of your donuts. There’s nothing that makes my day quite like seeing someone else’s kitchen filled with the same warmth and joy that these donuts have brought to mine.
Happy baking, friends. And don’t forget to save one for yourself before the crowd descends.
Frequently Asked Questions
Can I use apple juice instead of apple cider?
You can, but the flavor won’t be as rich or authentic. Apple juice is thinner and less concentrated than cider, with a milder apple taste. If you’re in a pinch, use apple juice but reduce it down to ¼ cup just like you would with cider. The reduction will help concentrate whatever flavor is there.
Why did my donuts stick to the pan?
This usually happens for one of two reasons: either you didn’t grease the pan thoroughly enough, or you let the donuts cool too long in the pan before removing them. Make sure you get butter or spray into every crevice of the pan, and remove the donuts after just 2-3 minutes of cooling. If they’re still stuck, run a thin knife or offset spatula around the edges to gently loosen them.
Can I make the batter ahead of time?
I don’t recommend it. The leavening agents (baking powder and baking soda) start reacting as soon as they hit the wet ingredients, so the batter needs to go into the oven right away. If you let it sit, your donuts won’t rise properly and will turn out dense and flat. You can, however, mix the dry ingredients and wet ingredients separately the night before, then combine them just before baking.
How do I get a perfect donut shape every time?
The key is piping the batter evenly into the cavities and not overfilling. Fill each cavity about ¾ full—any more and the donut will puff up and close the center hole. A piping bag gives you the most control, but you can also use a small cookie scoop to portion the batter into each cavity.
Can I double this recipe?
Absolutely. This recipe doubles beautifully. Just make sure you have two donut pans so you can bake all the donuts at once. If you only have one pan, you’ll need to bake in batches, and make sure to let the pan cool completely and re-grease it before adding the second batch of batter.
Pin This Recipe!
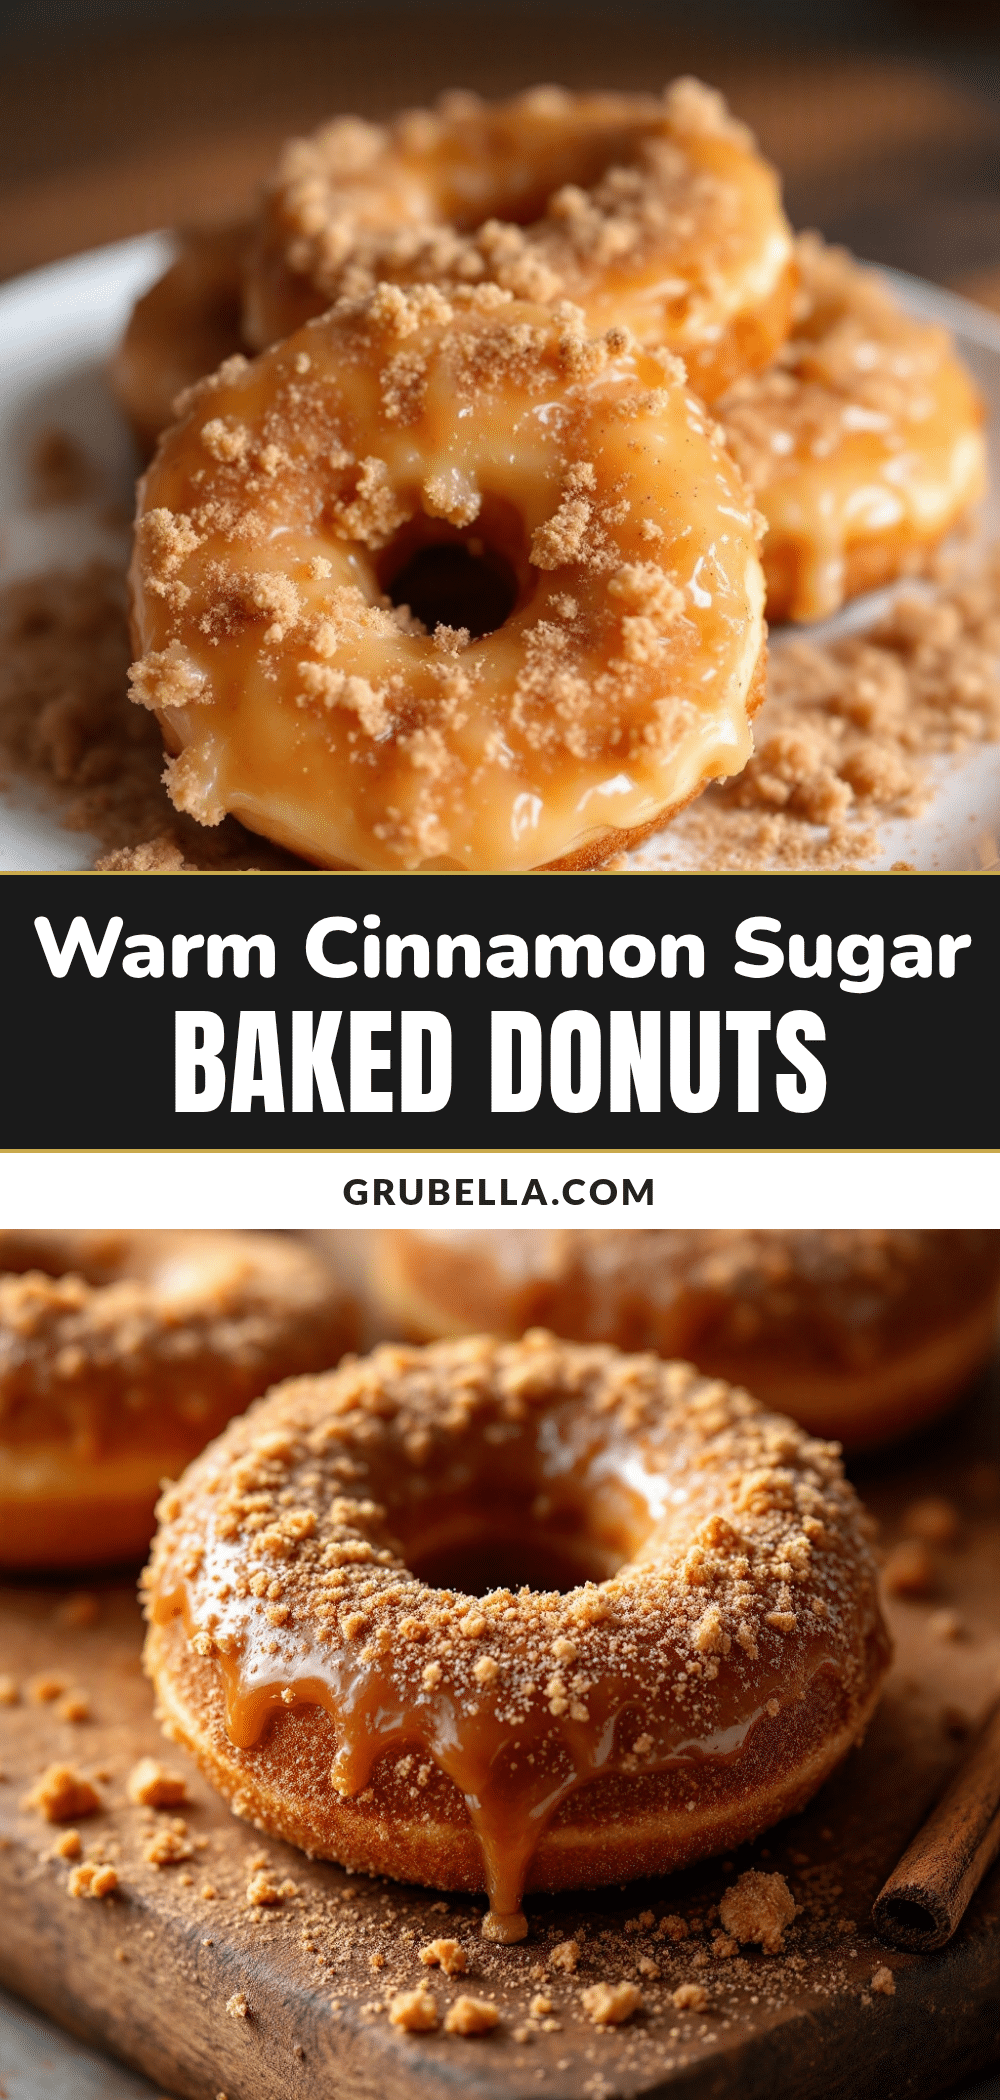
Best Baked Apple Cider Donuts (Easy Fall Recipe)
These baked apple cider donuts are tender, cakey, and rolled in cinnamon sugar while warm. Made with reduced apple cider for concentrated flavor, they’re a quick and easy fall treat that’s perfect for gatherings or cozy mornings.
- Prep Time: 15 minutes
- Cook Time: 12 minutes
- Total Time: 30 minutes
- Yield: 12 donuts 1x
- Category: Dessert
- Cuisine: American
Ingredients
- 1 cup apple cider
- 1 ¾ cups all-purpose flour
- ¾ cup granulated sugar
- 1 ½ teaspoons baking powder
- ½ teaspoon baking soda
- 1 teaspoon ground cinnamon
- ½ teaspoon ground nutmeg
- ½ teaspoon salt
- 1 large egg, room temperature
- ½ cup buttermilk
- ¼ cup unsalted butter, melted and slightly cooled
- 1 teaspoon vanilla extract
- ½ cup granulated sugar (for coating)
- 1 tablespoon ground cinnamon (for coating)
- 2 tablespoons unsalted butter, melted (for coating)
Instructions
- Pour the apple cider into a small saucepan and bring to a boil over medium-high heat. Reduce heat to medium-low and simmer until reduced to about ¼ cup, roughly 12-15 minutes. Set aside to cool.
- Preheat oven to 350°F (175°C). Grease a 6-cavity donut pan thoroughly with butter or non-stick spray.
- In a large bowl, whisk together flour, ¾ cup granulated sugar, baking powder, baking soda, cinnamon, nutmeg, and salt for about 20 seconds.
- In a separate medium bowl, whisk together egg, buttermilk, ¼ cup melted butter, vanilla extract, and cooled reduced apple cider until smooth.
- Pour wet ingredients into dry ingredients. Fold gently with a rubber spatula until just combined—a few small lumps are fine. Do not overmix.
- Transfer batter to a piping bag or zip-top bag. Snip off about ½ inch from the corner. Pipe batter into each donut cavity, filling about ¾ full.
- Bake for 10-12 minutes, until golden brown and a toothpick inserted into the thickest part comes out clean.
- Let donuts cool in the pan for 2-3 minutes, then turn out onto a wire rack.
- While donuts are still warm, brush each lightly with the remaining 2 tablespoons melted butter. Immediately roll in the cinnamon sugar mixture (½ cup sugar + 1 tablespoon cinnamon) until fully coated.
- If using only one donut pan, let it cool completely, re-grease, and repeat with remaining batter.
Notes
Don’t skip reducing the cider—it concentrates the apple flavor. Use room temperature ingredients for best results. Mix just until combined to avoid tough donuts. For best texture, coat donuts while warm. Store uncoated if making ahead; coat just before serving.
Nutrition
- Serving Size: 1 donut
- Calories: 215
- Sugar: 20
- Sodium: 210
- Fat: 8
- Saturated Fat: 5
- Carbohydrates: 34
- Fiber: 1
- Protein: 3
Keywords: baked apple cider donuts, fall recipe, apple cider donuts, cinnamon sugar donuts, easy donut recipe



