Love this? Save it for later!
Share the inspiration with your friends
I wasn’t expecting canning advice from my plumber, but there I was, standing in my kitchen with a dripping pipe, listening to Frank describe exactly how to make small-batch cinnamon vanilla canned pears. He’d noticed the bag of Bosc pears on my counter, the ones I’d bought on a whim at the farmers market and was frantically trying to use before they went soft. “You know what you need to do with those?” he said, wiping his hands on his coveralls. “Make my grandma’s canned pears. She used to put a vanilla bean in every jar, and the whole basement smelled like Christmas.” I honestly thought he was going to tell me to make a pie.
Frank’s grandma, as it turns out, was a woman who never made anything in large batches. She canned in small quantities, just enough for her and her husband, and she believed that every single jar deserved to be special. That idea stuck with me. Why do we always feel the need to process twenty pounds of fruit at once? Sometimes you just have a few pears that need a good home, and a small-batch recipe is exactly what you need. I mean, the first time I tried this, I only had four pears and a jar that was probably meant for pasta sauce. It worked perfectly.
These small-batch cinnamon vanilla canned pears are the kind of recipe that makes you feel like you’ve discovered a secret. The pears turn tender but not mushy, the syrup gets infused with warm vanilla and a hint of cinnamon, and the whole thing tastes like something you’d pay too much for at a fancy store. Maybe you’ve been there, staring at a box of pears that are about to turn and feeling guilty about wasting them. This is your solution. It’s simple, it’s forgiving, and it gives you a jar of something beautiful to tuck away in your pantry. I keep making this because every time I open a jar in the middle of winter, I remember Frank and his grandma, and it feels like I’m carrying on a tiny, delicious tradition.
Why You’ll Love This Recipe
I’ve tested this recipe more times than I care to admit, tweaking the sugar ratio and the cooking time until it was just right. As someone who has canned everything from tomatoes to pickles, I can tell you that this small-batch approach is a game-changer. You don’t need a giant pot or a dozen jars. You just need a little time and a few simple ingredients.
- Quick & Easy: From start to finish, you’re looking at about 45 minutes. That’s faster than driving to the store for a fancy dessert.
- Simple Ingredients: Pears, sugar, cinnamon, vanilla, and water. You probably have most of these in your kitchen right now.
- Perfect for Gifting: A single jar of these canned pears, tied with a ribbon, makes a heartfelt homemade gift that beats anything store-bought.
- Small Batch, No Waste: This recipe uses just 3-4 pears. No more staring at a mountain of fruit wondering what to do with it all.
- Unbelievably Delicious: The vanilla and cinnamon infuse the pears in a way that feels luxurious. It’s like having a warm hug in a jar.
What makes this recipe different from the rest is the technique. Instead of a heavy, cloying syrup, we use a light vanilla-infused liquid that lets the pear flavor shine. The cinnamon is subtle, not overpowering. It’s a balanced, elegant result that feels like something from a fancy restaurant, but you made it yourself. Honestly, the first time I opened a jar in January, I closed my eyes after the first bite. It’s that good. This recipe is perfect for when you want to preserve a taste of fall without the pressure of a full canning operation.
What Ingredients You Will Need
This recipe uses simple, wholesome ingredients to create something truly special. You don’t need any hard-to-find items, which is part of its beauty. Here’s what you’ll need to gather.
- Pears (3-4 medium): Bosc or Anjou pears work best because they hold their shape well during processing. Look for pears that are ripe but still firm. If they’re too soft, they’ll turn to mush. I prefer Bosc for their slightly spicy flavor and dense texture.
- Granulated Sugar (1/2 cup): This creates the syrup base. You can use organic cane sugar if you prefer. Don’t reduce the sugar too much, as it helps preserve the texture of the pears.
- Water (2 cups): Filtered water is best, especially if your tap water has a strong chlorine taste. It makes a difference in the final flavor.
- Vanilla Extract (1 tablespoon) or 1 Vanilla Bean: Pure vanilla extract is fine, but a vanilla bean takes these pears to another level. If using a bean, split it lengthwise and scrape the seeds into the syrup. I personally love the visual of the tiny black specks in the jar.
- Cinnamon Stick (1): A single stick adds a warm, aromatic note without making the pears taste like a cinnamon candle. I recommend Ceylon cinnamon if you can find it, as it’s milder and more complex than Cassia.
- Lemon Juice (1 tablespoon): This prevents the pears from browning and adds a touch of acidity that balances the sweetness. Freshly squeezed is always best.
You might also want a pinch of salt. It sounds odd, but a tiny pinch of salt enhances all the other flavors and keeps the syrup from tasting flat. I started adding it after a friend who’s a pastry chef mentioned it, and honestly, I’ll never go back. For a variation, you could add a star anise or a strip of orange peel to the syrup for a different flavor profile.
Equipment Needed
You don’t need a fancy canning setup for this small-batch recipe. Most of these items are probably already in your kitchen.
- Medium Saucepan: For making the syrup. A heavy-bottomed pan works best to prevent scorching.
- Pint-Size Mason Jar (1): A wide-mouth jar is easier to fill. Make sure it’s clean and sterilized. You can sterilize it by boiling it in water for 10 minutes or running it through the dishwasher.
- New Lid and Ring: Always use a new lid for a proper seal. The ring can be reused as long as it’s not rusted or bent.
- Small Pot or Kettle: For boiling water to process the jar. You need enough water to cover the jar by at least an inch.
- Tongs or Jar Lifter: To safely handle the hot jar. A regular pair of kitchen tongs can work in a pinch, but a jar lifter is much safer.
- Small Bowl: For holding the lemon water to prevent the pears from browning.
- Cutting Board and Sharp Knife: For peeling and slicing the pears.
- Measuring Cups and Spoons: For accurate ingredient measurements.
If you don’t have a jar lifter, you can use a silicone oven mitt to grab the hot jar, but be very careful. I’ve dropped a jar before, and it’s not a fun cleanup. A small funnel is also helpful for pouring the syrup into the jar without spilling, but it’s not essential.
Preparation Method
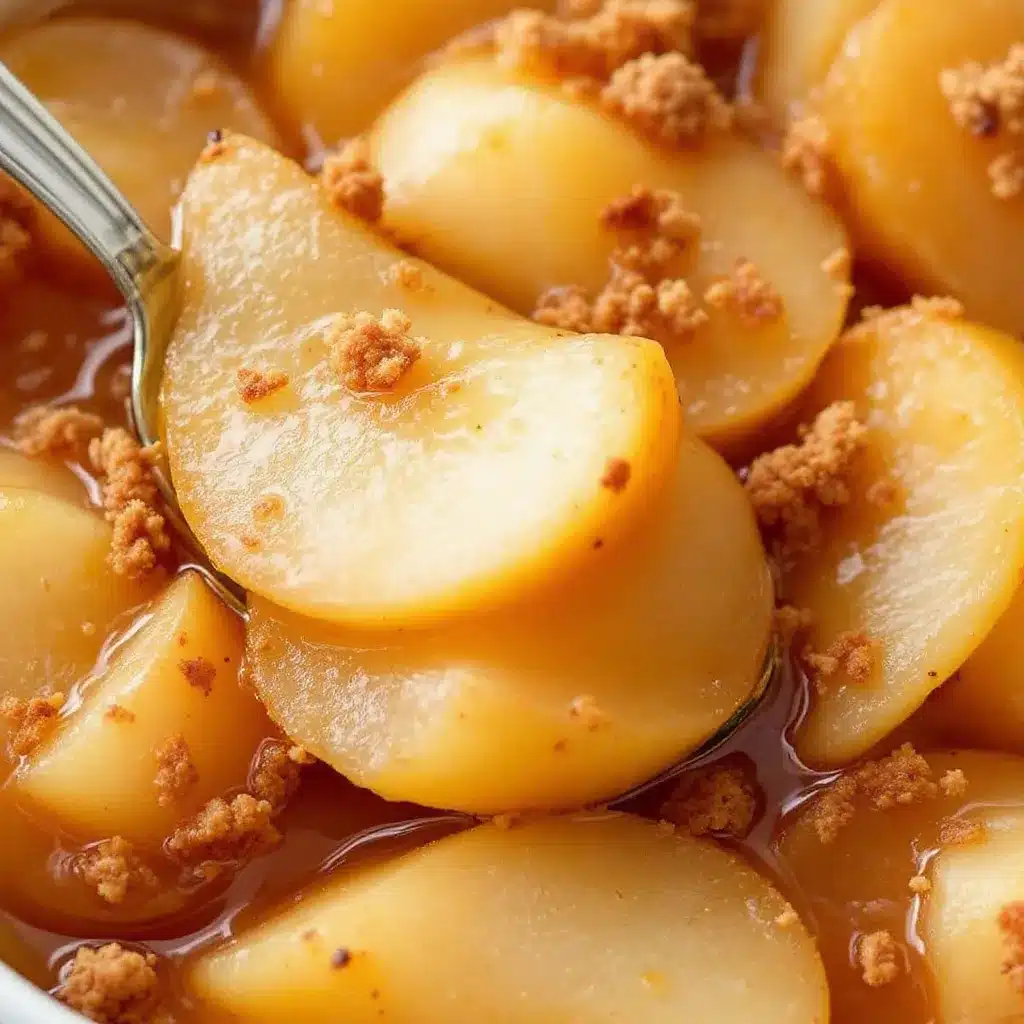
Follow these steps carefully, and you’ll have a beautiful jar of canned pears ready to enjoy. I’ve included all the little tricks I’ve learned along the way.
- Prepare the Pears: Start by filling a small bowl with cold water and adding the lemon juice. Peel the pears using a vegetable peeler. Cut each pear in half lengthwise, then use a melon baller or a small spoon to scoop out the core and seeds. Slice each half into quarters or thirds, depending on the size of your pears. You want chunks that are about 1-inch thick. Drop the pear slices into the lemon water as you go to prevent them from turning brown. This step is crucial, especially if you’re a slow peeler like me.
- Make the Syrup: In a medium saucepan, combine the 2 cups of water and 1/2 cup of granulated sugar. Add the cinnamon stick. If you’re using a vanilla bean, split it lengthwise and scrape the seeds into the pot, then add the pod as well. If you’re using vanilla extract, you’ll add it later. Bring the mixture to a boil over medium-high heat, stirring occasionally to dissolve the sugar. Once it’s boiling, reduce the heat to low and let it simmer for 5 minutes. The syrup should be clear and fragrant.
- Cook the Pears: Drain the pear slices from the lemon water and add them to the simmering syrup. Gently stir to coat them. Increase the heat to medium and bring the syrup back to a gentle boil. Cook the pears for 3-5 minutes, or until they are just tender when pierced with a fork. You don’t want them to be mushy, as they will continue to cook slightly during processing. They should still hold their shape. This timing depends on the ripeness of your pears, so check them after 3 minutes.
- Prepare the Jar: While the pears are cooking, prepare your jar. Place the clean jar in a pot of simmering water to keep it hot. You can also fill it with hot water and let it sit. A hot jar is essential to prevent it from shattering when you add the hot syrup. Boil the lid in a small saucepan of water for 5 minutes to soften the sealing compound.
- Fill the Jar: Using tongs, carefully remove the hot jar from the water and place it on a clean kitchen towel. Using a slotted spoon, pack the hot pear slices into the jar, leaving about 1/2 inch of headspace at the top. Don’t overfill the jar. If you’re using vanilla extract, add it to the hot syrup now and stir. Pour the hot syrup over the pears, leaving that 1/2 inch of headspace. Make sure the pears are completely covered by the syrup. Use a chopstick or a butter knife to gently run around the inside of the jar to release any air bubbles. Add more syrup if needed to maintain the headspace. Wipe the rim of the jar with a clean, damp cloth to remove any sticky residue. This is critical for a good seal.
- Seal and Process: Place the hot lid on the jar and screw on the ring until it’s fingertip-tight. Don’t overtighten. Place the jar back into the pot of simmering water. Make sure the water covers the jar by at least 1 inch. Bring the water to a full rolling boil, then start your timer. Process the jar for 10 minutes for pint-size jars at altitudes under 1,000 feet. Adjust processing time for higher altitudes (add 5 minutes for every 1,000 feet above sea level).
- Cool and Check the Seal: After 10 minutes, turn off the heat and remove the jar using your jar lifter. Place it on a clean kitchen towel, away from drafts. Let it cool completely, undisturbed, for 12 to 24 hours. You should hear a satisfying “pop” as the lid seals. After cooling, press the center of the lid. It should be concave and not move. If it pops up and down, the jar didn’t seal, and you should store it in the refrigerator and use it within a few weeks.
Cooking Tips & Techniques
I’ve made my fair share of mistakes with canning, and I want you to learn from them. The first time I tried this, I used pears that were too ripe, and I ended up with pear sauce instead of pear slices. It was still tasty, but not what I was going for. Here are some tips to ensure success.
- Choose the Right Pear: Firm, slightly underripe pears are your best friend for canning. They hold their shape beautifully. If your pears are super soft, consider making pear butter instead.
- Don’t Skip the Lemon Water: I know it’s an extra step, but it’s the best way to keep your pears looking pretty. Without it, they’ll turn an unappetizing brown before you even get them in the jar.
- Mind the Headspace: That 1/2 inch of space at the top of the jar isn’t arbitrary. It allows for expansion during processing. Too little headspace, and the syrup can leak out. Too much, and the jar might not seal properly.
- Use a Timer: It’s easy to get distracted. Set a timer for the processing step. Under-processing can lead to spoiled food, and over-processing can make the pears mushy.
- Trust the Pop: That popping sound when the jar cools is music to a canner’s ears. It means you’ve created a vacuum seal. If a jar doesn’t pop within 24 hours, don’t risk it. Pop it in the fridge.
One thing I learned the hard way is to always label my jars. I thought I’d remember what was inside, but a month later, I had a mystery jar that looked like pears but could have been anything. Write the date and the contents on the lid with a permanent marker. Your future self will thank you.
Variations & Adaptations
This recipe is a wonderful base for experimentation. Once you’ve mastered the basic version, try one of these twists.
- Spiced Pear Variation: Add a star anise, a few cloves, or a strip of orange zest to the syrup along with the cinnamon stick. It gives the pears a warm, holiday-like flavor that’s perfect for winter.
- Honey-Sweetened Version: Replace the granulated sugar with 1/3 cup of honey. The flavor will be more complex and floral. Keep in mind that honey can darken the syrup slightly, but it’s still beautiful.
- Bourbon Vanilla Pears: For an adult twist, add 2 tablespoons of bourbon to the syrup just before pouring it into the jar. The alcohol will mostly cook off during processing, leaving behind a warm, oaky flavor that pairs beautifully with the vanilla.
- Low-Sugar Option: You can reduce the sugar to 1/4 cup, but the pears will be softer and the syrup thinner. This is best for pears you plan to eat within a few months, as the sugar helps with long-term preservation.
- Spiced Chai Pears: Steep a chai tea bag in the hot syrup for 5 minutes before adding the pears. Remove the bag and proceed with the recipe. The cardamom and ginger notes are amazing.
I once tried a version with a splash of rose water, and it was surprisingly lovely. It felt very fancy, like something you’d serve at a tea party. Don’t be afraid to play around with flavors. The worst that can happen is you end up with a unique jar of pears that you can eat with yogurt or ice cream.
Serving & Storage Suggestions
These small-batch cinnamon vanilla canned pears are incredibly versatile. Here’s how to enjoy them.
Serving Ideas: Serve them chilled or at room temperature. They are fantastic on their own as a simple dessert. Spoon them over vanilla ice cream, pound cake, or a bowl of Greek yogurt. They also make a beautiful topping for pancakes, waffles, or oatmeal. For a savory twist, chop them up and add them to a cheese board with sharp cheddar or blue cheese. The sweet, spiced pears are a perfect counterpoint to salty, funky cheeses.
Storage: Once sealed, store the jars in a cool, dark, dry place like a pantry or a basement cupboard. They will keep for up to 12 months. For best quality, try to use them within 6-8 months. Once opened, store the jar in the refrigerator and use the pears within 2 weeks.
Reheating: You can enjoy them cold, or gently warm them in a small saucepan over low heat. Don’t boil them, or they’ll break apart. The warm syrup is incredibly comforting on a cold day.
Flavor Development: The flavors will continue to meld and deepen over time. I find that the pears taste best after they’ve been sitting for at least a month. The vanilla and cinnamon really have a chance to infuse the fruit. It’s like they get better with age.
Nutritional Information & Benefits
Here’s a rough estimate for a serving of these canned pears (about 1/2 cup of pears with syrup). Please note that this is an approximation and can vary based on the exact ingredients and portion sizes.
| Nutrient | Amount Per Serving |
|---|---|
| Calories | 120-150 |
| Total Fat | 0g |
| Sodium | 5mg |
| Total Carbohydrates | 32g |
| Dietary Fiber | 3g |
| Sugars | 28g |
| Protein | 0.5g |
| Vitamin C | 4% of DV |
| Potassium | 2% of DV |
Pears are a good source of dietary fiber, which is great for digestion. They also contain vitamin C and antioxidants. The cinnamon in this recipe may help with blood sugar regulation, while vanilla adds a lovely flavor without any extra sugar. This recipe is naturally gluten-free, dairy-free, and vegan, making it a great option for many dietary needs. If you are watching your sugar intake, you can try the low-sugar variation mentioned above. I love that this dessert feels indulgent but is made from whole, simple ingredients.
Conclusion
This small-batch cinnamon vanilla canned pears recipe is more than just a way to preserve fruit. It’s a small act of love, a way to capture a moment of the harvest season and tuck it away for later. Whether you’re a seasoned canner or a complete beginner, this recipe is forgiving, rewarding, and absolutely delicious. I honestly think it’s one of the most satisfying things you can make in under an hour.
I encourage you to make this recipe your own. Try a different spice, swap the sweetener, or add a splash of your favorite liquor. The beauty of small-batch canning is that you can experiment without committing to a huge batch. I’d love to hear how your pears turn out. What did you serve them with? Did you try a fun variation? Leave a comment below and share your experience. Don’t forget to pin this recipe for later so you can find it when pear season rolls around again. Happy canning, friends!
Frequently Asked Questions
Do I have to use a vanilla bean, or can I use extract?
You can absolutely use vanilla extract! Use 1 tablespoon of pure vanilla extract. Add it to the syrup just before pouring it into the jar, not during the boiling stage, to preserve its flavor. A vanilla bean gives a more intense, speckled look, but extract works wonderfully.
Can I double this recipe?
Yes, you can easily double or triple this recipe. Just make sure you have enough jars and a pot large enough to process them all at once. Don’t overcrowd the pot; the jars need to be surrounded by boiling water on all sides. You may need to process them in batches.
My pears floated to the top of the jar. Is that okay?
Yes, it’s perfectly normal for fruit to float in syrup, especially during the first few days after canning. The pears will often settle back down as they absorb the syrup. As long as the jar is sealed properly, it’s safe to eat.
How do I know if my jar is sealed?
After the jar has cooled for 12-24 hours, press down on the center of the lid. If it’s concave (curved downward) and doesn’t move or make a popping sound, it’s sealed. You can also remove the ring and gently lift the jar by the lid. If the lid holds, it’s sealed.
Can I use this recipe for other fruits?
Absolutely! This syrup and method work beautifully with other firm fruits like apples, peaches, nectarines, and plums. Adjust the cooking time based on the fruit’s firmness. Apples might need a minute or two longer, while peaches might cook a bit faster. The vanilla and cinnamon flavor profile is lovely with almost any stone fruit or pome fruit.
Pin This Recipe!
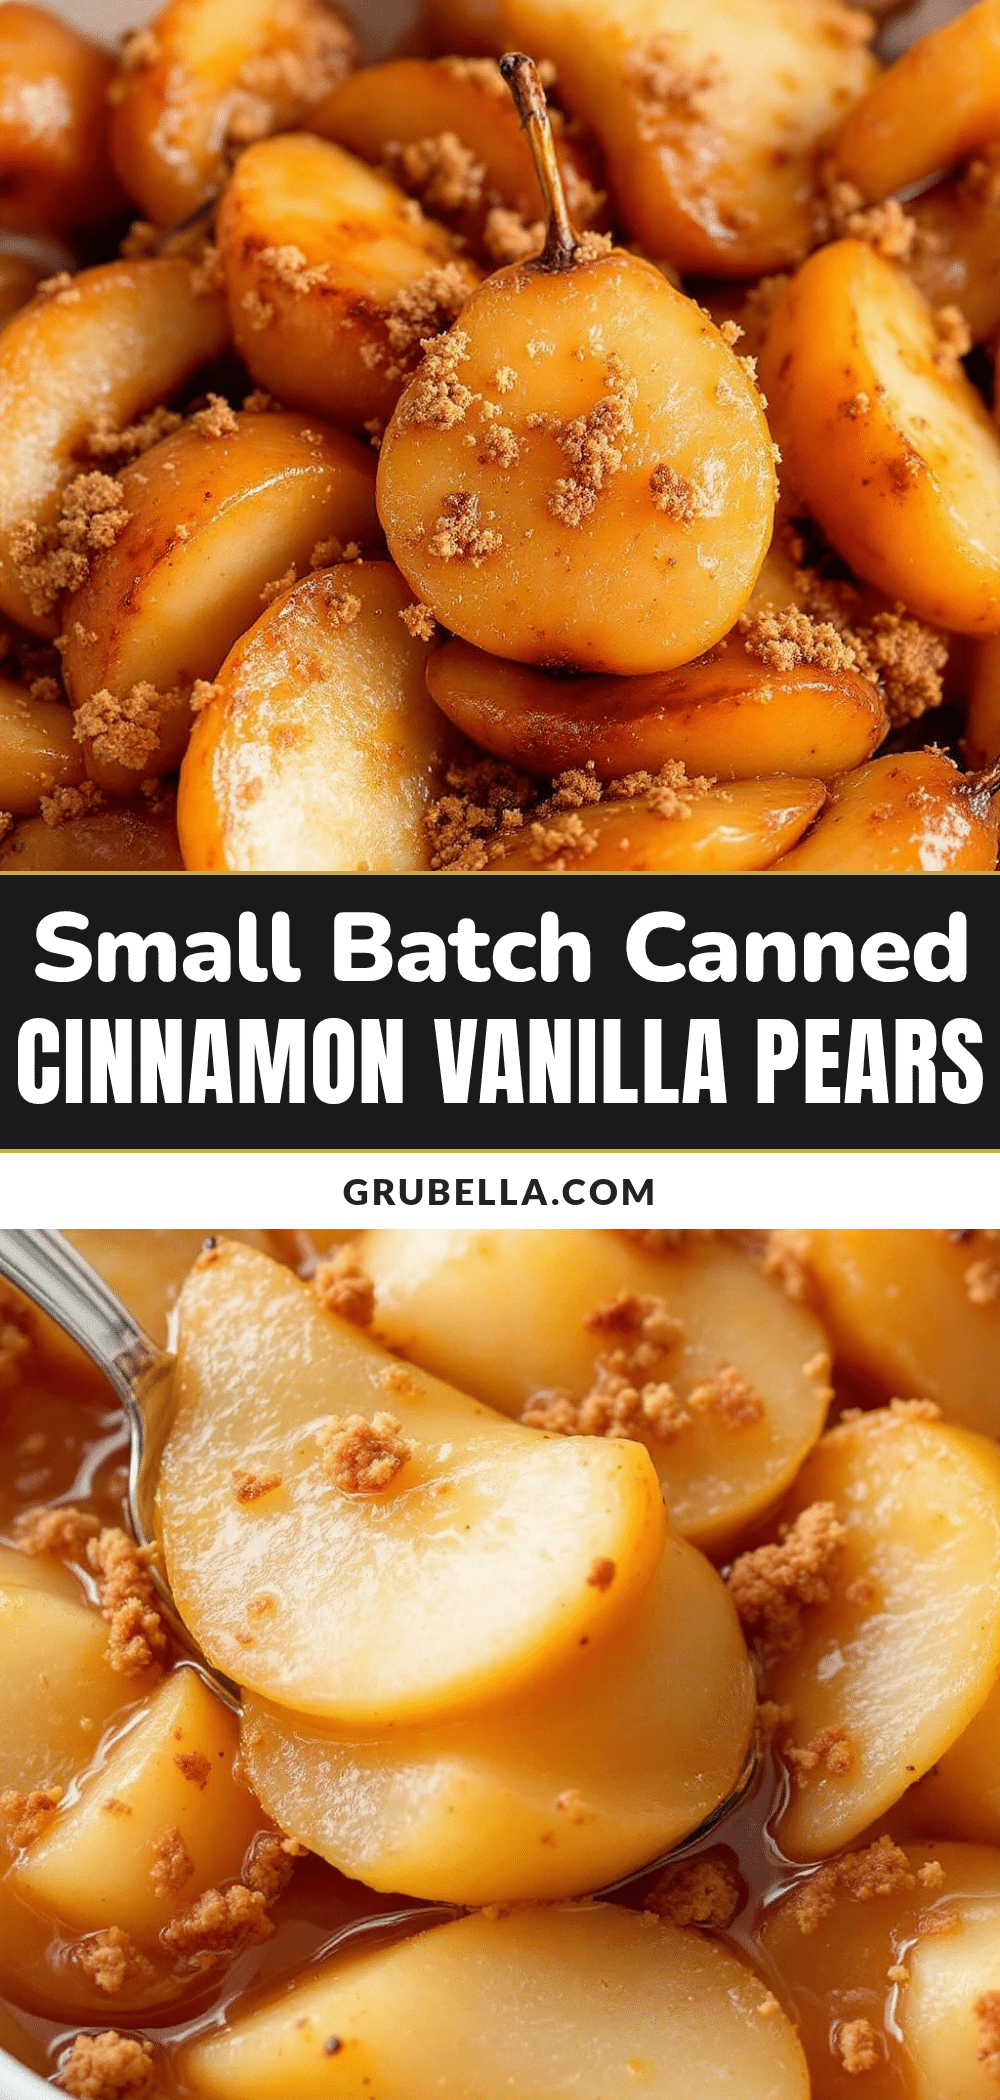
Small-Batch Canned Pears: Easy Vanilla Cinnamon Recipe
This small-batch recipe for cinnamon vanilla canned pears is quick, easy, and perfect for using up a few ripe pears. The pears turn tender in a light, vanilla-infused syrup with a hint of cinnamon, creating a delicious homemade treat that’s ideal for gifting or enjoying all winter long.
- Prep Time: 15 minutes
- Cook Time: 10 minutes
- Total Time: 45 minutes
- Yield: 1 pint (about 4 servings) 1x
- Category: Preserves
- Cuisine: American
Ingredients
- 3–4 medium Bosc or Anjou pears, ripe but firm
- 1/2 cup granulated sugar
- 2 cups water
- 1 tablespoon pure vanilla extract or 1 vanilla bean
- 1 cinnamon stick
- 1 tablespoon lemon juice
- Pinch of salt (optional)
Instructions
- Prepare the Pears: Fill a small bowl with cold water and add the lemon juice. Peel the pears, cut them in half lengthwise, and remove the cores. Slice each half into quarters or thirds (about 1-inch chunks). Drop the pear slices into the lemon water to prevent browning.
- Make the Syrup: In a medium saucepan, combine 2 cups water and 1/2 cup sugar. Add the cinnamon stick. If using a vanilla bean, split it lengthwise, scrape the seeds into the pot, and add the pod. Bring to a boil over medium-high heat, stirring to dissolve the sugar. Reduce heat to low and simmer for 5 minutes.
- Cook the Pears: Drain the pear slices and add them to the simmering syrup. Increase heat to medium and bring to a gentle boil. Cook for 3-5 minutes, until the pears are just tender but still hold their shape.
- Prepare the Jar: While the pears cook, place a clean pint-size mason jar in a pot of simmering water to keep it hot. Boil the lid in a small saucepan for 5 minutes to soften the sealing compound.
- Fill the Jar: Using tongs, remove the hot jar and place it on a clean towel. Using a slotted spoon, pack the hot pear slices into the jar, leaving 1/2 inch headspace. If using vanilla extract, add it to the hot syrup now. Pour the hot syrup over the pears, maintaining the 1/2 inch headspace. Run a chopstick or butter knife around the inside to release air bubbles. Wipe the rim clean.
- Seal and Process: Place the hot lid on the jar and screw on the ring until fingertip-tight. Place the jar back into the pot of simmering water, ensuring it is covered by at least 1 inch of water. Bring to a full rolling boil and process for 10 minutes (adjust for altitude: add 5 minutes for every 1,000 feet above sea level).
- Cool and Check the Seal: Turn off the heat and remove the jar using a jar lifter. Place it on a clean towel away from drafts and let it cool completely for 12-24 hours. You should hear a ‘pop’ as the lid seals. After cooling, press the center of the lid; it should be concave and not move. If it pops up and down, refrigerate and use within a few weeks.
Notes
Choose firm, slightly underripe pears for best texture. Don’t skip the lemon water to prevent browning. Ensure proper headspace (1/2 inch) for a good seal. Label jars with date and contents. For best flavor, let pears sit for at least a month before eating.
Nutrition
- Serving Size: 1/2 cup pears with s
- Calories: 120150
- Sugar: 28
- Sodium: 5
- Carbohydrates: 32
- Fiber: 3
- Protein: 0.5
Keywords: canned pears, small batch canning, vanilla cinnamon pears, homemade preserves, easy canning recipe



