Love this? Save it for later!
Share the inspiration with your friends
This was supposed to be a batch of banana muffins. I had the bananas—spotty, practically begging to be used—and I had the oats, and I had this grand vision of a lazy Sunday morning with a warm muffin and a cup of coffee. But somewhere between the second cup of coffee and the third episode of the show I was half-watching, I grabbed the wrong measuring cup. Instead of flour, I dumped in a full cup of oat flour I’d made the week before. The batter was… wrong. Too thick. Too sticky. Not muffin material at all. And I was already running late for a playdate at the park.
I stood there, staring at this weird, lumpy mixture, honestly ready to toss it. But I’d already mashed the bananas. I’d already cracked the eggs. The idea of wasting food—especially good, ripe bananas—just felt wrong. So I did the only thing I could think of: I scooped the batter onto a baking sheet, flattened it into cookie shapes, and threw them in the oven. I figured at worst, I’d have some weird, dense hockey pucks to feed to the birds. At best, maybe they’d be edible. What came out was nothing like the plan—and better. They were chewy, a little bit sweet, and perfectly portable. I ate two on the way out the door. My kid ate three in the car. And I realized, maybe I’d stumbled onto something. Maybe you’ve been there—staring at a kitchen fail, ready to give up, only to find out the mistake was the whole point. These cookies are that mistake, and honestly, I’ve been making them every week since.
Why You’ll Love These Breakfast Cookies
Let me tell you, I’ve tested a lot of breakfast recipes over the years. Some were complicated, some were bland, and some just didn’t survive the freezer. These cookies? They’re the ones I keep coming back to. Here’s why you’ll feel the same way:
- Quick & Easy: From bowl to oven in under 15 minutes. No mixer, no fuss, just a spoon and a bowl. Perfect for those mornings when you’re running on fumes.
- Simple Ingredients: You probably have everything in your pantry right now. Bananas, oats, a few pantry staples—no weird health food store finds required.
- Perfect for Meal Prep: Make a batch on Sunday, stash them in the freezer, and grab one (or two) on your way out the door all week long.
- Crowd-Pleaser: I’ve served these to kids, picky eaters, and even my dad who “doesn’t do healthy food.” They disappear every time.
- Unbelievably Delicious: The texture is the real star—chewy on the inside, slightly crisp on the edges. It’s comfort food that happens to be good for you.
What makes these different from every other banana oat cookie recipe out there? It’s the texture, honestly. Most recipes turn out either too dry or too mushy after freezing. I spent months tweaking the ratio of oats to banana, testing different mix-ins, and even burning a few batches (RIP, batch number four). The result is a cookie that thaws beautifully—no sogginess, no crumbling. It’s the kind of recipe that makes you close your eyes after the first bite, not because it’s fancy, but because it just works. It’s comfort food reimagined—healthier, faster, but with the same soul-soothing satisfaction. Perfect for impressing guests without stress, or turning a simple Tuesday morning into something memorable.
What Ingredients You Will Need
This recipe uses simple, wholesome ingredients to deliver bold flavor and satisfying texture without the fuss. Most of these are pantry staples, which is exactly how I like it. Here’s what you’ll need:
- Ripe Bananas: 3 large bananas, mashed. The spottier, the better. Seriously, if they’re still yellow, they’re not ready. You want them soft and almost liquid inside. (Adds natural sweetness and moisture.)
- Rolled Oats: 2 cups old-fashioned rolled oats. Not quick oats—they’ll turn mushy. I prefer Bob’s Red Mill for consistency. (Provides chewy texture and fiber.)
- Almond Butter: ½ cup creamy almond butter. You can use peanut butter or sunflower seed butter for a nut-free version. I like the subtle sweetness of almond here. (Binds everything together and adds healthy fat.)
- Honey or Maple Syrup: ⅓ cup. Honey gives a slightly floral sweetness, while maple syrup adds a deeper, caramel-like note. Both work beautifully. (Use agave for a vegan option.)
- Egg: 1 large egg, room temperature. This helps the cookies hold their shape. For a vegan version, use a flax egg (1 tablespoon flaxseed meal + 3 tablespoons water).
- Vanilla Extract: 1 teaspoon. Pure vanilla is best, but imitation works in a pinch. (Enhances the overall flavor profile.)
- Baking Soda: ½ teaspoon. Don’t skip this—it helps the cookies rise just a little and keeps them from being too dense.
- Salt: ¼ teaspoon. A pinch balances the sweetness and brings out the banana flavor.
- Cinnamon: 1 teaspoon. Optional, but I highly recommend it. It makes the whole kitchen smell like a cozy morning.
- Mix-Ins (Choose Your Adventure):
- ½ cup dark chocolate chips (I use Enjoy Life for dairy-free)
- ¼ cup chopped walnuts or pecans (adds crunch)
- ¼ cup dried cranberries or raisins (for extra chew)
- 2 tablespoons chia seeds or flax seeds (boosts nutrition)
Ingredient Selection Tip: Look for bananas that are heavily speckled with brown spots—they’re sweeter and easier to mash. If your bananas are still green, you can speed up the process by placing them in a paper bag with an apple overnight. For the oats, I’ve tested this with both rolled and quick oats, and rolled oats consistently give the best texture. Quick oats work in a pinch, but the cookies will be softer and less chewy.
Equipment Needed
You don’t need a fancy kitchen to make these cookies. Here’s what I use:
- Large Mixing Bowl: Any bowl will do, but a wide one makes mashing easier. I use a ceramic bowl that belonged to my grandmother—it’s got a chip in the rim, but it works perfectly.
- Fork or Potato Masher: For mashing the bananas. A fork works fine, but a potato masher is faster if you’re making a double batch.
- Baking Sheet: A standard 13×18 inch sheet. Line it with parchment paper for easy cleanup and to prevent sticking.
- Parchment Paper: Non-negotiable for me. Silicone mats work too, but I find parchment gives the cookies a slightly crisper edge.
- Cookie Scoop or Spoon: A 2-tablespoon scoop makes uniform cookies. If you don’t have one, just use a regular spoon and try to keep them the same size.
- Cooling Rack: Helps the cookies cool evenly and prevents soggy bottoms. If you don’t have one, transfer them to a plate after 5 minutes.
- Freezer-Safe Container or Bag: For storage. I use a large zip-top bag or a glass container with a tight lid.
Budget-Friendly Option: If you don’t have parchment paper, you can grease the baking sheet lightly with coconut oil. Just watch the bottoms—they might brown a little faster.
Preparation Method
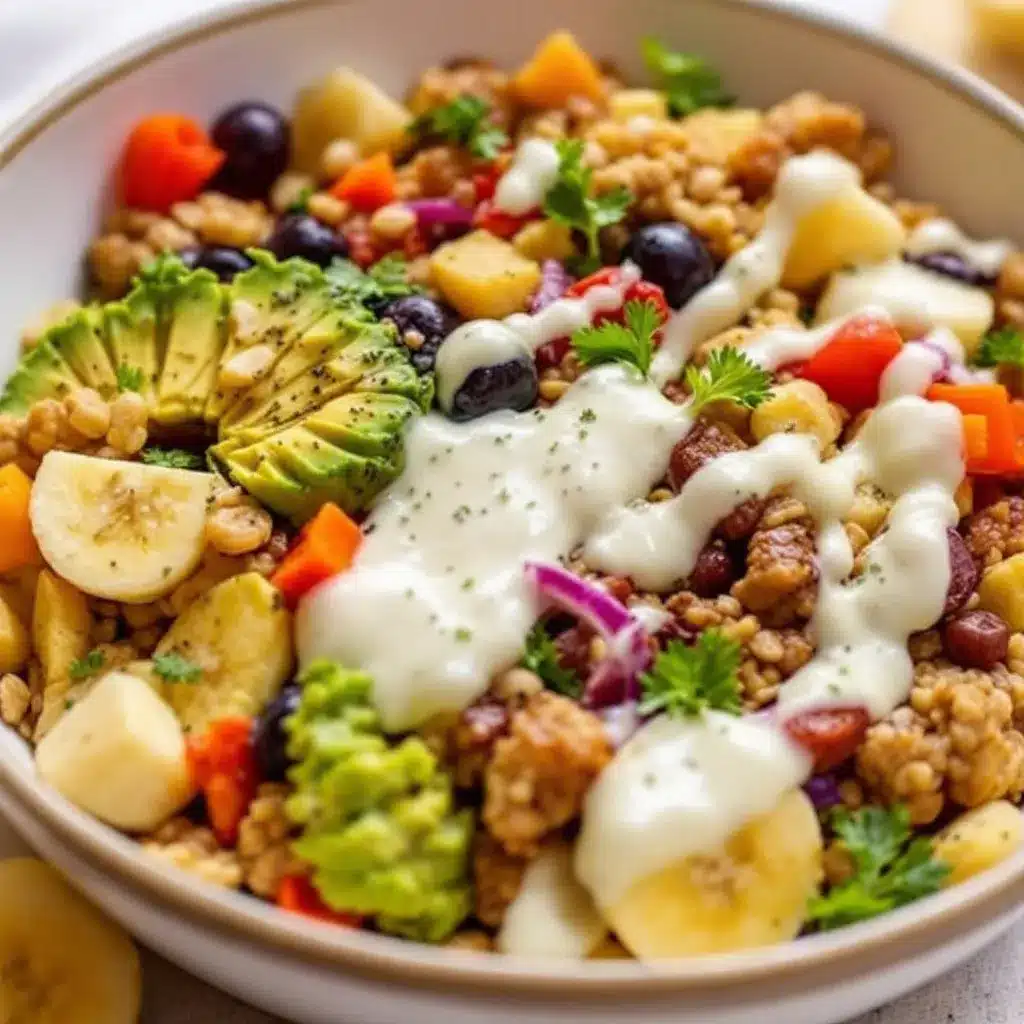
Let’s get to the fun part. This recipe is almost embarrassingly simple, but I’ve included all the little details that make it work every time.
- Preheat and Prep: Preheat your oven to 350°F (175°C). Line a baking sheet with parchment paper. Trust me on the parchment—it makes cleanup a breeze and prevents the cookies from sticking.
- Mash the Bananas: In a large bowl, mash the bananas with a fork until they’re mostly smooth. A few small lumps are fine—they add texture. You should have about 1 cup of mashed banana. (Pro tip: If your bananas are extra ripe, they’ll mash almost into a liquid. That’s perfect.)
- Mix the Wet Ingredients: Add the almond butter, honey (or maple syrup), egg, and vanilla extract to the mashed bananas. Stir until everything is well combined. The mixture should be smooth and slightly glossy. If it looks separated, keep stirring—it will come together.
- Add the Dry Ingredients: Add the rolled oats, baking soda, salt, and cinnamon. Stir until just combined. Don’t overmix, or the cookies will be tough. The dough will be thick and sticky—that’s exactly what you want.
- Fold in Mix-Ins: Gently fold in your chosen mix-ins. I usually go for dark chocolate chips and a handful of chopped walnuts. The chocolate melts into little pockets of sweetness, and the walnuts add a satisfying crunch.
- Scoop and Shape: Using a cookie scoop or a spoon, drop rounded tablespoons of dough onto the prepared baking sheet, spacing them about 2 inches apart. Flatten each cookie slightly with the back of a spoon or your fingers. They won’t spread much, so shape them to your desired thickness. (I like mine about ½ inch thick—chewy in the middle, crisp on the edges.)
- Bake: Bake for 12-15 minutes, or until the edges are golden brown and the tops are set. The centers will look slightly soft—that’s okay. They’ll firm up as they cool. For a crisper cookie, bake for 15-17 minutes. (My oven runs hot, so I check at 12 minutes and rotate the pan if needed.)
- Cool: Let the cookies cool on the baking sheet for 5 minutes. This step is important—they’re fragile when hot. Then transfer them to a cooling rack to cool completely. If you skip the cooling rack, the bottoms might get soggy.
- Freeze (Optional): Once cooled, place the cookies in a single layer in a freezer-safe container or bag. Separate layers with parchment paper to prevent sticking. They’ll keep for up to 3 months.
Sensory Cue: When the cookies are done, your kitchen will smell like banana bread and warm cinnamon. The edges should be a deep golden brown, and the tops will look slightly cracked. If you tap one gently, it should feel firm but give a little.
Cooking Tips & Techniques
I’ve made these cookies more times than I can count, and I’ve learned a few things the hard way. Here are my best tips:
- Don’t Skip the Banana Ripeness: I once used barely ripe bananas because that’s all I had. The cookies were bland and not sweet enough. The sugar in ripe bananas is what makes these cookies taste indulgent without added sugar. If your bananas aren’t spotty, you can roast them in a 300°F oven for 15-20 minutes to concentrate the sweetness.
- Measure Your Oats Correctly: Scoop the oats into your measuring cup and level them off with a knife. If you pack them down, you’ll end up with dry, crumbly cookies. I learned this after a particularly sad batch that fell apart in my hands.
- Chill the Dough if Needed: If your dough feels too sticky to handle, pop it in the fridge for 15 minutes. This is especially helpful on humid days. The cookies will hold their shape better and spread less.
- Use a Cookie Scoop for Uniformity: Uniform cookies bake evenly. I use a 2-tablespoon scoop, and it makes the whole process faster. Plus, they look prettier on the plate.
- Don’t Overbake: These cookies continue to set as they cool. If you wait until they look fully done in the oven, they’ll be overbaked and dry. Take them out when the edges are golden and the centers are still slightly soft.
- Double Batch Strategy: I always double the recipe and freeze half. It’s the same amount of work, and then I have breakfast for weeks. Just make sure to cool the cookies completely before freezing to prevent ice crystals.
My Biggest Failure: The time I forgot the baking soda. The cookies came out flat, dense, and sad. They tasted okay, but the texture was all wrong. Now I always double-check my ingredients before I start mixing. It’s a small step that saves a lot of disappointment.
Variations & Adaptations
One of the best things about this recipe is how flexible it is. Here are some of my favorite variations:
- Vegan Version: Replace the egg with a flax egg (1 tablespoon flaxseed meal + 3 tablespoons water, let sit for 5 minutes). Use maple syrup instead of honey. The cookies will be slightly softer but just as delicious.
- Gluten-Free: Use certified gluten-free rolled oats. That’s the only swap needed—everything else is naturally gluten-free. I’ve tested this with Bob’s Red Mill gluten-free oats, and they work perfectly.
- Nut-Free: Substitute the almond butter with sunflower seed butter or tahini. Sunflower seed butter will turn the cookies a slightly greenish color (it’s a natural reaction), but they taste great. Tahini adds a savory note that pairs surprisingly well with banana.
- Lower Sugar: Reduce the honey or maple syrup to ¼ cup. The bananas provide enough sweetness for most palates. You can also add a few drops of stevia if you want extra sweetness without sugar.
- Protein Boost: Add 2 tablespoons of your favorite protein powder. You may need to add an extra tablespoon of almond butter or a splash of milk to balance the texture. I’ve used vanilla and chocolate protein powders—both work well.
- Seasonal Twist: In the fall, add ½ teaspoon pumpkin pie spice and swap the chocolate chips for dried cranberries. In the summer, fold in fresh blueberries (add them gently to avoid smashing).
- Chocolate Lover’s Version: Use ¾ cup dark chocolate chips and drizzle melted chocolate over the cooled cookies. It’s decadent, but sometimes you need that.
Personal Variation: I once made these with a tablespoon of instant coffee granules mixed into the dry ingredients. The coffee flavor was subtle but added a wonderful depth that complemented the banana. My husband, who claims he doesn’t like coffee, ate six before I told him. He still doesn’t believe me.
Serving & Storage Suggestions
These cookies are incredibly versatile when it comes to serving. Here’s how I like to enjoy them:
- Serving Temperature: They’re delicious at room temperature, but I love them slightly warm. Pop one in the microwave for 10-15 seconds, and it tastes freshly baked. The chocolate chips get melty, and the oats soften just a bit.
- Presentation: Stack them on a plate with a few fresh berries and a side of yogurt for a beautiful breakfast board. For a kid’s lunchbox, I wrap one in a napkin—it stays intact and doesn’t make a mess.
- Complementary Dishes: Serve alongside a smoothie, a glass of milk, or a hot cup of coffee. They’re also great crumbled over a bowl of Greek yogurt for a quick parfait.
- Storage: Store in an airtight container at room temperature for up to 5 days. If your kitchen is warm, refrigerate them—they’ll last up to a week. For longer storage, freeze them in a single layer in a freezer-safe bag or container. They’ll keep for up to 3 months.
- Reheating: From frozen, microwave for 20-30 seconds, or let them thaw at room temperature for about 15 minutes. You can also reheat them in a 350°F oven for 5 minutes if you want that just-baked texture.
- Flavor Development: Honestly, these cookies taste even better the next day. The flavors meld together, and the texture becomes perfectly chewy. If you can resist eating them all on day one, you’re in for a treat on day two.
Nutritional Information & Benefits
Here’s a rough estimate per cookie (based on 12 cookies with chocolate chips and walnuts):
- Calories: Approximately 180-200
- Protein: 5-6 grams
- Fiber: 4-5 grams
- Fat: 8-10 grams (mostly healthy fats from almond butter and nuts)
- Sugar: 12-14 grams (naturally occurring from bananas and a touch of honey)
Health Benefits: Bananas are packed with potassium, which supports heart health and muscle function. Oats provide soluble fiber that helps lower cholesterol and keeps you full. Almond butter adds vitamin E and healthy monounsaturated fats. Plus, the cinnamon may help regulate blood sugar levels. These cookies are a balanced breakfast option that won’t leave you crashing mid-morning.
Dietary Considerations: This recipe is naturally dairy-free and can be made vegan, gluten-free, and nut-free with simple substitutions. It’s also egg-free if you use a flax egg. The only potential allergen is oats for those with celiac disease—opt for certified gluten-free oats.
Personal Wellness Perspective: I’m not a nutritionist, but I’ve learned that food doesn’t have to be complicated to be good for you. These cookies remind me that a healthy breakfast can actually be something I look forward to. They’re not about restriction—they’re about nourishment that tastes like a treat.
Conclusion
These Easy Freezer-Friendly Banana Oat Breakfast Cookies started as a kitchen mistake, but they’ve become a staple in my home. They’re proof that sometimes the best recipes come from the most unexpected places. Whether you’re a busy parent, a meal prep enthusiast, or just someone who loves a good cookie for breakfast, I hope you give these a try.
Don’t be afraid to make them your own—swap in your favorite mix-ins, adjust the sweetness, or double the batch. The beauty of this recipe is its flexibility. And if you forget an ingredient? Well, that’s how new recipes are born.
I’d love to hear how yours turn out. Did you add something unexpected? Did your kids gobble them up? Share your experience in the comments below, and don’t forget to pin this recipe for later. Happy baking, friends—you’ve got this.
Frequently Asked Questions
Can I use quick oats instead of rolled oats?
Yes, but the texture will be softer and less chewy. If you only have quick oats, reduce the baking time by 1-2 minutes and check for doneness early.
How do I prevent the cookies from being too dry?
Make sure your bananas are very ripe and measure your oats correctly. If the dough seems dry, add an extra tablespoon of almond butter or a splash of milk.
Can I make these cookies without almond butter?
Absolutely. Peanut butter, cashew butter, sunflower seed butter, or tahini all work well. Just note that the flavor will change slightly depending on what you use.
How long do these cookies last in the freezer?
Stored properly in an airtight container or freezer bag, they’ll stay fresh for up to 3 months. For best quality, eat them within 2 months.
Can I add protein powder to this recipe?
Yes! Add 2 tablespoons of your favorite protein powder. You may need to add an extra tablespoon of almond butter or a splash of milk to balance the texture. Vanilla or chocolate protein powder works best.
Pin This Recipe!
Easy Freezer-Friendly Banana Oat Breakfast Cookies
These chewy, naturally sweetened breakfast cookies are made with ripe bananas, oats, and almond butter. Perfect for meal prep, they freeze beautifully and make a quick, portable breakfast or snack.
- Prep Time: 15 minutes
- Cook Time: 15 minutes
- Total Time: 30 minutes
- Yield: 12 cookies 1x
- Category: Breakfast
- Cuisine: American
Ingredients
- 3 large ripe bananas, mashed (about 1 cup)
- 2 cups old-fashioned rolled oats
- ½ cup creamy almond butter
- ⅓ cup honey or maple syrup
- 1 large egg, room temperature
- 1 teaspoon vanilla extract
- ½ teaspoon baking soda
- ¼ teaspoon salt
- 1 teaspoon cinnamon (optional)
- ½ cup dark chocolate chips (optional)
- ¼ cup chopped walnuts or pecans (optional)
- ¼ cup dried cranberries or raisins (optional)
- 2 tablespoons chia seeds or flax seeds (optional)
Instructions
- Preheat oven to 350°F (175°C). Line a baking sheet with parchment paper.
- In a large bowl, mash bananas with a fork until mostly smooth.
- Add almond butter, honey or maple syrup, egg, and vanilla extract. Stir until well combined and smooth.
- Add rolled oats, baking soda, salt, and cinnamon. Stir until just combined. Dough will be thick and sticky.
- Gently fold in any desired mix-ins (chocolate chips, nuts, dried fruit, seeds).
- Using a cookie scoop or spoon, drop rounded tablespoons of dough onto prepared baking sheet, spacing 2 inches apart. Flatten each cookie slightly to about ½ inch thickness.
- Bake for 12-15 minutes, until edges are golden brown and tops are set. Centers will look slightly soft.
- Let cookies cool on baking sheet for 5 minutes, then transfer to a cooling rack to cool completely.
- For freezing: place cooled cookies in a single layer in a freezer-safe container or bag, separating layers with parchment paper. Freeze for up to 3 months.
Notes
For best texture, use very ripe bananas with brown spots. Rolled oats give a chewier texture than quick oats. Cookies can be stored at room temperature for up to 5 days, refrigerated for up to 1 week, or frozen for up to 3 months. Reheat from frozen in microwave for 20-30 seconds or at 350°F for 5 minutes.
Nutrition
- Serving Size: 1 cookie
- Calories: 190
- Sugar: 13
- Sodium: 120
- Fat: 9
- Saturated Fat: 2
- Carbohydrates: 26
- Fiber: 4
- Protein: 5
Keywords: banana oat breakfast cookies, freezer-friendly, healthy breakfast cookies, banana oatmeal cookies, meal prep breakfast



