Love this? Save it for later!
Share the inspiration with your friends
It was 10:47 PM on a drizzly Tuesday, and the craving was so specific it almost hurt. I wanted banana bread—not just any banana bread, but that particular kind with a crackly, sugar-crusted top and a center so tender it nearly falls apart. The problem? My bananas were practically screaming for attention on the counter, spotted and sweet, but my stand mixer was buried under a pile of cookbooks I swore I’d organize. I didn’t have the energy to dig it out, and honestly, I didn’t have the patience either. So I grabbed a single bowl, a fork, and decided to see what would happen if I just went rogue.
Maybe you’ve been there—staring at overripe bananas with good intentions but zero motivation to pull out every gadget in the kitchen. That’s exactly how this easy one-bowl banana bread was born. I mashed the bananas with the fork, added the melted butter, and just kept stirring. No mixer, no fuss, no dirtying every dish I owned. The batter came together in about four minutes flat. When I pulled the loaf out of the oven, the smell alone was enough to wake up my neighbor (sorry, Mrs. Gable). But the first bite? That was pure, unplanned magic.
I’ve made this banana bread more times than I can count since that rainy Tuesday night. It’s become my go-to for using up spotty bananas, for lazy Sunday mornings, and for those moments when you just need something warm and sweet without the production of a full baking project. It’s the kind of recipe that proves you don’t need fancy equipment or a culinary degree to make something genuinely delicious. You just need a bowl, a spoon, and a little bit of trust in the process. Let me show you how it’s done.
Why You’ll Love This Recipe
Let’s be honest—there are a million banana bread recipes out there. So why does this one deserve a spot in your rotation? Because it’s the one I keep coming back to, and I think you will too. Here’s what makes it special:
- No Mixer Required: Not a hand mixer, not a stand mixer—just a bowl and a fork or whisk. This is the kind of recipe you can make in pajamas with zero guilt.
- Simple Pantry Ingredients: You probably have everything already. Butter, sugar, eggs, flour, baking soda, salt, and those sad bananas on your counter. That’s it.
- One Bowl to Wash: I mean it. One bowl. The whole thing comes together in a single vessel, which means less cleanup and more time enjoying the warm loaf.
- Perfectly Moist Every Time: The texture is the real star here—tender, buttery, and almost custard-like in the center. It’s the kind of banana bread that makes you close your eyes after the first bite.
- Foolproof for Beginners: If you’ve never baked bread before, this is where you start. The batter is forgiving, the steps are simple, and the results are consistently excellent.
- Crowd-Pleaser Approved: I’ve brought this to brunches, given it as neighbor gifts, and watched it disappear at potlucks. Kids and adults alike go back for seconds.
This isn’t just another banana bread recipe—it’s the one that strips away the unnecessary steps and gets straight to the good stuff. It’s comfort food at its most accessible, and I promise, once you make it this way, you won’t go back to the fussy versions.
What Ingredients You Will Need
This recipe uses simple, humble ingredients to create something genuinely special. Nothing fancy, nothing hard to find—just the basics, used well. Here’s what you’ll need:
- Ripe Bananas (3 medium, about 1 ½ cups mashed): The riper, the better. You want them spotted brown all over—those are the sweetest and easiest to mash. If your bananas aren’t quite there yet, you can roast them in a 300°F oven for 15 minutes to speed things up.
- Unsalted Butter (⅓ cup, melted and slightly cooled): I use salted butter in a pinch and just reduce the added salt slightly. Melted butter gives the bread a rich, tender crumb without needing a mixer to cream it.
- Granulated Sugar (¾ cup): This gives the bread sweetness and helps create that signature crackly top. You can reduce it to ½ cup if you prefer less sweetness, but don’t go lower or the texture suffers.
- Large Egg (1, room temperature): The egg binds everything together and adds structure. If your egg is cold, just set it in warm water for 5 minutes before using.
- Vanilla Extract (1 teaspoon): Pure vanilla is best, but imitation works fine too. It rounds out the flavor beautifully.
- All-Purpose Flour (1 ½ cups): Spoon and level your flour—don’t scoop directly from the bag or you’ll end up with dry bread. I’ve tested this with whole wheat pastry flour (swap 1:1) and it works well, though the texture is slightly denser.
- Baking Soda (1 teaspoon): This is the only leavening agent you need. Make sure it’s fresh—if it doesn’t fizz when mixed with a little vinegar, toss it and buy new.
- Salt (½ teaspoon): Salt isn’t optional here—it balances the sweetness and enhances the banana flavor. I use fine sea salt.
- Optional Add-ins (½ cup): Chocolate chips, chopped walnuts, or dried cranberries all work beautifully. I’m partial to dark chocolate chips myself—they make the bread feel like a treat.
Equipment Needed
The beauty of this recipe is how little you need. Here’s the short list:
- A Large Mixing Bowl: Any bowl will do—ceramic, glass, or stainless steel. I use a 4-quart bowl for easy stirring without splashing.
- A Fork or Whisk: A fork works perfectly for mashing bananas and mixing the wet ingredients. A whisk is great for smoothing out the dry ingredients.
- A Rubber Spatula: This helps you scrape every last bit of batter into the pan. I’ve used a wooden spoon in a pinch, but a spatula is better.
- A 9×5-Inch Loaf Pan: This is the standard size. If you use an 8×4-inch pan, your bread will be taller and可能需要增加5-10分钟的烘烤时间。Glass pans work fine, but you may need to reduce the oven temperature by 25°F.
- Parchment Paper (optional but helpful): Lining the pan with parchment makes lifting the bread out effortless. I also spray the pan with non-stick spray as backup.
- Cooling Rack: A wire rack lets air circulate around the loaf, preventing a soggy bottom. If you don’t have one, you can use the inverted loaf pan to prop it up slightly.
That’s it. No stand mixer, no hand mixer, no food processor. Just the basics you probably already own.
Preparation Method
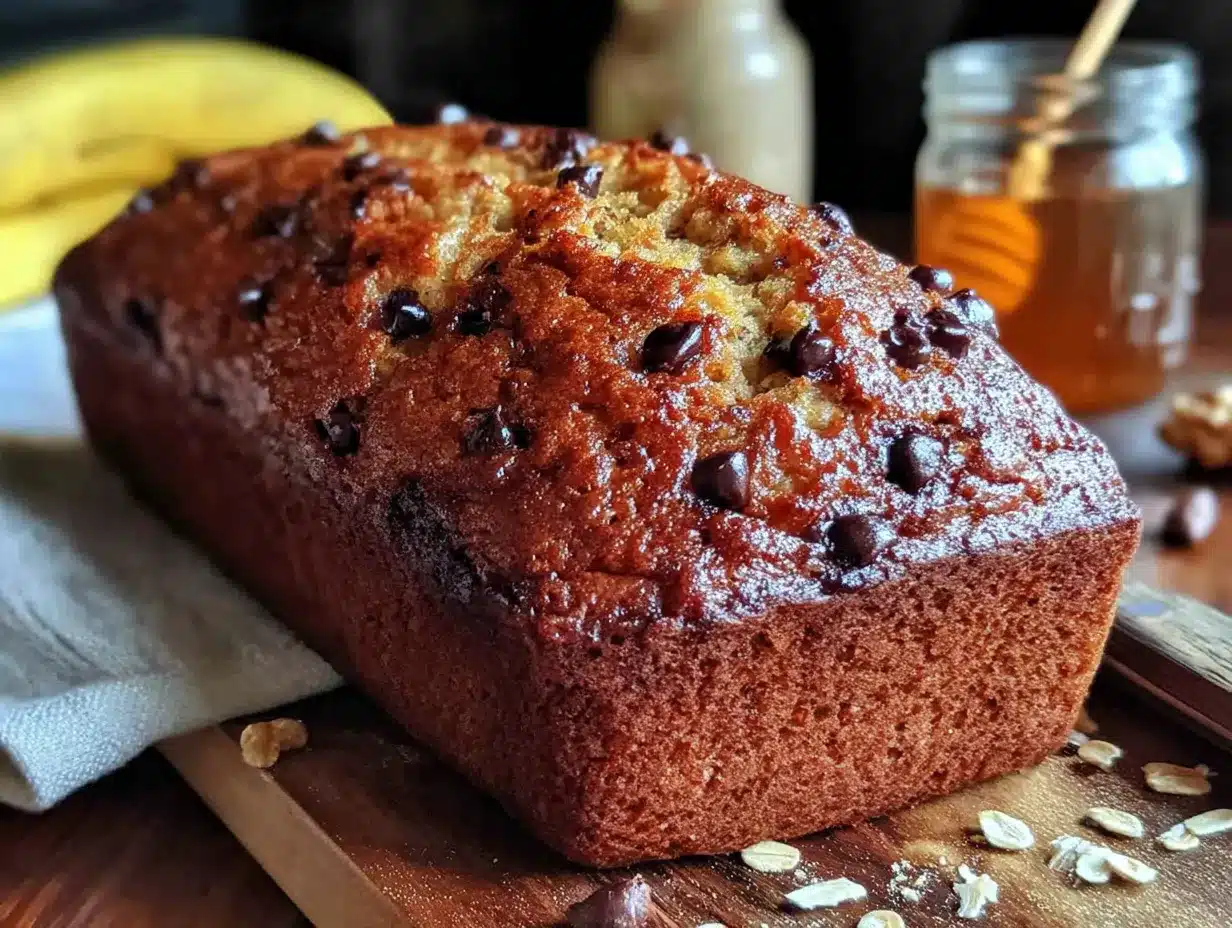
Follow these steps, and you’ll have warm banana bread in about an hour. I’ve included all the little tricks I’ve learned along the way.
- Preheat and Prep: Preheat your oven to 350°F (175°C). Grease a 9×5-inch loaf pan with butter or non-stick spray. If you’re using parchment paper, leave an overhang on the long sides for easy lifting later.
- Mash the Bananas: Peel the bananas into your large mixing bowl. Use a fork to mash them until they’re mostly smooth with a few small lumps—you don’t want a complete paste, as the little chunks add texture. This should take about 1 minute.
- Add the Wet Ingredients: Pour the melted butter over the mashed bananas and stir until combined. The mixture may look slightly separated at first—that’s normal. Add the sugar, egg, and vanilla extract, and whisk or stir vigorously until everything is smooth and glossy. It should look like a thick, pale caramel.
- Mix the Dry Ingredients: Sprinkle the flour, baking soda, and salt over the wet mixture. Stir gently with a spatula or wooden spoon until just combined—about 10 to 15 strokes. A few streaks of flour are fine; overmixing will make the bread tough. If you’re adding chocolate chips or nuts, fold them in at this stage.
- Pour and Smooth: Scrape the batter into the prepared loaf pan. Use the spatula to spread it evenly, and tap the pan on the counter a few times to release any air bubbles. The batter will be thick and slightly lumpy—that’s exactly what you want.
- Bake to Perfection: Place the pan in the center of the oven and bake for 50 to 60 minutes. Start checking at the 45-minute mark. The bread is done when a toothpick inserted into the center comes out clean or with a few moist crumbs. The top should be deep golden brown and crackled beautifully.
- Cool and Release: Let the bread cool in the pan for 10 minutes. Then run a knife around the edges (if not using parchment) and lift the loaf out onto a wire rack. Let it cool completely before slicing—about 1 hour. I know it’s tempting, but slicing too early will make it crumble.
Cooking Tips & Techniques
After making this banana bread more times than I can count, I’ve picked up a few tricks that make a real difference. Here are the ones I swear by:
- Use Overripe Bananas: This is non-negotiable. The bananas should be mostly black or heavily spotted. They’re sweeter, easier to mash, and give the bread its signature moisture. Green or barely yellow bananas won’t work—they’ll make the bread dense and bland.
- Don’t Overmix the Batter: I learned this the hard way after making a few tough loaves. Stir just until the flour disappears. A few lumps are fine—they’ll bake out. Overmixing develops gluten, which makes the bread rubbery instead of tender.
- Melt Butter, Don’t Cream It: This is the secret to the one-bowl method. Melted butter incorporates easily without a mixer and gives the bread a rich, moist texture. Just let it cool slightly before adding to the bananas, or you’ll cook the egg.
- Check for Doneness Properly: A toothpick test is reliable, but also look for the edges pulling away from the pan and a crackled, golden top. If the top is browning too quickly, tent the loaf with foil at the 40-minute mark.
- Let It Cool Completely: I know, I know—warm banana bread is heavenly. But if you slice it too soon, the center will be gummy and the loaf may collapse. Patience pays off here. Cool it fully on a wire rack for the best texture.
- Use a Kitchen Scale for Accuracy: If you have one, weighing your flour (180 grams) ensures consistent results every time. Scooping flour can vary by up to 20%, which is enough to dry out your bread.
Variations & Adaptations
This basic recipe is a great starting point, but part of the fun is making it your own. Here are some variations I’ve tried and loved:
- Chocolate Chip Banana Bread: Fold in ½ cup of semi-sweet or dark chocolate chips. I like to toss them in a tablespoon of flour first to prevent them from sinking to the bottom.
- Nutty Banana Bread: Add ½ cup of toasted walnuts or pecans, roughly chopped. Toast them in a dry skillet for 3-4 minutes first to bring out their flavor.
- Gluten-Free Version: Swap the all-purpose flour with a good 1:1 gluten-free baking blend (I like King Arthur’s). The texture will be slightly more delicate, but it’s still delicious.
- Vegan Option: Replace the egg with a flax egg (1 tablespoon ground flaxseed + 3 tablespoons water, let sit for 5 minutes). Use melted coconut oil or vegan butter instead of regular butter.
- Spiced Banana Bread: Add 1 teaspoon of cinnamon, ½ teaspoon of nutmeg, and a pinch of cloves to the dry ingredients. It gives the bread a warm, cozy flavor perfect for fall.
- Blueberry Banana Bread: Fold in 1 cup of fresh or frozen blueberries (don’t thaw them). Toss them in a little flour first to keep them from bleeding into the batter.
My personal favorite variation? A swirl of Nutella through the batter before baking. Just drop spoonfuls on top and drag a knife through it for a marbled effect. It’s absolutely ridiculous in the best way.
Serving & Storage Suggestions
This banana bread is wonderful in so many ways. Here’s how I like to serve and store it:
- Serving Temperature: It’s delicious warm, at room temperature, or even slightly toasted. For an extra treat, spread a slice with butter, cream cheese, or a drizzle of honey.
- Perfect Pairings: Serve it with a cup of hot coffee, a glass of cold milk, or a chai latte. For brunch, it pairs beautifully with scrambled eggs and fresh fruit.
- Storage at Room Temperature: Wrap the cooled loaf tightly in plastic wrap or foil, or store it in an airtight container. It will stay fresh for up to 4 days at room temperature.
- Refrigerator Storage: If you live in a warm climate, you can store it in the fridge for up to a week. Let it come to room temperature or toast slices before serving.
- Freezing Instructions: This bread freezes beautifully. Wrap the whole loaf or individual slices tightly in plastic wrap, then foil. Freeze for up to 3 months. Thaw at room temperature or pop slices directly in the toaster.
- Flavor Development: Honestly, this banana bread tastes even better the next day. The flavors meld and deepen overnight, and the texture becomes even more moist. If you can resist eating it all fresh, you’re in for a treat.
Nutritional Information & Benefits
Here’s an approximate nutritional breakdown per slice (based on 10 slices, without add-ins):
- Calories: 245
- Fat: 9g
- Carbohydrates: 38g
- Fiber: 2g
- Sugar: 18g
- Protein: 4g
Bananas are a great source of potassium, vitamin B6, and vitamin C. They also provide natural sweetness, which allows us to use less refined sugar. The butter adds richness, but you can easily swap it for coconut oil or applesauce for a lighter version. If you’re watching your sugar intake, you can reduce it to ½ cup without sacrificing too much texture. This recipe is naturally vegetarian and can be made gluten-free or vegan with the substitutions mentioned above. As always, these values are estimates and will vary based on your specific ingredients and add-ins.
Conclusion
This easy one-bowl banana bread is proof that you don’t need fancy equipment or complicated steps to make something truly wonderful. It’s the recipe I turn to again and again—when I need to use up spotty bananas, when I want a quick baking project, or when I just need a little comfort on a rainy day. It’s forgiving, adaptable, and always, always delicious.
I hope you give it a try and make it your own. Maybe you’ll add chocolate chips like I do, or maybe you’ll discover a new favorite variation. However you make it, I’d love to hear about it. Leave a comment below and let me know how it turned out—did you add anything fun? Did you serve it with something special? Your feedback helps other readers too, so don’t be shy.
Happy baking, friend. There’s nothing quite like a warm slice of homemade banana bread, and now it’s easier than ever to enjoy.
Frequently Asked Questions
Can I use frozen bananas for this recipe?
Absolutely! Thaw them completely first, then drain off any excess liquid before mashing. Frozen bananas are often even sweeter and more flavorful than fresh ones.
Why did my banana bread sink in the middle?
This usually happens if the bread is underbaked or if you opened the oven door too early. Make sure your oven is at the right temperature (use an oven thermometer if you’re unsure) and resist the urge to peek until the 45-minute mark.
Can I make this into muffins instead?
Yes! Divide the batter among a greased or lined 12-cup muffin tin. Bake at 350°F for 18-22 minutes, or until a toothpick comes out clean. You’ll get about 12 standard muffins.
How do I know when my bananas are ripe enough?
Look for bananas with plenty of brown spots or an overall brown appearance. They should be soft to the touch and smell sweet. If they’re still yellow with green tips, they’re not ready—give them a few more days on the counter.
Can I use whole wheat flour instead of all-purpose?
You can substitute up to half of the all-purpose flour with whole wheat flour without changing the texture too much. Using 100% whole wheat will result in a denser, more rustic bread. I’d recommend whole wheat pastry flour if you want to go all the way.
Pin This Recipe!
Easy One-Bowl Banana Bread: Best No-Mixer Recipe
This easy one-bowl banana bread requires no mixer and comes together in minutes. It’s perfectly moist, tender, and has a crackly sugar-crusted top—comfort food at its most accessible.
- Prep Time: 10 minutes
- Cook Time: 55 minutes
- Total Time: 1 hour 5 minutes
- Yield: 10 servings 1x
- Category: Dessert
- Cuisine: American
Ingredients
- 3 medium ripe bananas (about 1 ½ cups mashed)
- ⅓ cup unsalted butter, melted and slightly cooled
- ¾ cup granulated sugar
- 1 large egg, room temperature
- 1 teaspoon vanilla extract
- 1 ½ cups all-purpose flour, spooned and leveled
- 1 teaspoon baking soda
- ½ teaspoon fine sea salt
- ½ cup optional add-ins (chocolate chips, chopped walnuts, or dried cranberries)
Instructions
- Preheat your oven to 350°F (175°C). Grease a 9×5-inch loaf pan with butter or non-stick spray. If using parchment paper, leave an overhang on the long sides for easy lifting.
- Peel the bananas into a large mixing bowl. Use a fork to mash them until mostly smooth with a few small lumps, about 1 minute.
- Pour the melted butter over the mashed bananas and stir until combined. Add the sugar, egg, and vanilla extract, and whisk or stir vigorously until smooth and glossy.
- Sprinkle the flour, baking soda, and salt over the wet mixture. Stir gently with a spatula or wooden spoon until just combined—about 10 to 15 strokes. A few streaks of flour are fine. If adding chocolate chips or nuts, fold them in at this stage.
- Scrape the batter into the prepared loaf pan. Spread it evenly with the spatula, and tap the pan on the counter a few times to release air bubbles.
- Place the pan in the center of the oven and bake for 50 to 60 minutes. Start checking at the 45-minute mark. The bread is done when a toothpick inserted into the center comes out clean or with a few moist crumbs, and the top is deep golden brown and crackled.
- Let the bread cool in the pan for 10 minutes. Then run a knife around the edges (if not using parchment) and lift the loaf out onto a wire rack. Let it cool completely before slicing—about 1 hour.
Notes
Use overripe bananas (mostly black or heavily spotted) for best sweetness and moisture. Don’t overmix the batter—stir just until flour disappears to avoid tough bread. Let the bread cool completely before slicing to prevent crumbling. For accuracy, weigh flour (180 grams) if possible. The bread tastes even better the next day as flavors meld.
Nutrition
- Serving Size: 1 slice
- Calories: 245
- Sugar: 18
- Sodium: 280
- Fat: 9
- Saturated Fat: 5
- Carbohydrates: 38
- Fiber: 2
- Protein: 4
Keywords: banana bread, easy banana bread, one-bowl banana bread, no-mixer banana bread, moist banana bread, simple banana bread



