Love this? Save it for later!
Share the inspiration with your friends
“Mom, can I help with dessert this year?” I asked, half hoping she’d say no because, honestly, I was nervous about messing up the Mother’s Day dinner. But she smiled and handed me the recipe for these Perfect Strawberry Cheesecake Cups, saying, “Give it a try, I think you’ll surprise yourself.” This recipe wasn’t something I grew up baking—it actually came from my neighbor, Mrs. Alvarez, during a sunny Saturday morning when I stopped by to borrow some sugar and ended up chatting about our favorite desserts. She swore by these no-fuss cheesecake cups with fresh strawberries, calling them her secret to winning hearts without spending hours in the kitchen.
That day I jotted down the ingredients on a crumpled piece of paper while balancing a toddler on my hip and dodging a runaway puppy. The next week, I gave it a shot, and let me tell you, the results were nothing short of magical. The creamy cheesecake filling, the crumbly crust, and those juicy strawberries on top created a perfect harmony of flavors. Maybe you’ve been there—wanting to whip up something special but without the fuss and stress. These strawberry cheesecake cups are exactly that kind of treat.
Since then, this recipe has become my go-to for Mother’s Day, birthdays, or any time a little sweetness is needed. It’s easy enough for a beginner but impressive enough to make anyone feel like a dessert pro. Plus, it’s served in cute individual portions, so no awkward slicing or messy plates. Honestly, it’s the kind of dessert that makes you close your eyes after the first bite and smile—comfort food with a fresh, fruity twist. So, let me walk you through making these delightful strawberry cheesecake cups that I’m sure will be a hit at your next celebration.
Why You’ll Love This Recipe
After testing this recipe more times than I can count (and trust me, I’m not complaining), I’m convinced these Perfect Strawberry Cheesecake Cups are a must-have for your dessert repertoire. Here’s why they stand out:
- Quick & Easy: Comes together in under 30 minutes, perfect for those busy mornings or last-minute dessert plans.
- Simple Ingredients: No need to hunt down fancy products—most are pantry staples or fresh market finds.
- Perfect for Mother’s Day: Elegant but approachable, these cups show love without any baking stress.
- Crowd-Pleaser: Kids and adults alike keep asking for seconds—always a good sign!
- Unbelievably Delicious: The creamy texture with a hint of tang from cream cheese balances beautifully with fresh strawberries.
What really sets this recipe apart is the way the crust stays crisp under the creamy filling, thanks to a quick chill before assembling. Plus, I blend the cream cheese gently to keep it silky smooth, avoiding that dense, heavy feel some cheesecakes have. It’s the kind of dessert that feels fancy but doesn’t require a degree in baking science. Honestly, if you’re aiming to impress your mom or just treat yourself, these cups deliver that sweet satisfaction every time.
What Ingredients You Will Need
This recipe relies on simple, wholesome ingredients that come together to create bold flavor and a satisfying texture without fuss. Most of these you probably have on hand, and the fresh strawberries add that perfect seasonal pop.
- For the Crust:
- 1 ½ cups graham cracker crumbs (I prefer Honey Maid for the right balance of sweetness)
- 5 tablespoons unsalted butter, melted (adds richness and helps bind the crust)
- 2 tablespoons granulated sugar
- For the Cheesecake Filling:
- 16 oz (450g) cream cheese, softened (Philadelphia brand works great for smooth texture)
- ½ cup powdered sugar
- 1 teaspoon vanilla extract
- 1 cup heavy cream, cold (for fluffiness, don’t substitute with milk)
- For the Topping:
- 2 cups fresh strawberries, hulled and sliced (choose firm, ripe berries for best flavor)
- 2 tablespoons strawberry jam or preserves (optional, for extra glaze and shine)
- Fresh mint leaves for garnish (optional)
If fresh strawberries aren’t in season, frozen ones can work, just make sure to thaw and drain them well to avoid soggy cups. For a gluten-free option, substitute the graham cracker crumbs with gluten-free cookie crumbs or crushed nuts. I once swapped the heavy cream for canned coconut cream for a dairy-free twist, and it was surprisingly good, though the texture was slightly different.
Equipment Needed
- Mixing bowls – a medium and a large one for batter and cream whipping.
- Electric mixer or hand whisk – I find an electric mixer saves time and effort, but a sturdy whisk works if you’re patient.
- Measuring cups and spoons – precision counts here for balanced sweetness.
- Spatula – for folding and scraping down the sides.
- 12 small dessert cups or ramekins – you can use mason jars or clear plastic cups for a pretty presentation.
- Spoon or piping bag – to fill the cups neatly (a piping bag is optional but makes assembly look professional).
If you don’t have a mixer, chilling the cream cheese and cream well beforehand helps manual whipping. I once used a handheld milk frother in a pinch to whip the cream, and it did a decent job for a small batch. For budget-friendly dessert cups, reusable plastic ones are easy to clean and great for outdoor gatherings.
Preparation Method
- Make the Crust:
In a medium bowl, combine 1 ½ cups graham cracker crumbs, 5 tablespoons melted unsalted butter, and 2 tablespoons granulated sugar. Mix well until the crumbs are evenly coated and resemble wet sand.
Tip: If your crust mixture seems dry, add a teaspoon more melted butter. Press about 2 tablespoons of the mixture firmly into the bottom of each dessert cup. Place cups in the refrigerator to chill for at least 10 minutes to help the crust set. - Prepare the Cheesecake Filling:
In a large mixing bowl, beat 16 oz softened cream cheese with ½ cup powdered sugar and 1 teaspoon vanilla extract until smooth and creamy. This usually takes about 2-3 minutes on medium speed.
Note: Don’t rush this step—lumps can ruin the texture. Scrape down bowl sides as needed. - Whip the Cream:
In a separate bowl, whip 1 cup cold heavy cream until stiff peaks form (about 3-5 minutes with an electric mixer). Be careful not to overwhip; you want it fluffy but still smooth. - Combine:
Gently fold the whipped cream into the cream cheese mixture using a spatula. Fold carefully to keep the mixture light and airy.
Tip: If the filling feels too thick, add a splash of milk or cream to loosen slightly. - Assemble the Cups:
Spoon or pipe the cheesecake filling over the chilled crust in each cup, filling about ¾ full. Smooth the tops with the back of a spoon or spatula.
Time saver: Using a piping bag here makes the cups look extra neat and professional. - Add the Strawberries:
Top each cup with sliced fresh strawberries. For a glossy finish, gently warm 2 tablespoons strawberry jam and brush over the berries.
Warning: Don’t add the berry glaze too early; it can make the crust soggy if left too long. - Chill:
Place the assembled cups in the refrigerator for at least 2 hours before serving. This helps the cheesecake set perfectly and the flavors to meld.
Pro tip: Cover the cups loosely with plastic wrap to prevent fridge odors from sneaking in.
Cooking Tips & Techniques
Getting these strawberry cheesecake cups just right comes down to a few key points. First, patience is your friend when whipping the cream and beating the cream cheese. I’ve learned the hard way that rushing this step leads to lumps or a dense filling.
Another tip: chilling the crust before adding the filling is crucial. I once skipped this step because I was in a hurry, and the crust turned soggy, which was a bummer. The chill helps it hold up nicely against the creamy filling.
Folding the whipped cream into the cream cheese mixture is where you want to be gentle. Overmixing deflates the air you just whipped in, resulting in a heavier texture. I like to fold in thirds, turning the bowl and lifting the mixture carefully with a spatula.
When choosing strawberries, look for firm, brightly colored berries with no bruises. Ripe but not mushy is the sweet spot. If the strawberries are a bit tart, the sweetness of the cheesecake balances it out beautifully.
Lastly, timing your assembly and chilling is important. Giving the cups a few hours in the fridge makes serving easier and the texture better. I often make these the night before a brunch, so everything is ready to wow with minimal effort.
Variations & Adaptations
These strawberry cheesecake cups are incredibly versatile. Here are some ways you can switch things up:
- Berry Medley: Substitute or add blueberries, raspberries, or blackberries for a colorful, mixed-berry cup.
- Chocolate Twist: Mix ¼ cup cocoa powder into the crust for a chocolate graham base, or sprinkle mini chocolate chips on top.
- Dairy-Free Version: Use coconut cream instead of heavy cream and a vegan cream cheese substitute. The texture changes slightly but it’s delightfully creamy.
- Gluten-Free: Swap graham cracker crumbs with almond flour or gluten-free cookie crumbs.
- Personal Favorite: I sometimes add a teaspoon of lemon zest to the filling for a fresh citrus note that brightens the dessert.
Adjust baking times or prep slightly if you try baking the crust for added crunch, though I prefer the no-bake version for ease. If you want to make a layered parfait, alternate cheesecake filling and fruit in taller glasses for a fun presentation.
Serving & Storage Suggestions
Serve these cheesecake cups chilled, straight from the refrigerator. The cool, creamy texture paired with the fresh strawberries is pure delight. Garnish with a small mint leaf or a light dusting of powdered sugar for a pretty finish.
They pair wonderfully with a cup of hot coffee or a light sparkling rosé for a celebratory occasion like Mother’s Day. For brunch, they complement dishes like fluffy scrambled eggs or a fresh green salad.
Store any leftovers covered tightly in the refrigerator for up to 3 days. I don’t recommend freezing because the texture of the cream cheese filling changes and may become grainy.
When reheating (if you like your strawberries a little less cold), let the cups sit at room temperature for 10-15 minutes before serving. The flavors meld nicely over time, making them even more luscious after a day or two.
Nutritional Information & Benefits
Each serving of these strawberry cheesecake cups contains approximately 320 calories, with 22 grams of fat, 25 grams of carbohydrates, and 5 grams of protein. They’re a treat worth savoring!
Strawberries provide vitamin C and antioxidants, while cream cheese adds calcium and protein. Using fresh, whole ingredients means you skip preservatives and artificial flavors.
For those watching carbs, you can reduce sugar or use sugar substitutes to make this dessert lighter. The gluten-free option also makes it accessible for many dietary needs.
This dessert feels indulgent but with a fresh fruit topping and portion control, it’s easier to enjoy without guilt. Personally, I appreciate having a homemade sweet that’s both satisfying and feels a bit special.
Conclusion
These Perfect Strawberry Cheesecake Cups are more than just a dessert—they’re a sweet way to celebrate moments with the ones you love, especially on Mother’s Day. Their simplicity combined with that fresh strawberry charm makes them a winner every time.
Feel free to tweak the toppings or try one of the variations to suit your taste. Honestly, once you try these, I bet they’ll become a staple in your recipe box too.
If you make these, I’d love to hear how they turned out or if you added your own twist! Leave a comment, share your photos, or tell me about your favorite part of this recipe. Here’s to many more sweet memories and scrumptious desserts!
FAQs
Can I make the cheesecake cups ahead of time?
Yes! They can be assembled and refrigerated up to 24 hours before serving. Just cover them loosely with plastic wrap to keep them fresh.
What can I use instead of graham cracker crumbs?
You can substitute crushed digestive biscuits, vanilla wafers, or gluten-free cookie crumbs to suit your preference or dietary needs.
How do I keep the crust from getting soggy?
Chilling the crust before adding the filling helps it set firmly. Avoid adding wet toppings directly onto the crust without chilling first.
Can I use frozen strawberries?
Yes, but make sure to thaw and drain them well to prevent excess moisture from making the cups soggy.
Is there a way to make this dessert dairy-free?
Absolutely! Use coconut cream instead of heavy cream and a dairy-free cream cheese alternative. The texture will be a bit different but still delicious.
For more delicious treats with fresh fruit, you might enjoy my lemon blueberry muffins or the classic vanilla panna cotta that pairs beautifully with summer berries.
Pin This Recipe!

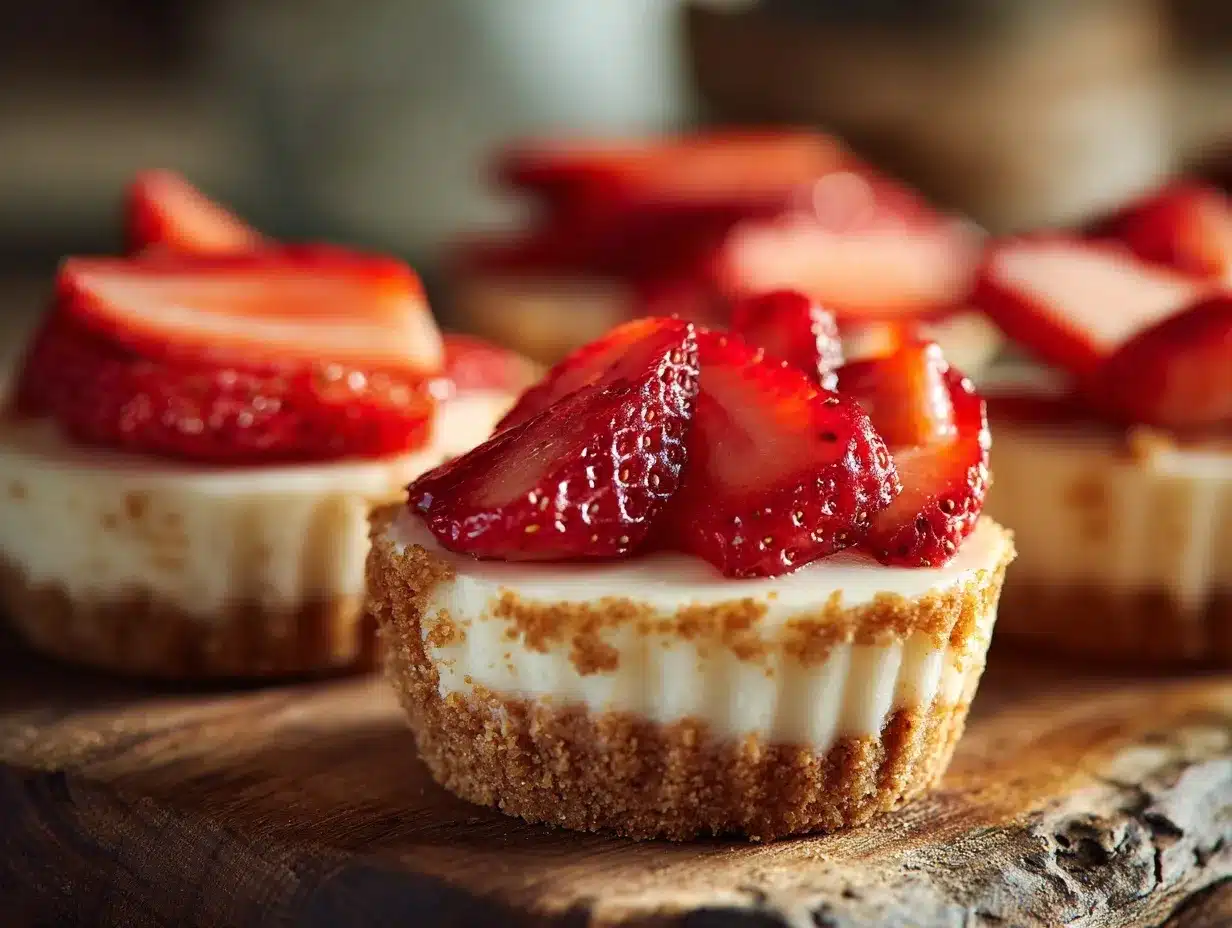
Perfect Strawberry Cheesecake Cups
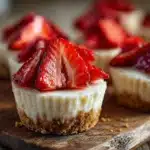
These no-bake strawberry cheesecake cups feature a crumbly graham cracker crust, creamy cheesecake filling, and fresh strawberries on top, perfect for Mother’s Day or any special occasion.
- Prep Time: 15 minutes
- Cook Time: 0 minutes
- Total Time: 2 hours 15 minutes
- Yield: 12 servings 1x
- Category: Dessert
- Cuisine: American
Ingredients
- 1 ½ cups graham cracker crumbs
- 5 tablespoons unsalted butter, melted
- 2 tablespoons granulated sugar
- 16 oz (450g) cream cheese, softened
- ½ cup powdered sugar
- 1 teaspoon vanilla extract
- 1 cup heavy cream, cold
- 2 cups fresh strawberries, hulled and sliced
- 2 tablespoons strawberry jam or preserves (optional)
- Fresh mint leaves for garnish (optional)
Instructions
- Make the Crust: In a medium bowl, combine graham cracker crumbs, melted butter, and granulated sugar. Mix until crumbs are evenly coated and resemble wet sand. Press about 2 tablespoons of the mixture firmly into the bottom of each dessert cup. Refrigerate for at least 10 minutes to set.
- Prepare the Cheesecake Filling: Beat softened cream cheese with powdered sugar and vanilla extract until smooth and creamy, about 2-3 minutes on medium speed. Scrape down bowl sides as needed.
- Whip the Cream: In a separate bowl, whip cold heavy cream until stiff peaks form, about 3-5 minutes. Avoid overwhipping.
- Combine: Gently fold whipped cream into the cream cheese mixture using a spatula, keeping the mixture light and airy. Add a splash of milk or cream if filling is too thick.
- Assemble the Cups: Spoon or pipe the cheesecake filling over the chilled crust in each cup, filling about ¾ full. Smooth the tops.
- Add the Strawberries: Top each cup with sliced fresh strawberries. For a glossy finish, warm strawberry jam and brush over berries. Do not add glaze too early to avoid soggy crust.
- Chill: Refrigerate assembled cups for at least 2 hours before serving. Cover loosely with plastic wrap to prevent odors.
Notes
Chill the crust before adding filling to prevent sogginess. Fold whipped cream gently to keep filling light. Use fresh, firm strawberries for best flavor. Can substitute frozen strawberries if thawed and drained well. For gluten-free, use gluten-free cookie crumbs or almond flour. For dairy-free, use coconut cream and vegan cream cheese.
Nutrition
- Serving Size: 1 cup
- Calories: 320
- Fat: 22
- Carbohydrates: 25
- Protein: 5
Keywords: strawberry cheesecake cups, no-bake cheesecake, easy dessert, Mother's Day dessert, individual cheesecake cups, fresh strawberries dessert